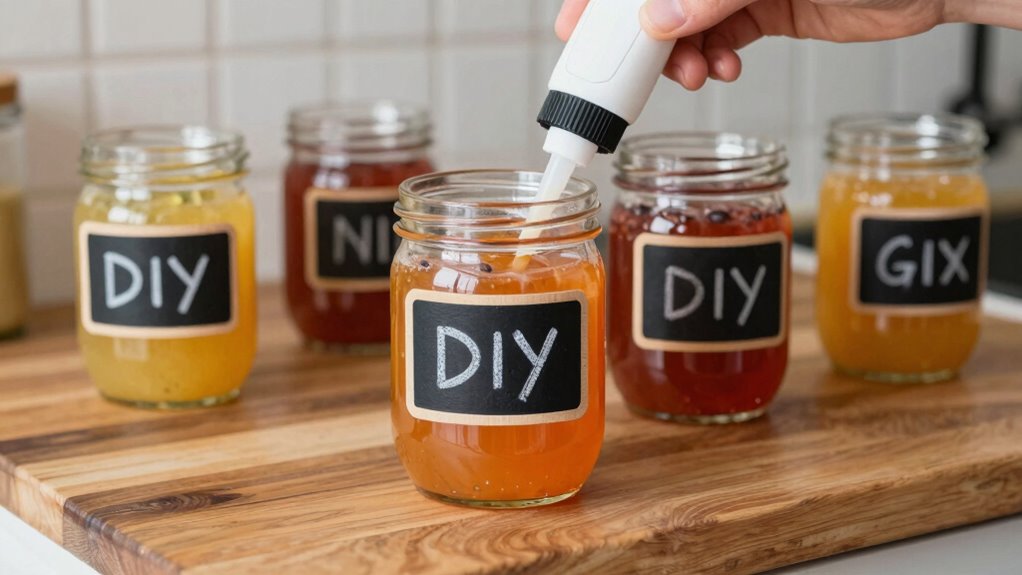
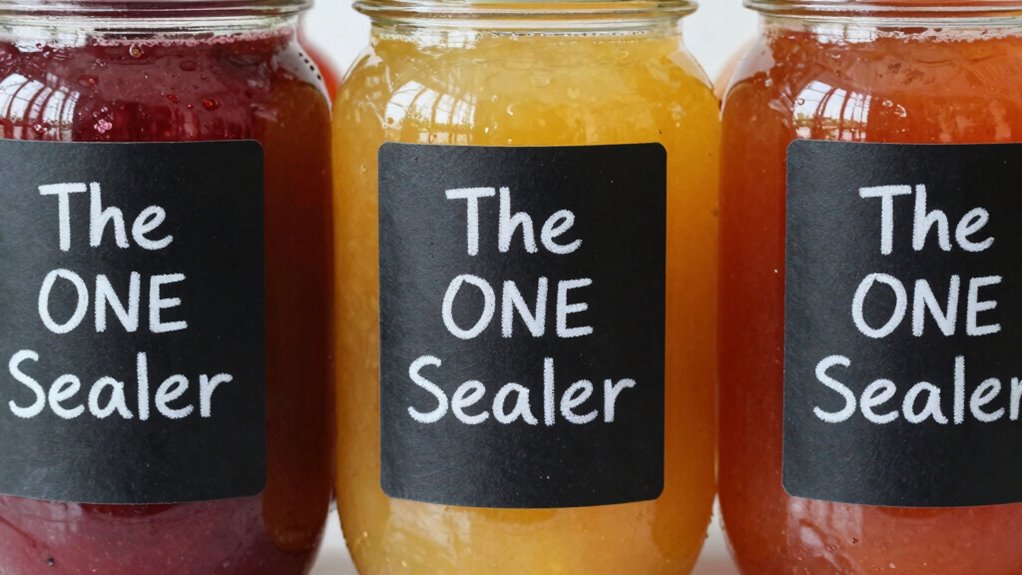
To prevent smudging on your DIY chalkboard juice labels, you’ll want a high-quality clear matte acrylic sealer. This sealer creates a protective, non-reflective coat that keeps your chalk markings crisp and easily wipeable. After applying your chalk or chalk marker, spray a light, even layer of sealer over the painted label and let it dry thoroughly. Using the right sealer guarantees your labels stay neat and legible, and you’ll discover tips to perfect your finishing touches just ahead.
Key Takeaways
- Use a high-quality, matte acrylic sealer designed for chalkboard surfaces to prevent smudging.
- Apply multiple light coats of sealer evenly over the painted label for best protection.
- Allow each coat of sealer to dry completely before handling or writing on the label again.
- Choose a sealer compatible with chalkboard paint to ensure proper adhesion and durability.
- Sealing creates a moisture-resistant surface, enabling easy cleaning and re-writing without smudging.
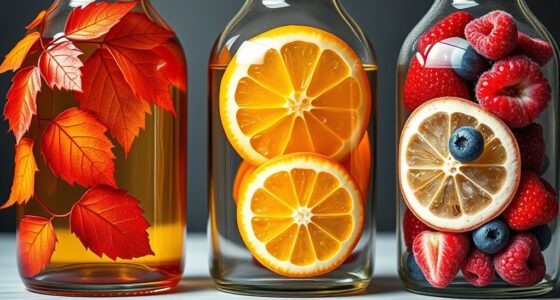
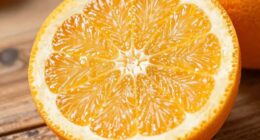
Creating your own DIY chalkboard juice labels is a simple and fun way to organize your beverages and add a personalized touch to your kitchen or party setup. When it comes to crafting these labels, chalkboard paint is your best friend. It allows you to create a surface that mimics traditional chalkboards, giving you the flexibility to write and rewrite as needed. You can apply chalkboard paint to small jars, tags, or even sturdy cardstock to create a durable surface that’s perfect for labeling. The key is to choose a high-quality chalkboard paint that adheres well and dries quickly, ensuring your labels stay put and look professional.
Create personalized chalkboard labels using paint on jars or tags for a fun, organized touch.
Designing your label is where your creativity truly shines. Your label design should be both functional and eye-catching. Think about the size and shape that best fits your bottles or containers. You might prefer classic rectangular tags, rounded circles, or even fun shapes like hearts or stars. Once you’ve chosen your shape, consider how you’ll decorate it. Use contrasting colors for the background and lettering to make your labels easily readable. Adding decorative borders or illustrations can give your labels a whimsical or elegant feel, depending on your style. Remember to leave enough space for writing the juice flavor and any other details you want to include, like ingredients or expiration dates.
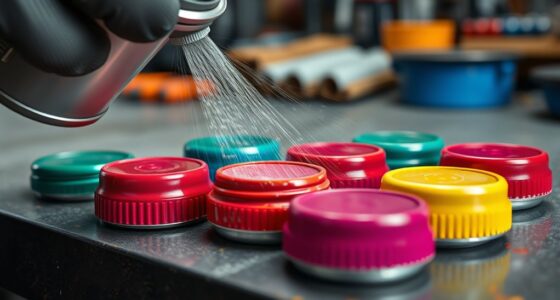
After applying the chalkboard paint and letting it dry completely, you’ll want to prepare your labels for writing. Using chalk or chalk markers works best because they glide smoothly and are easy to erase if you need to make changes. However, smudging can be a common issue, especially if the chalk isn’t fully cured or if the labels are handled frequently. This is where a reliable sealer comes into play. A clear, matte acrylic sealer works wonders to protect your chalk markings from smudging and moisture, without sacrificing the chalkboard look. When applying the sealer, use light, even coats and allow each layer to dry thoroughly before handling or writing on the labels again.
Furthermore, choosing the right materials and finishes can significantly enhance the durability and appearance of your labels, making your organization both functional and attractive. With your sealed chalkboard juice labels, you’ll find it much easier to keep your beverages organized and looking neat. The sealer prevents smudging, so your writing stays crisp and legible longer. Plus, if you want to change the label’s content, just wipe it clean with a damp cloth and write anew. Overall, combining quality chalkboard paint, thoughtful label design, and a good sealer creates a polished, personalized look that elevates your beverage presentation and simplifies your organization.

EanOruus Whole Juicing Maker, Locking Buckle Design, Quick Assembly, High Extraction for Greens & Produce, Premium Gray
Advanced Crushing System – Uses a slow auger to grind and press fresh ingredients, unlocking more vitamins than...
As an affiliate, we earn on qualifying purchases.
Frequently Asked Questions
Can I Reuse Chalkboard Juice Labels After Washing?
Yes, you can reuse chalkboard juice labels after washing if you use proper relabeling techniques. Gently wipe the labels with a damp cloth to remove residue, then dry thoroughly. To maintain label customization, reapply chalk or a chalk marker to update the contents. Using a good sealer helps prevent smudging, making your labels reusable and easy to update. Just verify the surface is clean before relabeling for best results.
What Types of Markers Work Best for Writing on Labels?
Think of your markers as the brushst of a painter; choosing the right type makes all the difference. For writing durability on labels, permanent markers like Sharpie or chalk markers work best. They resist smudging and water, ensuring your labels stay clear and vibrant. Avoid regular dry-erase markers, as they tend to smear or fade. Selecting the right marker is like choosing a sturdy foundation—your writing stays beautiful and intact.
How Long Do Chalkboard Labels Last Outdoors?
Chalkboard labels can last outdoors for several months if you guarantee good weather resistance and label durability. To extend their lifespan, use a high-quality sealer, like our recommended one, which protects against rain, sun, and humidity. Properly sealing your labels prevents smudging and fading, so they stay clear and legible longer. Keep in mind, frequent exposure to harsh weather may still cause some wear, but sealing greatly boosts their outdoor longevity.
Are There Eco-Friendly Sealing Options Available?
Did you know that over 85% of consumers prefer eco-friendly packaging? You can choose biodegradable sealers or plant-based adhesives to make your chalkboard juice labels more sustainable. These options effectively prevent smudging without harming the environment. By switching to eco-friendly sealers, you help reduce plastic waste and support greener practices, making your labels both functional and environmentally responsible.
How Do I Remove Labels Without Leaving Residue?
To remove labels without leaving residue, start by soaking the label in warm, soapy water for a few minutes to loosen the adhesive. Gently peel off the label, and if any residue remains, apply a small amount of rubbing alcohol or vinegar to help with residue cleanup. Use a soft cloth to wipe away the leftover adhesive, ensuring your surface stays clean and residue-free.
Canoly C16 Cold Press Juicer, 6" Extra Wide Feed Chute, 3-IN-1 Strainers (Juice & Sorbet & Nut Milk), Powerful AC Brushless Motor, Self Precut System, Juicer Machines with BPA-Free (Space Gray)
Canoly C16 3-in-1 Multi-Function Juicer: Features two strainers (Juice & Sorbet) to create fresh fruit/vegetable juice, creamy nut...
As an affiliate, we earn on qualifying purchases.
Conclusion
Now that you’ve mastered making your own chalkboard juice labels, you’re ready to add a touch of charm and organization to your space. Think of these labels as little windows into your creativity, turning an ordinary bottle into a work of art. With the sealer’s magic, smudges are banished, leaving your labels pristine and inviting. So go ahead, embrace this simple project—your kitchen will thank you for the stylish upgrade!

Ninja NeverClog Cold Press Juicer | Powerful Electric Slow Masticating Juicer with Pulp Control | XL Capacity | 24 oz. Juice Jug & 36 oz. Pulp Container | Dishwasher Safe | Charcoal | 150W | JC151
NON-STOP JUICING: This powerful masticating juicer’s high-torque motor powers through tough fruits and vegetables like apples, carrots, celery,...
As an affiliate, we earn on qualifying purchases.
Juicer Machines with 5.8" Large Chute, 2-in-1 Cold Press Juicer for Whole Vegetables Fruits 400W, Masticating juicer Easy to Clean Juice Extractor Machine for Making Nut Mike, Juice, Premium Gray
2-IN-1 Juicer Machines: This juicer features a powerful motor, enabling it to effortlessly produce a variety of nutritious...
As an affiliate, we earn on qualifying purchases.