
Juice Tips and Tricks
Cold-Pressed Juice How To Make
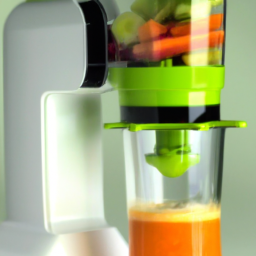
I have always loved cold-pressed juice, and I am constantly excited to experiment with new flavors and ingredients. The crisp and revitalizing taste of a cold glass of juice made from fresh fruits and veggies always amazes me, and its health benefits are undeniable.
If you’re interested in learning how to make your own cold-pressed juice, you’ve come to the right place. In this article, I’ll be sharing my tips and tricks for making delicious and nutritious cold-pressed juice right in your own kitchen.
We’ll start by discussing the benefits of cold-pressed juice and how to choose the right ingredients. Then, we’ll move on to the preparation and cleaning process, as well as operating your juicer. I’ll also share some ideas for mixing and matching flavors, storing your juice, and making your juice more nutritious.
Finally, we’ll wrap up with some recipes for cold-pressed juice and tips for juicing for a cleanse. So, grab your favorite fruits and veggies and let’s get started!
Key Takeaways
- Cold-pressed juice retains more nutrients and can be customized to individual taste preferences.
- Choosing fresh, organic, and seasonal produce is important for creating a delicious and nutritious beverage.
- Proper preparation, juicing, and storage techniques are essential for making cold-pressed juice.
- Juicing should be balanced with a healthy diet and exercise, and caution should be taken when juicing for a cleanse or for those with certain medical conditions.
Benefits of Cold-Pressed Juice
One of the main benefits of cold-pressed juice is that it retains more nutrients than traditional juice-making methods. This is because cold-pressing uses a hydraulic press to extract juice from fruits and vegetables, which produces less heat and oxidation than other methods. This gentle process helps to preserve the enzymes, vitamins, and minerals in the fruits and vegetables, making cold-pressed juice more nutrient-dense than other types of juice.
In addition to the nutritional benefits, cold-pressed juice can also be customized to suit individual taste preferences. With a wide variety of fruits and vegetables to choose from, it’s easy to create a blend that is both delicious and nutritious. Whether you prefer a sweet and fruity juice or a more earthy and vegetable-based blend, there are endless possibilities when it comes to making cold-pressed juice.

So, let’s move on to the next section and learn how to choose the right ingredients for your cold-pressed juices.
Choose the Right Ingredients
When it comes to choosing the right ingredients for cold-pressed juice, I always prioritize fresh produce. It’s important to consider whether to use organic or conventional fruits and vegetables as well, as some pesticides can be harmful to our health.
Additionally, I like to go for seasonal fruits and vegetables to ensure maximum freshness and flavor. By keeping these key points in mind, you can create delicious and nutritious cold-pressed juices at home.
Fresh Produce
With a variety of fruits and vegetables at my fingertips, crafting a cold-pressed juice is like conducting a symphony of flavors. Fresh produce sourcing is key to creating a delicious and nutritious beverage.
I love to visit farmers markets to find unique and seasonal ingredients. Here are some tips for selecting the freshest produce:
- Choose fruits and vegetables that are in season to ensure optimal flavor and nutrition.
- Look for produce that is firm and free of bruises or blemishes.
- Opt for organic produce whenever possible to avoid pesticides and other harmful chemicals.
- Smell the produce to ensure it’s fresh and ripe.
- Avoid pre-cut fruits and vegetables as they may have lost some of their nutritional value.
When it comes to cold-pressed juices, using fresh and high-quality ingredients is essential. In the next section, I’ll discuss the differences between organic and conventional produce and how it can impact your juice.
Organic vs. Conventional
Choosing organic produce over conventional can have a significant impact on your health and the environment, so it’s important to be informed. Organic farming uses natural methods to grow fruits and vegetables, without the use of synthetic fertilizers, pesticides, and genetically modified organisms (GMOs). This means that organic produce is free from harmful chemicals that can pose health risks to consumers and the environment.
In addition, organic farming practices promote soil health and biodiversity, which can lead to better crop yields and a more sustainable food system. When deciding between local and imported organic produce, it’s important to consider the environmental impact of transportation and the fair trade practices of the company. As a consumer, it’s important to be aware of labeling regulations and to support companies that prioritize organic farming and sustainable practices. With this knowledge, you can make informed choices about the food you eat and its impact on both your health and the environment.
As we move into the topic of seasonal fruits and vegetables, it’s important to keep in mind the benefits of choosing organic produce and how it can contribute to a healthier and more sustainable food system.
Seasonal Fruits and Vegetables
You’ll love the variety of seasonal fruits and vegetables available to you! Not only do they taste delicious, but they also provide a host of nutritional benefits.
Seasonal availability means that these fruits and vegetables are at their freshest and most flavorful, making them the perfect addition to your cold-pressed juice.
To make the most of seasonal produce, try incorporating a variety of fruits and vegetables into your juice. Some examples include:
- Summer: watermelon, cucumber, pineapple
- Fall: apples, pears, squash
- Winter: oranges, grapefruit, kale
- Spring: strawberries, spinach, carrots
By using seasonal produce, you can ensure that your juice is packed with vitamins, minerals, and antioxidants that your body needs. Plus, buying in-season fruits and vegetables can be more affordable and eco-friendly.
Now, onto preparation and cleaning.
Preparation and Cleaning
First, it’s important to note that according to a study by the USDA, leafy greens are one of the most commonly contaminated produce items, so be sure to thoroughly wash them before juicing.
Start by rinsing your fruits and vegetables under running water to remove any dirt or debris. Then, use a vegetable brush to scrub the produce, especially for items with a thick skin such as apples or cucumbers.
For leafy greens, fill a large bowl with cold water and let them soak for a few minutes before rinsing them again.
After cleaning your produce, it’s time to prepare them for the juicer. Cut your fruits and vegetables into smaller pieces to fit into the juicer chute, removing any seeds or pits.
For leafy greens, roll them up tightly before feeding them into the juicer, as this will help extract more juice.
With these cleaning tips and proper juicing technique, you’ll be well on your way to creating delicious and healthy cold-pressed juices.
Moving on to the next step, let’s talk about operating your juicer.
Operating Your Juicer
Now it’s time to get your hands dirty and start using your juicer to create the most amazing, nutrient-rich beverages. Before you start, make sure you’ve read the user manual and understand how to operate your specific juicer. Different juicers have different settings and methods of operation, so it’s important to be familiar with yours before you begin.
Once you’re ready to start juicing, begin by washing your fruits and vegetables thoroughly. Cut them into small pieces that’ll fit easily into the juicer chute. As you juice, be sure to monitor the pulp buildup and empty it frequently to prevent clogging.
After juicing, clean the juicer thoroughly to prevent any buildup or damage. Proper juicer maintenance will ensure that it continues to work efficiently and effectively. If you encounter any issues with your juicer, refer to the user manual for troubleshooting tips or contact the manufacturer for assistance.
Now that you know how to operate your juicer and keep it in good condition, you’re ready to start experimenting with different flavor combinations. Mixing and matching flavors can be a fun and creative process, so don’t be afraid to try new things.
In the next section, we’ll discuss some tips for creating delicious and healthy juice blends.
Mixing and Matching Flavors
Mixing and matching flavors is one of my favorite parts of making cold-pressed juice. Creating balanced combinations is key to making sure that the juice tastes great and provides all the necessary nutrients.
I love experimenting with different ingredients to find new flavor profiles that work well together. Adding herbs and spices can also add depth and complexity to the juice, making it even more enjoyable to drink.
Creating Balanced Combinations
Combining ingredients for cold-pressed juice is like creating a symphony, with each element playing an important role in achieving a balanced and harmonious blend. When making juice, it’s important to balance sweetness and acidity to achieve a well-rounded flavor.
Adding too much sweet fruit can overpower the juice, while too much acidity can make it too tart. Mixing fruit and vegetable juices is another way to create a balanced combination. Vegetables like kale, spinach, and cucumber add essential vitamins and minerals while balancing the sweetness of fruit juices.
To create a balanced blend, consider using a ratio of 2:1 or 3:1 for vegetables to fruit. Additionally, adding herbs like ginger, mint, or basil can enhance the flavor profile and add additional health benefits. Experimenting with different ingredients is key in finding your favorite combinations.
Don’t be afraid to try new fruits and vegetables or adjust the ratios to your liking. Creating cold-pressed juice is a fun and creative process that can lead to delicious and nutritious results.
Experimenting with Different Ingredients
To discover your personal favorite combinations of cold-pressed juice flavors, don’t be afraid to experiment with various fruits, vegetables, and herbs. Mixing and matching different ingredients will allow you to create unique flavor profiles that suit your taste buds. When experimenting, try to balance bitter, sweet, and acidic flavors, and keep in mind that some ingredients, like ginger or lemon, can add a refreshing kick to your juice.
To help you get started, here is a table of some popular ingredient combinations for cold-pressed juice:
| Fruits | Vegetables |
|---|---|
| Pineapple | Carrots |
| Apple | Cucumber |
| Orange | Kale |
| Grapefruit | Beetroot |
| Watermelon | Spinach |
Remember, this is just a starting point. Don’t be afraid to mix and match ingredients to create your own unique flavor experiments. In the next section, we will discuss how to add herbs and spices to enhance the flavor of your cold-pressed juice.
Adding Herbs and Spices
Spicing up your cold-pressed concoctions with aromatic herbs and exotic spices can unleash a whole new world of flavor sensations. Here are some herbs and spices that can take your juice from ordinary to extraordinary:
-
Ginger: This spicy root adds a zingy kick to any juice. It’s also great for digestion and has anti-inflammatory properties.
-
Mint: Refreshing and cooling, mint is perfect for hot summer days. It also aids in digestion and can help relieve nausea.
-
Turmeric: This vibrant yellow spice has a warm and earthy flavor. It’s a powerful anti-inflammatory and antioxidant.
-
Cinnamon: Sweet and warming, cinnamon is perfect for fall and winter juices. It also has blood sugar balancing properties.
By experimenting with different herbs and spices, you can create unique flavor combinations that suit your taste buds and nutritional needs. Once you find your favorite combinations, it’s important to store your juice properly to maintain its freshness and nutrient content.
Storing Your Juice
Make sure you store your cold-pressed juice properly to keep it fresh for longer! Long term storage can be achieved by freezing your juice, which can last up to 6 months. However, if you want to drink your juice within a week, refrigerating it is the best option.
Here are some refrigerator options for storing your cold-pressed juice:
| Option | Pros | Cons | How to Do It |
|---|---|---|---|
| Glass Bottles | Keeps juice fresh and free from toxins | Can be heavy and breakable | Fill the bottle to the top to minimize air exposure |
| Airtight Containers | Easy to use and store | May not keep juice as fresh as glass bottles | Choose a container with a tight-fitting lid and store it in the refrigerator |
| Mason Jars | Inexpensive and easy to find | Can break if not handled carefully | Fill the jar to the top and store it in the refrigerator |
| Plastic Bottles | Lightweight and durable | Can leach toxins into the juice | Choose a BPA-free bottle and store it in the refrigerator |
By following these storage tips, you can make sure your cold-pressed juice stays fresh and delicious for as long as possible. Now, let’s talk about some tips for making your juice more nutritious.
Tips for Making Your Juice More Nutritious
Now that you know how to properly store your cold-pressed juice, let’s discuss some tips for making it even more nutritious.
One way to maximize the nutrients in your juice is by pairing your fruits and vegetables strategically. For example, adding a citrus fruit like orange or grapefruit to your green juice can increase the absorption of iron from leafy greens like spinach and kale. Adding ginger to your juice can also help with digestion and reduce inflammation.
Another tip for making your juice more nutritious is by using a variety of colorful produce. Different colors indicate different nutrients, so incorporating a rainbow of fruits and vegetables into your juice can ensure that you are getting a wide range of vitamins and minerals.
Additionally, using organic produce when possible can minimize exposure to harmful pesticides and chemicals.
Now that you know how to make your cold-pressed juice more nutritious, let’s dive into some delicious recipes to try at home.
Recipes for Cold-Pressed Juice
Are you looking for some tasty and nutritious juice recipes to try at home using fresh fruits and vegetables? Look no further! Cold-pressed juice is a great way to get your daily dose of vitamins and minerals, and it’s easy to make at home. Here are some of my favorite juice recipes that you can try:
| Fruit | Vegetable | Flavor Combination |
|---|---|---|
| Apple | Kale | Sweet and Earthy |
| Pineapple | Cucumber | Tropical and Refreshing |
| Orange | Carrot | Citrus and Sweet |
| Beet | Ginger | Earthy and Spicy |
To make these juices, simply cut up the fruits and vegetables and put them through a juicer. Mix and match the ingredients to create your own unique flavor combinations.
Juicing for a cleanse is a great way to give your body a break from processed foods and give it a boost of nutrients. But before we dive into the specifics of juicing for a cleanse, let’s first discuss the benefits of juicing and how it can improve your overall health.
Juicing for a Cleanse
If you’re looking to give your body a much-needed detox, juicing for a cleanse is a great option that can help improve your overall health and well-being. Extended juicing can provide numerous benefits, including increased energy, improved digestion, and clearer skin.
By incorporating fresh fruits and vegetables into your juice recipes, you’re providing your body with essential vitamins and minerals that it needs to function properly.
To incorporate juicing into your daily routine, it’s important to invest in a high-quality cold-pressed juicer and stock up on fresh produce. Plan your meals ahead of time and incorporate juices into your breakfast or snack routine.
It’s important to remember that while juicing can be a beneficial tool for cleansing and improving your health, it’s not a sustainable long-term solution. It’s important to balance your juice intake with a healthy, balanced diet and regular exercise.
Frequently Asked Questions
Can I use frozen fruits and vegetables in my cold-pressed juice?
Yes, I can use frozen produce in my cold-pressed juice without compromising its nutritional value. Frozen fruits and vegetables are picked at their peak and frozen immediately, retaining their nutrients. Simply defrost before juicing.
How long does it take to clean a cold-pressed juicer?
Cleaning a cold-pressed juicer takes around 10-15 minutes, depending on the model. Maintenance tips include rinsing the parts immediately after use and thoroughly cleaning with a brush and mild soap. Regular cleaning ensures a longer lifespan for your juicer.
Is it necessary to peel fruits and vegetables before juicing them?
Peeling fruits and vegetables before juicing is not necessary. Consuming whole fruits provides added benefits like fiber, while the nutritional value of peels is high. Keep in mind that some peels may affect taste and texture.
Can I make cold-pressed juice without a juicer?
Yes, alternative methods like using a blender or food processor can make cold-pressed juice without a juicer. However, the nutritional benefits may vary due to increased oxidation. It’s recommended to use a juicer for optimal results.
How often should I drink cold-pressed juice for maximum health benefits?
To maximize the health benefits of cold-pressed juice, I recommend consuming it regularly in recommended serving sizes. Using organic produce in your juice can also provide additional health benefits.
Conclusion
Overall, making cold-pressed juice can be a fun and rewarding experience that results in a delicious and nutritious beverage. It’s important to choose the right ingredients, properly prepare and clean your equipment, and mix and match flavors to create unique and tasty combinations.
Storing your juice properly and making small adjustments to increase its nutritional value can also make a big difference. Imagine yourself standing in your kitchen, surrounded by fresh fruits and vegetables, as you carefully operate your juicer and create a vibrant and colorful drink.
Each sip is packed with vitamins, minerals, and antioxidants, giving you an energizing boost and a sense of well-being. Whether you’re making juice for a cleanse or just to enjoy as a refreshing treat, the process of cold-pressing can be a satisfying and healthy way to incorporate more fruits and veggies into your diet.
So go ahead and give it a try – your taste buds and your body will thank you!

Cindy thoroughly researches juicing trends, techniques, and recipes to provide readers with practical advice and inspiration. Her writing style is accessible, engaging, and designed to make complex concepts easy to understand. Cindy’s dedication to promoting the advantages of juicing shines through her work, empowering readers to make positive changes in their lives through the simple act of juicing.


While enjoying a glass of apple cider, my mind naturally wanders to the comparison between this delicious drink and its counterpart, apple juice.
At first glance, they may seem similar – both made from apples, both refreshing on a hot day – but there are some key distinctions that set them apart.
Think of it like this: apple juice is like the straight-laced, no-nonsense older sibling, while apple cider is the younger, more adventurous and rebellious counterpart. They may come from the same family, but they have their own distinct personalities and ways of doing things.
So, what exactly makes apple cider stand out from apple juice? Let’s dive in and find out.
Key Takeaways
- Apple cider is made from freshly pressed apples that are crushed and then pressed to extract their juice, which is left to ferment, giving it a cloudy appearance and tangy, slightly sour taste.
- Apple juice is made by pressing apples and then filtering the juice to remove any solids, resulting in a clear, smooth liquid that is sweeter than apple cider.
- Apple cider production retains the pulp and fiber from the apples, resulting in a cloudy appearance and a more complex flavor, while making apple juice involves removing the pulp and fiber from the apples, resulting in a smoother texture.
- Apple cider has a richer and spicier flavor than apple juice due to the blend of different apple varieties used in its production and is often enjoyed hot or cold during the fall season.
Defining Apple Cider and Apple Juice
Now, you may be thinking, "What’s the difference between apple cider and apple juice?"
Well, let’s break it down. Apple cider is made from freshly pressed apples that are crushed and then pressed to extract their juice. The juice is then left to ferment, which allows it to develop a tangy, slightly sour taste. The fermentation process also gives the cider its signature cloudy appearance.
On the other hand, apple juice is made by pressing apples and then filtering the juice to remove any solids. This results in a clear, smooth liquid that is sweeter than apple cider.
While both apple cider and apple juice have health benefits, apple cider is often considered to be the healthier option because it contains more nutrients, including vitamins A and C, as well as antioxidants.
Moving on to the production process, apple cider and apple juice are made differently.
The Production Process
When it comes to producing apple juice and apple cider, there are specific processes that must be followed to ensure quality and consistency.
As someone who’s worked in the industry for years, I can attest to the importance of understanding the nuances of both production methods.
From selecting the right apples to pressing and filtering the juice, there are many steps involved in creating these popular beverages.
Apple Juice Production
You may be surprised to learn that making apple juice involves removing the pulp and fiber from the apples, resulting in a smoother texture that some people find more enjoyable to drink. The process starts with selecting the right apple varieties, which can vary depending on the desired flavor and sweetness.
Once the apples are picked, they are washed and chopped into small pieces, making it easier to extract the juice. Here are some steps that are typically involved in apple juice production:
-
Crushing: The chopped apples are crushed to break down the cell walls and release the juice.
-
Pressing: The crushed apples are then pressed to extract as much juice as possible.
-
Filtration: The extracted juice is filtered to remove any remaining pulp or solids, resulting in a clear liquid.
After the juice is filtered, it can be pasteurized to extend its shelf life and stored in a cool, dark place. Different apple juice varieties can be created by using different apple varieties or by adding other fruits or spices for flavor. The storage techniques used can also affect the taste and quality of the juice.
Moving on to apple cider production, unlike apple juice, apple cider retains the pulp and fiber from the apples, resulting in a cloudy appearance and a more complex flavor.
Apple Cider Production
Who doesn’t love a drink that’s packed with flavor and texture, and that’s exactly what you get with the cloudy and complex apple cider production process!
The first step is to select the right apple varieties, which can range from tart to sweet depending on the desired taste profile. Once the apples are picked, they’re washed and ground into a pulp.
Next, the pulp is pressed to extract the juice, which is then left to ferment. This fermentation process is what gives apple cider its unique flavor and character. The natural yeasts present in the apples break down the sugars into alcohol, turning the juice into a deliciously tangy and slightly alcoholic beverage.
Different apple varieties and fermentation times can result in vastly different flavor profiles, making apple cider a versatile and enjoyable drink for all seasons.
As we move onto the subsequent section about filtering and pasteurization, it’s important to note that these steps can drastically alter the taste and texture of the final product.
Filtering and Pasteurization
To make apple cider, apples are crushed and pressed to extract the juice. Afterward, the juice undergoes a process of filtering and pasteurization to remove any bacteria or sediment, resulting in a clear and sweet beverage that is different from apple juice.
The filtering methods used in apple cider production vary, but all aim to eliminate any impurities that may affect the quality and taste of the final product. Some producers use multiple layers of cheesecloth to filter the juice, while others use modern filtration systems that can remove even the tiniest particles.
Pasteurization techniques are also essential in apple cider production, as they eliminate any harmful bacteria that may be present in the juice while preserving its flavor and quality. The most common pasteurization method used in apple cider production is flash pasteurization, which involves heating the juice to a high temperature for a short period. This method eliminates any bacteria without affecting the taste or texture of the cider.
After filtering and pasteurization, the apple cider is ready for consumption, and its appearance, texture, and flavor are quite different from apple juice.
Appearance
When it comes to apple juice and apple cider, appearance is an important factor to consider. As someone who’s worked in the food industry for years, I can tell you that apple juice is typically clear and golden in color, with a smooth and consistent texture.
On the other hand, apple cider tends to be cloudy in appearance, with a slightly thicker and more textured consistency. These differences in appearance are due to the different processing methods used for each beverage, and can also affect the flavor and overall experience of drinking each one.
Apple Juice Appearance
You’ve probably noticed that apple juice has a clear, golden appearance that’s different from the cloudy, amber appearance of apple cider. This is because apple juice is typically filtered to remove any pulp or sediment, resulting in a clear liquid.
The clarity of apple juice can vary depending on the type of apple used and the processing method. Some apple juices may have a slightly cloudy appearance due to the presence of tiny apple particles that are not completely filtered out.
In addition to clarity, the color of apple juice can also vary depending on the type of apple used. Some apple juices may have a lighter, more yellow color, while others may have a deeper, more amber color. The color can also be affected by the processing method, such as pasteurization or the addition of preservatives.
Overall, the appearance of apple juice is typically more uniform and consistent compared to apple cider.
Moving on to apple cider appearance, it’s important to note that the cloudy, amber appearance is due to the presence of apple pulp and sediment that is not filtered out.
Apple Cider Appearance
Imagine taking a sip of the warm, aromatic liquid, feeling the smooth texture of the drink coat your tongue as you savor the rich, amber color of the unfiltered liquid. Apple cider is a popular drink during the fall season and can be enjoyed hot or cold.
Unlike apple juice, apple cider has a cloudy appearance due to the sediment that is left in the liquid after the apples are pressed. To fully understand the differences between apple cider and apple juice, it’s important to know the variations in colors that apple cider can come in.
While most apple ciders are a deep amber color, the shade can vary from a light yellow to a dark brown depending on the type of apples used and the amount of sediment left in the liquid. The cloudy appearance of apple cider is due to the unfiltered particles that are left in the liquid, giving it a more natural and rustic feel.
Other differences in apple cider colors can be attributed to the length of time the apples are fermented and whether or not any additional ingredients are added, such as cinnamon or nutmeg. Moving on to the next section about flavor, apple cider not only differs from apple juice in its appearance but also in its taste profile.
Flavor
The flavor of apple cider is richer and spicier than that of apple juice. This is due to the fact that apple cider is made from a blend of different varieties of apples, including those that are tart and those that are sweet. The apples are crushed and pressed to extract the juice, which is then fermented for several weeks. During fermentation, natural yeasts and bacteria consume the sugars in the juice and convert them into alcohol. This process gives apple cider its distinct flavor, which can range from sweet and fruity to tangy and complex.
To illustrate the flavor differences between apple cider and apple juice, consider the following table:
| Apple Cider | Apple Juice | |
|---|---|---|
| Sweet | X | X |
| Tart | X | |
| Spicy | X | |
| Complex | X | |
| Fruity | X | X |
As you can see, apple cider has a much more complex flavor profile than apple juice. This makes it a popular choice for fall and winter drinks, as it pairs well with spices like cinnamon, nutmeg, and clove. In the next section, we will explore how the texture of apple cider differs from that of apple juice.
Texture
Feeling a chill in the air, you might be reminded of the cozy comfort of a warm blanket and a mug of something thick and creamy. That’s where apple cider comes in.
One of the key differences between apple cider and apple juice is the texture. Apple cider has a thicker, more viscous consistency compared to the thinner, more watery texture of apple juice.
To further understand the texture of apple cider, let’s take a look at the sensory experience it provides. When you take a sip of apple cider, you’ll notice the following:
- A slightly grainy texture due to the natural sediment in the cider
- A smooth, velvety mouthfeel that coats your tongue and throat
- A slightly tart and tangy taste that lingers on your palate
- A subtle spiciness from the added cinnamon or other fall spices
- A warming sensation that spreads from your mouth to your chest
Now, let’s move on to the next section about the nutritional value of apple cider.
Nutritional Value
You’ll be pleased to know that sipping on a mug of apple cider can provide you with some beneficial nutrients. Apple cider is made from pressing fresh apples, which means that it contains many of the same vitamins and minerals found in apples. Additionally, apple cider often contains spices such as cinnamon, nutmeg, and cloves, which can have their own health benefits.
To give you an idea of the nutritional content of apple cider, I’ve created this table:
| Nutrient | Amount per Serving |
|---|---|
| Calories | 120 |
| Total fat | 0g |
| Sodium | 10mg |
| Total carbohydrates | 31g |
| Sugars | 28g |
| Protein | 0g |
As you can see, apple cider is relatively high in calories and sugar, but it is also low in fat and sodium. It is also a good source of vitamin C, which is important for maintaining a healthy immune system. Some studies have suggested that drinking apple cider vinegar (a type of vinegar made from apple cider) can have health benefits such as improving digestion and reducing inflammation, but more research is needed to confirm these claims.
Moving on to popular uses of apple cider, it is often used in cooking and baking to add flavor and moisture to dishes.
Popular Uses
When it comes to apples, there are two primary ways to enjoy their delicious flavor: through apple juice or apple cider.
As someone who’s spent years studying the culinary arts, I can attest to the versatility of both beverages and the many different ways that they can be used in cooking and baking.
From apple cider donuts to apple juice marinades, the possibilities are endless when it comes to incorporating these delicious beverages into your recipes.
Apple Juice Uses
If you’re looking for a refreshing drink that’s also packed with vitamins, apple juice is a great choice. Did you know that one cup of apple juice contains 120% of your daily recommended intake of vitamin C?
Not only that, but apple juice is also a great source of potassium, which is essential for maintaining a healthy heart and blood pressure. Here are a few ways to incorporate apple juice into your diet:
- Mix it with sparkling water for a refreshing, low-sugar alternative to soda
- Use it as a base for apple juice cocktails, such as a classic Appletini or a spicy Apple Cider Margarita
- Add it to smoothies for a natural, sweet flavor boost
- Use it in place of water or milk when making oatmeal or other hot cereals
In addition to being delicious, apple juice has a number of health benefits. It’s been shown to help reduce the risk of heart disease, stroke, and certain types of cancer. And because it’s high in antioxidants, it can also help protect your cells from damage caused by free radicals.
So why not try incorporating a glass of apple juice into your daily routine?
Now, let’s move on to apple cider uses.
Apple Cider Uses
There are various ways to incorporate this delicious autumn beverage into your diet and daily routine. One of my favorite ways to enjoy apple cider is by making apple cider cocktails. There are endless possibilities when it comes to mixing apple cider with other ingredients to create refreshing and flavorful cocktails.
Some popular options include adding whiskey or rum for a boozy twist, or blending with ginger beer for a spicy kick. The sweetness of the apple cider perfectly balances out the strong flavors of the other ingredients, making for a perfectly balanced drink.
Another way to incorporate apple cider into your routine is by taking advantage of its health benefits. Apple cider vinegar, which is made from fermented apple cider, has been shown to have numerous health benefits, including promoting weight loss, improving digestion, and helping to manage blood sugar levels.
Adding a daily dose of apple cider vinegar to your routine can be as simple as mixing a tablespoon or two with water and drinking it first thing in the morning. With its delicious taste and numerous health benefits, apple cider is truly a versatile beverage that can be enjoyed in a variety of ways.
When it comes to regional variations, apple cider can differ in taste and texture depending on where it is produced.
Regional Variations
You’ll notice that regional variations can greatly affect the taste and production of both apple cider and apple juice. In North America, for example, apple cider is often made with a blend of different apple varieties, giving it a complex and nuanced flavor. In contrast, apple juice is typically made from a single variety of apple, resulting in a more consistent and straightforward taste.
These regional preferences can also influence the way apple cider and juice are consumed, with apple cider being a popular choice during fall harvest festivals in the United States and Canada due to its cultural significance.
In Europe, apple cider is often made using traditional methods that involve fermenting the juice for several months, resulting in a slightly alcoholic beverage. This type of apple cider is popular in countries like France, Spain, and the United Kingdom, where it is often served in pubs and enjoyed as a refreshing drink during the summer months. In contrast, apple juice is more commonly consumed in Europe as a breakfast beverage or as a mixer in cocktails.
These regional variations not only affect the taste and production of apple cider and juice but also reflect the cultural significance and traditions of different regions.
Frequently Asked Questions
How long has apple cider been around for?
Apple cider has been around for centuries, dating back to when colonists brought apple trees to America. Its production process involves crushing and pressing apples, then fermenting the juice. History and tradition are integral to the cider-making process.
Can apple cider or apple juice be used as a substitute for each other in recipes?
While apple cider and apple juice can both be used in recipes, they cannot always be substituted for one another in cocktails or baking. Apple cider’s stronger flavor and acidity may affect the outcome of the dish.
What are some common myths or misconceptions about apple cider and apple juice?
Debunking myths about apple cider and juice: Contrary to popular belief, apple cider is not just unfiltered apple juice. Nutritional comparison shows cider has less sugar and more antioxidants.
How do different types of apples affect the taste of apple cider and apple juice?
Apple varietals greatly impact flavor profiles in both apple cider and juice. The fermentation process creates chemical changes that enhance taste. Technical knowledge of these processes is crucial to creating a high-quality product.
Are there any health benefits or risks associated with consuming apple cider or apple juice?
As for the pros and cons of consuming apple cider and apple juice, both offer nutritional value in the form of vitamins and antioxidants. However, apple juice can be high in sugar and lacks the fiber found in apple cider. It’s important to consume both in moderation.
Conclusion
In conclusion, while both apple cider and apple juice come from apples, they’re two distinct beverages with unique characteristics. The production process and filtration methods play a significant role in determining the differences in appearance, flavor, and texture.
Apple cider is unfiltered and unpasteurized, giving it a cloudy appearance and a rich, full-bodied taste with a slightly tangy finish. On the other hand, apple juice is clear and smooth, with a sweet, crisp taste.
When it comes to nutritional value, both apple cider and apple juice offer health benefits. However, apple cider’s often considered to be the healthier option due to its higher concentration of antioxidants and polyphenols. It’s also a popular ingredient in recipes for fall-themed desserts, warm beverages, and savory dishes.
While regional variations may exist, apple cider and apple juice remain popular beverages worldwide. Whether you prefer the bold flavor and texture of apple cider or the sweet, refreshing taste of apple juice, both beverages offer a delicious way to enjoy the natural goodness of apples.
So next time you reach for a glass of apple cider or apple juice, take a moment to appreciate the unique qualities that make each beverage special.
Cindy thoroughly researches juicing trends, techniques, and recipes to provide readers with practical advice and inspiration. Her writing style is accessible, engaging, and designed to make complex concepts easy to understand. Cindy’s dedication to promoting the advantages of juicing shines through her work, empowering readers to make positive changes in their lives through the simple act of juicing.

I like to liven up my soups with a splash of lemon juice for a zesty and tangy flavor, but sometimes I go overboard and add too much. And what happens next? I end up with a soup that is overly sour and acidic, resulting in a dish that is unappetizing and disappointing to eat.
But fear not, there are several methods that can help fix too much lemon juice in soup and salvage your meal.
In this article, I will share with you my favorite techniques for fixing a soup that has been overpowered by lemon juice. From dilution and neutralization methods to creamy and starchy solutions, we will explore different ways to balance out the acidity and restore the flavor of your soup.
So, let’s get started and learn how to turn a lemony disaster into a delicious soup that you can enjoy.
Key Takeaways
- Balancing acidity is key to fixing soup with too much lemon juice
- Diluting with water or broth, adding sugar or honey, or neutralizing with baking soda, milk, or cream are effective methods to fix overpowering lemon flavor
- Adding starches like rice, pasta, potatoes, beans, or lentils can help balance flavor and add nutritional value
- Prevention methods such as using less lemon juice, adding acid at the end of cooking, or using lemon alternatives can avoid the issue altogether.
Understanding the Impact of Too Much Lemon Juice on Soup
Now, you might be wondering why your soup tastes so darn sour – well, it’s likely due to the excess lemon juice you added. Lemon juice is a powerful acid that can quickly overpower other flavors in your soup. The effects on taste can range from a subtle tanginess to an overwhelming sourness.
This can be quite unpleasant for those not expecting it, especially if the soup was already well-seasoned before the addition of lemon juice. However, all is not lost. Balancing acidity is the key to fixing a soup with too much lemon juice.
The sourness can be balanced out by adding other ingredients that can help neutralize the acid. For example, adding a small amount of sugar or honey can help counteract the sourness. Additionally, adding more broth or vegetables can also help dilute the lemon juice and make the soup less overpowering.
This brings us to the next section about the dilution method.
Dilution Method
First, you can try adding a little bit of water or broth to the soup to balance out the flavors. Think of it like watering a plant that’s been over-fertilized – just a little bit can go a long way to restoring the proper balance. When diluting the soup with water or broth, keep in mind that you may need to adjust the seasoning as well. Adding too much liquid can also affect the soup’s consistency, so be sure to add small amounts at a time and taste as you go to ensure you achieve the desired lemon flavor and soup consistency.
To help guide you in determining how much water or broth to add, you can use the following table as a reference. Keep in mind that these are general guidelines and may need to be adjusted based on your personal preference and the specific recipe you are working with.
| Soup Consistency | Lemon Flavor | Amount of Water/Broth to Add |
|---|---|---|
| Too thick | Too strong | 1-2 tablespoons |
| Just right | Too strong | 2-4 tablespoons |
| Too thin | Too strong | 4-6 tablespoons |
Once you have diluted the soup to your desired taste and consistency, you can move on to the neutralization method to further balance out the flavors.
Neutralization Method
Ready to take your soup from good to great? Try the neutralization method!
This method involves using a basic ingredient to counteract the acidity of the lemon juice. Some common basic ingredients include baking soda, milk, or cream.
To use this method, start by adding a small amount of the basic ingredient to the soup and tasting it. Continue to add a small amount at a time until the flavor balance is achieved. Be careful not to add too much, as this can cause the soup to become too alkaline and affect the overall taste.
Once you’ve neutralized the lemon juice, you can continue with the rest of the recipe as normal.
Now, let’s move on to the next section where we’ll talk about the creamy method of fixing too much lemon juice in soup.
Creamy Method
To take your soup to the next level, try adding a creamy ingredient like coconut milk or heavy cream. Not only will this create a smooth and luxurious texture, but it’ll also balance out the tanginess of the lemon.
Here are a few ways to incorporate creaminess into your soup:
-
Whipped cream: This may seem like an unusual addition, but a dollop of whipped cream can add a touch of sweetness and creaminess to your soup.
-
Coconut milk: If you’re looking for a dairy-free option, coconut milk is a great substitute. It adds a subtle tropical flavor that complements the lemon nicely.
-
Butter substitution: If you prefer a richer flavor, try substituting butter for some of the broth in your soup. This’ll add a creamy, velvety texture that’ll help mellow out the sourness.
-
Heavy cream: For a truly decadent soup, add a splash of heavy cream. This’ll create a thick, luscious texture that’ll make your taste buds sing.
-
Sour cream: If you’re looking for a tangy counterpoint to the lemon, try adding a dollop of sour cream. It adds a creamy, slightly sour note that complements the citrus nicely.
By incorporating a creamy element into your soup, you can transform a sour, tangy broth into a rich and indulgent treat. However, if you’re not a fan of creamy soups, don’t worry! There are other methods you can use to balance out the lemon.
Let’s take a look at the starchy method.
Starchy Method
When I find myself with a soup that’s too lemony, I turn to the starchy method to fix it. This involves adding starches like rice, pasta, or potatoes to the soup. These starches absorb the excess acidity and balance out the flavors. Another option is to add beans or lentils. These will not only absorb some of the lemon juice but also add texture and flavor to the soup.
Overall, the starchy method is a simple and effective way to fix a lemony soup.
Add Rice, Pasta, or Potatoes
Try throwing in some cooked rice, pasta, or diced potatoes to absorb the excess lemon flavor and add a hearty texture to your soup. Not only do these ingredients help to thicken your soup, but they also provide a neutral base that can balance out the acidity of the lemon juice.
When adding rice or pasta, make sure to cook them separately before adding them to the soup. This prevents them from becoming mushy and overcooked in the soup. As for potatoes, you can add them directly to the soup and let them cook until tender. Just be sure to adjust the seasoning as needed, as the added starchiness can dilute other flavors in the soup.
Adding rice, pasta, or potatoes is a simple and effective way to fix a soup that has too much lemon juice. However, if you wanna take it a step further, you can also try adding beans or lentils to your soup.
Add Beans or Lentils
In my previous subtopic, I shared how adding rice, pasta, or potatoes can help balance out the excess lemon juice in soup. While these starches are great for thickening the soup, they may not add much in terms of nutrition. That’s why I’d like to suggest adding beans or lentils to your soup as a protein addition that can also help absorb some of the acidity.
Beans and lentils are versatile ingredients that can be used in a variety of dishes, including soups. They not only add nutritional value but also help to thicken the soup and balance out the lemon flavor. Below is a table that shows the different types of beans and lentils you can add to your soup, along with their cooking techniques and approximate cooking times.
| Bean/Lentil | Cooking Technique | Cooking Time |
|---|---|---|
| Chickpeas | Boil | 45-60 mins |
| Black Beans | Simmer | 60-90 mins |
| Lentils | Simmer | 20-30 mins |
| Kidney Beans | Boil | 60-90 mins |
| Cannellini | Simmer | 60-90 mins |
By adding beans or lentils to your soup, you not only balance out the lemon juice but also add a source of protein to your meal. Just remember to adjust the cooking time and method based on the type of bean or lentil you’re using. Now that we’ve covered the protein addition technique, let’s move on to the next section where I’ll explain how to reduce the acidity in your soup using a different method.
Acid Reduction Method
So, if I’ve accidentally added too much lemon juice to my soup, I can use the acid reduction method to balance out the flavors.
One way to do this is to add more soup base to the mixture. This will help to dilute the sourness of the lemon juice and bring the overall flavor profile back to a more neutral state.
Another option is to add a pinch of baking soda, which will chemically react with the acid in the lemon juice and neutralize it.
By using these simple techniques, I can quickly fix my soup and avoid wasting any ingredients.
Add More Soup Base
Adding more soup base will help balance out the flavor of the soup if there’s too much lemon juice. The additional soup base will not only add more liquid to the soup, but it’ll also help dilute the overpowering lemon flavor. This is a great alternative solution if you don’t want to add any more ingredients or make any substitutions.
If you don’t have any additional soup base on hand, you can also try using chicken or vegetable broth as a substitute. This will have a similar effect as adding more soup base, as it’ll help dilute the lemon flavor and thicken the broth. However, be sure to taste the soup as you add the broth, as you don’t want to add too much and overcompensate for the lemon flavor.
To further adjust the acidity of the soup, you can also try adding a pinch of baking soda. This’ll neutralize the acidity of the lemon juice and help mellow out the flavor.
Add Baking Soda
You can easily adjust the acidity of your recipe by simply sprinkling a pinch of baking soda. Baking soda is alkaline, which means it can neutralize acidic ingredients like lemon juice. When baking soda reacts with an acidic ingredient, it produces carbon dioxide gas, water, and a salt. This chemical reaction can help reduce the sourness of your soup and make it more enjoyable.
However, if you don’t have baking soda on hand or prefer not to use it, there are other alternatives you can try. For instance, you can add a bit of sugar or honey to your soup, as the sweetness can counteract the tartness of the lemon juice. You can also try adding a dairy product like cream or yogurt, as the lactic acid can help balance out the acidity.
With these baking soda alternatives, you can easily fix your soup and make it taste just right. Moving on to the next method of flavor enhancement, you can also add herbs and spices to give your soup more depth and complexity.
Flavor Enhancement Method
When it comes to enhancing the flavor of a soup that’s lacking in taste, I have two go-to methods:
-
Adding more herbs or spices can add a depth of flavor that significantly improves the taste of a soup.
-
Topping it with something flavorful such as croutons, cheese, or even a dollop of sour cream can provide a burst of flavor that complements the soup’s taste profile.
Overall, both methods can be effective in enhancing the flavor of a soup.
Add More Herbs or Spices
To really balance out the overwhelming lemon flavor, try incorporating some additional herbs or spices into the soup. There are many herbal combinations and spice blends that can help to tone down the acidity of the lemon juice and provide a more complex flavor profile.
For instance, adding in some fresh thyme or rosemary can give the soup a subtle earthiness, while a pinch of cumin or coriander can add warmth and depth to the dish. It’s important to start small when adding herbs and spices, as you don’t want to overwhelm the soup with too many flavors.
Begin by adding a small amount of the herb or spice, then taste and adjust as needed. You may find that a particular blend works better with the other ingredients in your soup, so don’t be afraid to experiment until you find the perfect balance. Once you’ve achieved the desired flavor, you can move on to adding a flavorful topping to finish off the dish.
Add a Flavorful Topping
Enhance the flavor of your lemony soup by adding a delicious topping that’ll take it to the next level. Here are four flavorful toppings you can add to your soup:
-
Croutons – These small, crunchy bread cubes not only add texture to your soup but also provide a contrasting flavor that complements the lemony taste.
-
Parmesan Cheese – Sprinkling grated parmesan cheese on top of your soup adds a salty, nutty flavor that balances out the acidity of the lemon juice.
-
Chopped Nuts – Adding chopped nuts like almonds or pecans will give your soup a pleasant crunch and a nutty flavor that complements the lemon.
-
Fresh Herbs – Adding fresh herbs like parsley, thyme, or basil will not only add a pop of color to your soup but also enhance its flavor with their unique aromas.
Don’t have any of these toppings on hand? No problem! You can also experiment with ingredient substitutions to create your own unique topping.
Now, let’s move on to testing and adjusting the soup to make sure it’s just right.
Testing and Adjusting the Soup
First, don’t be discouraged by the overwhelming lemon flavor, but let’s fix it together.
To start, test the soup consistency and flavor balance. If the soup is too thin or watery, add more vegetables or a starch like potatoes or rice to thicken it up. If the soup is too thick, add more broth or water to thin it out.
Next, taste the soup and see if the lemon flavor is too strong. If so, try adding a pinch of sugar to balance out the acidity. If that doesn’t work, try adding a small amount of cream or butter to mellow out the lemon flavor. Remember to add these ingredients gradually, tasting as you go, so you don’t overcorrect and end up with an entirely different soup.
With a bit of testing and adjusting, you can fix that overly lemony soup and bring it back to a delicious and balanced flavor profile.
Now, let’s move on to some prevention methods to ensure that this doesn’t happen again in the future.
Prevention Methods
Now, let’s explore some ways you can prevent an overpowering citrus flavor in your future soup creations. Preventing over acidity is the key to achieving a perfect balance of flavors in your soup. Here are some prevention methods you can try:
-
Use less lemon juice. One of the easiest ways to prevent an overpowering lemon flavor is to simply use less lemon juice. Start by adding a small amount and gradually increase until you achieve the desired level of acidity.
-
Add acid at the end of cooking. Instead of adding lemon juice from the beginning of your soup-making process, try adding it at the end. This will allow you to better control the amount of acidity in your soup.
-
Use lemon alternatives. If you’re looking for a way to add acidity to your soup without using lemon juice, try using other acidic ingredients such as vinegar or white wine. These alternatives can give your soup a similar tang without overwhelming the other flavors.
By using these prevention methods, you can avoid the disappointment of an overly acidic soup. Incorporating lemon alternatives can also add a new depth of flavor to your soup that you may not have considered before.
Frequently Asked Questions
Can I substitute lime juice for lemon juice in soup?
Yes, you can substitute lime juice for lemon juice in soup. Lime juice adds a unique citrus flavor and has various benefits for cooking. To determine the right amount, start with a small amount and taste as you go.
How long can I keep soup with too much lemon juice in the refrigerator before it goes bad?
How long can soup with excess lemon juice last in the fridge? This depends on the ingredients and storage conditions. Spoilage indicators include a sour smell, off taste, and mold growth. Storage tips include covering tightly and consuming within 3-4 days.
Will adding sugar help balance out the acidity of the soup?
Using honey instead of sugar can help balance acidity in soup. To avoid adding too much lemon juice in the first place, start by adding small amounts and tasting as you go.
Can I use a blender to mix in additional ingredients to adjust the flavor of the soup?
Blender alternatives for flavor adjusting techniques include using a food processor or immersion blender. Adding ingredients like cream, broth, or potatoes can also help balance out the lemon juice in soup.
Is it safe to eat soup with too much lemon juice if I have acid reflux or other digestive issues?
Did you know that lemon juice in soup can enhance flavor and provide health benefits? However, for those with acid reflux, precautions must be taken. Tips include diluting with water or adding a dairy base.
Conclusion
In conclusion, fixing too much lemon juice in soup can be a daunting task, but it’s achievable with the right approach. The dilution method, neutralization method, creamy method, starchy method, acid reduction method, and flavor enhancement method are all effective ways of fixing a sour soup. However, the ideal method will depend on the type of soup and personal preferences.
To prevent this problem from occurring in the future, it’s recommended to add lemon juice in small increments and taste the soup as you go. Additionally, using a measuring spoon or juicer can help regulate the amount of lemon juice added.
By implementing these prevention methods and knowing how to fix a sour soup, you can ensure that your soup is always perfectly balanced and enjoyable.
Cindy thoroughly researches juicing trends, techniques, and recipes to provide readers with practical advice and inspiration. Her writing style is accessible, engaging, and designed to make complex concepts easy to understand. Cindy’s dedication to promoting the advantages of juicing shines through her work, empowering readers to make positive changes in their lives through the simple act of juicing.

I find the fermentation of juice fascinating, as it transforms a basic beverage into a delicious and nourishing refreshment. Being passionate about homebrewing, I have experimented with fermenting various fruits and vegetables, and I can attest to the many benefits that this traditional method provides.
Fermented juice is not only packed with probiotics and enzymes that support gut health and digestion, but it can also be a refreshing and flavorful alternative to sugary sodas and juices.
In this article, I will guide you through the process of fermenting juice step by step, from selecting the right equipment to trying out delicious recipes. Whether you are a seasoned fermenter or a curious beginner, you will learn everything you need to know to create your own fermented juice at home.
So let’s get started and explore the fascinating world of juice fermentation!
Key Takeaways
- The fermentation process converts sugars into alcohol, carbon dioxide, and other compounds, which improves taste, shelf life, and health benefits of the juice.
- Proper maintenance and cleaning of equipment and materials, temperature control and monitoring, and starter culture are necessary for successful fermentation.
- Choosing high-quality, fresh juice without additives or preservatives, experimenting with flavor pairings, and straining the juice to remove pulp or seeds are important steps in making fermented juice.
- Regular consumption of fermented juice is recommended, as it is packed with probiotics that improve gut health and boost the immune system. Safe fermentation practices are crucial for optimal results.
Understanding the Fermentation Process
Now that you’ve got your juice ready, let’s talk about how you can turn it into a delicious fermented drink!
Fermentation is a scientific process that converts sugars into alcohol, carbon dioxide, and other compounds. It is a natural process that can happen spontaneously, but controlling the conditions of fermentation can improve the taste, shelf life, and health benefits of the final product.
Fermentation benefits are not limited to creating an alcoholic beverage. Fermented drinks have been shown to have numerous health benefits, including improved digestion, increased immune function, and reduced inflammation.
The science behind fermentation involves microorganisms, such as yeast or bacteria, breaking down the sugars in the juice and producing alcohol and other compounds. The type of microorganism used, as well as the temperature and time of fermentation, can greatly affect the final taste and composition of the drink.
Now, let’s move on to the next step of choosing the right equipment for your fermentation process.
Choosing the Right Equipment
When selecting the appropriate gear, it’s important to consider the size of your batch and the length of time you plan to ferment. For smaller batches, a simple mason jar with a lid or airlock can suffice. However, for larger batches, a fermenting crock or stainless steel container may be necessary.
It’s also important to consider the material of the container, as certain metals can react with the acidic nature of the juice and affect the taste.
In addition to selecting the appropriate gear, it’s important to maintain and clean your equipment properly. This includes regularly sanitizing your containers, airlocks, and any other equipment used in the fermentation process.
Cost-effective options for equipment can include repurposed containers, such as glass jars or plastic buckets, or purchasing second-hand equipment. By properly maintaining your equipment and selecting the right gear for your batch, you can ensure a successful fermentation process.
As you move into the next section about selecting the right juice, it’s important to remember the impact that equipment and maintenance can have on the final product.
Selecting the Right Juice
To make the most delicious and flavorful fermented drink, you’ll want to choose a high-quality, fresh fruit or vegetable that you love. When selecting juice for fermentation, keep in mind the following tips:
-
Choose juice that is free of additives or preservatives, as these can inhibit the fermentation process.
-
Opt for juice that is not pasteurized, as this process kills off any natural yeasts present in the juice.
-
Consider using a mix of juices to create a unique flavor profile.
-
Experiment with different flavor pairings to find your perfect combination.
By carefully selecting your juice, you can create a drink that is both tasty and healthy. Once you’ve chosen your juice, it’s time to move onto preparing it for fermentation.
Preparing the Juice
Get the best flavor out of your selected fruit or vegetable by thoroughly cleaning it before squeezing the juice. This is an essential step in the juice fermentation process. If you use dirty or contaminated produce, your juice can spoil quickly, ruining all your hard work.
The best way to clean your produce is by rinsing it under cold water and scrubbing it gently with a soft brush. This removes any dirt, bacteria, or chemicals that may be on the surface.
Next, you need to prepare your juice for fermentation. Depending on the type of juice you’re using, you may need to blend different fruits and vegetables to get the right flavor profile. For example, if you’re making a green juice, you may want to blend kale, spinach, cucumber, and celery to create a balanced flavor. If you’re making a fruit juice, you may want to blend sweet fruits like apples, pears, and grapes with tart fruits like lemons or limes to create a delicious flavor combination.
Once you’ve blended your juice, make sure to strain it to remove any pulp or seeds. This will ensure that your fermentation process goes smoothly and that you end up with a clear, tasty drink.
Now that your juice is prepared, it’s time to add a starter culture to begin the fermentation process.
Adding a Starter Culture
As I introduce a starter culture into the juice, it’s like planting a seed that will bloom into a flavorful and fizzy drink.
There are various types of starter cultures that can be used to ferment juice, but the most popular ones are kefir grains, kombucha SCOBY, and wild yeasts. Kefir grains are lactic acid bacteria and yeast that create a thick and tangy drink. Kombucha SCOBY, on the other hand, is a symbiotic colony of bacteria and yeast that produces a slightly sour and effervescent beverage. Meanwhile, wild yeasts are naturally occurring microorganisms that can be found in the air, on fruits, and even on our skin. They can be unpredictable but can also yield unique and complex flavors.
One crucial factor in fermenting juice with a starter culture is temperature control. The ideal temperature range for most starter cultures is between 68-78°F (20-25°C). If the temperature is too low, the fermentation process may take longer, and the drink may not be as carbonated. On the other hand, if the temperature is too high, the bacteria and yeast may produce off-flavors or even die. It’s essential to monitor the temperature regularly, especially during the first few days of fermentation, when the microorganisms are most active.
As we move on to fermenting the juice, we need to shift our focus from introducing the starter culture to monitoring the fermentation process.
Fermenting the Juice
Now that we’ve added a starter culture to our juice, it’s time to move on to the next step: fermenting the juice.
Juice fermentation is a process that involves the natural breakdown of sugars in the juice by microorganisms, resulting in the production of alcohol, lactic acid, and carbon dioxide. This process not only improves the flavor of the juice but also increases its nutritional value.
One of the benefits of juice fermentation is that it can enhance the digestibility and bioavailability of nutrients in the juice. Fermentation breaks down complex carbohydrates and proteins, making them easier for the body to absorb. Additionally, fermented juice contains beneficial bacteria known as probiotics that can improve gut health and boost the immune system.
However, it’s essential to be careful during the fermentation process to avoid common mistakes that could lead to spoilage or contamination. The fermentation process can be unpredictable, and there are some common mistakes to avoid, such as using contaminated equipment, not properly sterilizing jars or bottles, or fermenting at the wrong temperature.
By following proper guidelines and being careful during the fermentation process, we can ensure that our juice turns out delicious and safe to consume.
As we move on to the next section about monitoring the fermentation process, it’s crucial to keep in mind that fermentation is an ongoing process that requires attention and care. By monitoring the progress of fermentation, we can ensure that our juice is fermenting correctly and avoid any potential issues that could arise during the process.
Monitoring the Fermentation Process
Keeping an eye on how our mixture is progressing is important during the fermentation process to ensure a delicious and safe end product. To monitor the fermentation process, we need to measure the acidity of the juice regularly. The acidity level will change during fermentation, and it’s essential to keep track of these changes to ensure that the juice doesn’t become too acidic or too sweet. We can use a pH meter or pH strips to measure the acidity level of the juice.
Ideally, we want the acidity to be between 3.5 and 4.5 pH. If the acidity level is too high, we can add calcium carbonate to reduce it. If the acidity level is too low, we can add more sugar to increase it.
Another critical aspect of monitoring the fermentation process is adjusting the sweetness of the juice. As the yeast consumes the sugar, the juice will become less sweet. However, we don’t want the juice to become too dry, as it will affect the taste of the final product.
To adjust the sweetness, we can add more sugar to the juice. It’s important to add the sugar in small amounts and to test the sweetness regularly. We can use a refractometer to measure the sugar level of the juice.
Once the acidity and sweetness levels are optimal, we can proceed to the next step of storing and aging the fermented juice.
Storing and Aging Fermented Juice
Once we’ve achieved the optimal acidity and sweetness levels, it’s time to store and age our deliciously fermented beverage. Long term storage is essential to further develop the flavor of our juice. This process may take weeks or even months, depending on the desired taste. We can store our fermented juice in glass bottles or jars, making sure to leave some headspace to allow for carbonation. It’s important to keep the bottles or jars in a cool, dark place to prevent any further fermentation.
During the aging process, the flavor of our fermented juice will continue to develop. In fact, we can even create different flavor profiles by experimenting with different storage methods. I’ve found that using oak or other wood barrels can add a unique depth of flavor to the juice. To further emphasize the importance of long term storage, here’s a table to show the effects of aging on flavor development:
| Time Stored | Flavor Development |
|---|---|
| 1 week | Mildly tangy |
| 1 month | Tangy and slightly sweet |
| 3 months | Tart and fruity |
| 6 months | Complex and full-bodied |
Now that we’ve covered the storage and aging of our fermented juice, we can move on to trying out delicious fermented juice recipes.
Trying Out Delicious Fermented Juice Recipes
Who wouldn’t want to dive into some lip-smacking fermented beverage recipes that’ll make your taste buds dance?
Here are some flavor combinations to try out:
-
Classic Apple Ginger: Mix apple juice with freshly grated ginger and add some honey for sweetness. Let it ferment for 2-3 days and enjoy a zesty, refreshing drink.
-
Blueberry Lemonade: Combine blueberry juice with lemon juice and a pinch of salt. Let it ferment for 1-2 days and serve over ice for a tangy and fruity twist on traditional lemonade.
When it comes to serving suggestions, you can get creative and experiment with different garnishes like fresh herbs, sliced fruits, or even edible flowers.
These fermented juice recipes are not only delicious but also good for your gut health.
So, let’s move on to the next section and learn about the health benefits of fermented juice.
Enjoying the Health Benefits of Fermented Juice
To fully reap the health benefits of fermented juice, you should consume it regularly. Fermented juice is packed with probiotics, which are live microorganisms that provide numerous health benefits. These include improving gut health, boosting the immune system, and even reducing the risk of certain diseases. Probiotics work by restoring the natural balance of bacteria in the gut, which is essential for overall health and wellbeing.
Exploring flavor combinations is also a fun way to enjoy the health benefits of fermented juice. Some popular flavors include ginger, turmeric, and citrus fruits like lemons and limes. You can also experiment with different fruits and herbs to create your own unique flavor combinations. Just be sure to use fresh, high-quality ingredients and follow safe fermentation practices to ensure the best results. With the right ingredients and techniques, you can enjoy the delicious taste and health benefits of fermented juice in no time.
Frequently Asked Questions
Can you ferment juice without a starter culture?
Why use a starter culture when fermenting juice? While it can provide consistency, experimenting with different juice blends can lead to unique flavors and beneficial bacteria. However, without a starter culture, there is a higher risk of spoilage and inconsistent results.
How long does it take for juice to ferment?
Fermentation time for juice varies based on factors such as fermentation temperature, sugar content, and presence of yeast or bacteria. Generally, it takes 1-2 weeks for juice to ferment, but this can be longer or shorter depending on these variables.
Can you ferment juice in a plastic container?
Fermenting juice in a plastic container is doable, but glass containers have advantages. They’re more durable and don’t leach chemicals. For successful fermentation in plastic, sanitize it first and keep it in a cool place.
Is it necessary to use organic juice for fermentation?
Using organic juice for fermentation offers the benefits of higher nutrient content and absence of harmful pesticides. Alternatives include non-organic juice, but may contain fewer nutrients and chemicals. Consider using organic for optimal results.
Can you use frozen juice for fermentation?
Yes, frozen juice can be used for fermentation. While fresh juice may produce slightly better results, freezing preserves nutrients and extends shelf life. Benefits of freezing include easier storage and availability.
Conclusion
In conclusion, fermenting juice is a simple and rewarding process that can yield delicious and nutritious beverages. It’s important to understand the fermentation process, choose the right equipment, select the right juice, and prepare it properly. Adding a starter culture and monitoring the fermentation process are also crucial steps to ensure successful fermentation.
One interesting statistic to note is that fermented juices have been consumed for thousands of years and are still popular today. In fact, a recent study found that fermented beverages accounted for a significant portion of global beverage sales, with kombucha alone generating over $1 billion in revenue in 2019. This shows the growing popularity and interest in fermented beverages and highlights the potential for experimentation and innovation in the field of fermented juice.
By following the steps outlined in this article and trying out some of the delicious fermented juice recipes provided, you can enjoy the health benefits and unique flavors of fermented juice. From boosting gut health to providing a natural source of probiotics, fermented juice is a great addition to any healthy lifestyle. So, go ahead and give it a try – your taste buds (and gut) will thank you!
Cindy thoroughly researches juicing trends, techniques, and recipes to provide readers with practical advice and inspiration. Her writing style is accessible, engaging, and designed to make complex concepts easy to understand. Cindy’s dedication to promoting the advantages of juicing shines through her work, empowering readers to make positive changes in their lives through the simple act of juicing.
-
 Juice Tips and Tricks3 months ago
How To Make Homemade Pickle Juice
-
 Health Benefits of Juice2 weeks ago
How Much Bottled Lemon Juice Equals 1 Lemon
-
 Juice Tips and Tricks3 months ago
How Much Lemon Juice Is Equal To Half A Lemon
-
 Juice Tips and Tricks3 months ago
How Much Lemon Juice Concentrate Equals One Lemon
-
 Juice Tips and Tricks2 months ago
How Long Can You Drink Orange Juice After The Expiration Date
-

 Popular Juice Brands2 months ago
9 Best No-Sugar-Added Popular Juice Brands
-
 Juice Tips and Tricks1 week ago
How Long Does Lemon Juice Last After Expiration Date
-

 Popular Juice Brands2 months ago
10 Top-Rated Organic Juice Brands to Try