To create chalkboard labels for juice jars, start by choosing a versatile material like adhesive-backed chalkboard vinyl for durability and easy cutting. Design simple, bold labels with clear lettering or decorative elements to make them attractive. Cut the labels into your preferred shapes using sharp scissors or a cutting machine like Cricut for precision. Before applying, clean your jars thoroughly, peel off the backing, and stick the labels smoothly. For more tips, keep exploring how to perfect your craft.
Key Takeaways
- Choose moisture-resistant chalkboard or vinyl labels for durability on juice jars.
- Use bold, simple lettering with chalk markers for clear visibility and easy readability.
- Cut labels into custom shapes with scissors or cutting machines for decorative appeal.
- Clean jars thoroughly before application, then carefully peel and position labels to avoid air bubbles.
- Smooth out labels with a squeegee or credit card to ensure strong adhesion and a professional finish.

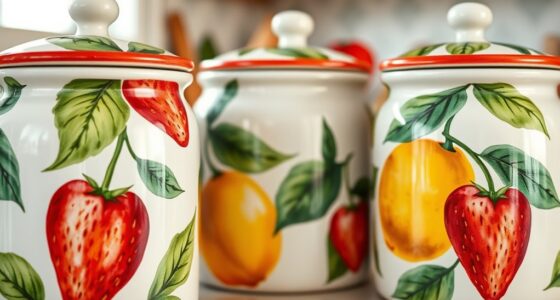
If you’re looking for a simple way to organize and personalize your juice jars, chalkboard labels are an excellent choice. They add a charming touch while making it easy to identify your juices at a glance. When it comes to customization tips, the key is selecting the right material options that suit your needs and style. You can choose from traditional chalkboard surfaces, which are typically made of a coated paper or plastic, or opt for more durable options like vinyl or adhesive-backed chalkboard sheets. Each material has its advantages: paper-based labels are budget-friendly and easy to write on, but they may not withstand moisture as well as vinyl or plastic options. Vinyl labels, on the other hand, are waterproof and more resistant to smudging or wearing out, making them perfect for kitchen environments where spills are common.
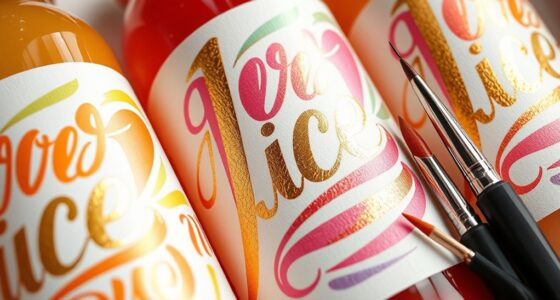
For a personalized look, consider using different colors of chalk or chalk markers. Regular chalk provides a classic, matte finish, but chalk markers offer more precision and vibrant colors, giving your jars a more polished appearance. When choosing material options, think about how often you’ll need to change the labels. If you plan to update your juice flavors frequently, a writable surface that’s easy to erase and re-write on is essential. For instance, chalkboard contact paper or adhesive sheets can be cut into custom shapes and reused multiple times, saving you money and effort over time. Additionally, selecting materials that are resistant to moisture will help your labels stay intact and legible longer in a kitchen setting.
Once you’ve selected your material, the next step is designing your labels. Keep it simple; large, clear lettering makes it easy to read from a distance. You might want to add decorative elements like borders, icons, or small illustrations to make each label unique. When it’s time to cut, use sharp scissors or a craft knife for precise edges, especially if you’re working with intricate shapes. For clean, professional-looking cuts, a cutting machine like a Cricut or Silhouette can be a game-changer. These tools allow you to create detailed designs and cut your labels accurately every time.
Applying your labels correctly is equally important. Make sure your jars are clean and dry before sticking on the labels. Peel off any backing carefully and press the label onto the surface, smoothing out any air bubbles. If you’re using a vinyl or waterproof material, pressing firmly and using a squeegee or credit card can help ensure a seamless adhesion. With these tips, your juice jars will not only look attractive but stay organized and easy to identify for weeks to come.
Frequently Asked Questions
Can Chalkboard Labels Be Reused Multiple Times?
Yes, chalkboard labels can be reused multiple times if you follow proper reusability tips and label maintenance. To keep them in good shape, clean the labels gently with a damp cloth after each use, avoiding harsh cleaners that can damage the surface. This way, you can easily erase the previous writing and reuse the labels for different jars, saving you money and effort.
What Are the Best Cleaning Methods for Chalkboard Labels?
You can keep your chalkboard labels looking fresh by using gentle cleaning solutions like a damp cloth or a soft sponge with water. For stubborn residue, mix a small amount of vinegar or mild soap with water. Avoid harsh chemicals that can damage the surface. Regular label maintenance, like wiping after each use, prevents buildup and guarantees your labels stay reusable and easy to read for a long time.
Are Chalkboard Labels Waterproof or Weather-Resistant?
You might wonder if chalkboard labels can withstand the elements. The good news is, with a waterproof coating, they become quite weather-resistant. This coating prevents water from seeping in and smudging your writing, making your labels durable outdoors. So, yes, when properly treated, chalkboard labels are designed to be waterproof and weather-resistant, giving you confidence that your labels will stay clear and legible no matter the weather.
Can Chalkboard Labels Be Written on With Regular Chalk?
You can write on chalkboard labels with regular chalk, but it’s best to use chalk chalk for clear, bold writing. Be aware that regular chalk can leave dust residue, which might smudge or be hard to clean. For cleaner results and less mess, consider using dustless chalk or liquid chalk markers. This way, your labels stay neat, legible, and easier to update when needed.
How Long Do Chalkboard Labels Typically Last Outdoors?
Chalkboard labels typically last outdoors for about 3 to 6 months, depending on weather resistance and fading durability. You should expect exposure to sun, rain, and wind to gradually wear down the labels. To extend their lifespan, consider sealing them with a weatherproof spray and reapplying chalk as needed. Regular maintenance helps keep your labels looking fresh and readable despite outdoor conditions.
Conclusion
Now that you’ve crafted your chalkboard labels, you’ve turned plain juice jars into storytellers, each one whispering its unique flavor story. Like a canvas awaiting its masterpiece, these labels symbolize your creativity and care, transforming everyday objects into personal touches. As you peel, write, and stick, remember you’re not just labeling jars — you’re crafting a visual melody of freshness and fun. Let each label be a badge of your effort, shining as a beacon of your homemade spirit.

Cindy thoroughly researches juicing trends, techniques, and recipes to provide readers with practical advice and inspiration. Her writing style is accessible, engaging, and designed to make complex concepts easy to understand. Cindy’s dedication to promoting the advantages of juicing shines through her work, empowering readers to make positive changes in their lives through the simple act of juicing.