
To DIY wooden crates for juice storage, start by sanding the wood smoothly to prevent splinters and prepare the surface. Use medium-grit sandpaper, then fine-grit for a polished finish. Next, apply a stain to highlight the wood’s natural grain and add warmth, wiping off excess for even coverage. Finish with a protective sealant to guard against moisture. If you keep going, you’ll discover tips to customize and enhance your crates for both function and style.
Key Takeaways
- Sand the wooden crates thoroughly with medium and fine-grit sandpaper for a smooth, splinter-free surface.
- Apply an even stain to enhance wood grain and warmth, wiping off excess for a uniform finish.
- Use water-based, non-toxic paint to add vibrant colors or custom designs, ensuring proper surface preparation beforehand.
- Seal the crates with a protective finish to prevent moisture damage and prolong durability.
- Add handles, labels, or personal touches after finishing to improve functionality and aesthetic appeal.
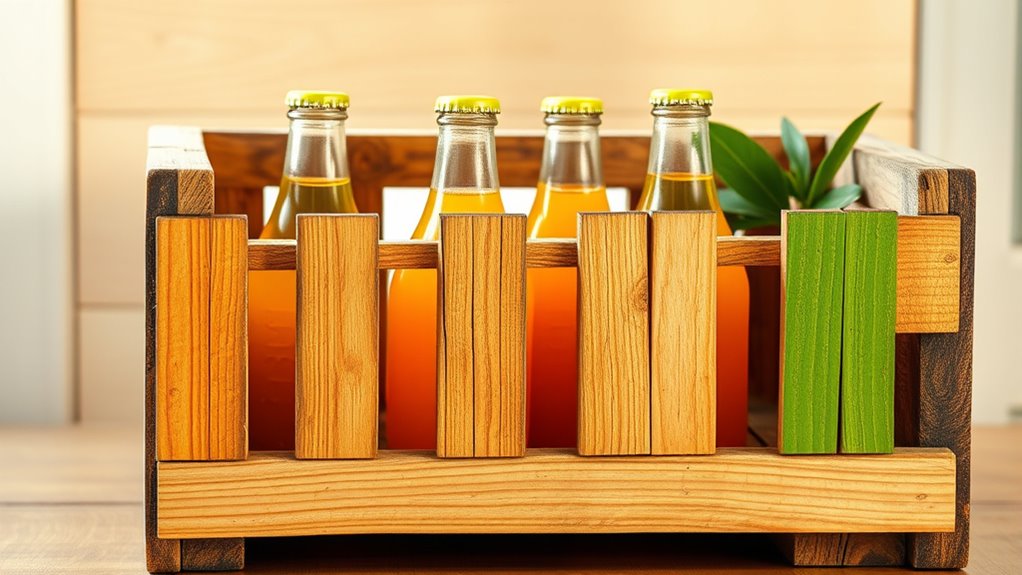
If you’re looking for a practical and customizable way to store your fresh juice, building your own wooden crates is an excellent solution. Not only do these crates help you organize your bottles efficiently, but they also allow you to add personal touches that match your space. To start, focus on mastering basic woodworking techniques, which guarantee your crates are sturdy and long-lasting. Using simple cuts, joints, and fasteners, you can assemble a durable frame that supports the weight of full juice bottles. It’s essential to measure carefully and double-check your cuts to avoid gaps or wobbling. When choosing materials, prioritize sustainable options like reclaimed wood or bamboo, which are eco-friendly and add a rustic charm to your storage solution. Sustainable materials not only reduce your environmental footprint but also give your crates a unique character that mass-produced counterparts can’t match.
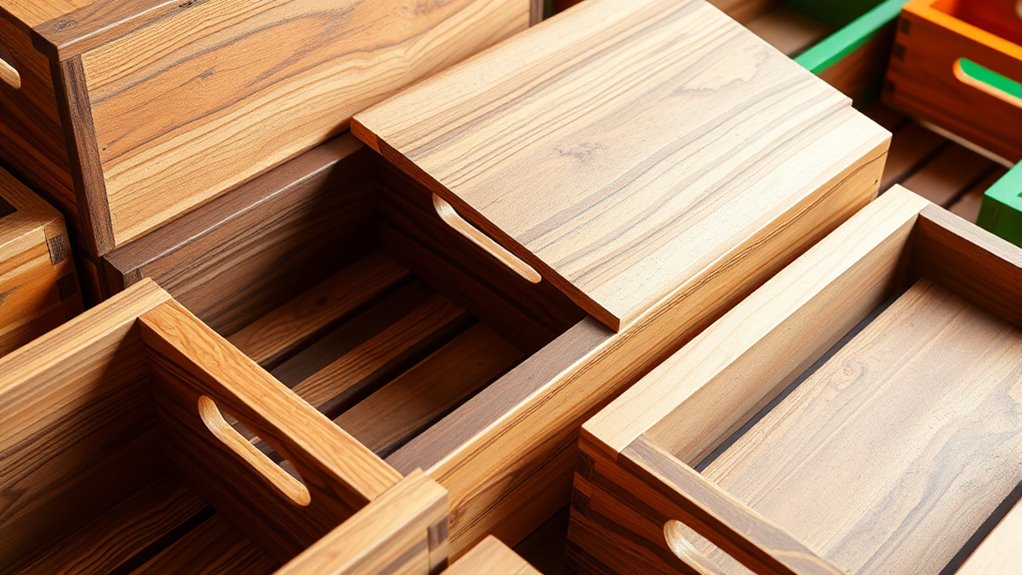
Once your frame is assembled, the next step is to sand your crates. Sandblasting or hand-sanding smooths out rough edges and surfaces, preventing splinters and making the crates safer to handle. Use medium-grit sandpaper for initial smoothing, then switch to fine-grit for a polished finish. This step is vital because it prepares the wood for staining or painting, ensuring an even, professional look. After sanding, you can choose to stain your crates, which enhances the natural grain and adds warmth to the wood. Apply the stain evenly with a brush or cloth, following the wood grain, and wipe off excess to prevent blotches. For a more vibrant or customized appearance, painting your crates is another excellent option. Use non-toxic, water-based paints for a safe and eco-friendly finish. You can opt for bright colors to brighten up your storage area or create patterns that match your decor.
Throughout the process, remember that your personal touch makes these crates special. Consider adding handles for easier transport or labels to identify different juice varieties. Sealing the wood with a protective finish helps prevent moisture damage, especially if you’re storing juice that might spill or condense. Building your own crates allows you to customize the size, design, and finish, giving you a functional piece that also reflects your style. With a little patience and attention to detail, you’ll craft sturdy, attractive storage that keeps your juice fresh and organized while making eco-conscious choices through sustainable materials and woodworking techniques.

Nut Milk Maker Machine,10 in 1 Automatic Plant Based Milk Maker, Soy Milk Machine
【One-Touch Smart Control】With a simple and intuitive interface, the soy milk machine maker is easy to use for...
As an affiliate, we earn on qualifying purchases.
Frequently Asked Questions
What Types of Wood Are Best for Juice Crate Durability?
You should choose hardwoods like oak or maple for your juice crate because of their tight wood grain, which provides better durability. These woods also offer natural moisture resistance, helping your crate withstand humidity and spills. Avoid softwoods like pine, which tend to have looser grain and are less durable. Selecting the right wood guarantees your crate stays sturdy and protects your juice effectively over time.
How Long Does It Take for Stain and Paint to Dry Completely?
Stain and paint typically take about 24 hours to dry completely, but drying time can vary depending on environmental factors like humidity, temperature, and ventilation. You should allow at least this period before using your crates to guarantee the finish sets properly. To speed up drying, keep the area well-ventilated and avoid high humidity. Patience ensures your paint and stain cure properly, giving your crates a durable, professional finish.
Can I Customize the Size of the Crates Easily?
Yes, you can easily customize the size of your crates with some simple adjustments. To do this, modify the cut measurements for your wood pieces, allowing you to create custom size options tailored to your needs. Just measure your desired crate dimensions carefully, then adjust your cuts accordingly. This allows for flexible crate dimension adjustments, ensuring your juice storage fits perfectly and looks great.
Are There Eco-Friendly Stain and Paint Options Available?
Yes, you can find eco-friendly stain and paint options for your crates. Look for products labeled as natural finishes or made from non-toxic, biodegradable ingredients. These eco-friendly options help reduce chemical exposure and environmental impact while still providing beautiful, durable results. By choosing natural finishes, you guarantee your wooden crates are safe for storing juice and environmentally conscious, making your project both functional and sustainable.
How Do I Prevent Mold or Mildew in Humid Environments?
To prevent mold or mildew in humid environments, you should focus on mold prevention and humidity control. Guarantee your crates are well-ventilated and keep the area dry by using dehumidifiers or fans. Regularly check for moisture and clean the crates with a mixture of vinegar and water. Applying a mold-resistant sealant can also help, but controlling humidity is your best defense against mold growth.

KIDISLE 32oz Automatic Soy Machine for Homemade Almond, Oat, Coconut, Soy, Plant Based Milks and Non Dairy Beverages with Delay Start/Keep Warm/Self-Cleaning/Boil Water, Black
【Versatile 8-in-1 Functionality】: This Nut Milk Maker offers eight different functions, from crafting nut milk and oat milk...
As an affiliate, we earn on qualifying purchases.
Conclusion
Now, you’ve got the skills to create your own wooden crates for juice storage. Sand, stain, or paint them to match your style—it’s all about making something functional and unique. Some say DIY projects boost happiness and creativity, and honestly, they might be onto something. So go ahead, build your crates, add your personal touch, and enjoy the satisfaction of a job well done. Turns out, crafting really can be good for the soul!

MAGETANG 7 in 1 Nut Milk Maker Machine 28oz Automatic Milk Maker for Homemade Coconut, Oat, Soy, Plant-Based Milk, Juice with 18H Delay Start/6H Keep Warm/Self Cleaning (Cream)
【Healthy&Nutrient-rich】: Say goodbye to carton milk, Enjoy rich, creamy, and additive-free, handmade milk made from nuts, grains, beans,...
As an affiliate, we earn on qualifying purchases.

KIDISLE 8 in 1 Nut Milk Maker Blender, 32oz Homemade Soy, Almond, Oat, Coconut, Plant Based and Non Dairy Beverages, Automatic Soybean Machine With Delay Start/Keep Warm/Boil Water, Cream
【Versatile 8-in-1 Functionality】: This Nut Milk Maker offers eight different functions, from crafting nut milk and oat milk...
As an affiliate, we earn on qualifying purchases.

Cindy thoroughly researches juicing trends, techniques, and recipes to provide readers with practical advice and inspiration. Her writing style is accessible, engaging, and designed to make complex concepts easy to understand. Cindy’s dedication to promoting the advantages of juicing shines through her work, empowering readers to make positive changes in their lives through the simple act of juicing.