
Lime juice cooks shrimp by denaturing their proteins, which changes their color from translucent to an opaque pink. This process usually takes about 20 to 30 minutes, depending on the thickness of the shrimp. However, be careful not to over-marinate, as it can make the shrimp tough and chalky. It’s important to use fresh shrimp for the best flavor and safety. Stick around to discover tips on marination and how to ensure your shrimp turn out perfectly. To achieve the perfect texture and flavor, it’s essential to balance the lime juice with complementary ingredients, such as garlic or herbs, which can enhance the dish’s overall appeal. Remember, marinating shrimp is just one aspect of preparation; also consider how to make a juice groove on your cutting board to catch any liquid from the shrimp or lime, ensuring a cleaner workspace. With the right techniques and attention to detail, your shrimp dish can become a standout at any gathering.
Key Takeaways
- Lime juice contains citric acid that denatures proteins in shrimp, effectively cooking them without heat.
- The marination process typically takes 20 to 30 minutes, with thicker shrimp requiring more time.
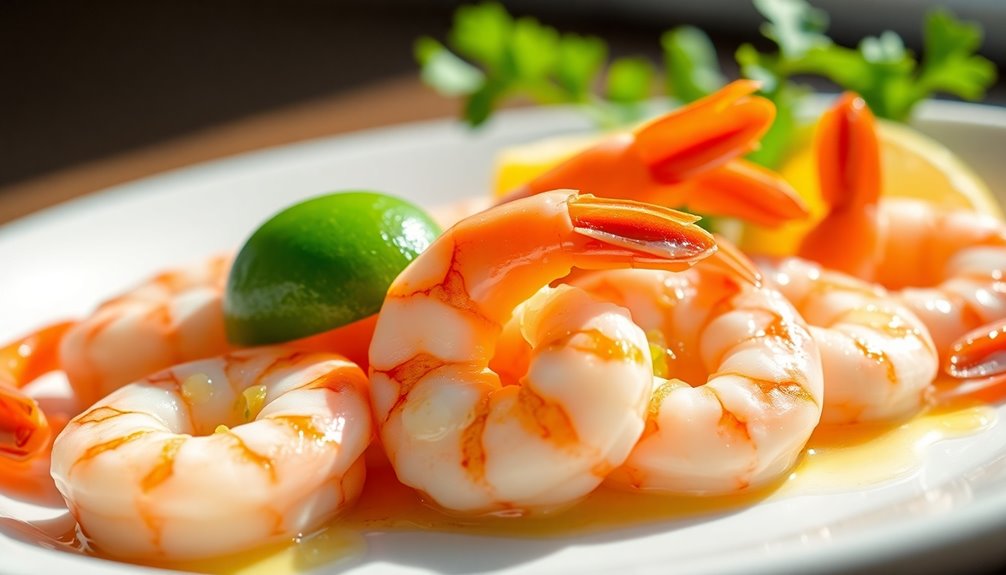
- As shrimp marinate, their translucent color changes to an opaque pink, indicating they are cooked.
- Over-marinating shrimp can lead to a tough texture, so monitoring time is essential.
- Freshness of shrimp is crucial, as lime juice does not kill bacteria like heat does.

When you marinate shrimp in lime juice, you're not just adding flavor; you're actually cooking them. Lime juice contains citric acid, which denatures the proteins in raw shrimp, altering their structure without applying heat. This unique property makes lime juice an excellent choice for marinating seafood, particularly if you enjoy dishes like ceviche. As the shrimp soak in the acidic marinade, you'll notice a fascinating transformation taking place.
The marination process typically takes about 20 to 30 minutes, during which the shrimp change from a translucent state to an opaque pink color. This visual cue is your indication that the shrimp are effectively cooked, thanks to the citric acid in the lime juice. However, you should keep in mind that the thickness of the shrimp plays a significant role in how quickly they "cook." Thicker shrimp may require a bit more time in the marinade to reach that perfect doneness, while thinner shrimp can cook more quickly.
While lime juice is a fantastic way to achieve that cooked shrimp texture, you need to be cautious about over-marinating. Leaving the shrimp in lime juice for too long can lead to a tough and chalky texture, which isn't what you want when preparing a delicious seafood dish. To avoid this, it's essential to monitor the marination time closely. If you're ever in doubt, it's better to err on the side of caution and check the shrimp earlier rather than later.
Freshness is another crucial factor when marinating shrimp. The acid in lime juice doesn't kill bacteria like heat does, so sourcing high-quality, fresh shrimp is vital for both safety and flavor. Always opt for raw shrimp that have been properly handled and stored to ensure you're getting the best taste and maintaining seafood safety.
If you're unsure about the freshness of the shrimp, it's best to consult your fishmonger or grocery store staff, as they can provide you with information on sourcing and quality.
Frequently Asked Questions
Does Lime Juice Cook Raw Shrimp?
Yes, lime juice does cook raw shrimp. When you marinate shrimp in lime juice, the citric acid denatures the proteins, similar to how heat works. This process gives the shrimp a firm texture and opaque color, making it appear as if it has been cooked. Similarly, understanding how lemon juice affects shrimp cooking reveals that it has a comparable effect due to its high acidity. Both lime and lemon juice can create delicious ceviche, allowing seafood lovers to enjoy shrimp without the use of heat.
You'll notice the shrimp change from translucent to opaque as they "cook." For best results, let them sit for about 10 to 30 minutes, depending on their size.
Just be careful not to marinate them too long, or they might become tough. Always use fresh shrimp for the best flavor!
How Does Lime Juice Cook Raw Fish?
When you marinate raw fish in lime juice, the citric acid causes a process called denaturation. This alters the proteins, changing the fish's texture without using heat.
You'll notice the fish becoming firm and opaque after about 20-30 minutes. However, remember that lime juice doesn't kill all bacteria, so always use fresh, high-quality seafood to ensure safety.
The thickness of the fish and temperature can also affect the marination time.
How Does Lemon Juice Cook Shrimp?
Imagine immersing tender shrimp in a shimmering pool of lemon juice, the citrus aroma wafting through the air.
As you let them marinate for 20 to 30 minutes, the acid begins to transform their translucent flesh into a firm, opaque delight.
Just keep an eye on the clock; over-marinating can lead to a rubbery texture.
Remember, fresh shrimp are key, as lemon juice doesn't eliminate bacteria like heat does.
Enjoy your zesty creation!
What Does Lime Juice Do in Cooking?
Lime juice plays a vital role in cooking by adding acidity, which brightens flavors and balances dishes.
When you use lime juice, it tenderizes proteins, enhances marinades, and acts as a natural preservative. Its tangy flavor complements various ingredients, making it perfect for dressings, dips, and seafood dishes.
You'll find that lime juice not only elevates taste but also contributes to the overall freshness of your meals, making them more vibrant and enjoyable.
Conclusion
When you marinate shrimp in lime juice, it's like giving them a sunbath—transforming them from raw to perfectly cooked in minutes. The citric acid penetrates the shrimp, changing their texture and color, much like how sunlight brightens a flower. Next time you whip up a shrimp cocktail or ceviche, remember this simple trick. With just a squeeze of lime, you're not just cooking; you're creating a vibrant dish that's bursting with flavor and freshness.

Cindy thoroughly researches juicing trends, techniques, and recipes to provide readers with practical advice and inspiration. Her writing style is accessible, engaging, and designed to make complex concepts easy to understand. Cindy’s dedication to promoting the advantages of juicing shines through her work, empowering readers to make positive changes in their lives through the simple act of juicing.