Juice Tips and Tricks
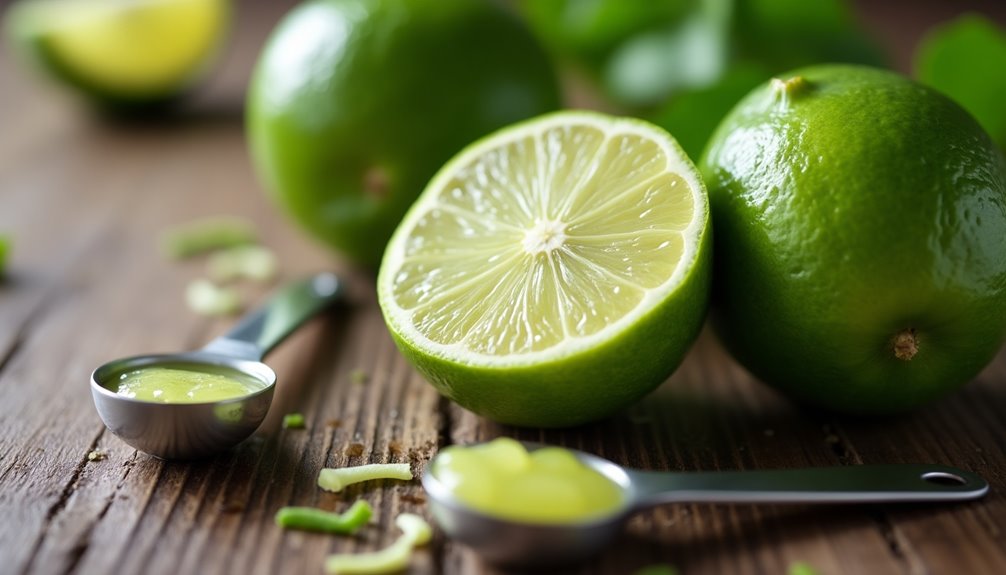
How Much Lime Juice Is Equivalent To One Lime
Have you ever been in the middle of making a recipe that calls for lime juice, only to realize you don’t have any fresh limes on hand? Or perhaps you’re adjusting a recipe to your liking and need help with the correct amount of lime juice to add?
As someone who loves to cook and experiment in the kitchen, I’ve found myself in these situations more times than I can count. That’s why I decided to do some research on how much lime juice is equivalent to one lime.
When it comes to using lime juice in recipes, there are a few factors that can affect the yield, such as the ripeness of the lime, the juiciness of the fruit, and the method used to extract the juice. As someone who values precision in cooking, I wanted to know the average yield of lime juice from a single lime and how to measure it accurately.
In this article, I’ll share my findings on how much lime juice you can expect to get from one lime, common lime juice measurements in recipes, and tips for maximizing your lime juice yield.
Key Takeaways
- Lime juice yield can be affected by factors such as ripeness, acidity level, and juicing technique.
- Rolling limes before juicing and microwaving them can increase yield, and room temperature limes are easier to juice.
- Lime juice is a good source of vitamin C and antioxidants, and is a popular ingredient in many dishes and drinks.
- Lime juice measurements vary depending on the size and juiciness of the lime, with small limes yielding 1 tablespoon and extra large limes yielding 4 tablespoons.
Factors Affecting Lime Juice Yield
If you want to get the most juice out of your lime, you should roll it firmly on a hard surface before cutting it open! This is because rolling the lime helps to break down the cell walls inside the fruit, making it easier to extract the juice.
In addition to rolling, there are a few other factors that can affect the amount of juice you can get from a lime. The first is the acidity level of the fruit. Limes with higher acidity levels tend to yield more juice than those with lower acidity levels. This is because the acid helps to break down the cell walls and release the juice.
Another factor that can affect lime juice yield is the ripeness of the fruit. Limes that are fully ripe tend to be softer and juicier than those that are not yet ripe. This is because the cell walls in a ripe lime are more developed and easier to break down. However, there is a trade-off here, as fully ripe limes tend to be sweeter and less acidic than less ripe limes.
With these factors in mind, it’s important to choose your limes carefully if you’re looking for the most juice. Now, let’s move on to the next section and talk about the average lime juice yield.
The Average Lime Juice Yield
You’ll be pleasantly surprised at how much tangy goodness you can extract from a single lime with a good citrus squeezer. The average lime juice yield ranges from 1 to 2 tablespoons per lime, depending on the juicing technique used.
Hand-squeezing is the most common method, but it may not yield as much juice as using a citrus squeezer or reamer. Moreover, microwaving the fruit for a few seconds or rolling it on a hard surface before juicing can help maximize the yield.
Aside from its delicious taste, lime juice is also known for its health benefits. It’s a good source of vitamin C, which boosts the immune system and promotes healthy skin. Lime juice also has antioxidants that help protect the body from cell damage caused by free radicals.
With all these benefits, it’s no wonder that lime juice is a popular ingredient in many dishes and drinks. But how do you measure the amount of juice you need for a recipe? Let’s find out.
How to Measure Lime Juice
Measuring the tangy goodness of freshly squeezed lime can make or break any dish, so it’s important to know the proper technique. There are many alternative measuring methods for lime juice, but the most accurate way is to use a juicer or reamer.
Here are some tips for measuring lime juice accurately:
- Cut the lime in half and use a citrus juicer or reamer to extract the juice.
- Use a measuring cup or spoon to measure the exact amount of juice required for the recipe.
- Be sure to use fresh limes for the best flavor and highest juice yield.
It’s important to note that bottled lime juice is not a good substitute for fresh lime juice in most recipes. Fresh lime juice has a bright, tangy flavor that can’t be replicated by bottled juice.
For tips on maximizing lime juice yield, try using a technique called ‘rolling’ the lime before cutting it in half. This helps break down the fibers in the lime and makes it easier to juice.
Tips for Maximizing Lime Juice Yield
When I’m juicing limes, I always make sure to roll them on the countertop first. This helps to break down the membranes inside the fruit and maximize the amount of juice I can extract.
Another trick I’ve found helpful is to microwave the lime for a few seconds before juicing it. This softens the fruit and makes it easier to squeeze.
Finally, I always use room temperature limes, as this also makes them easier to juice and ensures I get the most juice possible.
Roll the Lime Before Juicing
Before juicing, it’s a good idea to roll the lime to get the most juice out of it. This is because rolling limes helps to break up the cells within the fruit, making it easier for the juice to be extracted.
In addition, rolling limes also helps to release more of the natural oils within the lime peel, which can add extra flavor to your dishes. When it comes to rolling limes, there are a few different techniques you can use.
One popular method is to place the lime on a hard surface and roll it back and forth using the palm of your hand. Alternatively, you can also give the lime a gentle squeeze before rolling it to help loosen up the juice.
By taking the time to roll your limes before juicing them, you can ensure that you get the most juice and flavor possible from each fruit. Next, I’ll share another tip for maximizing lime juice yield – microwaving the lime.
Microwave the Lime
You wouldn’t think it, but popping a lime in the microwave for a few seconds can actually increase the amount of zesty goodness you get from it. This is because microwaving citrus fruits helps to break down the cell walls and release more juice. It also makes the fruit easier to squeeze, which means you can get more juice out of it with less effort.
Here’s a quick table to show you how long you should microwave your lime for depending on the wattage of your microwave:
Wattage | Time |
---|---|
600 | 10s |
800 | 7s |
1000 | 5s |
1200 | 4s |
The benefits of microwaving citrus don’t stop there. You can also try alternative microwave methods for juicing citrus, such as microwaving the fruit after you’ve cut it in half or microwaving it with a damp paper towel. These methods can help to soften the fruit and make it easier to juice. So next time you’re struggling to get enough juice out of your lime, try microwaving it first and see the difference it makes! Moving on to the next section, it’s important to note that using room temperature limes can also make juicing easier.
Use Room Temperature Limes
To make juicing easier and less of a hassle, try leaving your limes out at room temperature before using them. This simple step can make all the difference when it comes to extracting the most juice possible from your limes.
Not only are room temperature limes easier to juice, but they also yield more juice than those that are cold from the fridge. In addition to making juicing easier, using room temperature limes can also provide added health benefits.
Lime juice is known for its high levels of vitamin C and antioxidants, which can help boost the immune system and protect against chronic diseases. So, the next time you’re making a recipe that calls for lime juice, try leaving your limes out on the counter for a few hours beforehand and enjoy the added benefits of a little extra juice and nutrients.
Moving on to the next topic, have you ever wondered how much lime juice is in one lime?
How Much Lime Juice is in One Lime?
Unfortunately, there is no straightforward answer to how much lime juice is equivalent to one lime, as it depends on the size and juiciness of the lime. However, on average, one lime can yield about 2 tablespoons of juice. This is assuming that the lime is at room temperature and is properly juiced with a citrus press or juicer. To get the best results, it’s always a good idea to roll the lime on the countertop before cutting, as this helps release more juice. The lime juice per lime ratio can also vary depending on the variety of lime, with Persian limes generally providing more juice than Key limes. For recipes, it’s often safe to estimate about 2 tablespoons of lime juice per lime, but adjustments may be needed based on individual preferences.
It is important to note that lime juice and lime extract are not the same and cannot be used interchangeably in recipes. Lime extract is concentrated and has a more intense flavor than lime juice. Additionally, while lime juice can be substituted for lemon juice in recipes, the opposite is not recommended as lemon juice has a stronger and more acidic flavor. With this in mind, it is always best to follow the recipe and use the specified type and amount of citrus juice.
Moving on to the next section, it is helpful to know common lime juice measurements in recipes to ensure the right amount of juice is used.
Common Lime Juice Measurements in Recipes
In my previous subtopic, I discussed how much lime juice is in one lime. Now, let’s talk about common lime juice measurements in recipes.
When it comes to lime juice, the amount needed can vary depending on the recipe. Here are some common measurements you may come across while cooking with lime juice:
- 1 tablespoon of lime juice
- 1-2 tablespoons of lime juice
- 1/4 cup of lime juice
- 1/2 cup of lime juice
If you don’t have lime juice on hand or want to try something different, there are alternatives to lime juice such as lemon juice, grapefruit juice, or even orange juice. Keep in mind that the flavor profile may change slightly, but these alternatives can still add a citrusy kick to your dish.
If you need to measure other citrus juices, keep in mind that 1 lemon typically yields 2-3 tablespoons of juice, while 1 grapefruit yields around 1/2-3/4 cup of juice.
Now that we’ve covered the basics of measuring lime juice and some alternatives, let’s move on to adjusting lime juice measurements to taste.
Adjusting Lime Juice Measurements to Taste
Adjusting the amount of tart citrus flavor in a dish is easily achieved by tweaking the quantity of lime juice used. It’s important to note that lime juice not only adds flavor, but also acidity to a recipe. Too much acidity can overpower other flavors, while too little can result in a flat-tasting dish. Balancing flavors is key to creating a delicious and well-rounded dish.
To adjust the acidity of a dish, start by adding a small amount of lime juice and tasting as you go. If the dish still needs more acidity, add a little more at a time until the desired level is reached. Keep in mind that the amount of lime juice needed can vary depending on the recipe and personal preference. It’s always better to start with less and add more gradually, rather than adding too much at once and ruining the dish.
When it comes to lime juice substitutions, there are a few options to consider. But before we get into that, let’s discuss the importance of using fresh lime juice versus bottled.
Lime Juice Substitutions
When I run out of lime juice, I often wonder what other citrus juices or ingredients I can use as a substitute. Fortunately, there are a few options available. For example, you can use lemon or orange juice as they have similar acidity levels to lime juice. In addition, you can also use vinegar or white wine in recipes that call for lime juice.
Other Citrus Juices
Interestingly, a small lemon can yield nearly the same amount of juice as a lime, making it a suitable substitute in recipes that call for lime juice. Other citrus juices, such as grapefruit, orange, and even tangerine, can also be used in place of lime juice in certain recipes. Each of these citrus fruits has its own unique flavor profile and acidity level, so it’s important to consider which one will work best in a particular dish.
To help you decide which citrus juice to use as a substitute for lime juice, here is a comparison table of the most common citrus fruits and their juice yields:
Citrus Fruit | Juice Yield per Fruit | Acidity Level |
---|---|---|
Lime | 2 tablespoons | High |
Lemon | 2-3 tablespoons | High |
Grapefruit | 1/2 – 2/3 cup | Medium |
Orange | 1/4 – 1/3 cup | Low |
Tangerine | 1/4 – 1/3 cup | Low |
As you can see, lemon juice is a great substitute for lime juice, as it has a similar acidity level and yields nearly the same amount of juice. Grapefruit juice, on the other hand, has a slightly lower acidity level and a larger yield, so it may work well in recipes that call for a sweeter or milder citrus flavor. Orange and tangerine juices have a much lower acidity level and a larger yield, so they are best used in recipes where the citrus flavor is not the main focus.
Moving on to the next section, vinegar is another versatile ingredient that can be used as a substitute for lime juice in certain recipes.
Vinegar
Vinegar can be a versatile alternative to lime juice in certain recipes, adding a tangy and acidic flavor to dishes. Here are some uses of vinegar that you might not have considered before:
- Use balsamic vinegar as a salad dressing or marinade for meats.
- Add a splash of apple cider vinegar to sautéed vegetables or soups for a tangy kick.
- Use red wine vinegar to add depth of flavor to stews or to deglaze a pan.
- White vinegar can be used as a cleaning solution for countertops, floors, and even laundry.
Different types of vinegar can offer different flavors and levels of acidity, so it’s worth experimenting to find the perfect fit for your recipe. Whether you’re looking to add some zing to a salad or a savory dish, vinegar can be a great alternative to lime juice.
Speaking of alternatives, let’s talk about white wine…
White Wine
White wine can be a flavorful substitute for lime juice in certain recipes, offering a different level of acidity and adding complexity to dishes.
When it comes to white wine pairing, it’s important to choose one that complements the flavors of the dish. For example, a dry white wine like Sauvignon Blanc pairs well with seafood dishes that typically call for lime juice as a flavor enhancer.
Aside from its culinary uses, white wine also has potential health benefits. Moderate consumption of white wine may lower the risk of heart disease and certain types of cancer. However, it’s important to note that excessive alcohol consumption can have negative health effects.
With these considerations in mind, using white wine as a substitute for lime juice can not only offer a delicious twist to recipes, but also provide potential health benefits.
Moving on to recipes featuring lime juice, let’s explore some creative ways to incorporate this versatile ingredient into our cooking.
Recipes Featuring Lime Juice
Lime juice is a versatile ingredient in many recipes, and knowing how much juice is equivalent to one lime can make all the difference in achieving the perfect flavor. As someone who loves to experiment with unique lime-based cocktails and incorporate lime juice into my cooking, I’ve found that the amount of juice can vary depending on the size and juiciness of the lime. To help others achieve the right balance of acidity and tanginess in their dishes, I’ve put together a table that outlines the average amount of juice in one lime and how much juice can be obtained from different sizes of limes.
Lime Size | Amount of Juice |
---|---|
Small | 1 tablespoon |
Medium | 2 tablespoons |
Large | 3 tablespoons |
Extra Large | 4 tablespoons |
Not only is lime juice a flavorful addition to dishes, but it also has numerous health benefits. Lime juice is a great source of vitamin C, which is essential for overall immune system health. Additionally, it contains antioxidants that can help protect the body from damage caused by free radicals. So, not only can lime juice make your recipes taste better, but it can also provide a boost to your health. Incorporating lime juice into your diet is a simple and delicious way to reap these benefits.
Frequently Asked Questions
Can I use bottled lime juice instead of fresh lime juice in recipes?
I always prefer using fresh lime juice in recipes as it has a brighter and more complex flavor profile. However, if using bottled lime juice, make sure to store it in the fridge for optimal freshness.
Is there a difference in lime juice yield between different types of limes?
Different types of limes can vary in their juice yield, but all limes have similar lime juice acidity and flavor profile. It’s important to consider the ripeness and size of the lime when determining how much juice to use in a recipe.
How long can I store freshly squeezed lime juice in the fridge?
When it comes to storing freshly squeezed lime juice, shelf life is key. To preserve its flavor and quality, I recommend using airtight containers and refrigerating it for up to a week. By doing so, you can keep your juice fresh and ready to use whenever you need it.
Can I freeze lime juice for later use?
Yes, lime juice can be frozen for later use. Freezing benefits include extended shelf life, up to 6 months. However, it may affect the taste and texture. It’s best to store in an airtight container and label with the date.
How do I know if a lime is ripe enough to yield a good amount of juice?
When selecting ripe limes for juice extraction, look for fruits with a vibrant green color and a slight give when gently squeezed. It’s like picking the perfect apple from the orchard – a satisfying feeling knowing it will yield a sweet reward.
Conclusion
So there you have it, folks. The answer to the age-old question of how much lime juice is equivalent to one lime is not a straightforward one. It all depends on the size and juiciness of the lime, as well as the method used to extract the juice.
However, on average, one lime yields around 1-2 tablespoons of juice. To make sure you get the most juice out of your limes, try rolling them on a hard surface before cutting, microwaving them for a few seconds, or even using a citrus juicer. And don’t forget to taste as you go and adjust the lime juice measurements to your liking.
In the end, whether you’re making a refreshing summer drink or adding a zesty kick to your favorite dish, knowing how much lime juice to use is key. So go ahead and experiment, have fun, and ask yourself: can you ever have too much lime juice?
Susannah expertise lies in researching and compiling evidence-based content on juicing, nutrition, and overall health. She is committed to ensuring that The Juicery World offers accurate, up-to-date, and trustworthy information to empower readers to take control of their health. Susannah’s goal is to inspire individuals to embrace juicing as a way to nourish their bodies and live their best lives.
Juice Tips and Tricks
How Good Is Orange Juice After The Expiration Date
As a person who prioritizes my health, I always make sure to check the expiration dates on the food and beverages I consume, such as orange juice. Despite my diligence, there have been times when I discovered expired orange juice in my fridge, leading me to question its safety.
This led me to do some research on the topic and gain a better understanding of how good orange juice is after the expiration date. In this article, I will delve into the science behind expiration dates and the shelf life of orange juice.
I will also discuss the signs of spoilage, factors that affect the shelf life of orange juice, and proper storage techniques. Additionally, I will address the risks of consuming expired orange juice and when it is best to throw it out.
Furthermore, I will provide some creative ways to use expired orange juice and answer some frequently asked questions about orange juice. So, let’s get started and learn more about how good orange juice is after the expiration date.
Key Takeaways
- Orange juice has a shelf life of 5-7 days in the fridge when sealed, up to 2 weeks when unopened, and 8-12 months when frozen.
- Proper storage techniques, such as storing in a glass bottle or plastic jug, refrigerating between 33-40°F, and avoiding exposure to light, can extend orange juice shelf life.
- Consuming expired orange juice can lead to food poisoning, exposure to harmful bacteria, compromise to immune system, dehydration, and hospitalization.
- Orange juice can be used creatively even after the expiration date, such as in marinades, salad dressings, and baking, but if it has an off smell or taste, it should be disposed of.
Understanding Expiration Dates
You might think that expiration dates are just a suggestion, but they actually play a critical role in determining the safety of a product. When it comes to orange juice, there are two types of expiration dates to be aware of: the sell-by date and the use-by date.
The sell-by date is the date by which the store should sell the product, while the use-by date is the date by which the product should be consumed or thrown away. To read an expiration date, look for the phrase sell by or use by followed by a date.
The sell-by date indicates the last day the product should be sold in stores, while the use-by date indicates the last day the product is at peak freshness and quality. It’s important to note that these dates are only valid if the product has been stored properly before and after purchase.
Understanding expiration dates can help ensure that you consume products that are safe and of good quality. Now, let’s talk about the shelf life of orange juice and how it can be affected by expiration dates.
Shelf Life of Orange Juice
As you take a sip of the citrus elixir, you notice that its vitality has faded, leaving behind a stale and lifeless essence. Orange juice is a refreshing drink that is packed with nutritional value and offers a unique flavor profile. However, its shelf life is limited, and as time passes by, the quality of the juice deteriorates.
To understand the shelf life of orange juice, it is essential to consider several factors, such as the storage temperature, packaging, and processing methods. Typically, orange juice can last between 5-7 days in the refrigerator when stored in a sealed container. However, if left unopened in the fridge, it can last up to two weeks. The table below outlines the shelf life of orange juice under different storage conditions.
Storage Temperature | Shelf Life |
---|---|
Room Temperature | Less than 12 hours |
Refrigerated (Sealed) | 5-7 Days |
Refrigerated (Unopened) | Up to 2 weeks |
Frozen | 8-12 Months |
Understanding the shelf life of orange juice is essential to maintain its nutritional value and flavor profile. However, as time passes by, the juice may start to show signs of spoilage. In the next section, we will explore the signs of spoilage and how to identify them.
Signs of Spoilage
When orange juice goes bad, it’s important to know the signs of spoilage so you can avoid drinking it and potentially getting sick. Here are some telltale signs that your orange juice has gone bad:
-
Off flavors – If your orange juice tastes sour, bitter, or metallic, it’s likely gone bad and should be disposed of.
-
Discoloration – If your orange juice has turned a dark brown or black color, it’s a sign that it’s spoiled and should not be consumed.
-
Mold growth, changes in texture – If you see mold growth on the surface of your orange juice or notice changes in its texture, such as it becoming thicker or slimy, it’s time to throw it away.
It’s important to note that consuming spoiled orange juice can lead to food poisoning, so it’s always better to err on the side of caution and throw it away if you suspect it’s gone bad. To help prevent this, it’s essential to be aware of how long orange juice lasts. Unopened, commercially bottled or canned orange juice can last for several months if refrigerated, while freshly squeezed juice may only last a few days. Always check for signs of spoilage, such as an off smell, change in color, or bulging containers, before drinking.
Factors that affect orange juice shelf life include storage temperature, exposure to light and air, and the presence of preservatives.
Factors That Affect Orange Juice Shelf Life
If you don’t store your orange juice properly, it’ll turn into a disgusting, moldy mess in no time. The shelf life of orange juice can be influenced by various factors, including the juice’s acidity level and the use of preservatives.
Orange juice is naturally acidic, and this acidity helps to preserve the juice. However, the acidity level of orange juice can decrease over time, which can make it more susceptible to spoilage. Preservatives, such as citric acid and ascorbic acid, can help to extend the shelf life of orange juice.
These preservatives work by lowering the pH of the juice, making it more acidic and less hospitable to bacteria and mold. Additionally, some orange juice manufacturers use pasteurization to remove any harmful bacteria from the juice. Proper storage techniques can also help to extend the shelf life of orange juice.
Proper Storage Techniques
To ensure your orange juice remains fresh for as long as possible, you should store it in a cool, dark place away from direct sunlight. The temperature of the storage place should be between 33-40°F. If you store your juice in the refrigerator, make sure to place it in the back of the fridge, where the temperature is the most stable.
Additionally, once you open the container, make sure to seal it tightly after each use to prevent air from entering and causing the juice to go bad quickly. The type of container you use to store your orange juice can also affect its shelf life. The best container for orange juice is a glass bottle, followed by a plastic jug. Avoid using aluminum cans or paper cartons, as they can easily transfer flavors and odors to the juice.
By storing your orange juice properly, you can extend its shelf life and enjoy fresh squeezed orange juice for up to seven days. However, consuming expired orange juice can pose health risks, which we’ll discuss in the next section.
Risks of Consuming Expired Orange Juice
As someone who’s passionate about food safety, I feel compelled to caution against the risks of consuming expired orange juice.
The reality is that expired orange juice can potentially cause food poisoning, which can lead to symptoms such as vomiting, diarrhea, and even hospitalization.
Moreover, consuming expired orange juice can pose health risks such as exposure to harmful bacteria and a potential compromise to one’s immune system.
Food Poisoning
You may be at risk of food poisoning if you consume expired orange juice. According to the Centers for Disease Control and Prevention, there are an estimated 48 million cases of foodborne illness in the United States each year. Expired orange juice can contain harmful bacteria such as E. coli, salmonella, and listeria, which can cause food poisoning.
When orange juice passes its expiration date, it becomes a breeding ground for bacterial growth, which can lead to serious health consequences. Food poisoning can cause symptoms such as vomiting, diarrhea, abdominal pain, and fever. These symptoms can be mild or severe, depending on the type of bacteria present in the expired orange juice.
It is important to note that even if the orange juice looks, smells, and tastes fine, it can still harbor harmful bacteria that can cause food poisoning. Therefore, it’s crucial to dispose of expired orange juice and not consume it.
In the next section, we will discuss the potential health risks of consuming expired orange juice in more detail.
Health Risks
If you consume expired orange juice, your health could be seriously compromised due to the health concerns that arise from bacterial growth.
When orange juice is past its expiration date, it becomes a breeding ground for bacteria, which can multiply rapidly and lead to a host of health problems.
The most common bacteria found in expired orange juice is E.coli, which can cause symptoms such as diarrhea, vomiting, and abdominal pain.
Other harmful bacteria that can grow in expired orange juice include Salmonella and Listeria, which can cause serious illness and even death.
Consuming expired orange juice can lead to a variety of health risks, including food poisoning, dehydration, and even hospitalization.
It’s important to always check the expiration date on your orange juice before consuming it, and to throw it out immediately if it has passed that date.
By doing so, you can avoid the harmful effects of bacterial growth and ensure that you stay healthy and safe.
Knowing when to throw out orange juice is a crucial step in maintaining good health and avoiding the risks associated with consuming expired products.
When to Throw Out Orange Juice
When the expiration date on orange juice has passed, it’s time to toss it out to avoid any potential health risks. Consuming expired orange juice may lead to food poisoning or other illnesses, especially if it has been sitting in the fridge for a prolonged period of time. It’s important to pay attention to the expiration date and to store orange juice properly to ensure that it remains safe to drink.
To gain a better understanding of when to throw out orange juice, it’s helpful to refer to the table below. This table outlines the recommended shelf life of orange juice based on different storage methods and expiration dates. It’s worth noting that taste changes may occur before the expiration date, but this doesn’t necessarily mean the juice is unsafe to drink. However, if the juice has an off smell or taste, it’s best to err on the side of caution and dispose of it.
Storage Method | Expiration Date | Recommended Shelf Life |
---|---|---|
Unopened | Printed on carton | 7-10 days after opening |
Opened | Printed on carton | 7-10 days |
Refrigerated | Printed on carton | 7-10 days |
Freezer | Printed on carton | 6-8 months |
Room Temperature | Printed on carton | Do not store |
While it’s important to dispose of expired orange juice to avoid health risks, there are ways to use it up before it goes bad. In the next section, I will discuss some creative ways to incorporate expired orange juice into your cooking and baking.
Ways to Use Expired Orange Juice
Got some expired OJ sitting in the back of your fridge? No worries, there are plenty of fun and tasty ways to give it a second life in your cooking and baking! While it may not be ideal to drink expired orange juice due to the potential for bacteria growth, it can still be used in many DIY recipes and creative ways.
One popular use for expired orange juice is in marinades for meat or vegetables. The acidic nature of the juice can help tenderize the meat while also providing a unique citrus flavor. It can also be used in salad dressings, adding a tangy kick to your greens.
Additionally, expired orange juice can be used in baking, such as in recipes for cakes or breads that call for citrus flavors. However, it’s important to note that these uses are only recommended if the orange juice is only slightly expired, meaning it’s only a few days past the expiration date. If the juice has a foul odor or taste, it’s best to dispose of it.
So, next time you find yourself with expired orange juice, don’t throw it out just yet. Get creative with your cooking and baking! Now, let’s move on to some other FAQs about orange juice.
Other FAQs About Orange Juice
As a virtual assistant, I’ve received a lot of queries about orange juice. One question that often comes up is whether or not you can freeze orange juice. The answer is yes, you can freeze orange juice, but it may impact the taste and quality of the juice.
Another frequently asked question is how to tell if orange juice is fresh. The best way to determine the freshness of orange juice is by checking the expiration date or looking for signs of spoilage, such as a sour smell or a change in color.
Can You Freeze Orange Juice?
Freezing orange juice is a viable option for you to extend its shelf life and preserve its taste. By freezing orange juice, you can keep it fresh for up to six months. The process is quite simple. All you need to do is transfer the orange juice into a freezer-safe container, making sure to leave some room for expansion. Then, seal the container tightly and store it in the freezer.
One of the benefits of freezing orange juice is that it doesn’t affect the taste or quality of the juice. However, it’s important to note that the consistency of the juice may change slightly once it’s thawed. To ensure that your frozen orange juice remains fresh and safe to consume, it’s best to label the container with the date it was frozen and to use it within the recommended time frame.
Now that you know how to freeze orange juice, let’s move on to the next section and learn how to tell if orange juice is fresh.
How to Tell if Orange Juice is Fresh
If you don’t want to risk sour flavors and a curdled texture, it’s crucial to check for telltale signs of spoilage before taking a sip of your favorite morning beverage. Here are some juice freshness tips that can help you determine if your orange juice is still fresh:
-
Check the expiration date: Although this may seem obvious, it’s important to always check the expiration date before consuming any food or beverage. If the date has passed, it’s best to discard the juice.
-
Look for changes in color and consistency: If the juice has turned a darker shade of orange or has become thicker, it’s likely that it has spoiled.
-
Smell the juice: If the juice has a sour or off odor, it’s best to avoid drinking it.
-
Taste a small amount: If the juice tastes sour or off, it’s best to discard it.
To keep your orange juice fresh for longer, it’s important to store it properly. Here are some storage tips to keep in mind:
-
Store in the refrigerator: Orange juice should always be stored in the refrigerator to slow down the growth of bacteria and maintain freshness.
-
Keep the container sealed: Once you open the container, make sure to seal it tightly to prevent air and bacteria from entering.
-
Avoid exposure to light: Light can cause the breakdown of vitamins and other nutrients in the juice, so it’s best to store it in a dark place.
-
Use within 7-10 days: Even if the juice hasn’t reached its expiration date, it’s best to consume it within 7-10 days of opening for optimal freshness.
Frequently Asked Questions
Can drinking expired orange juice cause food poisoning?
Expired orange juice can cause food poisoning due to the growth of harmful bacteria. It is not safe to consume past the expiration date. Risks can be minimized by properly storing and checking expiration dates before consumption.
What is the best way to dispose of expired orange juice?
To recycle expired orange juice, pour it into a compost bin or use it as a natural cleaner. To prevent quick expiration, keep it refrigerated and consume it within a few days of opening. Anachronism: "Don’t let expired juice turn into a science experiment in your fridge."
Does freezing extend the shelf life of orange juice?
Freezing benefits the shelf life of orange juice by slowing down the growth of microorganisms that cause spoilage. Nutrient retention is also maintained by freezing. However, it is recommended to consume within 6 months of freezing.
Can you use expired orange juice for cooking and baking?
As a baker and mixologist, I’ve learned that expired orange juice can still be used in creative ways. It adds depth to cocktails and can be used in baking recipes that call for acidic ingredients. Just be sure to check for any signs of spoilage first.
What is the difference between pasteurized and unpasteurized orange juice in terms of shelf life?
Pasteurized orange juice has a longer shelf stability than unpasteurized due to the heat treatment that kills bacteria. However, pasteurization may also affect some of the nutritional value of the juice.
Conclusion
In conclusion, it’s important to understand the shelf life of orange juice and how to properly store it to ensure its freshness and safety. While orange juice can be consumed after its expiration date, there are risks associated with doing so. Signs of spoilage, such as a sour smell or taste, should be taken seriously and the juice should be discarded.
It’s also important to note that there are ways to use expired orange juice, such as in recipes or as a cleaning agent. However, caution should be exercised when using expired juice for anything other than consumption. As the saying goes, ‘when in doubt, throw it out.’
By following proper storage techniques and understanding the signs of spoilage, we can enjoy the benefits of fresh orange juice while minimizing the risks associated with consuming expired juice.
Cindy thoroughly researches juicing trends, techniques, and recipes to provide readers with practical advice and inspiration. Her writing style is accessible, engaging, and designed to make complex concepts easy to understand. Cindy’s dedication to promoting the advantages of juicing shines through her work, empowering readers to make positive changes in their lives through the simple act of juicing.
Juice Tips and Tricks
How To Cut A Juice Groove In A Cutting Board
As a cook who enjoys preparing meals at home, I understand the value of having a dependable cutting board in the kitchen. Despite having a top-quality cutting board, there can still be instances where it may be difficult to prevent juices from fruits, veggies, or meats from spilling. This is where a juice groove can be incredibly useful.
A juice groove is a channel cut into the cutting board’s surface that catches the juices, preventing them from spilling onto your countertop. In this article, I will guide you through the process of cutting a juice groove in a cutting board.
To do this, we will need a few tools and materials, including a router, a straight bit, sandpaper, and finish. We will also need a cutting board made of hardwood, such as maple or cherry.
With these items in hand, we can create a functional and aesthetically pleasing juice groove that will make our cooking experience much more enjoyable and hygienic. So let’s get started!
Key Takeaways
- A juice groove is a channel or indentation that catches spills and prevents liquids from flowing off the cutting board, improving hygiene in the kitchen.
- To cut a juice groove in a cutting board, you will need a hardwood cutting board, a router, a straight bit, sandpaper, and finish, as well as essential tools like a plunge router base, clamps, and safety gear.
- Choosing the right router bit is crucial for precise and clean cuts, and common types include straight, core box, and V-groove bits.
- Proper maintenance and care, such as regular oiling and avoiding abrasive cleaners, can help ensure that your cutting board stays in great condition for years to come.
Gather the Necessary Tools and Materials
To cut a juice groove in a cutting board, I need to gather the necessary tools and materials.
First, I need to select the right cutting board that’s thick enough to accommodate the groove.
Next, I need to choose the right router bit that’s designed for cutting grooves in wood.
Lastly, I need other essential tools, such as clamps, safety goggles, and a router guide to ensure accuracy and safety during the cutting process.
Selecting the Right Cutting Board
You’ll want to make sure that the cutting board you choose is not only durable, but also large enough to accommodate the juice groove you’ll be cutting. There are many different types of cutting board materials available, each with their own unique benefits and drawbacks. Some popular options include wood, bamboo, plastic, and composite materials.
When selecting a cutting board, consider the maintenance required to keep it in good condition. Wood and bamboo boards require regular oiling to prevent cracks and warping. Plastic boards are typically dishwasher safe, but can become scratched over time. Composite materials are often the easiest to maintain, as they are durable and dishwasher safe. To help you choose the right cutting board for your needs, refer to the table below for a comparison of popular materials.
Cutting Board Material | Benefits | Drawbacks |
---|---|---|
Wood | Durable, natural appearance, gentle on knives | Requires regular oiling, can warp or crack |
Bamboo | Sustainable, lightweight, resists bacteria | Requires regular oiling, can become brittle |
Plastic | Dishwasher safe, affordable, resists stains | Can become scratched or damaged |
Composite | Durable, dishwasher safe, resists bacteria | Limited appearance options |
Choosing the right cutting board is just the first step in cutting a juice groove. Next, you’ll need to select the right router bit to get the job done.
Choosing the Right Router Bit
Picking the perfect router bit is like selecting the perfect paintbrush for a masterpiece; it’s essential to achieve the desired outcome.
When it comes to cutting a juice groove in a cutting board, choosing the right router bit is crucial. There are different router bit types and sizes to choose from, and the right one will depend on the size and depth of the groove you want to create.
For instance, a straight bit is perfect for creating a shallow groove, while a core box bit will create a more rounded groove. You could also use a V-groove bit to create a decorative groove.
It’s essential to choose a bit that is at least as wide as the groove you want to create, and to adjust the depth of the bit accordingly. With the right router bit, you’ll be able to create a precise and clean juice groove that will make your cutting board both functional and beautiful.
Now, moving on to the next step, which is gathering other essential tools for the project.
Other Essential Tools
Now let’s get your workshop ready with the must-have tools for this project. To cut a juice groove in a cutting board, you’ll need a few essential tools.
These include a router, a router bit with a bearing guide, a plunge router base, clamps, and safety gear such as eye protection and earplugs. Must-have accessories for this project include a router bit with a bearing guide to help ensure that the groove is cut consistently and accurately.
A plunge router base will allow you to make precise cuts at varying depths, while clamps will help keep the cutting board securely in place during the process. Common mistakes when cutting a juice groove include not using enough clamps, not wearing safety gear, and not making the groove deep enough.
With the right tools and attention to detail, you can avoid these mistakes and create a beautiful and functional juice groove in your cutting board. Now that you have the necessary tools, let’s move on to preparing the cutting board for the groove.
Preparing the Cutting Board
Before I can start cutting a juice groove in my cutting board, I need to prepare the board first. This involves cleaning and sanding the board to ensure it’s smooth and free from any debris or rough edges.
Then, I need to mark the location of the juice groove on the board to ensure that it’s in the right spot and evenly spaced.
Cleaning and Sanding the Board
You’ll definitely want to give that board a good scrubbing and sanding to make sure it’s as smooth as a baby’s bottom before moving on to the next step. Proper maintenance is key to ensuring your cutting board lasts for years to come.
Avoiding common mistakes like using abrasive cleaners or neglecting to oil the board regularly can lead to cracking and warping over time.
Start by washing the board with hot, soapy water and a scrub brush. Rinse thoroughly and allow to dry completely.
Next, use a fine-grit sandpaper to sand the entire surface of the board, being sure to remove any rough spots or splinters.
Once the board is smooth to the touch, wipe it down with a damp cloth and allow it to dry completely before moving on to the next step – marking the location of the juice groove.
Marking the Location of the Juice Groove
To mark where the channel for collecting excess liquids will go, simply trace the outline of a small cup or bowl onto the surface of your newly cleaned and sanded wooden work surface. This will be your guide for cutting the juice groove.
Make sure to use measuring tools to ensure that the groove is consistent in width and depth. When cutting the groove, there are several cutting techniques you can use depending on the tools you have available.
A router is the most common tool used for cutting a juice groove, but a circular saw or jigsaw can also be used. It’s important to be precise with your cuts and follow the outline you traced earlier.
Once you’ve finished cutting the groove, move on to the next step of setting up the router.
Setting Up the Router
First, I need to install the router bit into the collet of the router. I’ll make sure it’s tightened securely using the wrench provided.
Then, I’ll adjust the depth of the cut based on the size of the groove I want to create. This is done by adjusting the router’s base plate up or down using the adjustment knob.
Installing the Router Bit
Once you’ve got the router bit installed, you’ll feel confident and ready to tackle the next step in creating your perfect cutting board. Before you do, take a moment to review some basic router maintenance.
Keeping your router in good condition will ensure that it works smoothly and efficiently, without causing any issues during use. Regularly clean the router bit and ensure that it’s properly tightened before use. If you’re experiencing any issues with your router, such as overheating or difficulty cutting, troubleshoot the issue before continuing with your project.
Now that your router is properly set up and maintained, it’s time to adjust the depth of the cut. This is an important step that will determine the width and depth of the juice groove.
By adjusting the depth of the cut, you can ensure that the groove is deep enough to catch any juices or liquids that may spill from your cutting board. To adjust the depth of the cut, simply adjust the height of the router bit until it reaches the desired depth.
With the depth set, you’ll be ready to start cutting your juice groove.
Adjusting the Depth of the Cut
Now that the router bit’s installed, it’s time to adjust the depth of the cut. This is crucial to ensure a precise and accurate juice groove. Before starting, I always make sure to wear eye and ear protection. Safety should always come first when working with power tools.
To adjust the depth of the cut, I first turn on the router and set it to a low speed. I then slowly lower the bit until it reaches the desired depth, making sure to do so in small increments. It’s important not to rush this process, as going too deep can ruin the entire board.
Once the depth is set, I turn off the router and double-check that everything is secure before moving on to the next step.
With the depth adjusted, it’s time to move on to cutting the juice groove.
Cutting the Juice Groove
To cut the juice groove in your cutting board, you’ll need to start by making sure you’re using the right router bit. A bit with a bearing guide is ideal, as it’ll ensure that your cuts are even and straight. Once you have the right bit, it’s important to use techniques that’ll result in a clean cut.
This means taking your time and making sure that the router is set at the correct depth. You may need to make multiple passes to achieve the desired depth, but it’s important not to rush the process. When cutting the juice groove, it’s also important to pay attention to the spacing between your cuts.
Ideally, the groove should be about 1/4 inch wide and 3/8 inch deep. To achieve this, you’ll need to make several passes with the router, moving the bit slightly closer to the board each time. Once you’ve completed the cutting process, it’s time to move on to sanding and finishing your cutting board to ensure that it’s ready for use.
Sanding and Finishing
Get the sandpaper and start smoothing out the surface of your newly routed channels, paying special attention to any rough spots or sharp edges that could cause splinters. When sanding your cutting board, use a sandpaper with a grit of 220 or higher to avoid leaving deep scratches on the surface. You can use a sanding block to ensure that you sand evenly across the cutting board.
Start sanding by moving the sandpaper in the direction of the wood grain. Don’t apply too much pressure as this can damage the surface of the cutting board. After sanding, wipe the surface of the cutting board with a clean cloth to remove any sawdust.
Applying a finish is also important to protect the cutting board from moisture and stains. You can use mineral oil, beeswax, or a combination of both to finish your cutting board.
To transition into the subsequent section about cleaning and maintaining your cutting board, it’s important to note that sanding and finishing your cutting board is not the final step in its care. Regular cleaning and maintenance are also necessary to keep your cutting board in top condition.
Cleaning and Maintaining Your Cutting Board
Keeping your cutting board in great condition requires regular cleaning and maintenance, so you can enjoy using it for years to come. One of the first things to consider is the type of material your cutting board is made of. Different materials have different benefits and drawbacks. For example, wooden cutting boards are more aesthetically pleasing and easier on knives, but require regular oiling to prevent warping and cracking. On the other hand, plastic cutting boards are easier to clean and sanitize, but can dull knives more quickly.
To properly maintain your cutting board, it is important to oil it regularly. This prevents the board from drying out, which can lead to cracks and warping. The type of oil you use is also important. Mineral oil is a common and inexpensive option, but some people prefer to use food-grade oils such as coconut oil or beeswax for a more natural option. To oil your board, simply apply a generous amount of oil to the surface and rub it in with a clean cloth. Let it sit for a few hours or overnight before wiping off any excess oil. By regularly oiling your cutting board and choosing the right material for your needs, you can ensure that it stays in top condition for years to come.
When it comes to other tips and tricks for cutting board maintenance, there are a few things to keep in mind. For example, avoid soaking your cutting board in water for extended periods of time, as this can lead to warping and cracking. Additionally, it’s a good idea to have multiple cutting boards on hand to prevent cross-contamination between different types of foods. By following these simple guidelines, you can ensure that your cutting board stays in great condition and performs well for all your cooking needs.
Other Tips and Tricks
As you prepare your meals, don’t forget to take extra steps to ensure your food stays safe and healthy to eat.
In addition to cleaning and maintaining your cutting board, you can also add a juice groove to prevent any liquids from spilling onto your countertops. Creating a juice groove is a simple process that can be done with a router or a table saw. However, if you don’t have access to these tools, you can also create a groove by using a chisel or a hand saw.
If you want to get creative with your cutting board, there are many alternative materials you can use. Bamboo, for example, is a sustainable and eco-friendly option that is also durable and easy to maintain.
Another option is using a combination of wood and resin to create a unique and colorful design. Whatever material you choose, make sure to pick one that is sturdy and non-toxic to ensure the safety of your food.
With these tips and tricks, you can make sure your cutting board not only serves its purpose but also adds a touch of style to your kitchen.
Frequently Asked Questions
Can a juice groove be added to an existing cutting board?
Yes, a juice groove can be added to an existing cutting board. Tools needed include a router, a straight bit, and a template. Step by step process involves securing the template, routing out the groove, and sanding the edges.
What is the purpose of a juice groove in a cutting board?
A cutting board with a juice groove prevents liquids from spilling over the edge and onto the countertop. It also helps to keep the work surface clean and free from bacteria. Cleaning and maintaining the groove is easy with regular washing and oiling.
How deep should a juice groove be?
When it comes to cutting board maintenance, ensuring the depth of the juice groove is correct is crucial. Choosing the right router bit is key to achieving the desired depth, typically around 1/4 inch for optimal functionality.
Can a hand saw be used instead of a router to cut a juice groove?
Using a hand saw to cut a juice groove in a cutting board is possible, but may not be as precise as using a router. Pros include affordability and portability, but cons include difficulty achieving a clean, straight cut.
Are there any safety precautions that should be taken when using a router to cut a juice groove?
When using a router, proper gear is essential for router safety. Eye protection, ear protection, and a dust mask should always be worn. Keep hands away from the bit and ensure the router is secure before use.
Conclusion
Well folks, that’s how you cut a juice groove in a cutting board! It may seem daunting at first, but with the right tools and techniques, it can be done with ease. Make sure to take your time and measure everything carefully to ensure a clean and even groove. Whether you’re a beginner or an experienced woodworker, practice makes perfect, just like learning how to draw Juice WRLD or any other artist. With patience and attention to detail, you’ll have the perfect cutting board in no time!
Remember to take your time when setting up the router and cutting the groove, as precision is key in achieving a clean and functional result. As the saying goes, "measure twice, cut once,"so don’t rush through any steps and double-check your measurements before making any cuts.
Once you’ve finished, don’t forget to sand and apply a finish to ensure the longevity of your cutting board. With proper care and maintenance, your newly grooved cutting board will be a valuable tool in your kitchen for years to come.
Happy cutting!
Cindy thoroughly researches juicing trends, techniques, and recipes to provide readers with practical advice and inspiration. Her writing style is accessible, engaging, and designed to make complex concepts easy to understand. Cindy’s dedication to promoting the advantages of juicing shines through her work, empowering readers to make positive changes in their lives through the simple act of juicing.
Juice Tips and Tricks
How Good Is Orange Juice After Opening
Were you aware that half of Americans consume orange juice at least once a week? Given its tasty flavor and the numerous health advantages it offers, it’s not surprising that a large number of individuals opt for orange juice as their preferred beverage. However, once you uncork a bottle of orange juice, how long before it becomes unfit for consumption?
In this article, I will delve into the shelf life of orange juice, its nutritional value, and how to tell if it has gone bad. I will also provide safety considerations, tips for extending its shelf life, different types of orange juice, and how to store it safely. Finally, I will answer the burning question: how long does orange juice last after opening, and what are the best ways to use up any leftover juice?
So, let’s get started.
Key Takeaways
- Freshly squeezed orange juice has a shorter shelf life than pasteurized orange juice.
- Proper refrigeration and handling can extend the shelf life of orange juice.
- Expired orange juice can be used in various recipes, but it’s crucial to be aware of potential safety hazards.
- Orange juice is high in sugar and calories, so moderation is key to reaping its health benefits.
The Shelf Life of Orange Juice
So, you’ve just opened a carton of orange juice and you’re wondering how long it will last. Well, the shelf life of orange juice can vary depending on factors such as storage temperature and the type of packaging used.
To preserve freshness, it’s recommended to refrigerate orange juice at a temperature between 32-40°F. If kept at room temperature, the juice will only last for a few hours before it begins to spoil.
The type of packaging used also plays a role in the shelf life of orange juice. For example, juice stored in a tetra pack carton can last up to a year if unopened, while juice in a clear plastic bottle will only last a few days after opening. In addition, exposure to light and air can also affect the quality of the juice.
Therefore, it’s best to consume orange juice within a few days after opening to ensure maximum freshness and nutritional value. Speaking of nutritional value…
The Nutritional Value of Orange Juice
The nutritional benefits of a freshly squeezed glass of citrus fruit nectar can be maintained for a considerable amount of time. Orange juice is a great source of vitamin C, which is essential for the immune system. It also contains folate, potassium, and thiamine. These nutrients are important for overall health, and they can be found in other juice alternatives, but not at the same level as orange juice.
Orange juice benefits include reducing inflammation, improving heart health, and lowering the risk of kidney stones. However, it’s important to note that orange juice is high in sugar and calories, so it should be consumed in moderation.
Overall, if you’re looking for a healthy beverage option, orange juice is a great choice.
In the next section, we’ll discuss how to tell if orange juice has gone bad.
How to Tell if Orange Juice has Gone Bad
To figure out if your orange juice has gone bad, you should take a sniff. If the juice smells sour or off, it may have gone bad. Another way to check is by looking at the color and texture. If the juice appears darker or thicker than usual, it may have started to spoil. It’s important to note that fresh orange juice typically has a shelf life of 5-7 days once opened, so it’s best to consume it within that timeframe. Additionally, give the juice a small taste. If it tastes fermented or unusually tangy, it’s likely no longer safe to drink. Learning *how to tell if juice spoiled* can help prevent foodborne illness, so when in doubt, it’s better to err on the side of caution and discard any questionable juice.
But what if you’ve missed the window and your orange juice has expired? Don’t worry, there are still ways to use it up. Expired orange juice can actually be used in a variety of recipes, such as marinades, salad dressings, and baked goods. Additionally, adding orange juice to your diet can provide numerous health benefits, including boosting your immune system and aiding in digestion. So the next time you have some expired orange juice, don’t throw it away – get creative and add it to your favorite recipes for a delicious and nutritious twist.
When it comes to expired orange juice, it’s important to keep safety considerations in mind. While it may still be usable in recipes, consuming expired juice can pose health risks, especially for those with weakened immune systems. It’s always best to err on the side of caution and discard any juice that appears to have gone bad.
Safety Considerations
When dealing with expired orange juice, it’s crucial to keep in mind the potential safety hazards that can arise. Possible contaminants such as bacteria, mold, and yeast can grow in the juice when it’s left unrefrigerated for too long or exposed to air. These contaminants can cause illnesses such as food poisoning or stomach infections.
It’s important to check the expiration date on the orange juice and properly handle it to avoid any potential safety risks. Proper handling includes refrigerating the orange juice immediately after opening it and consuming it within 7-10 days. It’s also important to avoid touching the spout of the container with your mouth or any other object that may be contaminated. If the juice has an unusual odor, appearance, or taste, it’s best to dispose of it immediately.
By following these safety measures, you can ensure that your orange juice is safe to drink and prevent any potential illnesses. Moving on to the next section, here are some tips for extending the shelf life of orange juice.
Tips for Extending the Shelf Life of Orange Juice
When it comes to extending the shelf life of orange juice, there are a few tips that I always keep in mind.
First and foremost, refrigeration is key. Keeping orange juice at a consistent temperature of 40°F or below can help prevent the growth of harmful bacteria.
Freezing is also an option, but it’s important to note that the texture and flavor may be affected.
Lastly, using preservatives can help to maintain the quality of the juice for a longer period of time. However, it’s important to use them in moderation and follow all instructions carefully.
Refrigeration
If you don’t refrigerate your orange juice after opening, it will only last for about 1-2 days before going bad. This is because orange juice is a perishable product that is prone to spoilage due to the presence of microorganisms.
When you leave orange juice at room temperature, these microorganisms can multiply rapidly, causing the juice to spoil even faster. Alternative storage methods, such as keeping the juice in a thermos or airtight container, can help preserve its freshness for a short period of time. However, these methods are not as effective as refrigeration and can lead to flavor changes.
It’s important to note that even if you refrigerate your orange juice after opening, it still has a limited shelf life of 5-7 days.
Transitioning to the subsequent section about freezing, it’s worth noting that freezing is a great way to extend the shelf life of orange juice. By freezing the juice, you can actually preserve its nutritional value and flavor for up to 8 months. However, there are some important considerations to keep in mind when freezing orange juice, which we’ll discuss in the next section.
Freezing
Previously, we discussed the importance of refrigerating orange juice after opening to maintain its freshness and quality. However, another option for preserving orange juice is freezing it. Freezing orange juice can extend its lifespan for up to six months, giving you more time to enjoy this delicious and nutritious beverage.
When freezing orange juice, it’s important to transfer it into a freezer-safe container that is airtight. This will prevent any freezer burn or contamination from other foods in the freezer. Once frozen, orange juice can be thawed in the refrigerator or at room temperature. It’s important to note that after thawing, the texture and taste of the orange juice may change slightly, but it will still be safe to consume. Frozen orange juice can also be used in recipes, such as smoothies or cocktails, adding a refreshing and tangy flavor.
To further explore the benefits of orange juice, I have provided a table below that highlights its nutritional value and potential health benefits. Orange juice is an excellent source of vitamin C, which helps support a healthy immune system and may reduce the risk of chronic diseases. Additionally, it contains folate, potassium, and antioxidants that can benefit heart health and overall wellness. Incorporating orange juice into your diet can be a delicious way to boost your nutrient intake and reap its health benefits.
Moving forward, if freezing or refrigeration is not an option, using preservatives can also help maintain the freshness and quality of orange juice. Let’s explore this option in the next section.
Using Preservatives
To maintain the freshness and quality of your orange juice for longer periods, you can use preservatives. These are substances that are added to the juice to prevent spoilage and extend its shelf life. Some common preservatives used in orange juice include sodium benzoate and potassium sorbate.
While preservatives can be effective in prolonging the shelf life of orange juice, there are alternatives to using them. For example, you can store your juice in airtight containers in the refrigerator, or freeze it for later use. Moreover, some people may be concerned about the potential health effects of consuming preservatives. However, studies have shown that when used in small amounts, preservatives are safe for consumption.
Moving on to the next topic, it’s important to consider the different types of orange juice available in the market.
Different Types of Orange Juice
You’ll love learning that freshly squeezed orange juice contains up to 50% more Vitamin C than its pasteurized counterpart. This is because freshly squeezed orange juice is made from different types of orange varieties, which are richer in nutrients than the ones used for pasteurized orange juice.
Some of the most common orange varieties used for freshly squeezed juice include Valencia, Navel, and Blood oranges. Drinking orange juice daily can provide numerous health benefits, including boosting the immune system, reducing inflammation, and improving heart health.
However, it’s important to note that not all orange juice is created equal. Some types of orange juice, such as those that contain added sugars or artificial flavors, can negate the health benefits of drinking orange juice. When choosing orange juice, it’s important to read the label carefully and opt for 100% pure orange juice.
In the next section, I’ll discuss how to store orange juice safely to ensure that it remains fresh and nutritious.
How to Store Orange Juice Safely
As I’ve mentioned before, there are different types of orange juice available in the market. But no matter which type you prefer, it’s important to know how to store orange juice safely to maintain its quality and freshness.
To keep your orange juice fresh and safe for consumption, here are some tips to follow:
- Always refrigerate orange juice after opening.
- Keep the juice in a tightly sealed container to prevent contamination.
- Avoid exposing the juice to light and air, as it can lead to oxidation and spoilage.
- Check the expiration date of the juice before purchasing and consuming it.
Aside from simply drinking orange juice, there are also creative recipes you can make using it. One popular method is making DIY orange juice concentrate. This involves reducing fresh orange juice on the stove until it becomes thick and concentrated, which can then be used in various recipes such as marinades, sauces, and desserts. By making your own concentrate, you can control the amount of sugar and additives that go into your recipes.
Now that we know how to store orange juice safely and have some ideas for creative recipes, the next step is to understand how long orange juice lasts after opening.
How Long Orange Juice Lasts After Opening
If you’re like most people, you’ve probably wondered how much time you have to enjoy your favorite citrus beverage once it’s been opened. The truth is, once you’ve opened a bottle of orange juice, it can only last a few days in the refrigerator. This is because the juice is exposed to air, which can cause it to spoil quickly.
The exact length of time will depend on a variety of factors, such as the type of orange juice, the storage conditions, and whether or not the juice has been pasteurized. But why is it so important to consume orange juice right after opening it?
For starters, orange juice is high in vitamin C, which is an essential nutrient that helps support a healthy immune system. By drinking orange juice regularly, you can help reduce your risk of developing infections and other illnesses. Additionally, orange juice is a good source of antioxidants, which can help protect your cells from damage caused by free radicals.
So, if you want to reap the benefits of consuming orange juice regularly, it’s best to drink it soon after opening the bottle. When it comes to leftover orange juice, there are a few ways you can use it up before it goes bad.
One idea is to use it as a marinade for chicken or fish, which can add a zesty flavor to your meals. Another option is to mix it into smoothies or cocktails for a refreshing beverage. Whatever you choose to do with your leftover orange juice, just make sure to use it up quickly to avoid wasting this nutritious drink.
The Best Ways to Use Leftover Orange Juice
Got some zesty citrus that’s starting to turn? Don’t let that liquid gold go to waste – here are some creative ways to use up that leftover sunshine in your fridge!
When it comes to ways to use leftover orange juice, the possibilities are endless. One easy option is to freeze the juice in an ice cube tray and use the cubes to add a burst of citrus flavor to water, cocktails, or smoothies. You can also use orange juice as a base for marinades or dressings, or add it to your morning oatmeal or yogurt for a fruity twist.
If you’re feeling more adventurous, there are plenty of creative recipes with orange juice that you can try. Orange juice can be used to make a tangy glaze for meats or roasted vegetables or as a secret ingredient in baking recipes – it pairs especially well with chocolate and spices like cinnamon and cloves. You can even make your own homemade popsicles by mixing orange juice with other fruit juices or yogurt.
So next time you have some leftover orange juice, don’t just let it sit in your fridge – get creative and try out some new recipes!
Frequently Asked Questions
Can orange juice be frozen?
Yes, orange juice can be frozen. However, the process can affect its nutritional value. Freezing can cause a loss of Vitamin C and a change in taste and texture. It is best to consume fresh orange juice for optimal nutritional benefits.
Is freshly squeezed orange juice healthier than store-bought?
Freshly squeezed orange juice has higher nutritional value than store-bought due to the absence of added sugars and preservatives. In contrast, store-bought juice is often pasteurized, which can decrease vitamin content.
Can I mix different types of orange juice together?
I have found that blending different types of orange juice can be a tasty option, but it may affect the nutritional value. It’s important to consider the sugar content and potential additives in each juice before mixing.
How long does orange juice last in a plastic bottle versus a glass bottle?
Based on studies, orange juice lasts longer in glass bottles due to their durability and ability to prevent air from entering. Plastic bottles have a higher risk of chemical leaching and environmental impact. Taste difference is negligible.
Can I drink expired orange juice if it still tastes okay?
I do not recommend drinking expired juice, even if it tastes okay. Consuming expired juice can pose safety concerns and lead to foodborne illness. Following proper juice storage best practices can help prevent this issue.
Conclusion
In conclusion, I’ve learned that orange juice can last for a considerable amount of time if stored properly. The shelf life of orange juice varies depending on the type and packaging, but generally, it can last for up to two weeks in the refrigerator after opening.
However, it’s essential to check for any signs of spoilage such as changes in taste, color, and smell before consuming. As the adage goes, "Waste not, want not."Leftover orange juice can be used in various ways, including making smoothies, marinades, and sauces.
It’s also crucial to remember the safety considerations when handling orange juice to prevent contamination and foodborne illnesses. With proper storage and handling, orange juice can be a nutritious and refreshing addition to one’s diet.
Cindy thoroughly researches juicing trends, techniques, and recipes to provide readers with practical advice and inspiration. Her writing style is accessible, engaging, and designed to make complex concepts easy to understand. Cindy’s dedication to promoting the advantages of juicing shines through her work, empowering readers to make positive changes in their lives through the simple act of juicing.
-
Popular Juice Brands4 weeks ago
10 Top-Rated Organic Juice Brands to Try
-
Popular Juice Brands4 weeks ago
9 Best No-Sugar-Added Popular Juice Brands
-
Health Benefits of Juice2 weeks ago
How Much Bottled Lemon Juice Equals 1 Lemon
-
Vegetable Juices4 weeks ago
12 Top Organic Vegetable Juice Brands Reviewed
-
Juice Tips and Tricks1 week ago
How Long Does Lemon Juice Last After Expiration Date
-
Juice Tips and Tricks2 weeks ago
How Long Does Juice Last After Juicing
-
Juice Tips and Tricks2 weeks ago
2 Lemons Equal How Much Juice
-
Vetted3 months ago
15 Best Juices for Diabetics: Refreshing Options That Won’t Spike Your Blood Sugar