
To achieve ombre effects on glass and PET bottles, start by thoroughly cleaning and drying the surface. Apply your first color at one end and load a damp brush with a second hue, overlapping slightly to blend. Use gentle, feathered strokes to soften gradations and work quickly while the paint is wet for seamless transitions. Practice on scrap material to refine your technique, and with patience, you’ll master the smooth color flow that makes your designs stand out.
Key Takeaways
- Prepare the glass or PET surface by cleaning and drying for optimal paint adhesion.
- Choose colors with smooth transition potential, such as warm to cool shades, for effective ombre blending.
- Apply paint starting at one end, then gradually overlap and blend with a damp brush or sponge for seamless gradients.
- Work quickly while the paint is wet to facilitate smooth color transitions and avoid harsh lines.
- Finish with thin layers, allowing drying time, and practice on scrap surfaces to perfect your ombre blending technique.
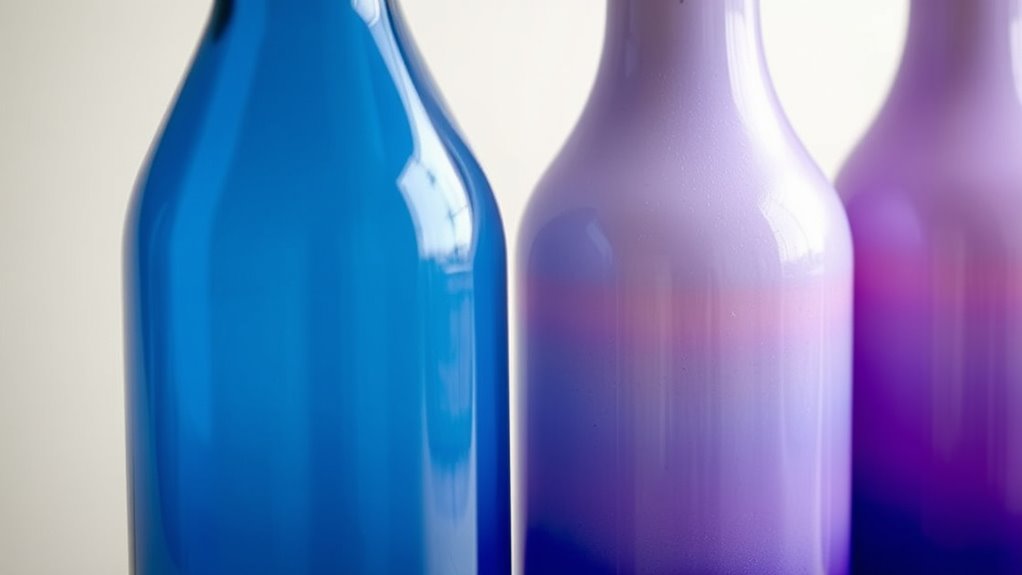
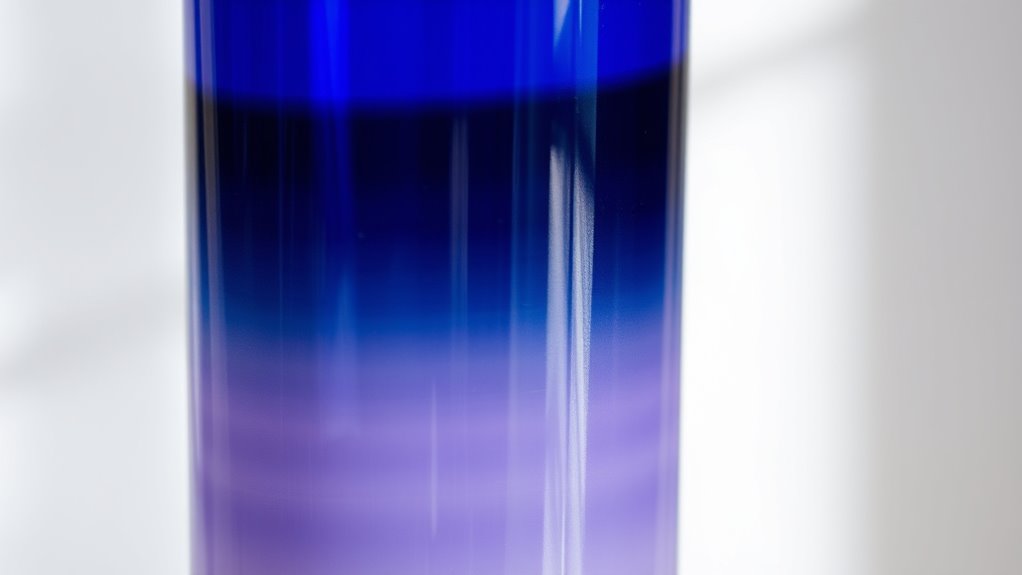
Ombre painting techniques create smooth shifts between colors, adding depth and dimension to your artwork. When working on glass and PET bottles, mastering this technique allows you to transform plain surfaces into eye-catching pieces. To achieve a seamless progression, you’ll focus on color blending and gradient shading, which are the core elements of ombre effects. As you start, choose two or more colors that naturally flow into each other. Light to dark or warm to cool shades work particularly well, depending on the mood you want to create.
Begin by preparing your bottle surface. Clean it thoroughly and ensure it’s dry before you start painting. Use a high-quality, flexible paintbrush or sponge to apply your colors. To facilitate smooth color blending, work quickly while the paint is still wet. Dip your brush into the first color and apply it at the top or bottom of the bottle, depending on your design. Then, load your brush with the second color and gently overlap the first, blending them where they meet. This overlapping area is essential for gradient shading — it’s where the colors merge seamlessly, creating that soft, ombre progression.
As you continue, keep blending by lightly feathering the edges of each color into the next. Use a clean, damp brush or sponge to soften harsh lines, ensuring the gradient appears natural and fluid. The key to effective color blending is gradual progression; avoid abrupt changes by continuously feathering the colors into each other. For longer gradients, work in sections, blending one area into the next until the entire surface achieves the desired ombre effect. Additionally, understanding the history of techniques can inspire innovative approaches and improve your craftsmanship.
If you make a mistake or the progression isn’t smooth enough, don’t worry. You can lightly mist the area with water or use a damp brush to re-blend the colors, softening any harsh lines. It’s also helpful to work in multiple thin layers rather than one thick coat, as this allows better control over the gradient shading and prevents streaks or uneven patches. Once you’re satisfied with your blending, let the paint dry thoroughly before adding any additional details or sealing.
Practicing color blending and gradient shading on scrap material before tackling your final piece can boost your confidence. Remember, the key to successful ombre painting on glass and PET bottles is patience and a steady hand. When done right, your bottles will exhibit a smooth, elegant transition of colors that highlight your craftsmanship and creativity.
Frequently Asked Questions
Can Ombre Painting Be Done on Curved Glass Surfaces?
Yes, you can do ombre painting on curved glass surfaces. The curved surface challenges your control, but with steady hands, you can achieve a smooth gradient. Use paint adhesion tips like cleaning the surface thoroughly, applying a primer if needed, and using quality paint suitable for glass. Practice on scrap glass first to master blending techniques, ensuring your ombre looks seamless despite the curves.
What Type of Paint Is Best for PET Bottles?
You should use a high-quality acrylic paint or specialized plastic paint for PET bottles. These paints offer excellent paint adhesion, ensuring your design stays intact. They also blend smoothly for a seamless ombre effect, allowing you to create beautiful color progressions. Make sure to clean the surface thoroughly before painting and consider applying a clear sealant afterward to protect your artwork and enhance durability.
How Do I Prevent Paint From Smudging During Drying?
Imagine pouring your heart into a beautiful painted bottle, only to see smudges ruin it. To prevent this, use gentle drying techniques like placing the bottle on a flat surface and avoiding touch until fully dry. Keep a steady airflow to speed up drying and prevent smudges. Using a clear sealant can also help lock in your work. Patience and careful drying are key to smudge prevention.
Is Sealing Necessary After Ombre Painting on Glass?
Yes, sealing is necessary after ombre painting on glass to protect your design. Applying a sealant enhances paint durability, preventing chipping and fading over time. You should wait until the paint is fully dry before applying a clear sealant, preferably one designed for glass surfaces. This extra step guarantees your artwork stays vibrant and intact, giving your decorated bottles a professional finish.
Can Ombre Techniques Be Used on Outdoor Bottles?
You can definitely use ombre techniques on outdoor bottles; in fact, 85% of DIY enthusiasts do so for decorative purposes. To guarantee durability, apply UV-resistant and weatherproof coatings, which protect your ombre design from fading and weather damage. These coatings enhance the longevity of your painted bottles, making them perfect for outdoor display. Just remember to seal your work properly to maintain vibrant colors and prevent peeling over time.
Conclusion
Now that you’ve explored ombre painting techniques for glass and PET bottles, you might believe that the beauty lies solely in the colors. But it’s the act of creating that truly transforms ordinary bottles into art. When you blend shades seamlessly, you’re not just decorating — you’re expressing emotion and craftsmanship. So, trust the process and let your creativity flow. After all, sometimes the most imperfect strokes make the most stunning masterpieces.

Cindy thoroughly researches juicing trends, techniques, and recipes to provide readers with practical advice and inspiration. Her writing style is accessible, engaging, and designed to make complex concepts easy to understand. Cindy’s dedication to promoting the advantages of juicing shines through her work, empowering readers to make positive changes in their lives through the simple act of juicing.