
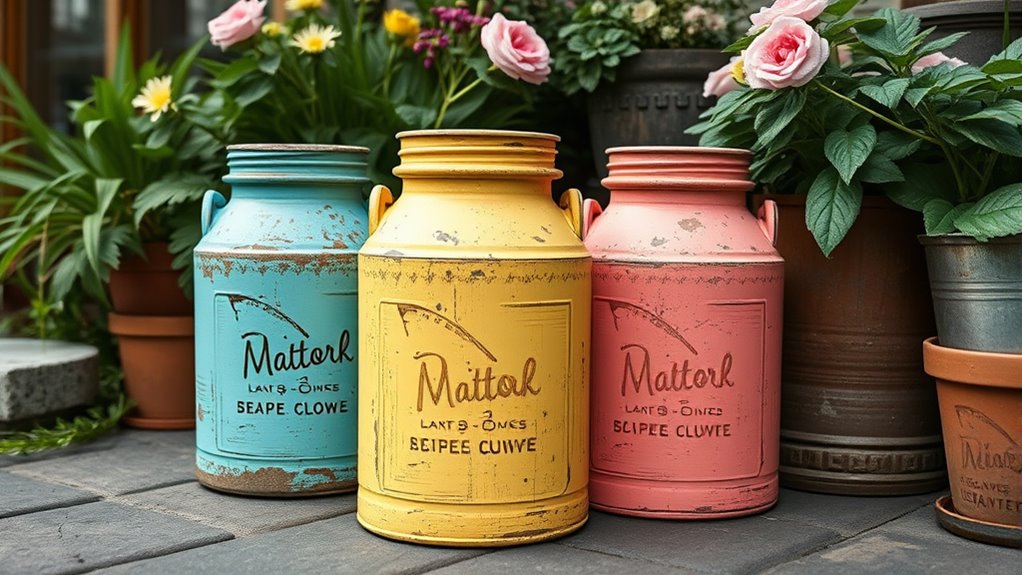
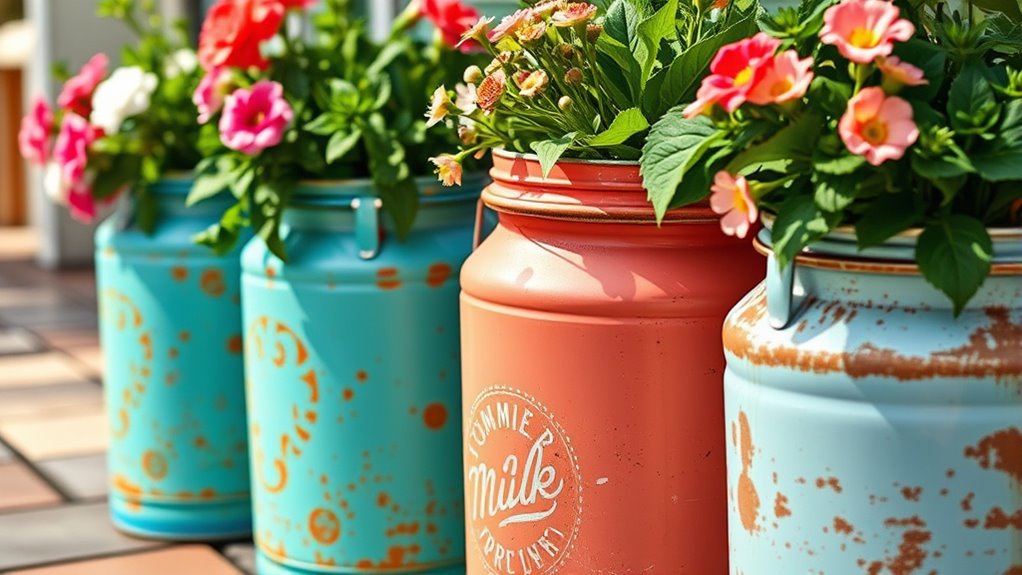
Transforming old milk cans into painted patio décor is a fun and creative project. First, select sturdy cans free of rust or deep dents and clean them thoroughly. Use exterior or chalk paint to add color and design, layering for depth and sealing with weatherproof finishes. Decorate with stencils, embellishments, or plant arrangements to suit your style. For tips on long-lasting results and stylish arrangements, keep exploring—you’ll find plenty of ideas to inspire your upcycling journey.
Key Takeaways
- Select sturdy, rust-free milk cans with vintage appeal and clean thoroughly before painting.
- Use high-quality exterior or chalk paint suitable for metal, and apply protective sealant for weather resistance.
- Plan and sketch creative designs or patterns, incorporating floral, rustic, or geometric motifs to match outdoor décor.
- Add decorative accents like charms or stencils, then layer colors and textures for a personalized, eye-catching finish.
- Regularly maintain and seal the painted cans, clean with mild soap, and protect them from harsh weather for lasting beauty.
Gathering and Preparing Your Milk Cans

Before you start upcycling your milk cans, you need to gather and prepare them properly. Milk can history dates back to the 19th century, making these items rich in vintage charm. Collect cans that are sturdy and free of rust or deep dents, as these can be challenging to work with. To prepare, wash each can thoroughly with soap and water, removing any dirt or residue. If there’s rust, gently sand the surface to create a smooth base for painting. Consider your vintage collection ideas—think about repurposing milk cans into planters, storage, or decorative pieces. Proper cleaning and preparation guarantee your upcycled milk cans will last longer and look their best, transforming them into charming patio décor with a history-rich touch. Additionally, understanding lifestyle trends can inspire creative ideas for incorporating vintage items into modern outdoor spaces. Exploring upcycling techniques can further enhance your project’s durability and aesthetic appeal. To ensure your project is successful, familiarize yourself with DIY painting methods that can help achieve a polished finish. Incorporating weather-resistant finishes can also help your painted milk cans withstand outdoor conditions and extend their lifespan. Using appropriate sealing products can provide extra protection against the elements, ensuring your décor remains beautiful over time.
Choosing the Perfect Paint and Supplies
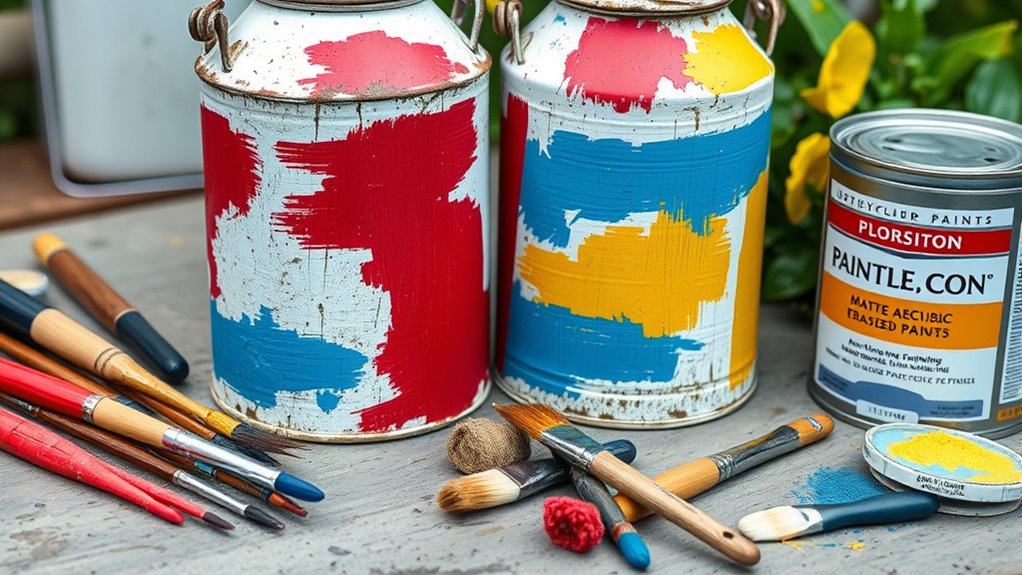
Selecting the right paint and supplies is crucial for achieving a professional and lasting finish on your upcycled milk cans. Start by considering your color matching goals to guarantee your cans complement your outdoor décor. Choose high-quality exterior or chalk paint designed for metal surfaces, as these will adhere better and resist weather damage. When selecting paint, think about durability and finish—matte or glossy, depending on your style. Don’t forget to pick up brushes, rollers, or spray tools suitable for your project size and detail work. Using the proper supplies not only simplifies the process but also results in a smooth, even coating. Investing in good paint and tools ensures your painted milk cans will look beautiful and stand the test of time in your patio space. Additionally, understanding the types of paint finishes can help you select the best look and longevity for your project. Being aware of weather-resistant coatings can also extend the lifespan of your painted décor in outdoor settings. To further enhance your project, consider exploring paint preparation techniques to ensure optimal adhesion and durability. Proper surface cleaning and preparing the metal surface can significantly improve the adhesion and overall quality of your finish.
Cleaning and Sanding the Surface
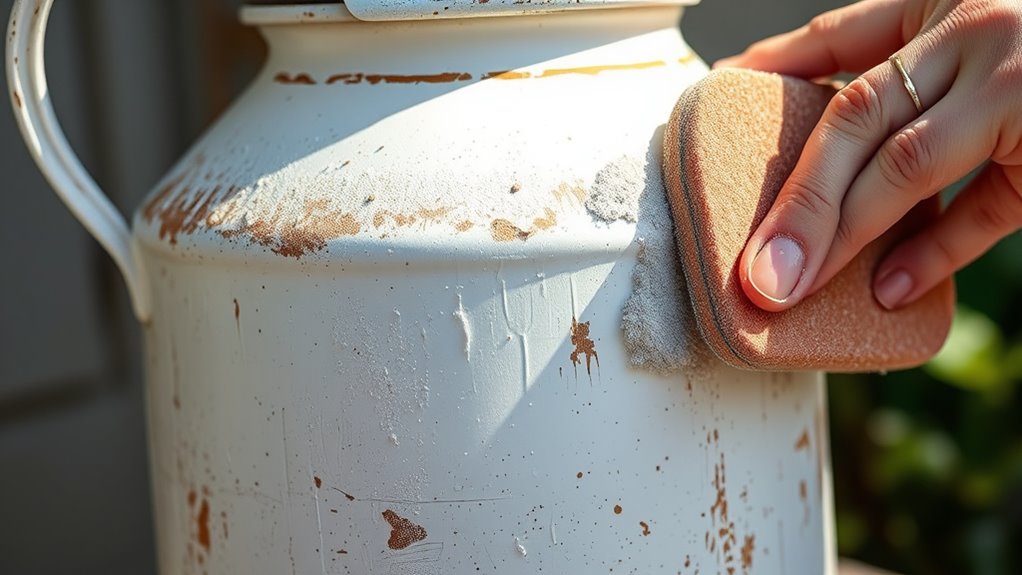
Start by giving your milk cans a thorough cleaning to remove dirt, grease, and any residual paint or rust. Proper metal preparation is essential for the paint to adhere well and last longer. Use a gentle cleaner and a scrub brush or sponge to make certain all grime is removed. Once clean, let the cans dry completely. Next, sand the surface lightly with fine-grit sandpaper to smooth out any rough spots and create a better bonding surface. Focus on areas with rust or peeling paint, removing these imperfections. Surface smoothing not only improves the appearance but also helps the paint adhere evenly. Be sure to wipe away any dust from sanding with a damp cloth before moving on to priming or painting. This step ensures a professional, long-lasting finish for your upcycled décor. Additionally, employing appropriate vacuum cleaner attachments like dusting brushes can help remove any remaining dust or debris from the surface before painting. To achieve optimal results, consider proper surface preparation techniques that enhance paint adhesion and durability.
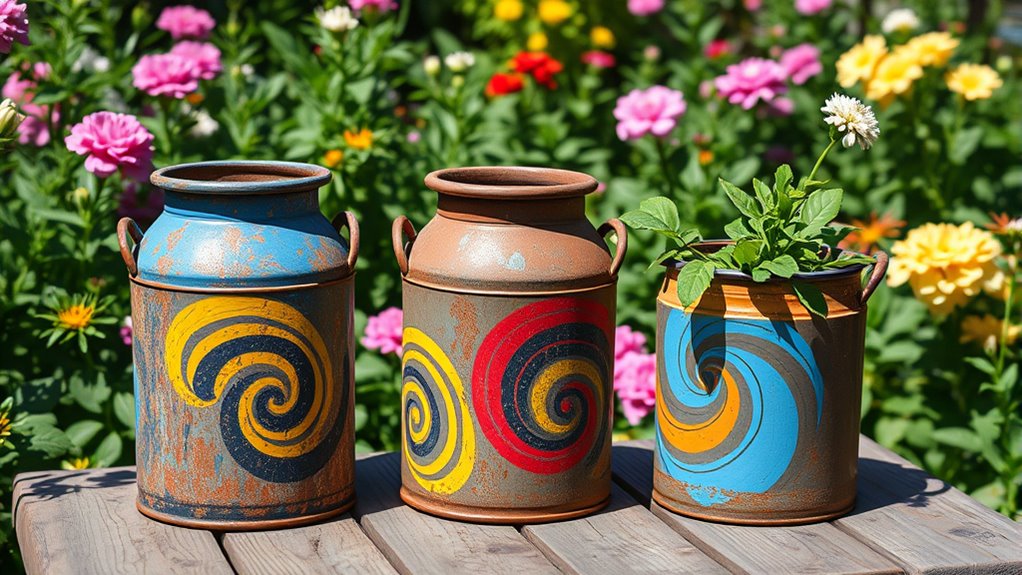
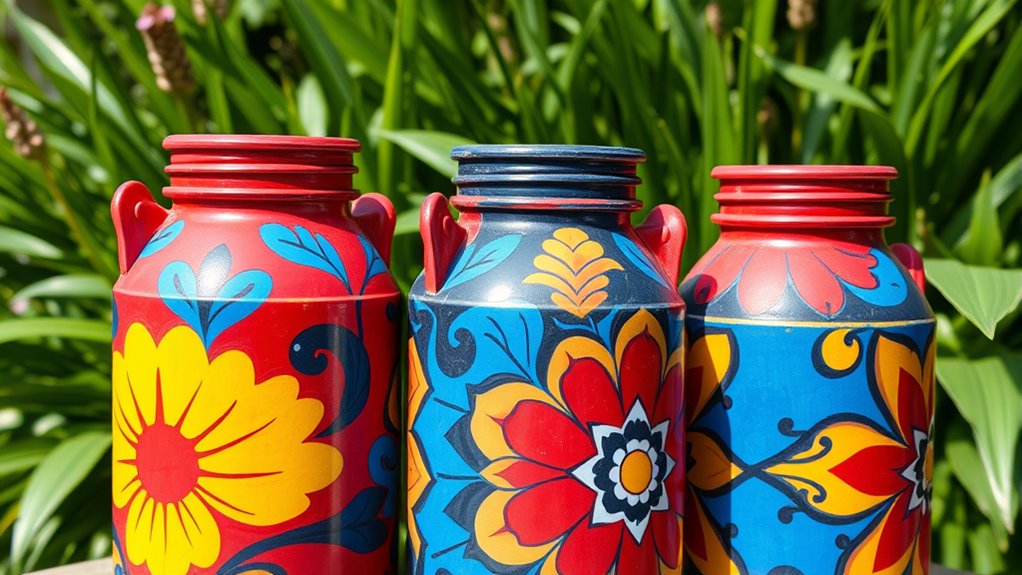
Designing Your Painted Pattern
Once you’ve prepared your milk cans, it’s time to plan your painted pattern. Start by selecting a color palette that complements your outdoor space—think vibrant or muted tones, depending on your style. Gather pattern inspiration from nature, vintage designs, or geometric shapes. To help visualize, use this simple table:
| Pattern Style | Color Palette Options |
|---|---|
| Floral or Botanicals | Pastel shades or bold hues |
| Geometric | Monochrome or contrasting colors |
| Rustic or Vintage | Earth tones and faded shades |
Decide which pattern speaks to you and aligns with your garden’s vibe. Sketch rough ideas or gather images that inspire your design, ensuring your painted pattern enhances your patio décor.
Applying Paint in Layers
Applying paint in layers guarantees your design has depth and durability. Using layering techniques, you build your design gradually, allowing each coat to dry before adding the next. This process enhances color blending, creating smooth progressions and richer hues. layering techniques can also help in achieving a more professional finish, especially for beginners. To achieve the best results: 1. Start with a light base coat to establish your background color. 2. Apply additional layers with darker or contrasting shades, blending edges for seamless progressions. 3. Use a dry brush or sponge to add textured details on top of the layered paint. Layering techniques give your milk can a professional look, while color blending ensures the final design feels cohesive and vibrant. Incorporating proper layering methods can help in achieving a polished appearance and add dimension to your project. Proper financial planning can help in budgeting for your DIY project, ensuring you stay within your desired expenses. Additionally, considering space optimization can help you organize your patio décor more effectively, making your outdoor area more functional and inviting. Take your time, and enjoy watching your patio décor come to life with depth and character.
Sealing and Protecting Your Artwork
Once you’ve finished your artwork, applying a clear sealant helps safeguard it from scratches and weather damage. Regular maintenance, like cleaning and reapplying the sealant when needed, keeps your piece looking fresh. Keep these tips in mind to ensure your upcycled milk can stays vibrant for years to come. Utilizing durable materials designed for outdoor use can further enhance the longevity of your décor.
Apply Clear Sealant
Have you considered how a clear sealant can enhance and protect your upcycled milk can artwork? Applying a weatherproof coating with UV protection is essential for durability. It keeps your paint vibrant and shields against the elements. To do this effectively:
- Choose a high-quality clear sealant suitable for outdoor use.
- Use a brush or spray to apply an even, thin layer over your painted surface.
- Allow sufficient drying time before exposing your milk can to weather.
- Incorporating fetal movement awareness can help ensure your project remains undisturbed during periods of pregnancy. Additionally, selecting a weather-resistant finish compatible with outdoor conditions ensures long-lasting protection. This step ensures your design stays colorful and intact over time. The UV protection prevents fading from sunlight, while the weatherproof coating guards against rain and rust. Proper sealing transforms your project into a resilient patio décor piece, ready to withstand the elements and promote emotional well-being. Incorporating air purifier features can further improve the indoor environment where your décor is displayed, enhancing overall health benefits.
Regular Maintenance Tips
To keep your upcycled milk can artwork looking its best, regular maintenance is essential. Start by inspecting the paint and sealant for chips or wear, and touch up as needed to prevent damage from garden pests or moisture. Protect your piece by applying a clear sealant periodically, especially after harsh weather. Maintaining a consistent watering schedule around your garden helps prevent excess moisture from seeping into the metal, which could cause rust or paint deterioration. Keep your milk can elevated or in a sheltered spot to minimize exposure to rain and direct sunlight. Regular cleaning with a soft cloth will remove dirt and debris, preserving your artwork’s vibrant color. With consistent care, your painted patio décor will stay beautiful and durable for years to come.
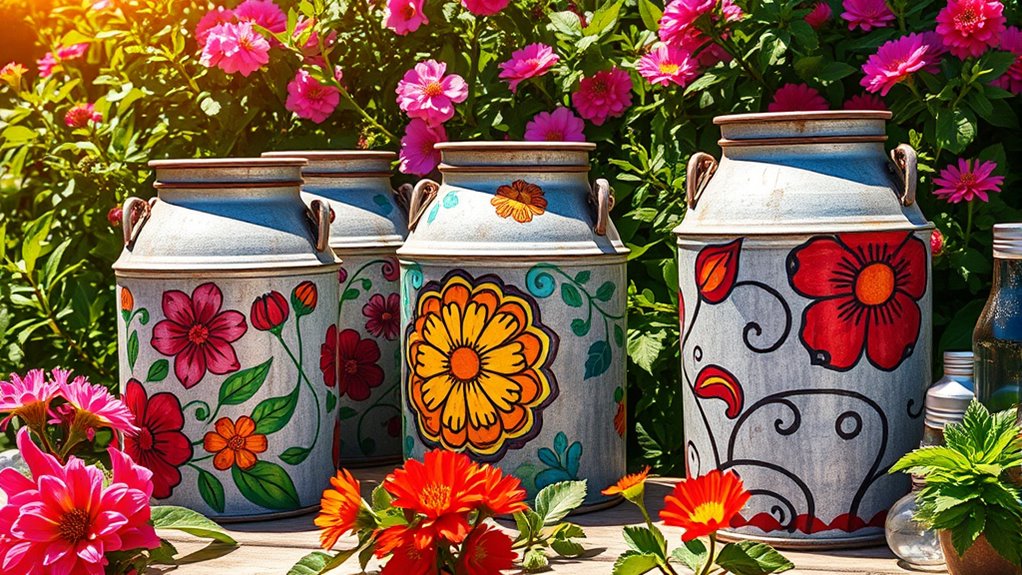
Customizing With Additional Decorations

Ever wondered how to make your upcycled milk can stand out even more? Customizing with additional decorations lets you add unique charm. To enhance your design, consider these options:
Enhance your upcycled milk can with decorative accents, thematic embellishments, and personalized patterns for a charming outdoor display.
- Attach ornamental accents like metal charms or vintage knobs for a textured, eye-catching look.
- Incorporate thematic embellishments such as painted flowers, butterflies, or seasonal motifs to reflect your style.
- Use stencils or decals to add intricate patterns or inspiring quotes, giving your can a personalized touch.
- Be sure to select appropriate sealants to protect your decorations from weather damage and ensure longevity.
These details elevate your project and create a cohesive patio décor. Adding ornamental accents and thematic embellishments makes the milk can truly your own, transforming simple repurposing into an artful expression. Keep it fun and tailored to your outdoor space!
Arranging Your Upcycled Cans in the Patio
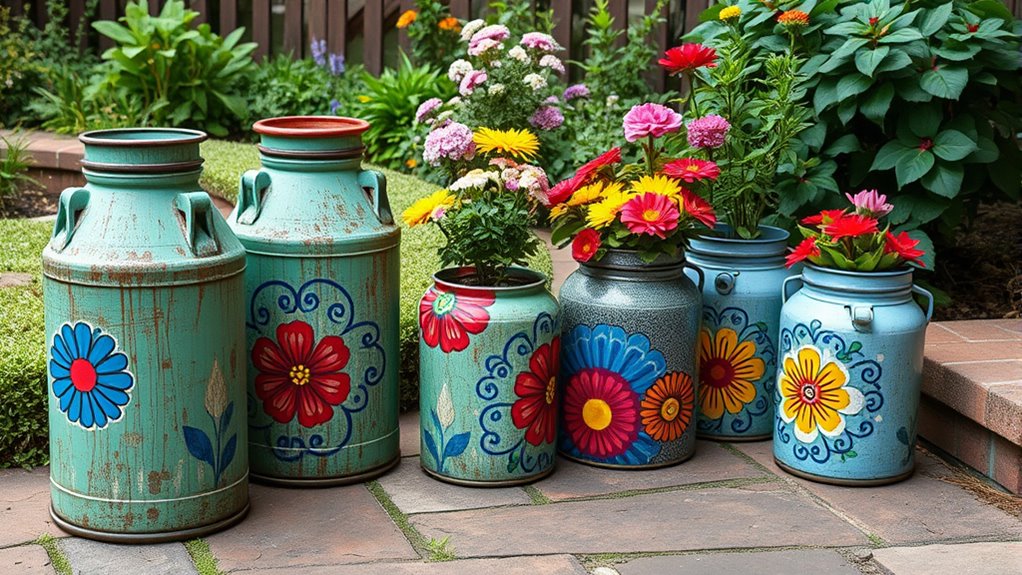
Arranging your upcycled milk cans in the patio transforms your space into a vibrant, personalized oasis. Start by experimenting with creative plant arrangements, mixing flowers, herbs, and greenery to add visual interest. Use height variations by placing some cans on stands or small pedestals to create dimension. For a balanced look, consider symmetrical display ideas, such as lining cans along a walkway or grouping them in pairs or odd numbers. Position cans near seating areas or along pathways to invite movement and exploration. Mix and match colors and designs to reflect your style and make your patio uniquely yours. Keep the arrangement natural and inviting, ensuring each can contributes to the overall harmony of your outdoor space.
Caring for Your Painted Milk Cans Over Time
To keep your painted milk cans looking their best, you need to protect them from weathering and wear. Regular cleaning will help maintain their appearance, and knowing how to do touch-up painting can extend their life. Let’s explore simple tips to care for your cans and keep them beautiful over time.
Protect From Weathering
How can you guarantee your painted milk cans withstand the elements over time? The key is applying a good weatherproof coating to enhance outdoor durability. Here are three tips:
- Choose a high-quality, outdoor-rated sealant or clear topcoat to protect your paint from rain, sun, and temperature changes.
- Ensure the milk cans are thoroughly cleaned and dried before applying the weatherproof coating for maximum adhesion.
- Regularly inspect your cans and touch up any chips or scratches with additional sealant to maintain their weather resistance.
Using these steps, you create a protective barrier that keeps your painted milk cans vibrant and durable, even in harsh weather. This extra layer of defense prolongs their beauty and preserves your upcycled patio décor.
Regular Cleaning Tips
Keeping your painted milk cans looking their best over time requires regular cleaning to remove dirt, dust, and debris that can dull their finish. Use a soft cloth or sponge with mild soap and water to gently wipe the surface, avoiding harsh abrasives that could scratch the paint. Regular cleaning helps maintain outdoor durability by preventing grime buildup that can weaken the paint’s adhesion. If you notice any areas where the paint seems to be lifting or peeling, clean them carefully and consider a touch-up if necessary, but avoid over-washing, which can compromise the finish. Protecting your milk cans through consistent cleaning ensures they stay vibrant and resilient against the elements, maximizing their longevity and keeping your patio décor looking fresh and attractive.
Touch-Up Painting Methods
As your painted milk cans age, occasional touch-up painting can keep them looking fresh and vibrant. To do this effectively, focus on key brush techniques, like feathering and stippling, to blend new paint seamlessly. Before starting, check if you need to do any color mixing to match the original shade perfectly. Here are some tips:
- Use a small, high-quality brush for precise touch-ups around details and edges.
- Mix your paint thoroughly to match the existing color, adding small amounts of white or black as needed.
- Apply thin, even coats, allowing each layer to dry completely before adding another for a smooth finish.
These methods will help your milk cans retain their charm and keep your patio décor looking polished over time.
Frequently Asked Questions
Can I Use Any Type of Paint on Milk Cans?
When choosing the right paint for milk cans, you should consider the material and outdoor durability. Not all paints work well on metal, so opt for a rust-resistant, weatherproof paint like acrylic or enamel. Preparation techniques are key—clean the cans thoroughly, sand any rough spots, and apply a primer for better adhesion. This guarantees your painted milk cans last longer and look great on your patio.
How Long Does the Paint Typically Last Outdoors?
The paint on your milk cans typically lasts several years outdoors, but its durability depends on proper paint protection and weather resistance. To guarantee long-lasting paint, choose a high-quality outdoor or exterior paint designed for weather durability. Applying a clear sealer or topcoat adds extra protection against moisture, UV rays, and temperature changes. Regular maintenance, like cleaning and touch-ups, also helps your painted cans look great over time.
Are There Eco-Friendly Paint Options Suitable for Upcycling?
You’re likely wondering if eco-friendly paints suit outdoor projects. The good news is, biodegradable paints and those made with natural pigments are great options. They’re designed to be less harmful to the environment and safe for outdoor use. When choosing, look for products labeled biodegradable or natural pigment-based, and verify they’re weather-resistant. This way, you can enjoy beautiful, eco-conscious décor that lasts outdoors.
What Tools Are Best for Detailed Painted Patterns?
Your hands will thank you when you use fine-tipped brushes for detailed painted patterns; they allow you to create intricate designs with precision. For stenciled effects, go for small foam or stencil brushes, which help achieve crisp edges. Experiment with different brush techniques like dry brushing for texture. These tools make your artwork pop and turn simple cans into stunning, personalized patio décor.
Can I Safely Use These Painted Cans for Growing Food Plants?
You can safely use painted cans for growing food plants if you prioritize food safety. Make sure to use non-toxic paints designed for outdoor or garden use, avoiding any that contain harmful chemicals. Properly seal the paint to prevent leaching, and consider lining the inside with a food-safe barrier if needed. With these precautions, your painted cans can become charming, safe containers for your edible plants.
Conclusion
By upcycling old milk cans into painted patio décor, you transform forgotten items into stunning, personalized accents. For example, imagine turning a rusty can into a cheerful flower planter that brightens your outdoor space and sparks conversations. With a little creativity and care, your DIY project can become a cherished part of your patio’s charm, showcasing your personality and eco-friendly spirit. Start today and enjoy the beauty of your handcrafted outdoor masterpiece!

Susannah expertise lies in researching and compiling evidence-based content on juicing, nutrition, and overall health. She is committed to ensuring that The Juicery World offers accurate, up-to-date, and trustworthy information to empower readers to take control of their health. Susannah’s goal is to inspire individuals to embrace juicing as a way to nourish their bodies and live their best lives.