Juice Tips and Tricks
How To Make Grape Juice With A Blender
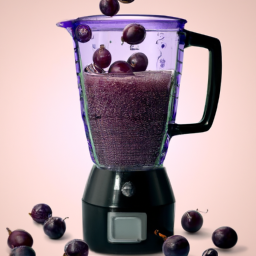
On a hot summer day when the sun is shining bright, there’s nothing quite like enjoying a refreshing glass of grape juice. Rather than buying a store-bought version, you can make your own grape juice at home using a blender. Not only is this a more affordable option, but it also lets you customize the flavor to suit your taste.
Picture this: plump, juicy grapes bursting with sweetness, waiting to be transformed into a delicious drink. With just a few simple steps, you can turn those grapes into a refreshing beverage that’s perfect for any occasion.
Making grape juice with a blender is not only easy, but it’s also a great way to use up extra grapes from the farmer’s market or your own backyard. So grab your blender and let’s get started.
Key Takeaways
- Choose grapes with desired sweetness and acidity, such as Concord grapes.
- Use a high-powered blender and blend grapes in smaller batches for a smoother texture.
- Add a splash of lemon juice to enhance flavor and adjust sweetness with honey or sugar.
- Strain the mixture through a fine mesh strainer to remove pulp and store the grape juice in an airtight container in the back of the fridge to maintain freshness.
Choose Your Grapes
Grapes are a must-have ingredient when making grape juice, so grab ’em and start blending! When choosing your grapes, remember that different grape varieties have varying levels of sweetness and acidity. Some great options include Concord grapes, Muscadine grapes, and Thompson Seedless grapes.
Additionally, consider your grape color preferences. Red grapes will give your juice a deeper, richer color, while green grapes will result in a lighter, more refreshing juice.
Once you’ve decided on your grape variety and color, it’s time to move onto the next step: washing and preparing your grapes.

Wash and Prepare Your Grapes
Before I can start making grape juice, I need to properly wash and prepare my grapes. This involves removing all the stems and leaves from the grapes, as they can affect the taste and texture of the juice.
I then need to clean and rinse the grapes thoroughly to ensure that they’re free of any dirt or debris.
Removing Stems and Leaves
First, you’ll wanna grab your bunch of grapes and pick off any stubborn stems or leaves that are still attached. This step is crucial to ensure that your grape juice will have a smooth and consistent texture. Here are some tips to make this process easier:
- Hold the grape bunches under running water to help loosen the stems and leaves.
- Use a sharp knife or scissors to cut off the stems close to the grapes.
- Gently rub the grapes between your fingers to loosen any remaining leaves.
- If you’re using small grapes, you can also try squeezing them gently to remove the stems.
Don’t worry about removing every single stem or leaf, but try to get rid of the majority to avoid any bitter taste in your juice.
Now that you have removed the stems and leaves, it’s time to move on to the next step of the process: cleaning and rinsing the grapes. This step is crucial to remove any dirt, debris, or pesticides that may be present on the surface of the grapes.
Cleaning and Rinsing
Ironically, the key to a healthy and delicious grape juice isn’t the grapes themselves, but rather the cleaning and rinsing process.
Before putting the grapes in the blender, it’s important to clean them thoroughly to remove any dirt, pesticides, or bacteria that may be present. One of the best ways to do this is by using natural cleaning products such as vinegar or baking soda. These products are effective in removing any harmful substances without leaving any residue on the grapes.
When rinsing the grapes, it’s important to take extra precautions to avoid bacterial contamination. One tip is to rinse them under running water for at least 30 seconds, making sure to rub each grape gently to remove any dirt or debris. Another tip is to use a colander or strainer to rinse the grapes, as this will help to remove any excess water and prevent the grapes from becoming waterlogged.
By taking these steps, you can ensure that your grape juice is not only delicious but also safe to drink.
With the grapes cleaned and rinsed, it’s time to add them to the blender and start blending!
Add Grapes to Blender
Now, toss a generous amount of grapes into your blender and get ready to taste the sweet, juicy goodness! But before adding the grapes, make sure your blender is suitable for this task. High-powered blenders, such as Vitamix or Ninja, work best for making grape juice. If you don’t have a high-powered blender, you can still make juice, but the consistency may be a bit chunkier.
When it comes to grape varieties, any type can be used to make juice. However, Concord grapes are the most commonly used for juice because of their intense flavor and high sugar content. Red and green grapes can also be used, but they may produce a lighter-colored juice.
Once the grapes are in the blender, you’re ready to move on to the next step of blending them into a smooth liquid.
Blend Grapes
To achieve a smoother texture, it’s advisable to blend the grapes in smaller batches. Blending techniques play a crucial role in ensuring that the grape juice is smooth and free of lumps. When blending, it’s important not to overload the blender with too many grapes at once.
Start by adding a few grapes, then gradually increase the amount until all the grapes are blended. Here are some tips to make your blending experience more enjoyable:
- Use ripe grapes for a sweeter taste
- Add a splash of lemon juice to enhance the flavor
- Experiment with different grape juice recipes to find your favorite combination
By following these tips, you’ll be able to create a delicious and refreshing grape juice that’s perfect for any occasion. Once the grapes are blended to your desired consistency, the next step is to strain the grape mixture.
Strain Grape Mixture
To strain the grape mixture, I first choose a fine mesh strainer that’ll effectively remove the pulp and keep the juice. I prefer using this type of strainer. Once I have my strainer ready, I pour the grape mixture through it. Then, I press down on the pulp with a spoon or spatula to extract as much juice as possible.
Make sure to leave a double new line after every complete sentence.
Choosing a Strainer
After blending the grapes, it’s important to choose a strainer that will effectively remove any unwanted seeds or pulp from the juice. Here are some things to consider when selecting a strainer:
-
Types of strainers: There are several types of strainers available, including mesh strainers, cheesecloth, and nut milk bags. Mesh strainers come in different sizes and can be made of plastic or metal. Cheesecloth is a thin, cotton fabric that is available in different grades. Nut milk bags are made of a fine mesh material and are designed for straining nut milk, but can also be used for juicing.
-
Pros and cons of different strainer materials: Mesh strainers made of plastic are affordable and easy to clean, but may not be as durable as metal ones. Metal strainers are more durable but can be more expensive. Cheesecloth is inexpensive and versatile but can be difficult to clean. Nut milk bags are easy to clean and reusable, but may not be as effective at removing pulp as other types of strainers.
-
Personal preference: Ultimately, the type of strainer you choose will depend on your personal preference and the amount of time you want to spend straining the juice. Experiment with different types of strainers to find the one that works best for you.
Choosing the right strainer is an important step in making grape juice with a blender. Once you’ve selected the strainer that works best for you, it’s time to move on to the next step: straining the grape pulp.
Straining Grape Pulp
Now that we’ve chosen a suitable strainer, it’s time to move onto the next step in making grape juice with a blender. We need to strain the grape pulp from the juice.
To do this, we’ll need to pour the blended grapes through the strainer and use a spatula or spoon to press the pulp against the mesh to extract as much juice as possible.
After straining the grape pulp, you may be left wondering what to do with it. Don’t throw it away just yet! There are many uses for grape pulp, such as making jams, jellies, and even grape pulp recipes like grape muffins or grape bread. The pulp is also rich in fiber and antioxidants, making it a healthy addition to any recipe. So, before discarding the pulp, consider using it in one of these creative ways.
Now that we’ve strained the grape pulp, we can move on to the final step in making grape juice – sweetening it to taste.
Sweeten to Taste
Adjusting the sweetness of your grape juice is a matter of personal preference. Some people like their juice tangy and tart, while others prefer it sweeter. To sweeten your grape juice, you can add honey or sugar. Here are some tips for getting the perfect sweetness:
-
Start small: When adding sweeteners to your grape juice, it’s best to start with a small amount and taste as you go. You can always add more, but it’s difficult to take away sweetness once it’s been added.
-
Use alternative sweeteners: If you’re looking for a healthier alternative to sugar, try using honey, maple syrup, or agave nectar. These sweeteners are more natural and have a lower glycemic index than white sugar.
-
Consider the type of grapes: Some grapes are naturally sweeter than others. If you’re using very sweet grapes, you may not need to add any additional sweeteners.
Once you’ve adjusted the sweetness of your grape juice to your liking, it’s time to chill it.
Chill Your Grape Juice
Now that I’ve made grape juice with my blender, it’s time to chill it. Refrigerating the juice is essential to keep it fresh for longer periods.
I usually pour the juice into a glass jar and place it in the refrigerator for a couple of hours before drinking. If I want my juice extra cold, I’ll add some ice cubes before drinking.
Refrigerating Your Juice
After blending your grapes, it’s important to refrigerate your juice to maintain its freshness and taste. Here are some tips for storing fresh juice in your refrigerator:
- Store your grape juice in an airtight container to prevent it from absorbing any odors from other foods in your fridge.
- Keep your grape juice in the back of the fridge where it’s the coldest, away from the door where temperature fluctuations can occur.
Homemade grape juice can last up to 5 days in the refrigerator, but it’s best to consume it within 2-3 days for optimal freshness. If you notice any signs of spoilage, such as a foul odor or mold, discard the juice immediately.
Before drinking your grape juice, give it a good shake or stir to evenly distribute any sediment that may have settled at the bottom of the container.
Now that your grape juice is chilled and ready to go, it’s time to add some ice for a refreshing summer drink.
Adding Ice
To cool down your summer beverage, simply plop a few ice cubes into your glass and watch as the heat melts away like a popsicle on a hot July day. But if you want to take your grape juice to the next level, consider adding some blended ice.
Blending ice cubes into your grape juice not only cools it down, but it also adds a slushy texture that can make you feel like you’re sipping on a fancy frozen drink. When blending ice into your grape juice, it’s important to use the right blending techniques.
Start by adding a few ice cubes to your blender and pulsing it a few times until the ice is chopped up into small pieces. Then, gradually add in your grape juice and blend until the ice is fully incorporated. If you want to get creative, you can also try adding in alternative ingredients like frozen berries or sliced bananas for a fruity twist. Once your mixture is smooth, give it a taste and adjust the sweetness or consistency by adding more juice or a splash of water if needed. If you’re wondering how to blend apple juice, you can follow the same steps—just substitute the grape juice with apple juice for a refreshing variation. Mixing and matching different fruits allows you to customize your beverage to your exact liking!
Once your blended grape juice is ready, serve and enjoy!
Serve and Enjoy
Once the grape juice is ready, simply pour it into glasses and savor the refreshing taste. To enhance the experience, consider some creative serving ideas and pairings with food. For instance, you can add a slice of lime or lemon to the glass to give the juice a citrusy twist. Alternatively, you can mix the grape juice with other fruit juices such as orange or pineapple for a more complex flavor profile.
When it comes to pairing grape juice with food, the options are endless. You can serve it with cheese, crackers, and charcuterie for a sophisticated appetizer. Or, you can pair it with a light salad or seafood dish for a healthy and refreshing meal. Whatever your choice, make sure to enjoy the grape juice in good company and in a relaxing environment.
To store your grape juice, follow the next subtopic on how to keep it fresh for longer periods.
Store Your Grape Juice
Now that you’ve enjoyed your freshly made grape juice, it’s time to think about how to store the remaining juice. Proper storage is important to preserve the freshness and taste of the juice for a longer period. Here are some tips and preservation techniques to help you store your grape juice:
-
Refrigerate: Store the grape juice in the refrigerator immediately after making it. Keeping it at a temperature between 32-40°F will help to maintain its freshness and quality for up to 5-7 days.
-
Use airtight containers: Transfer the grape juice to an airtight container or bottle before storing it in the refrigerator. This will prevent the juice from oxidizing and losing its flavor.
-
Freeze: If you’re not planning to consume the grape juice within a week, you can freeze it for up to 6 months. Pour the juice into freezer-safe containers or ice cube trays and place them in the freezer.
By following these storing tips and preservation techniques, you can enjoy your homemade grape juice for a longer period. Now that you know how to store your grape juice, let’s move on to the next section where we’ll discuss how to experiment with flavors to create unique and delicious blends.
Experiment with Flavors
Don’t be afraid to mix things up and try new flavors when creating your own unique blends of juice. One of the best things about making grape juice with a blender is that you can experiment with different flavor combinations until you find the perfect one.
For example, you can add a splash of lemon juice to your grape juice to give it a tangy twist. Alternatively, you can add a few sprigs of fresh mint to give your juice a refreshing herbal flavor.
Once you’ve created your own flavor combinations, it’s important to do some taste testing to make sure your juice is just right. Take a small sip of your juice and pay attention to the flavor profile. Is it too sweet? Too tart? Too bitter? Adjust the flavors as needed until you achieve the perfect balance.
With a little bit of experimentation and taste testing, you can create your own unique and delicious grape juice blends that you’ll love to drink again and again.
Frequently Asked Questions
Can I use frozen grapes for grape juice?
Yes, frozen grapes can be used for grape juice. Benefits include convenience and longer preservation. However, drawbacks include a less fresh taste and altered texture. Consider using alternative fruits for homemade juice, such as strawberries or blueberries.
How long does it take to blend the grapes into juice?
Blending time for grape juice varies based on grape quality and desired consistency. Fresh, ripe grapes will blend faster than frozen or less ripe grapes. Expect blending to take 1-2 minutes.
Do I need to remove the stems from the grapes before blending them?
Yes, it’s best to remove the stems from the grapes before blending them. Leaving the stems on can result in a bitter taste in the juice. To remove stems, use a sharp knife or grape stemmer.
What is the best type of blender to use for making grape juice?
The best blender types for making grape juice are high-powered blenders with a minimum of 1000 watts. A powerful motor ensures that the grapes are well blended and the juice is smooth.
Can I use honey or another sweetener instead of sugar to sweeten my grape juice?
When making grape juice, honey can be used as a nutritive sweetener instead of sugar. Non-nutritive sweeteners may also be used, but the taste may be affected. Experiment with different sweeteners to find what works best for your taste preference.
Conclusion
In conclusion, making grape juice with a blender is an easy and delicious way to enjoy the many health benefits of grapes. Whether you prefer sweet or tart grapes, you can choose any variety you like to create a refreshing and nutritious drink.
Remember to wash and prepare your grapes before blending, and strain the mixture to remove any pulp or seeds. You can also experiment with different flavors, such as adding lemon or mint for a unique twist.
One example of the benefits of grape juice is a study conducted by the University of Leeds, which found that consuming grape juice can lower blood pressure and reduce the risk of heart disease. This highlights the importance of incorporating grape juice into your diet as part of a healthy lifestyle.
By making your own grape juice with a blender, you can control the ingredients and ensure that you’re getting the maximum health benefits from this delicious drink. So go ahead and give it a try – your taste buds and your body will thank you!

Cindy thoroughly researches juicing trends, techniques, and recipes to provide readers with practical advice and inspiration. Her writing style is accessible, engaging, and designed to make complex concepts easy to understand. Cindy’s dedication to promoting the advantages of juicing shines through her work, empowering readers to make positive changes in their lives through the simple act of juicing.


I enjoy experimenting with new recipes and incorporating various flavors into my cooking. Recently, I’ve been fascinated by the flexibility of clam juice. This ingredient can elevate the flavor of both savory dishes and cocktails, providing them with a distinct umami taste.
Making clam juice from scratch might seem daunting, but it’s actually quite simple. All you need are fresh clams, a steamer, and some basic kitchen tools.
In this article, I’ll walk you through the steps of making clam juice, from sourcing fresh clams to adjusting the flavor to your liking. We’ll also discuss how to extract the maximum flavor from the clam meat and shells before straining the liquid into a smooth, savory juice. For those interested in a slightly different twist, we’ll briefly touch on how to prepare clamato juice, a flavorful mix of clam juice and tomato juice, which is ideal for cocktails or as a refreshing beverage. Whether you’re using it as a cooking base or a drink mixer, making your own clam juice ensures the freshest taste possible.
So, let’s get started!
Key Takeaways
- Sourcing fresh clams from a reliable seafood market is crucial for making clam juice.
- Steaming the clams until their shells open and the meat is cooked through is necessary before collecting the clam juice.
- Adjusting the flavor of the clam juice with spices like celery salt, black pepper, and garlic powder can enhance the taste.
- Using clam juice in cocktails and cooking adds a unique flavor and provides health benefits while keeping it low in fat.
Sourcing Fresh Clams
You gotta head to your local seafood market to get your hands on some fresh clams for this clam juice recipe. Finding a reliable supplier is key to getting the best quality clams for your juice.
Look for a market that has a good reputation for selling fresh seafood. Don’t hesitate to ask the staff where the clams came from and how fresh they are. They should be able to tell you when the clams arrived and how they were stored.
When checking the quality of the clams, make sure that they are tightly closed. If the clam is open, tap it gently with your finger. If it doesn’t close, it’s no good. Also, check the shells for any cracks or chips.
Once you’ve found your clams, it’s time to move on to cleaning and preparing them for the juice.
Cleaning and Preparing the Clams
First, start by scrubbing the clams under running water to remove any debris or sand. It’s important to remove any sand or grit from the clams, as it can ruin the flavor of the juice. To ensure that the clams are clean, use a stiff-bristled brush or sponge to scrub the shells thoroughly. Pay special attention to the hinge area, as this is where sand and debris tend to accumulate.
Once the clams are clean, it’s time to shuck them. Shucking can be tricky, but with a little practice, it becomes easier. Hold the clam with the hinge facing you and insert the tip of a clam knife into the small gap between the two shells. Wiggle the knife back and forth to loosen the muscles that hold the clam closed, then twist the knife to pop the shell open.
Once the shell is open, use the knife to cut the muscle that attaches the clam to the shell. Repeat this process with all of the clams, discarding any that don’t open.
With the clams cleaned and shucked, we’re ready to move on to steaming them to create our delicious clam juice.
Steaming the Clams
Now it’s time to coax the savory essence from the ocean’s bounty by gently steaming the clams until they surrender their briny nectar.
To start, it’s important to select fresh, live clams. Look for clams that are tightly closed or that close when tapped. Avoid any that are already opened or have broken shells. Once you have your clams, rinse them thoroughly in cold water to remove any grit and sand.
Next, prepare the steaming apparatus by adding a couple of inches of water to a large pot and bringing it to a boil. Place the clams in the pot, cover with a tight-fitting lid, and reduce the heat to medium. Steam the clams for 5-10 minutes, until their shells have opened and the meat is cooked through.
Remove the clams from the pot and discard any that have not opened. Now, we can move on to the next step of collecting the clam juice.
Collecting the Clam Juice
As you watch the steam rise from the pot, the tantalizing aroma of the briny ocean fills your senses, signaling that it’s time to collect the precious liquid that will infuse your dish with flavor. Collecting the clam juice is just as important as steaming the clams, and it’s crucial to do it properly to ensure a delicious final product. There are several straining techniques to choose from, each with its own unique flavor profile.
One popular method is to use a cheesecloth or fine-mesh sieve to strain the clam juice. This results in a clear, smooth liquid that’s perfect for soups and stews. Another option is to use a colander or strainer with larger holes to capture some of the clam meat and add a more robust flavor to the juice. Whatever method you choose, be sure to discard any sand or sediment that may have accumulated at the bottom of the pot. Now that you have collected the clam juice, it’s time to adjust the flavor to your liking.
Adjusting the Flavor
To truly bring out the flavors of your dish, you’ll want to add a few key ingredients to your collected liquid. Start by adding some spices to the juice. I recommend using a combination of celery salt, black pepper, and garlic powder. You can also experiment with other spices, such as cumin or paprika, to give your clam juice a unique flavor.
When adjusting the flavor of your clam juice, it’s important to pay attention to the ratios of the ingredients. Start with a small amount of each spice and taste as you go. You can always add more, but it’s difficult to remove spices once they’ve been added.
Once you’ve found the perfect combination of spices, store your clam juice in an airtight container in the refrigerator for up to a week.
Storing Your Clam Juice
Don’t let your hard work go to waste by forgetting to store your deliciously seasoned clam juice in an airtight container in the refrigerator. Clam juice must be stored properly to maintain its freshness and flavor.
You can store it in a glass jar or a plastic container with a tight-fitting lid. The clam juice can be refrigerated for up to three days. However, if you want to extend its shelf life, you can freeze it for up to six months.
Freezing options are available if you wish to store your clam juice for a longer period. You can store it in an airtight container or a freezer bag. Before freezing, make sure to remove excess air from the bag or container to prevent freezer burn.
When ready to use, thaw it in the refrigerator or place the container in a bowl of warm water until it reaches room temperature. Now that you know how to store your clam juice, let’s move on to using it in cocktails.
Using Clam Juice in Cocktails
Get ready to add a new twist to your cocktail game by infusing your drinks with the unique flavor of briny ocean goodness. Using clam juice in cocktails might sound strange, but it adds a deliciously savory taste to your drinks.
Mixology techniques such as rimming your glass with Old Bay seasoning or using a smoked salt rim can enhance the flavor even more.
When it comes to flavor combinations, clam juice pairs well with tomato juice for a classic Bloody Mary or with citrus for a refreshing and tangy cocktail. Try mixing clam juice with grapefruit juice, lime juice, and tequila for a delicious twist on a Paloma.
The possibilities are endless, and experimenting with different ingredients can lead to some surprisingly delicious drinks.
Now that you have some ideas for using clam juice in cocktails, let’s talk about using it in cooking.
Using Clam Juice in Cooking
Cooking with clam juice is like adding a splash of ocean flavor to your dish, giving it a subtle but distinct taste that elevates the overall experience. Not only does it add a unique flavor, but it also has some health benefits.
Clam juice is low in fat, high in protein, and a good source of vitamins and minerals. Here are three ways to incorporate clam juice in your cooking:
-
Use clam juice as a broth base: Clam juice can be used as a base for soups and stews to give your dish a rich, savory flavor. Use it as a substitute for chicken or vegetable broth for a seafood twist.
-
Add clam juice to sauces: Add a splash of clam juice to your pasta sauce or stir-fry sauce for a briny, salty flavor that complements the other ingredients. It also helps to add a little extra liquid to thin out thick sauces.
-
Use clam juice in seafood dishes: Clam juice pairs well with other seafood such as shrimp, scallops, and fish. Use it to poach seafood or as a marinade to infuse the flavors. It also works well as a steaming liquid for clams and mussels.
Incorporating clam juice in your cooking not only adds a unique flavor but also provides some health benefits. It’s a great way to add some extra protein and nutrients to your dishes while keeping it low in fat. Give it a try and see how it elevates your cooking techniques to the next level.
Frequently Asked Questions
Can you use canned clams instead of fresh ones for making clam juice?
Yes, canned clams can be used instead of fresh ones for making clam juice. However, the flavor comparison may not be as good as with fresh clams.
What is the nutritional value of clam juice?
As a health-conscious individual, I appreciate the numerous health benefits of clam juice. It’s low in calories, high in protein, and contains essential vitamins and minerals. Culinary uses of clam juice include adding depth of flavor to seafood dishes and cocktails. Try incorporating it in your recipes for a nutrient boost.
Can you freeze clam juice for later use?
Yes, you can freeze clam juice for later use. To do this, simply pour the leftover clam juice into a freezer-safe container and place it in the freezer. When ready to use, thaw it and try using it in recipes like chowders or seafood stews.
How long can you keep homemade clam juice in the refrigerator before it goes bad?
I once kept homemade clam juice in the fridge for a week, and it went bad. To avoid this, store it in an airtight container and consume within three days. Keep it in the coldest part of your fridge.
Is it possible to make clam juice without a steamer?
Yes, alternative methods to using a steamer include boiling shucked clams in water or using canned clams. Flavor variations can be achieved with added spices or by using different types of clams.
Conclusion
Well folks, that’s how you make clam juice! It’s a labor-intensive process, but completely worth it for the deliciously briny flavor that you’ll get.
As a lover of seafood, I can tell you that this juice is the perfect addition to any dish that needs a little extra oomph. It’s like a flavor bomb that will take your cooking to the next level.
One thing I love about making clam juice is the satisfaction of knowing that I made it myself. It’s a bit like catching a fish and cooking it on the spot – there’s a sense of pride that comes with knowing exactly where your food comes from.
Plus, the freshness of the clams really shines through in the final product. So, give it a try and let me know what you think!
Cindy thoroughly researches juicing trends, techniques, and recipes to provide readers with practical advice and inspiration. Her writing style is accessible, engaging, and designed to make complex concepts easy to understand. Cindy’s dedication to promoting the advantages of juicing shines through her work, empowering readers to make positive changes in their lives through the simple act of juicing.

Creating cherry juice from scratch may seem overwhelming, but believe me, it is simpler than you may think and the final product is truly rewarding.
Not only is homemade cherry juice delicious, it’s also packed with health benefits that you won’t find in store-bought versions.
First off, let’s talk about the benefits of cherry juice. Cherries are loaded with antioxidants and anti-inflammatory compounds that have been shown to reduce inflammation, ease arthritis pain, and even improve sleep.
Plus, cherry juice is a natural source of melatonin, which can help regulate your sleep cycle. So not only will making your own cherry juice save you money, it’ll also give you a health boost that you won’t find in any other store-bought juice.
Ready to get started? Let’s dive in.
Key Takeaways
- Homemade cherry juice is packed with health benefits not found in store-bought versions, such as antioxidants, anti-inflammatory compounds, and natural melatonin.
- Ripe cherries must be washed thoroughly, cooked, and strained to make cherry juice, and adding vanilla extract or lemon juice can enhance its taste.
- Cherry juice can be mixed with different flavors, stored in glass bottles away from sunlight, and used in various recipes or skincare routines.
- Cherry juice has health benefits such as reducing muscle damage and inflammation, relieving joint pain and stiffness, and being a good source of vitamins and minerals, but it is important to avoid products with added sugars or preservatives.
Gather Your Ingredients
You’ll need to grab all the necessary ingredients for making delicious cherry juice. First and foremost, you’ll need fresh cherries. Depending on the recipe you choose, you may also need water, sugar, lemon juice, and other flavorings.
It’s important to choose ripe cherries that are sweet and juicy for the best flavor and health benefits. Speaking of health benefits, cherry juice is packed with nutrients and antioxidants. It’s been shown to reduce inflammation, support heart health, and even improve sleep.
Plus, there are endless variations of cherry juice recipes to try, from simple blends to more complex cocktails. But before you can start mixing, you’ll need to wash and prepare your cherries.
Wash and Prepare Your Cherries
Once you’ve gathered your fresh cherries, it’s time to rinse them thoroughly in a colander under cool running water. This is a crucial step to ensure that your cherry juice is free from dirt, debris, and pesticides. Here’s how to wash and prepare your cherries:
- Sort through your cherries and remove any stems or leaves that may still be attached.
- Place the cherries in a colander and rinse them under cool running water for a few minutes.
- Use your fingers to gently rub the cherries to remove any dirt or debris that may be stuck to them.
- Once the cherries are clean, place them on a clean towel and pat them dry with another towel.
Cherry juice has numerous health benefits, including reducing inflammation, improving sleep quality, and aiding in muscle recovery after exercise. With a few simple steps, you can make your own cherry juice at home.
Now that your cherries are clean and ready to go, it’s time to move on to the next step: cooking your cherries.
Cook Your Cherries
Now that the cherries are clean and prepped, it’s time to start cooking them to release their natural sweetness and flavor. There are different cooking techniques you can use to make cherry juice, depending on your preferences and the recipe you’re following. One popular method is to simmer the cherries in water and sugar until they break down and form a thick syrup. This technique works well for recipes that call for a concentrated juice or syrup, such as cherry cordials or cherry glazes for meats.
Another option is to use a slow cooker or crockpot to cook the cherries over low heat for several hours. This technique is ideal for recipes that require a milder, more subtle flavor, such as cherry lemonade or cherry-infused water. If you prefer a more intense flavor, you can also roast the cherries in the oven until they caramelize and become soft and juicy. Whatever cooking technique you choose, make sure to follow the recipe instructions carefully to ensure the best results.
To strain and cool your cherry mixture, you will need a fine-mesh sieve or a cheesecloth. Gently pour the cooked cherries into the sieve or cheesecloth and press down with a spoon to extract as much juice as possible. Discard the solids and let the juice cool to room temperature before transferring it to a container with a lid. You can store the cherry juice in the fridge for up to a week, or freeze it for longer storage. Enjoy your homemade cherry juice as a refreshing drink, or use it as a base for cocktails, smoothies, and other delicious beverages.
Strain and Cool Your Cherry Mixture
Now that I’ve cooked my cherries and extracted the juice, it’s time to strain and cool the mixture.
Choosing the right strainer is crucial to ensure that all the pulp and seeds are removed from the juice. I prefer using a fine mesh strainer to achieve a smooth consistency.
Once strained, it’s important to let the juice cool to room temperature before storing it in the refrigerator.
Choosing the Right Strainer
To get the most juice out of your cherries, it’s important to use a fine mesh strainer, like a chinois, which will catch any remaining pulp or bits of skin. When choosing the right strainer, consider the following:
-
Nylon vs. metal: Nylon strainers are cheaper and easier to find, but metal strainers are more durable and won’t retain odors or flavors.
-
Mesh size vs. pulp retention: A finer mesh will catch more pulp and result in a clearer juice, but it may take longer to strain. A coarser mesh will let more pulp through, but will result in a cloudier juice.
-
Straining techniques: Pressing the cherries through the strainer will yield more juice, but may also result in more pulp and a cloudier juice. Pouring the mixture through the strainer will result in a clearer juice, but may take longer and require more effort.
-
Using cheesecloth or coffee filters: If you want an even clearer juice, you can strain it through cheesecloth or a coffee filter. This will remove any remaining pulp or sediment.
Once you’ve chosen the right strainer and strained your cherry mixture, it’s time to cool it down before serving.
Cooling Your Cherry Mixture
After straining, it’s essential to let the cherry mixture cool to room temperature before adding it to your recipe. This step is important because adding hot cherry juice to a recipe could cause it to curdle or separate.
Not to mention, it’s easier to handle and mix the juice when it’s at room temperature.
When it comes to cherry juice recipes, there are many benefits and risks to consider. Cherries are high in antioxidants and have anti-inflammatory properties, which can help reduce inflammation and improve overall health. However, cherries are also high in sugar and should be consumed in moderation, especially for those with diabetes or other health concerns.
It’s important to weigh the benefits and risks before incorporating cherry juice into your diet.
To add flavorings to your cherry juice, you can consider adding honey or lemon juice. These ingredients can enhance the taste of the juice and provide additional health benefits.
Add Flavorings
Now that I’ve strained and cooled my cherry mixture, it’s time to add some flavorings! Choosing the right flavorings is crucial to creating a delicious cherry juice.
I like to experiment with different combinations. For example, adding a touch of vanilla extract or a squeeze of lemon juice can make a big difference.
Choosing the Right Flavorings
Picking the perfect flavorings is like finding the cherry on top of your sundae. It’s the finishing touch that takes your cherry juice from good to great. When it comes to flavoring options, there are countless choices available. From spices like cinnamon and nutmeg to herbs like basil and mint, the possibilities are endless.
However, when selecting your flavorings, there are a few things to consider:
-
Taste testing: Before adding any flavorings to your cherry juice, it’s important to taste them individually. This way, you can see how they might interact with the natural sweetness of the cherries. Some flavorings may overpower the cherry taste, while others may complement it perfectly.
-
Purpose: Think about why you want to add flavorings to your cherry juice. Are you looking to add depth and complexity to the flavor, or simply enhance the natural sweetness of the cherries? Once you have a clear purpose in mind, it will be easier to select the right flavorings.
-
Seasonality: Certain flavorings work better in different seasons. For example, cinnamon and nutmeg are perfect for fall and winter, while fresh herbs like basil and mint are better suited for spring and summer.
-
Quantity: When it comes to adding flavorings, less is often more. Start with a small amount and gradually add more until you achieve the desired taste. You can always add more, but you can’t take it away.
Choosing the right flavorings is an important step in making delicious cherry juice. Once you’ve selected your flavorings, the next step is to experiment with different combinations to find the perfect balance of taste.
Experimenting with Different Combinations
Get creative with your flavorings and mix and match different combinations to find the perfect blend for your taste buds! Cherry juice, on its own, can be quite tart and overpowering for some. However, by experimenting with different flavor combinations, you can come up with a delicious and unique drink that will be perfect for any occasion.
One way to mix up your cherry juice is by adding other beverages to it. For example, mixing cherry juice with lemonade or limeade can create a refreshing summer drink. Alternatively, you could mix cherry juice with tea for a warm and cozy winter beverage. To help get you started, here is a table of some different combinations to try:
| Beverage | Cherry Juice Ratio | Flavor Profile |
|---|---|---|
| Lemonade | 1:1 | Tart and refreshing |
| Limeade | 1:1 | Citrusy and sweet |
| Tea | 1:2 | Warm and cozy |
| Ginger Ale | 1:3 | Spicy and sweet |
With so many different cherry juice flavor experiments to try, the possibilities are endless! Once you have found your perfect blend, it’s important to store your cherry juice properly to ensure it stays fresh and delicious.
Store Your Cherry Juice
Once the cherry juice has been strained and bottled, it’s a good idea to keep it in the fridge to ensure it stays fresh. Remember, time flies like an arrow, but fruit flies like a banana, so be sure to keep the lid on tight!
Here are some preservation methods that can help extend the shelf life of your cherry juice:
-
Use glass bottles: Plastic bottles can release chemicals into the juice over time, affecting its taste and quality. Glass bottles, on the other hand, are non-reactive and can preserve the flavor and nutrients of the juice for longer periods.
-
Keep it away from sunlight: Sunlight can cause the juice to spoil faster due to oxidation. Store your cherry juice in a cool, dark place to prevent exposure to light.
-
Freeze in ice cube trays: If you have excess cherry juice, freeze it in ice cube trays. These cubes can be added to smoothies or juices for added flavor and health benefits.
-
Use preservatives: If you want to extend the shelf life of your cherry juice even further, consider using natural preservatives like lemon juice or honey. These ingredients can help prevent bacterial growth and keep your juice fresh for longer.
By following these preservation methods, you can ensure that your cherry juice stays fresh and flavorful for as long as possible. Now, it’s time to enjoy your delicious creation!
Enjoy Your Cherry Juice
Now that you’ve stored your cherry juice properly, it’s time to enjoy it! There are numerous ways to enjoy cherry juice, both as a drink and as an ingredient in recipes.
One of my favorite ways to drink cherry juice is to simply pour a glass of it over ice and add a splash of sparkling water for a refreshing spritzer. You can also mix cherry juice with other fruit juices, such as orange or pineapple, to create a delicious and healthy blend.
Aside from being a tasty drink, cherry juice also offers a variety of health benefits. It’s high in antioxidants, which can help protect your cells from damage caused by free radicals. Additionally, cherry juice has anti-inflammatory properties, which may help reduce inflammation in the body.
If you’re looking for ways to incorporate cherry juice into your diet beyond just drinking it, there are plenty of tasty recipes that use it as an ingredient, such as cherry smoothies, cherry BBQ sauce, and cherry chia seed pudding.
In the next section, we’ll dive deeper into the health benefits of cherry juice.
Health Benefits of Cherry Juice
I’m excited to discuss the health benefits of cherry juice with you. Cherry juice is packed with antioxidants and anti-inflammatory properties that help reduce inflammation in the body.
In addition, it contains essential vitamins and minerals that contribute to overall health and wellness.
Let’s dive in and explore these key points in greater detail.
Antioxidants and Anti-Inflammatory Properties
Cherry juice isn’t just delicious; it’s also packed with antioxidants and anti-inflammatory properties that can benefit your health and well-being. As an athlete, incorporating cherry juice into your daily routine can be especially helpful.
The antioxidants in cherry juice help reduce muscle damage and inflammation, leading to faster recovery times and improved performance. Additionally, cherry juice’s anti-inflammatory properties have been shown to reduce joint pain and stiffness, making it an excellent option for those with arthritis or other inflammatory conditions.
So, whether you’re an athlete or just looking to improve your overall health, adding cherry juice to your diet can provide a wide range of benefits. Moving on to the next section, let’s talk about the essential vitamins and minerals found in cherry juice.
Vitamins and Minerals
You’ll be thrilled to know that incorporating cherry juice into your daily routine can provide you with essential vitamins and minerals that can benefit your overall health and well-being.
Cherry juice is a good source of vitamin C, which can help boost your immune system and improve skin health. It also contains vitamin A, which is important for maintaining healthy vision and skin. Additionally, cherry juice provides minerals such as potassium, which is essential for maintaining healthy blood pressure levels, and copper, which plays an important role in the formation of red blood cells.
It’s important to ensure that you’re getting enough vitamins and minerals in your daily intake, and cherry juice is a great way to do that. However, it’s important to note that not all cherry juice products are created equal. Some juices may have added sugars or preservatives, which can negate the health benefits.
In the next section, we’ll explore different variations of cherry juice that you can make at home to ensure that you’re getting the most out of this delicious drink.
Cherry Juice Variations
There are various ways to jazz up your cherry juice, such as adding a splash of lime or mixing it with sparkling water. Here are some ideas to add some excitement to your cherry juice:
-
Cherry Juice Cocktails: Mix your cherry juice with your favorite liquor and create a refreshing cocktail. Some popular options include mixing it with vodka, rum, or tequila. You can also add some soda or tonic water to give it a fizzy kick.
-
Cherry Juice for Skincare: Cherry juice is rich in antioxidants, making it a great addition to your skincare routine. You can use it as a toner or mix it with other natural ingredients like honey and yogurt to create a face mask. It’s also great for hydrating your skin and reducing inflammation.
So, next time you pour yourself a glass of cherry juice, try one of these variations to mix things up and enjoy the health benefits in a fun and delicious way.
Frequently Asked Questions
Can cherry juice be made with frozen cherries?
Like a frozen tundra, frozen cherries offer the convenience of year-round availability but may lack the juiciness of fresh ones. To store them, seal in an airtight container and freeze up to 6 months. Yes, you can make cherry juice with frozen cherries, but they may require more sugar and water to achieve the desired consistency.
How long does it take to cook the cherries?
Cooking time for cherries depends on the preparation method. If boiling, it can take up to 30 minutes, while simmering can take 10-15 minutes. Once soft, strain the cherries for juice.
Can sugar be substituted with honey or another sweetener?
Honey is the holy grail of natural sweeteners for cherry juice. Unlike sugar, honey has antibacterial properties that can boost your immune system. It’s a healthier option that also enhances the flavor of the juice.
How long does cherry juice last in the fridge?
Cherry juice lasts about 5-7 days in the fridge. Signs of spoilage include a sour smell and an off taste. Leftover juice can be used for smoothies, cocktails, or as a marinade for meat. To extend its shelf life, consider freezing the cherry juice in ice cube trays and thawing portions as needed for future use. For those wondering how long tart cherry juice lasts compared to sweeter varieties, it generally follows the same timeframe of 5-7 days in the fridge. Always ensure to store it in an airtight container to preserve its freshness.
Can cherry pits be left in the mixture while cooking?
It is not recommended to cook with cherry pits as they contain small amounts of cyanide which can be toxic. However, cherry pits have potential health benefits such as reducing inflammation and promoting better sleep when consumed in small amounts.
Conclusion
Well, there you have it, folks – a simple and easy recipe for making delicious cherry juice.
Not only is it a tasty drink, but it also has numerous health benefits. Did you know that a cup of cherry juice contains the equivalent of 90-100 cherries? That’s a lot of antioxidants and anti-inflammatory compounds packed into one cup!
Research has shown that cherry juice can aid in reducing inflammation, improving sleep quality, and even reducing muscle soreness after a workout. So why not try making your own cherry juice at home and reap the benefits?
With just a few ingredients and a little bit of time, you can have a refreshing and healthy drink to enjoy any time of the day.
Cindy thoroughly researches juicing trends, techniques, and recipes to provide readers with practical advice and inspiration. Her writing style is accessible, engaging, and designed to make complex concepts easy to understand. Cindy’s dedication to promoting the advantages of juicing shines through her work, empowering readers to make positive changes in their lives through the simple act of juicing.

I really adore clamato juice, and nothing beats the flavor of a freshly prepared glass of this zesty and delicious beverage. Creating clamato juice from scratch is actually quite simple, and it’s a wonderful way to impress your family and friends with your cooking prowess.
In this article, I’ll take you through the step-by-step process of making clamato juice, from the ingredients you’ll need to the equipment required and the tips and tricks for getting the perfect taste.
To get started, you’ll need a few basic ingredients, including tomato juice, clam juice, Worcestershire sauce, hot sauce, and lime juice. You’ll also need some equipment, such as a blender or food processor, a fine mesh strainer, and a large mixing bowl.
Making clamato juice is a fun and rewarding experience, and I can’t wait to show you how it’s done!
Key Takeaways
- Making clamato juice at home is easy and requires basic ingredients like tomato juice, clam juice, Worcestershire sauce, hot sauce, and lime juice.
- Experiment with different flavors and spices to find the perfect balance, and adjust the seasoning frequently to ensure that the flavors are well balanced.
- Clamato juice is a good source of vitamins A and C, as well as potassium, and is relatively low in calories and fat.
- Homemade clamato juice can be enjoyed on its own or used as a base for cocktails like a Bloody Mary.
Ingredients needed to make clamato juice
You’ll need some key ingredients to whip up a delicious batch of clamato juice. First and foremost, you’ll need clam juice and tomato juice. The clam juice gives the drink its distinct umami flavor, while the tomato juice adds a sweet and tangy taste. If you don’t have clam juice on hand, you can use canned clams, but keep in mind that the taste may not be as authentic.
For an extra kick, you can add some hot sauce or Worcestershire sauce to the mix. Alternative ingredients can be used to add some variety to your clamato juice. Some people like to add celery salt, black pepper, or even horseradish to their drinks. These ingredients can give the juice a bit more spice and depth.
As for nutritional value, clamato juice is a good source of vitamins A and C, as well as potassium. It’s also relatively low in calories and fat, making it a healthy option for those watching their weight. To move on to the next step, you’ll need some equipment to help you prepare your clamato juice.
Equipment needed
All you need is a blender and a strainer to achieve the perfect combination of tomato, clam, and spices. These essential tools are readily available in any kitchen, making the process of creating your own clamato juice a breeze.
When it comes to the blender, the best brands to use are Vitamix and Blendtec, as they’re powerful enough to blend all the ingredients smoothly without any lumps. For the strainer, a fine mesh one is recommended to ensure that the juice obtained is smooth and free of any particles.
Once you have your blender and strainer ready, creating your own clamato juice is a simple process. First, you need to blend the tomatoes, clam juice, and spices together until you get a smooth consistency. Next, you strain the mixture using the fine mesh strainer to remove any solids and create a smooth liquid. After straining, pour the clamato juice into a clean container and refrigerate it until you’re ready to serve. You can customize the flavor by adjusting the amount of spices or by adding lemon or lime juice for an extra kick. If you’re also interested in learning how to make refreshing tropical drinks, you can check out how to prepare coconut juice, which involves cracking open a coconut and collecting the water inside for a naturally sweet beverage.
With this easy-to-follow process, making your own clamato juice at home has never been simpler.
Step-by-step instructions
Okay, let’s get started with making our clamato juice! First, I’ll mix together the clam juice, tomato juice, and all the spices in a large pitcher.
Then, I’ll use a blender to thoroughly blend the mixture until it’s smooth.
Next, I’ll strain the juice through a fine mesh strainer to remove any pulp or seeds.
Finally, I’ll store the juice in a tightly sealed container in the refrigerator until it’s ready to be served.
This process is simple but yields a delicious, homemade clamato juice that’s perfect for any occasion.
Mixing the ingredients
Once you’ve gathered all the necessary ingredients, it’s time to start mixing them together to create the perfect blend of sweet and savory flavors in your homemade clamato juice. There are many mixing techniques you can use to achieve the desired taste, but the most important thing is to experiment with different flavors until you find the perfect balance.
To start, combine the clam juice and tomato juice in a large pitcher. Stir the mixture together until it’s well-blended and smooth.
Next, add the Worcestershire sauce, hot sauce, and lime juice to the pitcher, and mix everything together again. Take a taste of the mixture and adjust the seasonings as needed, adding more hot sauce or lime juice if you prefer a spicier or tangier drink.
Once you’re happy with the flavor, move on to the next step of blending the mixture until it’s completely smooth and frothy.
Blending the mixture
As you start blending the mixture, imagine you’re crafting a masterpiece – the smooth and frothy texture elevating the flavors to new heights.
Blending techniques are crucial to achieving the perfect consistency for your clamato juice. You can use a blender, food processor, or immersion blender depending on your preference.
When blending, experiment with different flavors to find the perfect balance. Add more clam juice for a brinier taste, or more tomato juice for a sweeter profile. Don’t be afraid to add spices like cumin, chili powder, or celery salt to give your clamato juice a unique twist.
Once you’ve achieved the desired consistency and flavor, it’s time to move on to the next step – straining the juice.
Straining the juice
Now that we’ve blended the mixture, it’s time to move on to the next step in making homemade clamato juice – straining the juice. This step is crucial if you want to remove any pulp or sediment from the final product.
To do this, I like to use a fine mesh strainer to ensure that the juice is as smooth and clear as possible. To strain the juice, simply place the strainer over a large bowl or pitcher and pour the blended mixture through it. You may need to use a spatula or spoon to help push the juice through the strainer and remove any excess pulp.
Once you’ve strained all of the juice, discard any remaining pulp and sediment in the strainer. And voila – you now have freshly strained clamato juice that’s ready to be enjoyed!
Now that we have strained the juice, it’s time to move on to the final step – storing the juice. To ensure that your homemade clamato juice stays fresh and flavorful, it’s best to store it in an airtight container in the refrigerator. This will help preserve the taste and quality of the juice for up to a week.
So let’s grab a pitcher or bottle and get ready to store our delicious homemade clamato juice!
Storing the juice
To ensure your homemade clamato juice remains fresh and flavorful, store it in an airtight container in the refrigerator. Preservation methods are important to keep in mind when making your own clamato juice.
The best containers to use are glass or plastic bottles with tight-fitting lids. It’s also important to store the juice in the refrigerator as soon as possible after making it to prevent bacterial growth.
When storing the juice, make sure to leave some room at the top of the container for expansion, especially if using plastic bottles. It’s also a good idea to label the container with the date the juice was made to keep track of its freshness.
If stored properly, homemade clamato juice can last up to a week in the refrigerator. To take your clamato juice to the next level, there are some tips and tricks for perfecting it.
Tips and tricks for perfecting your clamato juice
I’ve found that adjusting the seasoning is crucial for achieving the perfect balance of flavors in my clamato juice. Sometimes I’ll add a little extra celery salt or Worcestershire sauce to give it an extra kick.
Adding citrus, like a squeeze of fresh lime or lemon, can also brighten up the flavor and add a refreshing twist. And if I’m feeling adventurous, I’ll experiment with different spices, like cumin or smoked paprika, to add a unique depth of flavor to my clamato juice.
Adjusting the seasoning
As you’re adjusting the seasoning, you’ll want to taste the clamato juice frequently to ensure that the flavors are well balanced. Depending on your preference, you can make your clamato juice either spicy or mild. To make it spicy, you can add a few dashes of hot sauce or a pinch of cayenne pepper. If you prefer it mild, you can omit these ingredients altogether.
Another important factor in adjusting the seasoning is determining whether or not to add salt. Some people prefer their clamato juice to have a salty taste, while others find it too overpowering. If you do decide to add salt, start with a small amount and gradually add more until you reach your desired level of saltiness.
Once you’ve adjusted the seasoning to your liking, you can move on to the next step of adding citrus for extra flavor.
Adding citrus for extra flavor is a great way to enhance the taste of your clamato juice. In the next section, we’ll discuss how to add citrus and which types of fruits work best.
Adding citrus for extra flavor
You can really enhance the flavor of your clamato by adding citrus – just imagine the zesty burst of flavor it’ll bring to your taste buds! Citrus combinations are a great way to add depth and complexity to your clamato juice.
Some popular flavor pairings include lime, lemon, and grapefruit. Lime is a classic choice for adding a tangy kick to your clamato. You can either squeeze the juice directly into the juice or cut the lime into wedges and use them as a garnish.
Lemon adds a slightly sweeter note and pairs well with the seafood flavor of the clamato. Grapefruit is a bolder choice, but its bitterness can balance out the salty and savory components of the clamato. Experiment with different citrus combinations to find your perfect match.
Next, let’s talk about experimenting with different spices to take your clamato to the next level.
Experimenting with different spices
Feeling adventurous in the kitchen? Why not spice up your clamato with some unexpected flavors like cumin or smoked paprika? Adding different spices to your clamato juice can create a unique and delicious flavor profile that will impress your guests.
Here are three spice combinations to try in your next batch of clamato juice:
-
Cumin and Lime – the warm, earthy flavor of cumin pairs perfectly with the tartness of lime juice. Add a pinch of salt to bring out the flavors even more.
-
Smoked Paprika and Garlic – for a smoky, savory twist on your traditional clamato juice, try adding a dash of smoked paprika and a clove of minced garlic. This combination is perfect for a Bloody Mary-style drink.
-
Curry Powder and Coconut Milk – for a tropical take on your clamato juice, mix in some curry powder and coconut milk. The sweetness of the coconut milk will balance out the boldness of the curry powder, creating a delicious and unexpected flavor.
Once you’ve added your chosen spices, give your clamato juice a taste test. Adjust the seasonings as needed until you’ve found the perfect balance.
With these unique spice combinations, your clamato juice will be the talk of the party. Ready to try even more variations on the classic clamato juice recipe? Let’s explore some exciting twists on the traditional recipe that will take your clamato juice to the next level.
Variations on the classic clamato juice recipe
I love experimenting with different variations of the classic clamato juice recipe to add some spice and excitement to my drink. One of my go-to variations is spicy clamato juice, which is perfect for those who love a little kick in their drink.
Another fun option is clamato juice with tequila, which is a perfect drink to enjoy during happy hour or a night out with friends.
Lastly, for those who prefer a more refreshing taste, clamato juice with beer is a great option to try out.
Spicy clamato juice
Get ready for a kick of heat with this spicy clamato juice recipe! If you’re someone who loves a good spicy cocktail, then this one is definitely for you.
Here are some key ingredients and steps to make this delicious drink:
- Clamato juice
- Hot sauce
- Worcestershire sauce
- Lime juice
- Celery salt
Start by adding a couple of dashes of hot sauce to your glass of Clamato juice. Then, add a splash of Worcestershire sauce and a squeeze of lime juice. Finally, sprinkle some celery salt over the top and give it all a good stir.
Once you’ve made your spicy clamato juice, it’s time to think about what food pairings would work well with this drink. Some great options include spicy seafood dishes, grilled meats, or even a spicy vegetarian chili.
And if you’re looking for other cocktail recipes to try, be sure to check out the next section on Clamato juice with tequila.
Clamato juice with tequila
When you’re in the mood for a tasty and refreshing cocktail, add a splash of tequila to your Clamato for a zesty twist that will leave you craving more. Tequila pairing with Clamato juice is a match made in heaven. The smoothness and richness of tequila blend perfectly with the tangy and spicy flavor of Clamato juice. The combination of tomato juice, spices, and tequila creates a refreshing and invigorating drink that is sure to impress your guests.
To make this delicious cocktail, start by filling a glass with ice and adding a shot of your favorite tequila. Then, pour in Clamato juice until the glass is almost full. To add even more flavor, sprinkle some salt and pepper on top and stir. As for garnish ideas, sliced jalapeños, lime wedges, and celery stalks are great options that will add an extra kick to your drink.
Now that you know how to make a Clamato juice with tequila, it’s time to move on to the next section and learn about the perfect pairing of Clamato juice with beer. Let’s explore how this combination can take your cocktail game to the next level.
Clamato juice with beer
Ready to take your cocktail game to the next level? Mix up a delicious Clamato and beer combo that will leave your taste buds begging for more.
This beer pairing is perfect for those who love a savory and slightly spicy flavor profile. The Clamato juice adds a unique twist to the classic beer, making it a refreshing and exciting drink option.
When it comes to choosing the right beer for your Clamato juice, there are a few options to consider. A light Mexican lager or pilsner works well, as it won’t overpower the Clamato juice’s flavor profile. Alternatively, a crisp and refreshing wheat beer or a hoppy IPA can also complement the savory taste of the Clamato juice.
Experiment with different beer styles to find your perfect flavor combination.
Ready to serve up this delicious drink? Keep reading for some serving suggestions that will take your Clamato and beer combo to the next level.
Serving suggestions
For a refreshing twist, try serving your clamato juice over ice with a slice of lime. This simple addition can elevate the taste and presentation of your drink.
But why stop there? Here are some spice pairings and presentation ideas to make your clamato juice stand out:
- Sprinkle in some celery salt or Old Bay seasoning for a savory kick.
- Add a few dashes of hot sauce for a spicier version.
- Serve in a chilled glass rimmed with Tajin seasoning for a Mexican-inspired twist.
- Garnish with a skewered shrimp or a slice of cucumber for a fancy touch.
- Mix in some tequila and serve in a salt-rimmed glass for a delicious and boozy cocktail.
By incorporating these ideas, you can impress your guests and take your clamato juice to the next level.
And don’t forget, besides being tasty, clamato juice also has health benefits. Let’s explore them in the next section.
Health benefits of clamato juice
I’m really excited to talk about the health benefits of clamato juice. Not only is it a delicious drink, but it’s also packed with essential vitamins and minerals.
Plus, it’s low in calories, making it a great choice for anyone trying to watch their weight.
Some studies even suggest that there may be potential health benefits from the combination of clams and tomatoes in this unique beverage.
Rich in vitamins and minerals
You’ll be happy to know that clamato juice isn’t just delicious, but it’s also rich in vitamins and minerals.
In fact, just one cup of clamato juice provides over 50% of your daily recommended intake of vitamin C. It’s also a great source of potassium, magnesium, and vitamin A.
These essential nutrients are necessary for maintaining healthy blood pressure, strong bones, and healthy vision.
One of the benefits of drinking clamato juice is that it’s widely available in grocery stores and restaurants. It’s an easy way to incorporate vitamins and minerals into your diet without having to spend time preparing meals.
However, it’s important to note that clamato juice does contain added salt, which can be a drawback for those with high blood pressure.
Nonetheless, overall, clamato juice is a healthy and tasty option to consider. Plus, it’s low in calories, making it a great choice for those looking to maintain a healthy weight.
Low in calories
Don’t overlook the fact that this tasty beverage is also low in calories, making it a great addition to your diet if you’re trying to watch your weight. As someone who’s always looking for healthy alternatives, I appreciate that clamato juice provides nutritional benefits without adding unnecessary calories to my daily intake.
With only around 50 calories per serving, clamato juice is a refreshing and guilt-free way to quench your thirst. In addition to being low in calories, clamato juice also contains a variety of vitamins and minerals that are essential to a healthy diet.
This delicious drink is a good source of vitamin C, which supports a healthy immune system, and vitamin A, which promotes healthy vision and skin. It also contains potassium, an electrolyte that helps regulate blood pressure and supports healthy muscle function.
So, not only is clamato juice a tasty beverage, but it also provides important nutritional benefits. Speaking of benefits, let’s explore the potential health benefits of clam and tomato in the next section.
Potential health benefits of clam and tomato
Although clamato juice is low in calories, it also has potential health benefits due to its main ingredients: clam and tomato. Clams are a great source of protein, vitamins, and minerals, including iron, zinc, and vitamin B12. Tomatoes are rich in antioxidants, particularly lycopene, which has been linked to a reduced risk of heart disease and certain types of cancer.
Aside from its nutritional value, clamato juice also has culinary applications. Its unique flavor profile makes it a popular ingredient in cocktails, particularly the classic caesar cocktail. It can also be used as a base for soups, marinades, and dressings. Additionally, some people use it as a replacement for tomato juice in their favorite recipes to add a hint of umami flavor from the clams.
Transitioning to the next section, the history of the caesar cocktail and clamato juice is just as fascinating as its potential health benefits and culinary uses.
History of the Caesar cocktail and clamato juice
I’ve always been fascinated by the origins of cocktails, and the Caesar is no exception. As a Canadian, I know firsthand how popular this drink is in my home country. But how did it come to be?
I’m excited to explore the history of the Caesar, including its evolution over time and the key factors that have contributed to its enduring popularity.
Origins of the Caesar
You may be surprised to learn that the Caesar, a popular cocktail made with clamato juice, was actually invented in Canada in 1969. The origins of the Caesar can be traced back to the Italian dish, spaghetti alle vongole, which is spaghetti with clams.
The creator of the Caesar, Walter Chell, was tasked with creating a new drink to celebrate the opening of a new restaurant in Calgary. He drew inspiration from the dish and combined clam juice, tomato juice, Worcestershire sauce, and vodka to create the now-iconic cocktail.
The Caesar’s origins have cultural significance in Canada, as it has become a national drink and a staple at many Canadian events and gatherings. The drink even has its own National Caesar Day, celebrated annually on the Thursday before the May long weekend.
The Caesar has also inspired various spin-offs, such as the Bloody Caesar, which uses tomato juice instead of clamato juice. With its unique blend of flavors and Canadian roots, the Caesar has become a beloved cocktail in Canada and beyond. But how did it become so popular in Canada?
Popularity in Canada
Now that we know the origins of the Caesar, let’s talk about its popularity in Canada. As a Canadian myself, I can attest to the fact that the Caesar is a beloved cocktail in our country. It’s practically a staple at any social gathering or brunch outing.
One of the key ingredients that sets it apart from a regular Bloody Mary is clamato juice. Clamato juice is a blend of tomato juice and clam broth, and it’s a popular ingredient not just in cocktails, but also in Canadian cuisine. It’s often used as a base for seafood soups and chowders, and it’s even been incorporated into some popular snack foods like potato chips.
But when it comes to the Caesar, clamato juice adds a unique depth of flavor that can’t be replicated with just tomato juice alone. It’s the perfect complement to the vodka, Worcestershire sauce, hot sauce, and other spices that make up the Caesar’s signature flavor profile.
As clamato juice has become more widely available outside of Canada, the Caesar has gained a bit of a following in other parts of the world as well. But how has the recipe evolved over time? Let’s take a closer look.
Evolution of the recipe
Over the years, the Caesar recipe has undergone some changes, but the classic combination of vodka and clam-infused tomato juice remains the bread and butter of this iconic Canadian cocktail.
The history of Clamato dates back to the 1960s when a Chicago-based juice company came up with the idea of combining tomato juice and clam broth.
The product was an instant hit, especially in Canada, where it became the primary ingredient of the Caesar cocktail.
Clamato juice has a cultural significance in Canada, where it is considered a national treasure and a symbol of Canadian identity.
The drink’s popularity has led to several variations of the original recipe, including spicy and extra spicy versions.
Today, Clamato is not only used in cocktails but also as a base for soups and sauces.
With such a rich history, it’s no surprise that making homemade Clamato juice has become a popular activity in many households.
But if you’re not up for the task, here’s how to buy and store store-bought Clamato juice.
Buying and storing store-bought clamato juice
When it comes to buying and storing store-bought clamato juice, there are several key points to consider.
First and foremost, choosing the right brand is crucial to ensure the best taste and quality.
Proper storage techniques, such as keeping it refrigerated and avoiding exposure to light, can also extend its shelf life and maintain its flavor.
And don’t forget to check the expiration date to ensure it’s still fresh and safe to consume.
Choosing the right brand
Picking the perfect brand of Clamato juice can make all the difference in achieving that delicious, savory flavor for your next cocktail or meal. Before purchasing, make sure to compare prices to ensure you’re getting the best value for your money.
Often, the prices will vary depending on the store or the size of the bottle, so be sure to do your research beforehand. Another helpful tip is to conduct a taste test comparison.
You may find that some brands have a stronger tomato or clam flavor than others. It’s important to find a brand that matches your taste preferences to ensure that your drink or meal tastes as great as possible. Once you’ve picked the perfect brand, it’s important to store it properly to maintain its flavor and quality.
Proper storage techniques
To maintain the flavor and quality of Clamato juice, it’s important to properly store it in the refrigerator after opening. I always make sure to transfer the juice into an airtight container before placing it in the fridge. This helps control the temperature and prevent any air from entering, which can cause the juice to spoil quickly.
When storing Clamato juice, it’s best to keep it at a temperature below 40°F. This ensures that the juice stays fresh and flavorful for a longer period of time. Additionally, to extend its shelf life, I always make sure to consume the juice within 7-10 days of opening. This not only prevents spoilage but also helps maintain the taste and quality of the juice.
With proper storage techniques, you can enjoy Clamato juice for an extended period of time.
As important as proper storage is, it’s also essential to know the shelf life and expiration dates of Clamato juice.
Shelf life and expiration dates
Understanding the shelf life and expiration dates of your favorite drinks can save you from potentially harmful health consequences and wasted money. Clamato juice, like any other juice, has a shelf life and expiration date that you should be aware of.
The shelf life of clamato juice depends on whether it is packaged or homemade. Packaged clamato juice typically has a shelf life of around 12 months, while homemade clamato juice can last for up to 5 days when stored in the refrigerator. To extend the shelf life of homemade clamato juice, it’s important to store it in an airtight container and keep it refrigerated. You can also add a small amount of vinegar or lemon juice to the juice to increase its acidity, which will help to preserve it for longer.
Ways to tell if clamato juice has gone bad include changes in color or texture, a foul odor, or a sour taste. If you notice any of these signs, it’s best to discard the juice to avoid any potential health risks.
Frequently Asked Questions
Can I use fresh clams instead of canned clams to make clamato juice?
Yes, fresh clams can be used to make Clamato juice. The recipe variations with fresh clams are endless – from roasted clams to sautéed clams. Experiment with different flavors to find your perfect blend.
How long does homemade clamato juice last in the fridge?
The shelf life of homemade clamato juice in the fridge is around 5-7 days. To prolong its freshness, store it in an airtight container and keep it refrigerated at all times.
Can I add alcohol to my homemade clamato juice to make a Caesar cocktail?
Yes, you can add alcohol to your homemade clamato juice to make a caesar cocktail. Vodka is the traditional choice, but feel free to experiment with recipe variations by substituting gin or tequila for a unique twist on this classic drink.
Are there any substitutes for Worcestershire sauce in the recipe?
When making a Caesar cocktail, Worcestershire sauce is a key ingredient, but if you don’t have it, there are substitute options. Soy sauce or fish sauce can be used, but they will give the drink a different flavor variation.
Can I use a blender instead of a juicer to make clamato juice?
Blending clamato ingredients creates a chunky mess, not juice. A juicer strains the mixture, producing a smooth consistency. Homemade is better than store bought. Use a juicer, not a blender.
Conclusion
Well, that’s it! You now know how to make clamato juice from scratch. With just a few simple ingredients and some basic kitchen equipment, you can create a delicious and refreshing drink that’s perfect for any occasion.
Whether you’re hosting a summer barbecue, enjoying a lazy afternoon by the pool, or just looking for a new twist on your favorite cocktail, clamato juice is sure to hit the spot.
But before we go, let me ask you this: can you imagine the satisfaction of serving up a homemade clamato juice to your friends and family? The look on their faces as they take that first sip of your expertly crafted beverage? The pride you’ll feel knowing that you created something truly special?
So what are you waiting for? Get in the kitchen, grab your ingredients, and start mixing! Your taste buds (and your guests) will thank you.
Cindy thoroughly researches juicing trends, techniques, and recipes to provide readers with practical advice and inspiration. Her writing style is accessible, engaging, and designed to make complex concepts easy to understand. Cindy’s dedication to promoting the advantages of juicing shines through her work, empowering readers to make positive changes in their lives through the simple act of juicing.


15 Best Cold Press Juicers With Large Feed Chutes for Effortless Juice Extraction
Discover the 15 best cold press juicers with large feed chutes for effortless juice extraction, but which one will be...


15 Best Coffees for French Press That Will Elevate Your Brewing Game
Imagine brewing the perfect cup of coffee with our top 15 picks for French press; you won't want to miss...


15 Best Cold Press Juicers on Amazon: A Comprehensive Review for Health Enthusiasts
Discover the top 15 cold press juicers on Amazon that maximize nutrients and flavors; find out which models made the...


15 Best Cachoo Cold Press Juicers of 2025 – Our Top Picks for Fresh Juice Lovers
Find the perfect Cachoo cold press juicer for your kitchen in 2025 and discover the unique benefits that await your...


15 Best Organic Coffees of 2025 – Savor the Purest Brews
Get ready to indulge in the 15 best organic coffees of 2025, where exceptional flavors await—discover which brews made the...


The 15 Best JE-60 Easy Clean Slow Cold Press Juicers of 2025 – Your Guide to Healthier Juicing
Discover the top 15 JE-60 Easy Clean Slow Cold Press Juicers of 2025 that transform your juicing experience—find out which...


15 Best Dual Coffee Makers of 2025 – Brew Your Perfect Cup Every Time
Master the art of coffee brewing with the 15 best dual coffee makers of 2025, and discover which one will...


15 Best Cold Press Juicers for Pure Juice Lovers in 2025 – Expert Reviews & Recommendations
The 15 best cold press juicers for pure juice lovers in 2025 offer unmatched efficiency and nutrient retention, but which...


15 Best Coffee Grinders for Espresso Lovers: Expert Reviews & Recommendations
Learn about the 15 best coffee grinders for espresso lovers, featuring expert recommendations that could elevate your brewing experience to...


15 Best Atsent Cold Press Juicers of 2025 – Fresh Juice at Your Fingertips
Discover the top 15 Atsent cold press juicers of 2025 that guarantee fresh juice at home; find out which model...


15 Best Coffee Beans for Espresso That Will Elevate Your Brewing Game
Sip your way to espresso perfection with these 15 exceptional coffee beans that promise to transform your brewing game—discover the...


15 Best Prefix Cold Press Juicers of 2025: 10 Individual Suggestions You Can’t Miss
Navigate through the 15 best cold press juicers of 2025 and uncover top picks that will revolutionize your juicing experience—discover...
-

 Popular Juice Brands4 weeks ago
10 Top-Rated Organic Juice Brands to Try
-

 Popular Juice Brands4 weeks ago
9 Best No-Sugar-Added Popular Juice Brands
-
 Health Benefits of Juice2 weeks ago
How Much Bottled Lemon Juice Equals 1 Lemon
-

 Vegetable Juices4 weeks ago
12 Top Organic Vegetable Juice Brands Reviewed
-
 Juice Tips and Tricks1 week ago
How Long Does Lemon Juice Last After Expiration Date
-
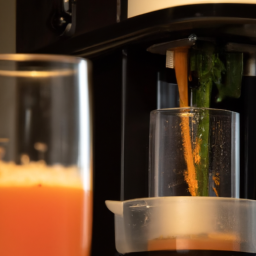 Juice Tips and Tricks2 weeks ago
How Long Does Juice Last After Juicing
-
 Juice Tips and Tricks2 weeks ago
2 Lemons Equal How Much Juice
-

 Vetted3 months ago
15 Best Juices for Diabetics: Refreshing Options That Won’t Spike Your Blood Sugar