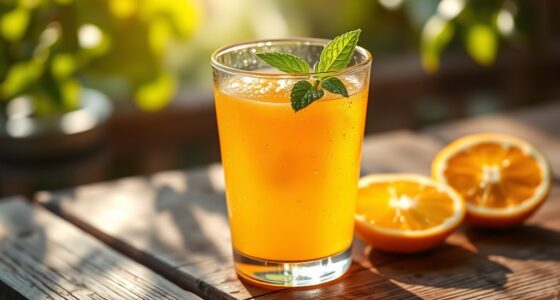
To can grape juice, start by crushing 3 ½ pounds of fresh grapes in a saucepan and covering them with boiling water. After simmering for 10 minutes, strain the mixture to collect the juice. Sweeten it with about ½ cup of sugar per quart, then boil to dissolve fully. Fill jars, process them in a water bath for 5-10 minutes, and let them cool. With proper sealing, your homemade juice can last a year—keep on for detailed steps! Once your grape juice is prepared and sealed, you may want to explore how to prepare cactus juice for a refreshing alternative. Start by selecting ripe cactus pads, carefully removing the spines, and then chopping them into small pieces. Blend with water before straining to create a smooth, nutrient-packed beverage that can be served chilled or used in cocktails.
Key Takeaways
- Start by preparing 3 ½ pounds of fresh, clean grapes, washing and destemming them before crushing.
- Extract juice by simmering crushed grapes in boiling water for 10 minutes, then strain using a damp jelly bag or cheesecloth.
- Sweeten the collected juice to taste, typically adding about ½ cup of sugar per quart, and bring it to a boil.
- Fill clean canning jars with the hot juice, leaving ¼ inch of headspace, and process in a water bath for 5-10 minutes.
- Allow jars to cool for 12-24 hours, check seals, and store in a cool, dark place for up to a year.
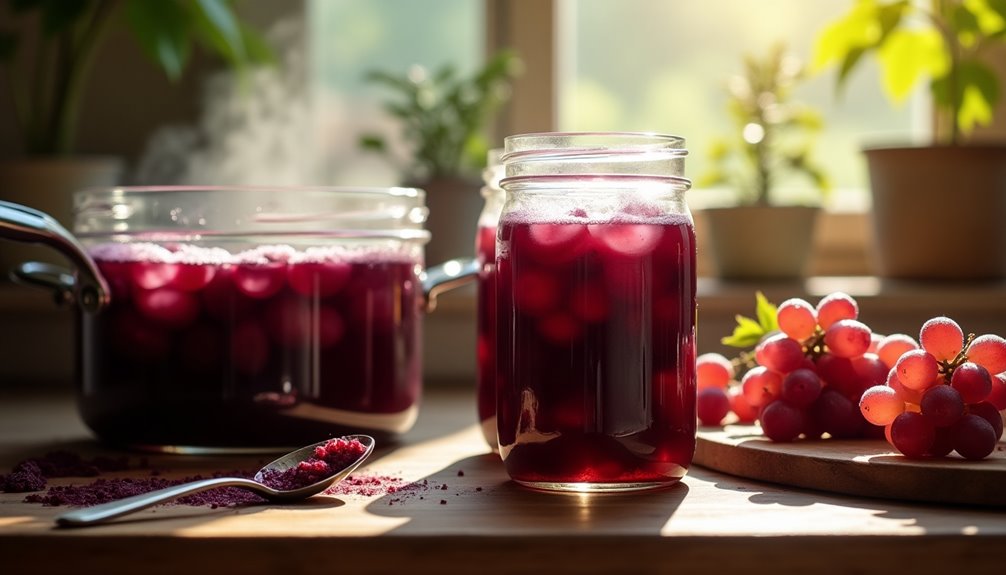
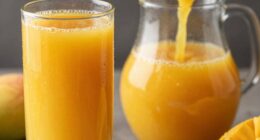
Canning grape juice is a rewarding process that lets you enjoy the taste of fresh grapes year-round. You'll love knowing that you've preserved the essence of summer, allowing you to sip on homemade juice even in the cold months. To get started, you'll need approximately 3 ½ pounds of fresh, ripe grapes, which will yield about 1 quart of juice after processing. Make sure the grapes are clean and free from any blemishes—this will ensure the best flavor in your final product.
First, wash and destem the grapes. This step is crucial because it removes any leaves or stems that could affect the taste. Once your grapes are ready, crush them in a saucepan. It's best to use a potato masher or a similar tool to break down the fruit.
After crushing, cover the grapes with boiling water. The boiling water helps soften the skins, which is essential for extracting all that delicious juice. Let the mixture simmer for about 10 minutes. This short cooking process makes it easier to separate the juice from the skins and seeds.
Once the grapes have softened, you'll need to strain the mixture. Use a damp jelly bag or cheesecloth to do this. Pour the grape mixture into the bag and let it drain into a bowl or pot. As you strain, you'll see the rich purple juice flow out, leaving behind the solids. It's a satisfying sight.
After extracting the juice, it's time to sweeten it to taste. You'll typically want to add about ½ cup of sugar per quart, but feel free to adjust based on your preference for sweetness.
After sweetening, bring the juice mixture to a boil. This step is important, as boiling not only helps dissolve the sugar but also prepares the juice for canning. While it's boiling, prepare your jars. Make sure they're clean and ready for filling.
When the juice reaches a rolling boil, fill the prepared jars, leaving about ¼ inch of headspace at the top. This space is necessary for the juice to expand during processing.
Now, you're ready for the canning process. Place the filled jars into a water bath canner. It's key that the jars are covered by at least an inch of water. Process the jars for 5-10 minutes, depending on your altitude. This step ensures that the juice is sealed and safe for storage.
After processing, carefully remove the jars and let them cool for 12-24 hours. Check for proper seals by pressing the center of each lid; it shouldn't pop back.
Once cool, store your jars in a cool, dark place. With proper sealing, your homemade grape juice can last for up to a year. Enjoy your efforts and indulge in the taste of summer, no matter the season!
CO-Z Manual Citrus Juicer, Commercial Grade Cast Iron Orange Juicer, Professional Heavy Duty Juice Press with Removable Strainer, Manual Juice Extractor for Orange Lemon Pomegranate Citrus, Gray
PROFESSIONAL HOME JUICER: CO-Z's hand press citrus juicer provides commercial-grade fresh juice from any soft or pulpy fruit...
As an affiliate, we earn on qualifying purchases.
Frequently Asked Questions
Can Grape Juice Be Canned?
Yes, you can definitely can grape juice!
It's a great way to preserve the deliciousness of fresh grapes. Just make sure you've got clean jars and fresh, ripe grapes for the best flavor.
You'll want to process the jars in a water bath for a few minutes to ensure they're sealed properly.
Once cooled, check the seals and store them in a cool, dark place for several months of enjoyment!
What Is the Best Way to Preserve Grape Juice?
To preserve grape juice effectively, you'll want to use water bath canning.
Start by filling sterilized quart jars with fresh grapes, adding sugar, and pouring boiling water over them. Make sure to leave a little headspace, clean the rims, and secure the lids.
Process the jars for 5 to 10 minutes, then let them cool for up to 24 hours. Properly sealed jars can last up to 18 months in a cool, dark place.
How Many Grapes Does It Take to Make a Quart of Juice?
Ever wonder how many grapes you need for that delicious quart of juice?
You'll typically need about 3 ½ cups of fresh grapes, which is roughly 2 pounds.
Depending on the grape variety and juicing method, you can expect to yield about 2 quarts from 6 to 8 pounds of grapes.
Can You Can Grape Juice Without Sugar?
Yes, you can can grape juice without sugar, but you should be cautious.
Omitting sugar might affect the flavor and shelf life since sugar acts as a natural preservative. To ensure safety, use a pressure canner instead of a water bath for proper sterilization.
Keep an eye on your jars for signs of spoilage or fermentation, as sugar-free options can be more vulnerable over time.
Always prioritize safe canning practices for best results.

EanOruus Whole Juicing Maker, Locking Buckle Design, Quick Assembly, High Extraction for Greens & Produce, Premium Gray
Advanced Crushing System – Uses a slow auger to grind and press fresh ingredients, unlocking more vitamins than...
As an affiliate, we earn on qualifying purchases.
Conclusion
As you seal those jars of grape juice, it's like bottling up the essence of summer, ready to burst open with flavor on a chilly winter day. Each sip will transport you to sun-kissed vineyards, where the sweetness dances on your tongue. You've captured not just juice, but memories and laughter shared with loved ones. So, pop that lid, pour a glass, and let the vibrant taste remind you of sunny days long gone. Cheers to your hard work!

Ninja NeverClog Cold Press Juicer | Powerful Electric Slow Masticating Juicer with Pulp Control | XL Capacity | 24 oz. Juice Jug & 36 oz. Pulp Container | Dishwasher Safe | Charcoal | 150W | JC151
NON-STOP JUICING: This powerful masticating juicer’s high-torque motor powers through tough fruits and vegetables like apples, carrots, celery,...
As an affiliate, we earn on qualifying purchases.

10.6 Gallon / 40L Mosakar Hydraulic Fruit Press. 5 Ton Pressure. Juice Contact Parts are AISI 304 Stainless Steel. Grape Wine Apple Cider Press for Home Use
10.6 Gallon / 40L large Capacity. Hydraulic jack provides 5 tons of pressure for maximum juice squeezing at...
As an affiliate, we earn on qualifying purchases.

Cindy thoroughly researches juicing trends, techniques, and recipes to provide readers with practical advice and inspiration. Her writing style is accessible, engaging, and designed to make complex concepts easy to understand. Cindy’s dedication to promoting the advantages of juicing shines through her work, empowering readers to make positive changes in their lives through the simple act of juicing.