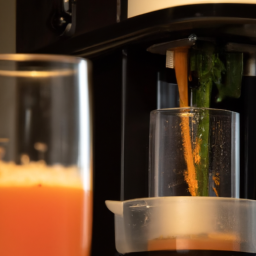
Juice Tips and Tricks
How To Cut A Juice Groove In A Cutting Board

As a home cook, I know the importance of having a reliable cutting board in the kitchen. However, there are times when even the best cutting board may struggle to contain the juices from fruits, vegetables, or meats. This is when a juice groove comes in handy.
A juice groove is a channel cut into the cutting board’s surface that catches the juices, preventing them from spilling onto your countertop. In this article, I will guide you through the process of cutting a juice groove in a cutting board.
To do this, we will need a few tools and materials, including a router, a straight bit, sandpaper, and finish. We will also need a cutting board made of hardwood, such as maple or cherry.
With these items in hand, we can create a functional and aesthetically pleasing juice groove that will make our cooking experience much more enjoyable and hygienic. So let’s get started!
Key Takeaways
- A juice groove is a channel or indentation that catches spills and prevents liquids from flowing off the cutting board, improving hygiene in the kitchen.
- To cut a juice groove in a cutting board, you will need a hardwood cutting board, a router, a straight bit, sandpaper, and finish, as well as essential tools like a plunge router base, clamps, and safety gear.
- Choosing the right router bit is crucial for precise and clean cuts, and common types include straight, core box, and V-groove bits.
- Proper maintenance and care, such as regular oiling and avoiding abrasive cleaners, can help ensure that your cutting board stays in great condition for years to come.
Gather the Necessary Tools and Materials
To cut a juice groove in a cutting board, I need to gather the necessary tools and materials.
First, I need to select the right cutting board that’s thick enough to accommodate the groove.

Next, I need to choose the right router bit that’s designed for cutting grooves in wood.
Lastly, I need other essential tools, such as clamps, safety goggles, and a router guide to ensure accuracy and safety during the cutting process.
Selecting the Right Cutting Board
You’ll want to make sure that the cutting board you choose is not only durable, but also large enough to accommodate the juice groove you’ll be cutting. There are many different types of cutting board materials available, each with their own unique benefits and drawbacks. Some popular options include wood, bamboo, plastic, and composite materials.
When selecting a cutting board, consider the maintenance required to keep it in good condition. Wood and bamboo boards require regular oiling to prevent cracks and warping. Plastic boards are typically dishwasher safe, but can become scratched over time. Composite materials are often the easiest to maintain, as they are durable and dishwasher safe. To help you choose the right cutting board for your needs, refer to the table below for a comparison of popular materials.
| Cutting Board Material | Benefits | Drawbacks |
|---|---|---|
| Wood | Durable, natural appearance, gentle on knives | Requires regular oiling, can warp or crack |
| Bamboo | Sustainable, lightweight, resists bacteria | Requires regular oiling, can become brittle |
| Plastic | Dishwasher safe, affordable, resists stains | Can become scratched or damaged |
| Composite | Durable, dishwasher safe, resists bacteria | Limited appearance options |
Choosing the right cutting board is just the first step in cutting a juice groove. Next, you’ll need to select the right router bit to get the job done.
Choosing the Right Router Bit
Picking the perfect router bit is like selecting the perfect paintbrush for a masterpiece; it’s essential to achieve the desired outcome.
When it comes to cutting a juice groove in a cutting board, choosing the right router bit is crucial. There are different router bit types and sizes to choose from, and the right one will depend on the size and depth of the groove you want to create.
For instance, a straight bit is perfect for creating a shallow groove, while a core box bit will create a more rounded groove. You could also use a V-groove bit to create a decorative groove.
It’s essential to choose a bit that is at least as wide as the groove you want to create, and to adjust the depth of the bit accordingly. With the right router bit, you’ll be able to create a precise and clean juice groove that will make your cutting board both functional and beautiful.
Now, moving on to the next step, which is gathering other essential tools for the project.
Other Essential Tools
Now let’s get your workshop ready with the must-have tools for this project. To cut a juice groove in a cutting board, you’ll need a few essential tools.
These include a router, a router bit with a bearing guide, a plunge router base, clamps, and safety gear such as eye protection and earplugs. Must-have accessories for this project include a router bit with a bearing guide to help ensure that the groove is cut consistently and accurately.
A plunge router base will allow you to make precise cuts at varying depths, while clamps will help keep the cutting board securely in place during the process. Common mistakes when cutting a juice groove include not using enough clamps, not wearing safety gear, and not making the groove deep enough.
With the right tools and attention to detail, you can avoid these mistakes and create a beautiful and functional juice groove in your cutting board. Now that you have the necessary tools, let’s move on to preparing the cutting board for the groove.
Preparing the Cutting Board
Before I can start cutting a juice groove in my cutting board, I need to prepare the board first. This involves cleaning and sanding the board to ensure it’s smooth and free from any debris or rough edges.
Then, I need to mark the location of the juice groove on the board to ensure that it’s in the right spot and evenly spaced.
Cleaning and Sanding the Board
You’ll definitely want to give that board a good scrubbing and sanding to make sure it’s as smooth as a baby’s bottom before moving on to the next step. Proper maintenance is key to ensuring your cutting board lasts for years to come.
Avoiding common mistakes like using abrasive cleaners or neglecting to oil the board regularly can lead to cracking and warping over time.
Start by washing the board with hot, soapy water and a scrub brush. Rinse thoroughly and allow to dry completely.
Next, use a fine-grit sandpaper to sand the entire surface of the board, being sure to remove any rough spots or splinters.
Once the board is smooth to the touch, wipe it down with a damp cloth and allow it to dry completely before moving on to the next step – marking the location of the juice groove.
Marking the Location of the Juice Groove
To mark where the channel for collecting excess liquids will go, simply trace the outline of a small cup or bowl onto the surface of your newly cleaned and sanded wooden work surface. This will be your guide for cutting the juice groove.
Make sure to use measuring tools to ensure that the groove is consistent in width and depth. When cutting the groove, there are several cutting techniques you can use depending on the tools you have available.
A router is the most common tool used for cutting a juice groove, but a circular saw or jigsaw can also be used. It’s important to be precise with your cuts and follow the outline you traced earlier.
Once you’ve finished cutting the groove, move on to the next step of setting up the router.
Setting Up the Router
First, I need to install the router bit into the collet of the router. I’ll make sure it’s tightened securely using the wrench provided.
Then, I’ll adjust the depth of the cut based on the size of the groove I want to create. This is done by adjusting the router’s base plate up or down using the adjustment knob.
Installing the Router Bit
Once you’ve got the router bit installed, you’ll feel confident and ready to tackle the next step in creating your perfect cutting board. Before you do, take a moment to review some basic router maintenance.
Keeping your router in good condition will ensure that it works smoothly and efficiently, without causing any issues during use. Regularly clean the router bit and ensure that it’s properly tightened before use. If you’re experiencing any issues with your router, such as overheating or difficulty cutting, troubleshoot the issue before continuing with your project.
Now that your router is properly set up and maintained, it’s time to adjust the depth of the cut. This is an important step that will determine the width and depth of the juice groove.
By adjusting the depth of the cut, you can ensure that the groove is deep enough to catch any juices or liquids that may spill from your cutting board. To adjust the depth of the cut, simply adjust the height of the router bit until it reaches the desired depth.
With the depth set, you’ll be ready to start cutting your juice groove.
Adjusting the Depth of the Cut
Now that the router bit’s installed, it’s time to adjust the depth of the cut. This is crucial to ensure a precise and accurate juice groove. Before starting, I always make sure to wear eye and ear protection. Safety should always come first when working with power tools.
To adjust the depth of the cut, I first turn on the router and set it to a low speed. I then slowly lower the bit until it reaches the desired depth, making sure to do so in small increments. It’s important not to rush this process, as going too deep can ruin the entire board.
Once the depth is set, I turn off the router and double-check that everything is secure before moving on to the next step.
With the depth adjusted, it’s time to move on to cutting the juice groove.
Cutting the Juice Groove
To cut the juice groove in your cutting board, you’ll need to start by making sure you’re using the right router bit. A bit with a bearing guide is ideal, as it’ll ensure that your cuts are even and straight. Once you have the right bit, it’s important to use techniques that’ll result in a clean cut.
This means taking your time and making sure that the router is set at the correct depth. You may need to make multiple passes to achieve the desired depth, but it’s important not to rush the process. When cutting the juice groove, it’s also important to pay attention to the spacing between your cuts.
Ideally, the groove should be about 1/4 inch wide and 3/8 inch deep. To achieve this, you’ll need to make several passes with the router, moving the bit slightly closer to the board each time. Once you’ve completed the cutting process, it’s time to move on to sanding and finishing your cutting board to ensure that it’s ready for use.
Sanding and Finishing
Get the sandpaper and start smoothing out the surface of your newly routed channels, paying special attention to any rough spots or sharp edges that could cause splinters. When sanding your cutting board, use a sandpaper with a grit of 220 or higher to avoid leaving deep scratches on the surface. You can use a sanding block to ensure that you sand evenly across the cutting board.
Start sanding by moving the sandpaper in the direction of the wood grain. Don’t apply too much pressure as this can damage the surface of the cutting board. After sanding, wipe the surface of the cutting board with a clean cloth to remove any sawdust.
Applying a finish is also important to protect the cutting board from moisture and stains. You can use mineral oil, beeswax, or a combination of both to finish your cutting board.
To transition into the subsequent section about cleaning and maintaining your cutting board, it’s important to note that sanding and finishing your cutting board is not the final step in its care. Regular cleaning and maintenance are also necessary to keep your cutting board in top condition.
Cleaning and Maintaining Your Cutting Board
Keeping your cutting board in great condition requires regular cleaning and maintenance, so you can enjoy using it for years to come. One of the first things to consider is the type of material your cutting board is made of. Different materials have different benefits and drawbacks. For example, wooden cutting boards are more aesthetically pleasing and easier on knives, but require regular oiling to prevent warping and cracking. On the other hand, plastic cutting boards are easier to clean and sanitize, but can dull knives more quickly.
To properly maintain your cutting board, it is important to oil it regularly. This prevents the board from drying out, which can lead to cracks and warping. The type of oil you use is also important. Mineral oil is a common and inexpensive option, but some people prefer to use food-grade oils such as coconut oil or beeswax for a more natural option. To oil your board, simply apply a generous amount of oil to the surface and rub it in with a clean cloth. Let it sit for a few hours or overnight before wiping off any excess oil. By regularly oiling your cutting board and choosing the right material for your needs, you can ensure that it stays in top condition for years to come.
When it comes to other tips and tricks for cutting board maintenance, there are a few things to keep in mind. For example, avoid soaking your cutting board in water for extended periods of time, as this can lead to warping and cracking. Additionally, it’s a good idea to have multiple cutting boards on hand to prevent cross-contamination between different types of foods. By following these simple guidelines, you can ensure that your cutting board stays in great condition and performs well for all your cooking needs.
Other Tips and Tricks
As you prepare your meals, don’t forget to take extra steps to ensure your food stays safe and healthy to eat.
In addition to cleaning and maintaining your cutting board, you can also add a juice groove to prevent any liquids from spilling onto your countertops. Creating a juice groove is a simple process that can be done with a router or a table saw. However, if you don’t have access to these tools, you can also create a groove by using a chisel or a hand saw.
If you want to get creative with your cutting board, there are many alternative materials you can use. Bamboo, for example, is a sustainable and eco-friendly option that is also durable and easy to maintain.
Another option is using a combination of wood and resin to create a unique and colorful design. Whatever material you choose, make sure to pick one that is sturdy and non-toxic to ensure the safety of your food.
With these tips and tricks, you can make sure your cutting board not only serves its purpose but also adds a touch of style to your kitchen.
Frequently Asked Questions
Can a juice groove be added to an existing cutting board?
Yes, a juice groove can be added to an existing cutting board. Tools needed include a router, a straight bit, and a template. Step by step process involves securing the template, routing out the groove, and sanding the edges.
What is the purpose of a juice groove in a cutting board?
A cutting board with a juice groove prevents liquids from spilling over the edge and onto the countertop. It also helps to keep the work surface clean and free from bacteria. Cleaning and maintaining the groove is easy with regular washing and oiling.
How deep should a juice groove be?
When it comes to cutting board maintenance, ensuring the depth of the juice groove is correct is crucial. Choosing the right router bit is key to achieving the desired depth, typically around 1/4 inch for optimal functionality.
Can a hand saw be used instead of a router to cut a juice groove?
Using a hand saw to cut a juice groove in a cutting board is possible, but may not be as precise as using a router. Pros include affordability and portability, but cons include difficulty achieving a clean, straight cut.
Are there any safety precautions that should be taken when using a router to cut a juice groove?
When using a router, proper gear is essential for router safety. Eye protection, ear protection, and a dust mask should always be worn. Keep hands away from the bit and ensure the router is secure before use.
Conclusion
Well folks, that’s how you cut a juice groove in a cutting board! It may seem daunting at first, but with the right tools and techniques, it can be done with ease. Make sure to take your time and measure everything carefully to ensure a clean and even groove. Whether you’re a beginner or an experienced woodworker, practice makes perfect, just like learning how to draw Juice WRLD or any other artist. With patience and attention to detail, you’ll have the perfect cutting board in no time!
Remember to take your time when setting up the router and cutting the groove, as precision is key in achieving a clean and functional result. As the saying goes, "measure twice, cut once,"so don’t rush through any steps and double-check your measurements before making any cuts.
Once you’ve finished, don’t forget to sand and apply a finish to ensure the longevity of your cutting board. With proper care and maintenance, your newly grooved cutting board will be a valuable tool in your kitchen for years to come.
Happy cutting!

Cindy thoroughly researches juicing trends, techniques, and recipes to provide readers with practical advice and inspiration. Her writing style is accessible, engaging, and designed to make complex concepts easy to understand. Cindy’s dedication to promoting the advantages of juicing shines through her work, empowering readers to make positive changes in their lives through the simple act of juicing.


As a lover of cooking and baking, I’ve often pondered the juice content of a lime. This is a crucial factor in numerous recipes, ranging from guacamole to key lime pie, and having an idea of the expected juice amount can greatly impact the outcome.
After conducting some experiments in my kitchen, I’ve discovered some interesting findings about lime juice yield and how to maximize it. Factors such as the ripeness of the lime, the temperature of the fruit, and the method of extraction can all impact lime juice yield. Through careful measurement and analysis, I’ve found that the average lime can produce anywhere from 1 to 2 tablespoons of juice.
However, by following some simple tips and alternative extraction methods, you can increase the amount of juice you get from each lime and make the most out of this versatile citrus fruit. So, let’s dive into the science behind lime juice production and explore some delicious recipes that call for it.
Key Takeaways
- Key limes produce less juice than Persian limes.
- Heating and rolling the lime can increase juice extraction.
- Electric juicers are more efficient in extracting juice than hand-squeezing.
- On average, a lime produces 1-2 tablespoons of juice.
Factors that Affect Lime Juice Yield
Wanna know the secret to getting the most juice out of your lime? It all comes down to the factors that affect lime juice yield.
One of the most important factors is the cooking technique used. Heating up the lime can help break down the cellular structure of the fruit, releasing more juice. A popular method is to microwave the lime for about 10 seconds, or to roll it on a hard surface with the palm of your hand to soften it up.
Another important factor is the citrus acidity of the lime. The higher the acidity, the more juice the lime will produce. This is because the acid helps to break down the cell walls, making it easier to extract the juice. So, when selecting limes, it’s best to choose ones that are firm to the touch and feel heavy for their size, as they tend to be more acidic.
With these factors in mind, you can maximize your lime juice yield and get the most out of your citrus. Speaking of which, let’s take a look at the average lime juice yield.
Average Lime Juice Yield
In my experiments, I’ve found that the average lime juice yield varies depending on the type of lime and juicer used.
Comparing key limes to Persian limes, I’ve found that key limes yield a slightly lower amount of juice on average.
Additionally, when comparing hand-squeezed and electric juicers, I’ve found that electric juicers tend to yield a higher amount of juice.
Comparison of Key Lime and Persian Lime
Did you know that when it comes to juicing, the Key Lime produces less juice than the Persian Lime? In fact, studies have shown that the Key Lime has a lower juice yield compared to the Persian Lime. This can be attributed to the fact that Key Limes are smaller and have a thinner skin, resulting in less flesh and juice.
Additionally, Key Limes have a higher acidity level compared to the sweeter Persian Limes, making them less ideal for juicing. To further understand the difference between the two lime varieties, it’s important to consider their taste and acidity levels. Key Limes have a distinct tart and acidic flavor, which makes them popular in certain dishes such as Key Lime pie. On the other hand, Persian Limes have a milder and sweeter taste, which makes them a preferred choice for juicing.
It’s important to keep in mind these differences when deciding which lime to use for juicing. When it comes to juicing, there are various methods one can use, including hand-squeezing and electric juicers. Let’s explore the differences between the two methods in the next section.
Comparison of Hand-Squeezed and Electric Juicers
You’re about to discover the difference between hand-squeezing and using an electric juicer, like two different paths leading to the same destination, but with different experiences along the way. Let’s take a look at the pros and cons of each method and compare the cost difference.
Hand-squeezing lime juice is a traditional and simple way to get the job done. It requires a bit of elbow grease, but it’s a great way to make sure you’re getting every last drop of juice out of your lime. On the other hand, electric juicers are quick and efficient, but they can be expensive and take up a lot of counter space. Here’s a table to help you weigh the pros and cons and compare the cost difference:
| Hand-squeezing | Electric Juicer | |
|---|---|---|
| Pros | Inexpensive | Quick and efficient |
| Easy to clean | Consistent results | |
| Portable | Less elbow grease | |
| Cons | Time-consuming | Expensive |
| Inconsistent results | Takes up counter space | |
| Requires more effort | Difficult to clean |
Now that you have a better idea of the pros and cons of each method and their cost comparison, let’s move on to some tips for maximizing your lime juice yield.
Tips for Maximizing Lime Juice Yield
Get the most out of your lime by giving it a good roll on the countertop before slicing it open and squeezing the juice into your recipe. This technique helps to break down the membranes inside the lime, which allows for easier juice extraction.
You can also try microwaving the lime for a few seconds before juicing it, which can help to soften it and increase the amount of juice you can get out of it.
It’s also important to choose the right lime variety for juicing. Key limes are smaller and have thinner skins than Persian limes, which means they have less juice but a stronger flavor. Persian limes, on the other hand, have more juice but a milder flavor.
By understanding the differences between lime varieties and using the right juicing technique, you can maximize the amount of juice you can extract from your limes.
As we move on to alternative lime juice extraction methods, keep in mind that these tips can also be applied to other citrus fruits.
Alternative Lime Juice Extraction Methods
If you’re looking for a quicker and more efficient way to extract lime juice, try using a citrus juicer. DIY lime presses may work for occasional lime juicing, but a citrus juicer is a better investment for frequent use.
There are different types of citrus juicers available in the market, but the most common ones are the electric and manual juicers. Electric juicers are more expensive but they’re faster and easier to use. Manual juicers, on the other hand, are cheaper and can be used anywhere without the need for electricity.
Another alternative method for extracting lime juice is by using a blender. Cut the limes into small pieces and blend them in a blender until smooth. Pour the blended mixture into a strainer to remove the pulp and seeds. The result is a smooth and pulp-free lime juice. However, this method may not be as efficient as using a citrus juicer, and some people may not like the texture of the juice.
Nonetheless, it is a good option if you don’t have a citrus juicer or if you need to extract a large amount of lime juice quickly. With these alternative methods, you can make the most out of your limes and get the most juice possible for your recipes that call for lime juice.
Recipes that Call for Lime Juice
Adding lime juice to your favorite recipes can enhance their flavor and give them a refreshing citrus twist. Lime juice is a versatile ingredient that can be used in a variety of recipes, from savory dishes to sweet desserts.
If you’re looking for a creative way to use lime juice, try making lime-based cocktails like margaritas or mojitos. Lime juice can also be substituted for lemon juice in many recipes, giving them a unique twist.
When using lime juice in recipes, it’s important to note that the acidity of the lime can affect the overall flavor of the dish. To balance out the acidity, consider adding a pinch of sugar or using less lime juice than the recipe calls for.
If you’re looking for a dessert recipe that uses lime juice, try making key lime pie. This creamy and tangy dessert is a classic American favorite and is perfect for any occasion.
Other uses for lime juice include cleaning, skin care, and even as a natural insect repellent. By incorporating lime juice into your daily routine, you can benefit from its many uses and enjoy its refreshing flavor in all aspects of your life.
Other Uses for Lime Juice
Incorporating lime juice into your daily routine can add a refreshing twist to your skincare routine. Lime juice has natural antibacterial properties, making it a great addition to your skincare routine. It can help prevent acne and blemishes while also brightening and evening out your skin tone. Lime juice can also be used as a natural exfoliant, helping to remove dead skin cells and leave you with a radiant glow. Additionally, the citrus scent of lime juice can leave you feeling energized and invigorated.
Aside from its skincare benefits, lime juice can also be used in a variety of other ways. Lime zest, for example, can be used to add flavor to dishes such as salads, soups, and marinades. Lime juice can also be incorporated into creative cocktails, such as margaritas or mojitos. Its tart flavor pairs well with sweet ingredients like agave or honey.
Whether you’re using it to enhance your beauty routine or to add flavor to your food and drinks, lime juice is a versatile ingredient with many uses.
Transitioning into the subsequent section about the history and origins of limes, it’s interesting to note that limes were originally grown in Southeast Asia and were brought to the Americas by Spanish explorers. Today, limes are grown in many parts of the world and are used in a wide variety of cuisines and beverages. From its humble beginnings, lime juice has become a beloved ingredient with a rich history and cultural significance.
History and Origins of Limes
After learning about other uses for lime juice, I became curious about the history and origins of limes. As I researched, I discovered that lime cultivation dates back to ancient times, with evidence of its use in India and Southeast Asia as early as 1000 BC.
Limes were brought to the Mediterranean by Arab traders and eventually made their way to the Americas during the colonial period. Limes have played a significant role in many cultures and have been used for medicinal purposes, as well as culinary applications.
In many countries, limes are a symbol of hospitality and are often used to welcome guests. Additionally, limes have been used in traditional medicine to treat a variety of ailments, such as scurvy and indigestion. Learning about the cultural significance of limes has given me a deeper appreciation for this versatile fruit and its impact on history and culture.
As I delve further into the world of limes, I’m excited to explore their nutritional benefits. With high levels of vitamin C and other beneficial nutrients, limes have the potential to provide numerous health benefits.
Nutritional Benefits of Limes
I find it fascinating to explore the nutritional benefits of limes. Firstly, limes are a great source of Vitamin C, which is essential for maintaining a healthy immune system.
Additionally, limes contain other nutrients such as potassium and folate, which have numerous health benefits.
Lastly, research suggests that consuming limes may aid in digestion, lower blood sugar levels, and promote heart health.
Vitamin C Content
Surprisingly, a lime contains about 30% of the recommended daily intake of vitamin C, making it a great source of this essential nutrient. As someone who’s health-conscious, I’m always on the lookout for foods that are rich in vitamins and minerals.
Here are a few reasons why the vitamin C content in limes is so beneficial:
-
Boosts immune function: Vitamin C is known to enhance the production of white blood cells, which are responsible for fighting off infections.
-
Helps prevent scurvy: Scurvy is a disease caused by a deficiency in vitamin C. Consuming limes, which are high in vitamin C, can help prevent this condition.
-
Promotes healthy skin: Vitamin C is essential for the production of collagen, which is a protein that keeps the skin firm and elastic.
Moving on to other nutrients, limes also contain small amounts of vitamins A and E, as well as minerals like calcium, potassium, and magnesium. These nutrients, along with the vitamin C content, make limes a great addition to any healthy diet.
Other Nutrients
Additionally, limes are a good source of vitamins A and E, as well as minerals such as calcium, potassium, and magnesium. These nutrients are essential for the proper functioning of our body.
Lime juice not only adds flavor to your food, but it also helps in preserving the nutrients present in the food. Maximizing the flavor of lime juice is important, and it can be achieved by squeezing fresh limes rather than using bottled juice.
When it comes to preserving nutrients, it’s important to handle the limes properly. Store them in a cool, dark place and avoid exposing them to sunlight for long periods of time.
When juicing limes, it’s best to use a hand-held juicer instead of an electric one, as the heat generated by the latter can destroy some of the nutrients.
By taking these steps, you can ensure that you’re getting the maximum amount of nutrients from your lime juice.
Limes not only add flavor to your food, but they’re also packed with essential nutrients. By maximizing the flavor of lime juice and preserving its nutrients, you can reap the many health benefits that limes have to offer.
Health Benefits
Limes are a fantastic source of vitamins and minerals that can provide numerous health benefits. Lime juice is loaded with Vitamin C, which is essential for boosting immune function, reducing inflammation, and promoting wound healing.
Moreover, lime juice is rich in flavonoids that possess antioxidant properties. This can help prevent cellular damage and reduce the risk of chronic diseases like cancer and heart disease.
In addition to these health benefits, lime juice can be used in a variety of recipes. It’s a popular ingredient in many cuisines around the world, adding a tangy and refreshing flavor to dishes like guacamole, ceviche, and salsa.
If you don’t have fresh limes on hand, you can use lime juice substitutes like lemon juice, white vinegar, or apple cider vinegar.
Now that we know about the health benefits of limes, let’s take a closer look at how to select and store them properly.
How to Select and Store Limes
When I’m selecting limes, I always look for ones that are heavy for their size and have smooth skin with no blemishes.
To ensure they stay fresh, I store them in a cool, dry place, away from direct sunlight.
Limes can last up to two weeks if stored properly, but it’s always best to use them as soon as possible for the most flavor and nutritional benefits.
Choosing Ripe Limes
To make sure you get the most juice out of your lime, make sure it feels heavy for its size and has a slightly soft exterior. When selecting ripe limes, color isn’t a reliable indicator of ripeness as limes can be green, yellow, or even orange when fully ripe.
Instead, gently press the lime with your thumb to feel for a slight give. This indicates that the lime is juicy and ready to use. When testing lime ripeness, it’s important to note that limes don’t ripen further once they’re picked.
Therefore, it’s crucial to select ripe limes at the store or farmers market. By choosing ripe limes, you’ll be able to extract more juice and get the most flavor out of your citrus. Proper storage methods are also important in maintaining the freshness of your limes.
Proper Storage Methods
Preserve the tangy flavor of your freshly picked citrus by storing them in a cool, dry place with good air circulation. Proper storage is essential in preserving the quality of your limes.
Optimal conditions for storing limes are between 45 to 50 degrees Fahrenheit with a humidity level of 85 to 90 percent. Keep in mind that storing limes at higher temperatures could cause them to dry out faster and lose their flavor.
To maintain the freshness of your limes, you need to store them in a container that can provide protection from the environment. Some good container options include a plastic bag with small holes for ventilation, a perforated plastic container, or a mesh bag. Avoid using sealed plastic bags or containers as they can trap moisture and promote mold growth.
Proper storage is just the first step in keeping your limes fresh. The next section will cover the shelf life of limes and how to tell if they’re still good to use.
Shelf Life
After learning about the proper storage methods for limes, it’s important to understand their shelf life. Limes have a limited lifespan and will expire if left unattended, so it’s crucial to consume or preserve lime juice before it goes bad.
The shelf life of limes largely depends on their ripeness at the time of purchase. Ripe limes typically have a shorter shelf life than unripe ones. On average, limes can last up to two weeks when stored at room temperature and up to a month when refrigerated.
However, as limes begin to age, their skin may start to shrivel and the juice may become less flavorful. To prevent expiring limes, it’s best to store them in a cool, dry place and consume them as soon as possible.
Alternatively, you can preserve lime juice by freezing it in an airtight container or by using it in recipes that call for lime juice, such as marinades or sauces. By doing so, you can extend the shelf life of your limes and ensure that they don’t go to waste.
Frequently Asked Questions
What are some common lime varieties used for juicing?
I prefer using Persian limes for juicing as they produce more juice than Key limes. I recommend using a lime squeezer for maximum extraction efficiency, as hand juicing can result in lower yields.
How does the ripeness of a lime affect its juice yield?
Ripeness impact on lime juice yield is significant. Through my juicing techniques, I found that ripe limes produce more juice than unripe ones. This was confirmed by data-driven analysis using a refractometer and pH meter.
Are there any tools or gadgets that can help extract more juice from a lime?
I’ve found that using a manual citrus press or an electric juicer can increase lime juice yield. Additionally, zesting the lime before juicing can release more oils and enhance flavor. Experimenting with different techniques and tools can lead to optimal results.
Can lime juice be frozen for later use?
I freeze lime juice in ice cube trays for later use. Benefits include saving time and money, and having fresh juice available year-round. Freezing methods vary, but I prefer to add a pinch of salt to enhance flavor.
What are some common substitutes for lime juice in recipes?
When substituting lime juice, consider using lemon juice, vinegar, or citric acid. Each has its own pros and cons. To make homemade lime juice concentrate, juice limes and reduce the liquid in a pot.
Conclusion
In conclusion, I’ve discovered that the average lime produces approximately 1-2 tablespoons of juice. However, this yield can vary greatly depending on factors such as ripeness, temperature, and juicing method. It’s important to keep these factors in mind when preparing recipes that call for lime juice. Additionally, the size of the lime can also affect the juice yield, with larger limes typically providing more juice. If you’re aiming for a more consistent result, it’s a good idea to have an extra lime or two on hand just in case. Ultimately, the juice yield from one lime can vary, so tasting and adjusting to achieve the desired flavor is key when cooking or preparing beverages.
One particularly interesting statistic that I came across is that lime juice has been found to contain high levels of citric acid, which can help to prevent the growth of bacteria and viruses. This means that incorporating lime juice into your diet can potentially boost your immune system and protect against illnesses.
So, the next time you reach for a lime, remember the potential health benefits that come along with it.
Cindy thoroughly researches juicing trends, techniques, and recipes to provide readers with practical advice and inspiration. Her writing style is accessible, engaging, and designed to make complex concepts easy to understand. Cindy’s dedication to promoting the advantages of juicing shines through her work, empowering readers to make positive changes in their lives through the simple act of juicing.

As a grapefruit juice enthusiast, there is a certain magic in starting the day with a cool, freshly squeezed glass of grapefruit juice. Its zesty and slightly sour flavor is perfect for perking up the senses and getting the day off to a great start. Yet, like many fresh juices, figuring out how long grapefruit juice stays fresh can be a challenge.
So, just how long is fresh squeezed grapefruit juice good for? Picture this, you’ve just spent a good amount of time squeezing a bunch of grapefruits to make your favorite juice. You take a sip and it’s absolutely delicious, but as the day goes on, you start to wonder if it’s still safe to drink.
This is where understanding the factors that affect the shelf life of fresh squeezed grapefruit juice comes in handy. From storage methods to signs of spoilage, in this article, we’ll cover everything you need to know to ensure your grapefruit juice stays fresh and safe to consume.
Key Takeaways
- Fresh squeezed grapefruit juice should be stored at 40°F or below in an airtight container to prevent oxidation and loss of flavor/nutrients.
- Adding lemon juice or ascorbic acid can preserve color and flavor for 5-7 days.
- Signs of spoilage include a sour/off taste, cloudy appearance, and foul odor. Spoiled juice can cause food poisoning.
- Canned juice can be stored for up to a year, while frozen juice should be consumed within a few months. Thawing should be done in the refrigerator for best flavor/nutrient retention.
Factors Affecting the Shelf Life of Fresh Squeezed Grapefruit Juice
If you want to extend the lifespan of your freshly squeezed grapefruit juice, you’ll need to consider a few key factors. The first is the temperature at which the juice is stored. Fresh squeezed grapefruit juice should be kept in the refrigerator at a temperature of 40 degrees Fahrenheit or below. If the juice is stored at a higher temperature, it will spoil more quickly.
Another factor that affects the taste and health benefits of fresh squeezed grapefruit juice is exposure to air. Once the juice is squeezed, it begins to oxidize and lose its flavor and nutritional value. To slow down this process, it’s important to store the juice in an airtight container. This will help to preserve the juice’s freshness and prevent it from going bad too quickly.
With these factors in mind, you can enjoy your fresh squeezed grapefruit juice for longer and reap all of its health benefits. So, how long can fresh squeezed grapefruit juice last in the fridge?
How Long Can Fresh Squeezed Grapefruit Juice Last in the Fridge?
You’ve just made a deliciously tangy elixir that’s ready to chill in the fridge until its sweet nectar is ready to be savored. But how long can you expect your fresh squeezed grapefruit juice to last? Proper storage is key to preserving freshness.
The best way to keep your juice fresh is to store it in an airtight container in the refrigerator. This will prevent the juice from being exposed to air, which can cause it to oxidize and lose its flavor. To further extend the shelf life of your fresh squeezed grapefruit juice, you can also consider adding a small amount of lemon juice or ascorbic acid to the mix. These ingredients can help to preserve the color and flavor of your juice for up to 5-7 days.
Additionally, it’s worth noting that fresh squeezed grapefruit juice is packed with vitamins and antioxidants that can help to boost your immune system and support overall health. Try incorporating a glass of fresh squeezed grapefruit juice into your daily routine for a refreshing and nutritious way to start your day.
As much as we would love for our fresh squeezed grapefruit juice to last forever, it’s important to know the signs that it has gone bad. In the next section, we’ll discuss how to tell if your juice has spoiled and what to do with it.
Signs that Fresh Squeezed Grapefruit Juice Has Gone Bad
Pay attention to these warning signs! When your grapefruit juice starts to smell funky or develop mold, it’s time to toss it out.
These are common contaminants that can grow in fresh squeezed juice when not properly stored. While some may think it’s okay to drink juice that’s past its prime, it’s important to understand the potential health risks.
Drinking bad grapefruit juice can lead to food poisoning, which can cause symptoms such as vomiting, diarrhea, and stomach cramps. In severe cases, it can even lead to dehydration and hospitalization.
To avoid these potential health risks, it’s best to only consume fresh squeezed grapefruit juice that has been stored properly. With that said, let’s move on to some tips for storing fresh squeezed grapefruit juice.
Tips for Storing Fresh Squeezed Grapefruit Juice
Ironically, even though grapefruit juice is known for its sour taste, storing it in a sweet spot can help prolong its shelf life. When it comes to storing fresh squeezed grapefruit juice, there are a few tips to keep in mind to ensure that it stays fresh for as long as possible. One of the most important factors is the container in which the juice is stored. It’s crucial to use an airtight container to prevent the juice from being exposed to air, which can cause it to spoil more quickly. Glass containers are the best option, as they don’t contain any chemicals that can leach into the juice and alter its taste.
Another important factor to consider is the refrigeration options. Fresh squeezed grapefruit juice should always be stored in the refrigerator to keep it fresh for as long as possible. The ideal temperature for storing grapefruit juice is between 32 and 40°F (0 and 4°C). This temperature range helps to slow down the growth of bacteria and other microorganisms that can cause the juice to spoil. Additionally, it’s important to keep the juice away from any other foods that emit strong odors, as the juice can easily absorb these smells and alter its flavor. By following these tips, you can ensure that your fresh squeezed grapefruit juice stays fresh and delicious for a longer period of time.
As important as it is to store fresh squeezed grapefruit juice properly, it’s also crucial to know when it’s time to toss it out. In the next section, we’ll explore some ways to tell if your grapefruit juice has spoiled and should no longer be consumed.
How to Tell If Your Grapefruit Juice Has Spoiled
It’s crucial to be able to recognize when your grapefruit juice has gone bad, as drinking spoiled juice can lead to health risks and a waste of money. Common contaminants in grapefruit juice include bacteria, mold, and yeast, which can cause the juice to ferment and spoil.
Signs that your juice has gone bad include a sour or off taste, a cloudy appearance, and a foul odor. Drinking spoiled grapefruit juice can not only upset your stomach, but it can also lead to more serious health risks such as food poisoning. If you suspect your juice has gone bad, it’s best to discard it rather than risk drinking it.
In the next section, we’ll discuss whether or not fresh squeezed grapefruit juice can be frozen for later use.
Can You Freeze Fresh Squeezed Grapefruit Juice?
Freezing fresh squeezed grapefruit juice is a convenient way to preserve its tangy flavor and nutritional benefits for later use. Not only does it allow you to enjoy the taste of freshly squeezed grapefruit juice all year-round, but it also saves time and effort in making the juice every time you want to drink it. However, before you start freezing your grapefruit juice, there are a few things you need to keep in mind.
First, it is important to note that freezing grapefruit juice can alter its texture and taste. To minimize this effect, it is recommended to use airtight containers and leave some space at the top to allow for expansion. Additionally, it is best to consume the frozen juice within a few months to ensure it maintains its quality. But don’t let this discourage you from freezing your grapefruit juice! There are plenty of creative grapefruit recipes that you can make with frozen juice, such as grapefruit margaritas or grapefruit sorbet. Plus, the benefits of drinking fresh grapefruit juice, such as reducing inflammation and promoting healthy digestion, make it worth the effort of preserving it for later use.
As convenient as freezing fresh squeezed grapefruit juice may be, it is important to know how long you can store it to ensure its quality. In the next section, we will discuss how long frozen grapefruit juice can last and the best ways to thaw it.
How Long Can You Store Frozen Grapefruit Juice?
Storing frozen grapefruit juice is a great way to have a tangy and nutritious drink at your fingertips whenever you need it. But how long can you store it? Here are some things to keep in mind:
-
Freezing methods: When freezing grapefruit juice, it’s important to use a method that won’t damage the flavor and texture of the juice. One popular method is to pour the juice into ice cube trays, then transfer the frozen cubes to a plastic bag. Another option is to use a vacuum sealer to remove all the air from a plastic bag before freezing.
-
Best containers: Regardless of the freezing method you choose, it’s important to use a container that is airtight and won’t allow any moisture to enter. Glass containers are not recommended, as they can crack and break when frozen. Plastic containers with tight-fitting lids are a good choice, as are plastic bags designed for freezing food.
With these tips in mind, you can store frozen grapefruit juice for up to six months without sacrificing quality. However, when you’re ready to enjoy your juice, it’s important to thaw it properly to maintain its flavor and nutritional value.
How to Thaw Frozen Grapefruit Juice
To enjoy your frozen grapefruit juice, you’ll need to thaw it properly, so it’s ready to drink when you want it. Thawing techniques vary depending on how much time you have and what equipment you have available. Here are some popular thawing methods to consider:
| Thawing Method | Time Required | Flavor Preservation |
|---|---|---|
| Refrigerator | 24 hours | Best |
| Room Temperature | 2-3 hours | Good |
| Microwave | 30 seconds to 1 minute | Okay |
| Cold Water Bath | 30 minutes to 1 hour | Okay |
| Hot Water Bath | 5-10 minutes | Worst |
To preserve the flavor of your grapefruit juice, it’s best to thaw it slowly in the refrigerator. This method will take the longest, but it will also retain the most flavor and nutrients. If you’re short on time, you can try thawing at room temperature or using a microwave, but be aware that these methods may affect the taste. Avoid using hot water to thaw your juice as this can damage the nutrients and create a bitter taste. Once your juice is thawed, give it a good stir before drinking to make sure it’s fully mixed and ready to enjoy.
Other ways to preserve fresh squeezed grapefruit juice include freezing it in ice cube trays or canning it.
Other Ways to Preserve Fresh Squeezed Grapefruit Juice
Preserving the zesty flavor of grapefruit juice can be achieved through alternative methods such as canning or freezing in ice cube trays.
Canning fresh squeezed grapefruit juice involves heating the juice to a high temperature, pouring it into sterilized jars, and sealing them tightly. The jars can then be stored in a cool, dark place for up to a year. This method not only preserves the flavor of the juice but also makes it convenient to use throughout the year.
Another way to make fresh squeezed grapefruit juice last longer is to freeze it in ice cube trays. Simply pour the juice into the trays and freeze until solid. The juice cubes can then be stored in a freezer-safe container for up to six months. These cubes can be used in a variety of recipes, such as marinades, cocktails, and smoothies.
By preserving grapefruit juice in these alternative ways, the zesty flavor can be enjoyed throughout the year.
Frequently Asked Questions
Can I mix fresh squeezed grapefruit juice with other juices?
As the saying goes, "variety is the spice of life."Mixing combinations of fresh squeezed grapefruit juice with other juices can add nutritional benefits to your diet. Experiment with different flavors and ratios to find your perfect blend.
Does adding sugar or preservatives affect the shelf life of fresh squeezed grapefruit juice?
Adding sugar or preservatives to fresh squeezed grapefruit juice can affect its shelf life by changing its pH level and providing a food source for bacteria. Refrigeration is important to slow down bacterial growth. Effects of processing can also impact shelf life.
Can I store fresh squeezed grapefruit juice in a plastic container?
I recommend using glass containers instead of plastic for storing fresh squeezed grapefruit juice, as plastic can leach chemicals into the juice. Best storage practices include keeping the juice refrigerated and consuming it within 2-3 days.
Can I reuse a container that previously held grapefruit juice for storing more fresh squeezed juice?
While it is possible to reuse a container that previously held grapefruit juice, container hygiene is important to prevent contamination. Alternative storage options include glass bottles or jars.
Can I still drink grapefruit juice if it has changed color or has a slightly different taste?
If grapefruit juice changes color or has a different taste, it may indicate spoilage. Refrigeration can extend shelf life, but it’s best to discard if there are noticeable changes in color or taste.
Conclusion
So, if you’re wondering how long fresh squeezed grapefruit juice is good for, the answer is that it depends on a number of factors. Generally speaking, fresh squeezed grapefruit juice can last up to five to seven days when stored properly in the fridge.
However, it’s important to keep in mind that factors like temperature, exposure to light, and the level of acidity in your juice can all affect its shelf life. While some may argue that it’s not worth the effort to squeeze your own grapefruit juice, the truth is that the flavor and nutritional value of fresh squeezed juice can’t be beat.
With a little bit of care and attention, you can enjoy delicious, healthy grapefruit juice for days or even weeks. So, if you’re willing to put in the time and effort, go ahead and give it a try! Don’t forget that grapefruit juice isn’t the only refreshing option you can explore. If you’re ever struggling with digestion, many people also turn to pear juice for constipation relief, thanks to its high fiber content and natural laxative properties. By incorporating a variety of juices into your routine, you can support both hydration and overall well-being.
Cindy thoroughly researches juicing trends, techniques, and recipes to provide readers with practical advice and inspiration. Her writing style is accessible, engaging, and designed to make complex concepts easy to understand. Cindy’s dedication to promoting the advantages of juicing shines through her work, empowering readers to make positive changes in their lives through the simple act of juicing.

As a newcomer to drinking celery juice for its many health advantages, I often question the duration of its freshness. Understanding the expiration date of this juice is crucial to avoid any possible health hazards and ensure you’re enjoying a refreshing and nutritious drink.
In this article, we’ll explore the shelf life of celery juice, how to store it properly, and how to make it last longer. Celery juice has gained popularity in recent years due to its potential health benefits, such as reducing inflammation, aiding digestion, and improving skin health. However, to reap these benefits, it’s crucial to consume fresh and unpasteurized celery juice.
Celery juice that’s been sitting around for too long can lose its nutritional value and may even become a breeding ground for harmful bacteria. So, let’s dive into the science of celery juice and its shelf life to ensure that we’re getting the most out of our daily juice.
Key Takeaways
- Fresh and unpasteurized celery juice is crucial for obtaining health benefits.
- Celery juice can be stored in an airtight container in the fridge for up to 3 days.
- Freezing celery juice in small portions can extend its shelf life.
- Adding lemon juice to celery juice can slow down the oxidation process.
Shelf Life of Celery Juice
Wondering how long your celery juice will last? Let me tell you, it’s good for up to 3 days in the fridge! However, for the best taste and maximum nutrients, it’s always ideal to drink it as soon as possible. Over time, it can start to lose its potency, and the flavor may become a bit dull. Remember, the fresh celery juice shelf life may vary slightly depending on how it’s stored, so be sure to keep it in an airtight container to maintain its freshness.
It’s essential to note that celery juice preservation and freshness retention depend on how you store it. The best way to preserve the juice’s freshness is by consuming it immediately after juicing. However, if you have to store it, be sure to transfer it to an airtight container. Doing this will help maintain its freshness for up to three days in the fridge.
It’s worth noting that celery juice can lose its freshness and nutritional value if not stored correctly. Therefore, it’s essential to store it properly to keep it fresh and healthy.
Let’s now look at the proper storage of celery juice to help you enjoy your juice for longer.
Proper Storage of Celery Juice
To keep your refreshing celery juice at its best, make sure to store it in a cool and dry place. Celery juice preservation is crucial to maintaining its freshness and nutritional value.
It’s best to consume celery juice within 24 to 48 hours after making it, but if you need to store it for longer, there are a few things to keep in mind.
Firstly, always use the best containers to keep your juice fresh. Glass containers with a tight-fitting lid are the best option, as they don’t leach chemicals into the juice and can be easily sanitized. Plastic containers can also be used, but make sure they’re BPA-free and have a tight-fitting lid.
Additionally, always refrigerate your celery juice immediately after making it. This will help slow down the oxidation process and prevent the growth of harmful bacteria.
To make celery juice last longer, there are a few steps you can take. One important tip is to avoid exposing the juice to air as much as possible. This means pouring it into a smaller container as you consume it, rather than leaving it in a larger container with a lot of air space.
Another option is to freeze your celery juice in small portions. Simply pour the juice into ice cube trays and freeze. You can then thaw the cubes as needed and add them to fresh juice to extend its shelf life.
Making Celery Juice Last Longer
When it comes to making celery juice last longer, I’ve found that adding lemon juice can help preserve its freshness. The acidity of the lemon juice can slow down the oxidation process and prevent the juice from turning brown.
Additionally, using an airtight container can also help keep the juice fresh for longer periods of time. This is because it prevents exposure to air and other contaminants.
Adding Lemon Juice
Squeezing some lemon juice into your celery juice not only adds a delicious tang, but also helps to extend its shelf life. This is because lemon juice contains citric acid, which acts as a natural preservative. In addition to prolonging the freshness of your celery juice, adding lemon juice can also enhance its flavor. The tartness of the lemon juice balances out the bitterness of the celery, creating a refreshing and revitalizing drink.
To make the most of this flavor combination and preservation technique, try adding one tablespoon of fresh lemon juice to every cup of celery juice. You can adjust the amount of lemon juice to your personal taste preference. Here’s a table to help you get started on your celery juice and lemon juice experiment:
| Celery Juice | Lemon Juice | Flavor Profile | Shelf Life |
|---|---|---|---|
| 1 cup | 1 tbsp | Balanced | 3-4 days |
| 2 cups | 2 tbsp | Tart | 3-4 days |
| 3 cups | 3 tbsp | Refreshing | 4-5 days |
| 4 cups | 4 tbsp | Citrusy | 4-5 days |
Using an airtight container is another crucial step in keeping your celery juice fresh for longer.
Using an Airtight Container
Keeping your celery juice fresh is essential, and one way to do this is by using an airtight container. Storing methods play a vital role in preserving the nutritional value of celery juice. When exposed to air, the enzymes present in the juice can break down the nutrients, leading to oxidation and spoilage.
By using an airtight container, you can prevent the air from entering the container and maintain the freshness of the celery juice. An airtight container can be made of glass or plastic, but it should have a tight-fitting lid. Glass containers are preferred because they’re non-toxic and don’t react with the celery juice. However, if you’re using a plastic container, make sure it’s BPA-free.
Store the container in the refrigerator, away from light and heat. This will help to further slow down the oxidation process and extend the shelf life of your celery juice. So, now that you know how to store celery juice, let’s move on to the next question: how long can you keep celery juice?
How Long Can You Keep Celery Juice?
Celery juice can be stored in the refrigerator for up to 24 hours, but it is best to consume it as soon as possible to get the maximum health benefits. This is because the longer the juice sits, the more nutrients it loses. If you are doing a juice cleanse or trying to reap the juicing benefits of celery juice, it is important to make fresh juice daily.
To help you keep track of how long your celery juice has been in the refrigerator, here is a table that shows the recommended storage time for different types of juice:
| Type of Juice | Recommended Storage Time |
|---|---|
| Celery Juice | Up to 24 hours |
| Green Juice (Kale, Spinach, etc.) | Up to 48 hours |
| Citrus Juice | Up to 24 hours |
| Beet Juice | Up to 48 hours |
Remember, these are just guidelines and it is always best to consume your juice as soon as possible. Drinking expired celery juice can lead to food poisoning and other health issues, so it is important to be mindful of how long your juice has been sitting in the refrigerator.
Drinking Expired Celery Juice
So, we learned about how long we can keep celery juice in the previous subtopic. But what happens when we drink expired celery juice? Are there any health risks involved, or are there any benefits?
First of all, drinking expired celery juice can lead to foodborne illnesses like salmonella or E. coli. These bacteria can multiply quickly in expired celery juice, leading to symptoms like vomiting, diarrhea, and fever. It’s important to always check the expiration date and discard any celery juice that has gone bad.
On the other hand, drinking fresh celery juice has many health benefits, including improved digestion, reduced inflammation, and increased hydration. If you’re looking for an alternative or substitute to celery juice, you can try other fresh vegetable juices like carrot or cucumber juice.
Now that we know the risks of drinking expired celery juice and the benefits of fresh celery juice, what can we do with the leftover celery pulp? Let’s find out in the next section.
Reusing Celery Pulp
Wow, you won’t believe the incredible things you can do with leftover celery pulp! After juicing celery, you can keep the pulp and use it in various juice pulp recipes.
Some ideas include adding it to smoothies for added texture, mixing it with other vegetable pulp for a nutritious vegetable broth, or even using it as a base for veggie burgers. If you’re not interested in using the pulp for food, there are composting options as well.
Celery pulp is high in nitrogen and makes a great addition to any compost pile. It can also be used as a soil amendment or fertilizer for plants. With so many options, there’s no need to waste the leftovers from your celery juice.
Looking for other uses for celery juice? Keep reading to discover the benefits and ways to incorporate this nutritious drink into your daily routine.
Other Uses for Celery Juice
I’m excited to explore the other uses for celery juice beyond just drinking it. Did you know that celery juice can be used in cooking and baking?
Adding it to soups, stews, and marinades can give a unique flavor while also providing health benefits.
Additionally, celery juice can be used in skincare routines as it contains antioxidants and anti-inflammatory properties that can help with acne and other skin issues.
Cooking and Baking
If you’re a fan of baking, you don’t want to miss out on the delicious and healthy addition of celery juice that can last up to 3 days in the refrigerator! Not only does it add a unique flavor to your baked goods, but it also provides a boost of nutrients. I’ve experimented with celery juice in a variety of recipes, from muffins to breads, and have been pleasantly surprised by the results.
To help you get started, I’ve compiled a table of some of my favorite recipe ideas and kitchen gadgets that are perfect for incorporating celery juice into your baking. Whether you’re looking for a savory or sweet recipe, there’s something for everyone. So, grab your juicer and let’s get baking! Now, let’s move on to the next section to see how celery juice can benefit your skin.
| Recipe Ideas | Kitchen Gadgets |
|---|---|
| Celery juice muffins | Juicer |
| Celery juice bread | Mixing bowls |
| Celery juice marinade | Baking sheets |
| Celery juice salad dressing | Measuring cups |
| Celery juice smoothie bowl | Whisk |
Skincare
Now that we’ve explored the wonders of cooking and baking with celery juice, let’s dive into its skincare benefits. As someone who struggles with acne-prone skin, I’m always on the lookout for natural remedies that can help soothe and prevent breakouts. And celery juice might just be the answer.
Celery contains vitamin K, which helps reduce inflammation and redness in the skin. It also has antioxidants that can help protect against environmental stressors and premature aging. To reap these benefits, you can incorporate celery juice into your skincare routine by using it as a toner or mixing it with other ingredients for a DIY face mask.
There are countless recipes online that cater to different skin types and concerns. From a simple mix of celery juice and aloe vera gel to a more complex blend of celery juice, honey, and turmeric, there’s something for everyone.
When it comes to improving our health, it’s important to approach it holistically. That means not only nourishing our bodies with healthy foods, but also taking care of our skin. With celery juice, we can do both.
So, if you’re looking to spice up your skincare routine, give celery juice a try and see how it works for you. And if you’re already a fan, stay tuned for some tips on how to incorporate it into your diet.
Tips for Incorporating Celery Juice into Your Diet
To incorporate celery juice into your diet, try adding it to your morning routine as a refreshing and hydrating start to your day.
Juicing techniques are important when it comes to creating a delicious and nutritious glass of celery juice. You can use a juicer or a blender to make celery juice, but a juicer is recommended as it extracts the maximum amount of juice and nutrients from the celery.
Celery juice is rich in vitamins and minerals such as vitamin K, vitamin C, folate, and potassium. It’s also a good source of antioxidants and anti-inflammatory compounds that can help reduce inflammation and oxidative stress in the body.
Incorporating celery juice into your diet can help improve digestion, boost your immune system, and even improve your skin health.
So, go ahead and give it a try to reap all the amazing benefits that celery juice has to offer!
Frequently Asked Questions
Can you freeze celery juice?
I learned that freezing celery juice can alter its texture and taste. Instead, I recommend storing celery juice in an airtight container in the fridge for up to 3 days for optimal freshness.
How often should you drink celery juice for maximum benefits?
I recommend drinking celery juice on an empty stomach every morning for best results. It’s important to consume it within 30 minutes of juicing to maximize its benefits. Anytime of day is optimal.
Can you mix other fruits or vegetables with celery juice?
Yes, you can mix other fruits and vegetables with celery juice to create juice combinations with added nutritional benefits. For example, adding apples or carrots can enhance the flavor and increase the vitamin content.
Does the quality of celery affect the shelf life of celery juice?
The quality of celery plays a significant role in juice preservation. Fresh, high-quality celery produces juice that lasts longer compared to wilted or low-quality celery. Proper storage also prolongs shelf life.
Is it safe to drink celery juice while pregnant or breastfeeding?
While pregnant, I drank celery juice to help with morning sickness. As a breastfeeding mom, I continued to drink it to boost lactation. Celery juice is safe and beneficial during pregnancy and breastfeeding, but always consult with a healthcare professional.
Conclusion
In conclusion, keeping celery juice fresh and healthy is a must for anyone who wants to reap its many benefits. It’s like maintaining a well-oiled machine.
Proper storage, careful handling, and smart use of leftovers can all contribute to a longer shelf life and more nutritious drink. By following these tips, you can enjoy celery juice that’s not only delicious but also packed with essential vitamins, minerals, and antioxidants.
So, don’t let your celery juice go to waste. Keep it fresh and drink up!
Cindy thoroughly researches juicing trends, techniques, and recipes to provide readers with practical advice and inspiration. Her writing style is accessible, engaging, and designed to make complex concepts easy to understand. Cindy’s dedication to promoting the advantages of juicing shines through her work, empowering readers to make positive changes in their lives through the simple act of juicing.


15 Best Cold Press Juicers With Large Feed Chutes for Effortless Juice Extraction
Discover the 15 best cold press juicers with large feed chutes for effortless juice extraction, but which one will be...


15 Best Coffees for French Press That Will Elevate Your Brewing Game
Imagine brewing the perfect cup of coffee with our top 15 picks for French press; you won't want to miss...


15 Best Cold Press Juicers on Amazon: A Comprehensive Review for Health Enthusiasts
Discover the top 15 cold press juicers on Amazon that maximize nutrients and flavors; find out which models made the...


15 Best Cachoo Cold Press Juicers of 2025 – Our Top Picks for Fresh Juice Lovers
Find the perfect Cachoo cold press juicer for your kitchen in 2025 and discover the unique benefits that await your...


15 Best Organic Coffees of 2025 – Savor the Purest Brews
Get ready to indulge in the 15 best organic coffees of 2025, where exceptional flavors await—discover which brews made the...


The 15 Best JE-60 Easy Clean Slow Cold Press Juicers of 2025 – Your Guide to Healthier Juicing
Discover the top 15 JE-60 Easy Clean Slow Cold Press Juicers of 2025 that transform your juicing experience—find out which...


15 Best Dual Coffee Makers of 2025 – Brew Your Perfect Cup Every Time
Master the art of coffee brewing with the 15 best dual coffee makers of 2025, and discover which one will...


15 Best Cold Press Juicers for Pure Juice Lovers in 2025 – Expert Reviews & Recommendations
The 15 best cold press juicers for pure juice lovers in 2025 offer unmatched efficiency and nutrient retention, but which...


15 Best Coffee Grinders for Espresso Lovers: Expert Reviews & Recommendations
Learn about the 15 best coffee grinders for espresso lovers, featuring expert recommendations that could elevate your brewing experience to...


15 Best Atsent Cold Press Juicers of 2025 – Fresh Juice at Your Fingertips
Discover the top 15 Atsent cold press juicers of 2025 that guarantee fresh juice at home; find out which model...


15 Best Coffee Beans for Espresso That Will Elevate Your Brewing Game
Sip your way to espresso perfection with these 15 exceptional coffee beans that promise to transform your brewing game—discover the...


15 Best Prefix Cold Press Juicers of 2025: 10 Individual Suggestions You Can’t Miss
Navigate through the 15 best cold press juicers of 2025 and uncover top picks that will revolutionize your juicing experience—discover...
-

 Popular Juice Brands4 weeks ago
10 Top-Rated Organic Juice Brands to Try
-

 Popular Juice Brands4 weeks ago
9 Best No-Sugar-Added Popular Juice Brands
-
 Health Benefits of Juice2 weeks ago
How Much Bottled Lemon Juice Equals 1 Lemon
-

 Vegetable Juices4 weeks ago
12 Top Organic Vegetable Juice Brands Reviewed
-
 Juice Tips and Tricks7 days ago
How Long Does Lemon Juice Last After Expiration Date
-
 Juice Tips and Tricks1 week ago
How Long Does Juice Last After Juicing
-
 Juice Tips and Tricks1 week ago
2 Lemons Equal How Much Juice
-

 Vetted3 months ago
15 Best Juices for Diabetics: Refreshing Options That Won’t Spike Your Blood Sugar