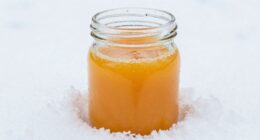
Hello fellow fans of juicing! I am excited to walk you through juicing one of my absolute favorite fruits – the kiwi.
Not only is kiwi delicious, but it’s also packed with essential vitamins and minerals that can benefit your overall health.
Before we get started, let’s gather our supplies. You’ll need a juicer, a cutting board, a sharp knife, and of course, fresh kiwis. I recommend using ripe kiwis for the best flavor and juiciness.
Now, let’s get to juicing!
Key Takeaways
- Use a masticating juicer for best results when juicing kiwis.
- Peel kiwis and cut into small pieces before juicing.
- Discard seeds to avoid a hard and crunchy texture.
- Experiment with different variations by adding other fruits or spices for added flavor.
Gather Your Supplies
Before you can begin juicing a kiwi, you need to gather all of the necessary supplies. First and foremost, you’ll need a juicer. There are a variety of juicing techniques you can use, but a masticating juicer is the best option for juicing kiwis. This type of juicer uses a slow, crushing motion to extract the juice from the fruit, which helps preserve the nutrients and enzymes in the fruit.
In addition to a juicer, you’ll also need fresh kiwis. There are several different kiwi varieties to choose from, including the fuzzy kiwi and the golden kiwi. When selecting your kiwis, make sure they’re ripe but not overripe. Overripe kiwis can be too soft and may not produce as much juice.
Once you have your juicer and your kiwis, you’re ready to move on to the next step: washing and peeling the kiwis.
Wash and Peel the Kiwis
First, you’ll want to grab those fuzzy green beauties and give them a good scrub under some cool water. This will remove any dirt or debris that may be lingering on the surface.
Once they are nice and clean, it’s time to peel them. There are a few different peeling techniques you can use, but I find that a simple vegetable peeler works best. Hold the kiwi firmly in one hand and use the peeler to remove the skin in thin strips. Be careful not to remove too much of the flesh underneath.
Peeling the kiwis not only makes them easier to juice, but it also has some nutritional benefits. The skin of the kiwi is actually edible and contains a good amount of fiber and vitamin C. However, some people may find the texture or taste unappealing. By peeling the kiwis, you can still enjoy all of the nutritional value without any unwanted texture.
Once your kiwis are peeled, it’s time to cut them into small pieces to prepare for juicing.
Cut the Kiwis into Small Pieces
Now it’s time to get those kiwis ready for the juicer by chopping them into bite-sized pieces that are so small, you’ll think they could fit through the eye of a needle! This step might seem tedious, but it’s crucial to ensure a smooth and efficient juicing process.
Here are some tips to help you cut your kiwis like a pro:
- Use a sharp knife: A dull knife will make the cutting process much harder and can even cause injury.
- Cut off the ends: Slice off the top and bottom of the kiwi to create a flat surface to work with.
- Cut in half: Hold the kiwi upright and slice it down the middle.
- Cut into small pieces: Cut each half into small, bite-sized pieces.
Kiwi juice recipes are becoming increasingly popular due to the many nutritional benefits of kiwi juice. Kiwis are high in vitamin C, vitamin K, and potassium, making them a great addition to any juice blend.
So, let’s get those kiwis cut up and add them to the juicer to create a delicious and nutritious beverage!
Add the Kiwi to the Juicer
To start the juicing process, simply drop those bite-sized kiwi pieces into the juicer and watch as they blend together with the other fruits and vegetables. It’s important to note that kiwis are extremely juicy, so there’s no need to add any extra water or liquid to the mix. Just let the juicer do its job and enjoy the natural sweetness of the kiwi.
Here are a few juicing tips to keep in mind when working with kiwis. First, make sure the kiwi is fully ripe for maximum juiciness and sweetness. Second, experiment with different kiwi juice variations by adding other fruits like pineapple or mango, or by adding a touch of ginger or mint for added flavor.
With these tips in mind, you’ll be able to create delicious and refreshing kiwi juice in no time!
Juice the Kiwi
Now that we’ve added the kiwi to the juicer, let’s juice it!
Once the juicing is complete, we should have a delicious and nutritious kiwi juice.
But what should we do with the pulp and seeds?
I recommend using the pulp for smoothies as it’s packed with fiber and nutrients.
However, it’s best to discard the seeds as they can be tough and gritty in texture.
Use the Pulp for Smoothies
Blend the beautiful, bright kiwi pulp into your favorite smoothie for a burst of bold flavor and beneficial nutrients! Don’t waste the pulp after juicing your kiwi – it can be used in a variety of creative ways. Try incorporating it into your baking recipes for a unique twist, or experiment with different kiwi smoothie recipes to find your favorite.
Not only does kiwi pulp add a delicious taste to your smoothies, it’s also packed with nutrients. Kiwis are high in vitamin C, fiber, and potassium, making them a great addition to any diet. So next time you’re juicing kiwis, don’t forget to save the pulp and add it to your smoothies for an extra boost of flavor and health benefits.
Now, let’s move on to the next step and learn how to discard the seeds.
Discard the Seeds
Hey, don’t want those pesky seeds ruining your kiwi experience, do you? So take a spoon and scoop them out, ensuring a smooth and enjoyable kiwi eating experience. Removing seeds from a kiwi is essential to enjoy its delectable flesh without getting interrupted by the small, black seeds.
Here are four reasons why you should discard the seeds when juicing a kiwi:
- The seeds have a hard and crunchy texture that can interfere with the smooth texture of the juice.
- Kiwi seeds can be difficult to digest, which can cause discomfort and bloating.
- Removing the seeds can help preserve the flavor of the kiwi, making it taste fresher and more vibrant.
- Instead of discarding the seeds, you can save them to use in other recipes. Kiwi seeds can be added to smoothies or salads for a crunchy texture.
Now that you have removed the seeds, your kiwi is ready to be juiced. Simply blend the kiwi flesh with water, strain the mixture, and pour it into a glass. Serve it chilled and enjoy the refreshing taste of kiwi juice. For an extra burst of flavor, you can squeeze in a bit of lemon or add a hint of honey to sweeten the juice to your liking. If you’re ever in need of a quick guide on how to prepare kiwi juice, just remember it’s a simple process of blending, straining, and serving. Enjoy it as a hydrating snack or pair it with your favorite meal for a tropical twist!
Pour and Serve
Now that the kiwi is juiced, it’s time to pour and serve!
For a refreshing drink, I recommend adding some ice to the glass before pouring in the kiwi juice. To add a little extra flair, try garnishing with a sprig of mint or a slice of lemon.
These simple touches can elevate the overall presentation and taste of the drink.
Add Ice for a Refreshing Drink
To really chill out your kiwi juice, just toss in some ice cubes! Here are three ways to make your kiwi drink even more refreshing:
-
Crushed ice: For a slushy texture, use crushed ice instead of regular cubes. This will give your kiwi mocktail a fun and playful vibe.
-
Fruit ice cubes: Try freezing small pieces of kiwi or other fruits in an ice cube tray. Once frozen, add these fruity ice cubes to your drink for a burst of flavor and color.
-
Flavored ice: If you want to get creative, infuse your ice cubes with different flavors. For example, add a few drops of lemon juice or mint extract to your water before freezing. This will add a subtle hint of flavor to your kiwi juice.
Now that your drink is perfectly chilled, let’s move on to the next step: garnish with mint or lemon.
Garnish with Mint or Lemon
For an extra pop of freshness, don’t forget to add a sprig of mint or a slice of lemon to your kiwi juice. Both options are great garnishes that complement the flavor of kiwi perfectly.
Mint adds a cool and refreshing taste, while lemon adds a tangy zest. Ultimately, the choice between mint and lemon comes down to personal preference.
In addition to being a flavorful addition, mint also comes with some health benefits. Mint has been shown to aid in digestion and can help alleviate symptoms of indigestion and bloating. It also contains antioxidants that can help improve overall health.
So, not only is adding mint to your kiwi juice a delicious idea, but it can also be a healthy one. Now, let’s move on to the next step and learn how to clean your juicer.
Clean Your Juicer
Don’t let your juicer become a breeding ground for germs and bacteria; give it a quick clean after every use to ensure your health and safety. Effective cleaning of your juicer is essential to keep it functioning properly and to prevent the buildup of bacteria and mold. Here are some maintenance tips to help you keep your juicer clean:
Cleaning Supplies | Frequency | Method |
---|---|---|
Dish soap | After every use | Hand wash with warm soapy water |
Vinegar | Weekly | Soak in a 1:1 vinegar and water solution for 15 minutes |
Baking soda | Monthly | Apply a paste of baking soda and water to stubborn stains |
By following these simple cleaning techniques, you can prolong the life of your juicer and ensure a healthy drink every time. Once your juicer is clean, it’s time to move on to the next step – storing your juice.
Remember to always keep your juicer clean and well-maintained to ensure the longevity of your machine and the safety of your drinks.
Store Your Juice
When I make fresh juice, I often have more than I can drink in one sitting. To save it for later, I refrigerate it in an airtight container. This way, I can enjoy it within 24 to 48 hours while still retaining most of its beneficial nutrients.
If I want to store it for longer, I freeze it in ice cube trays and then transfer the cubes to a freezer-safe bag. This is a great option for busy days when I don’t have time to make fresh juice but still want to reap its health benefits.
Refrigerate for Later Use
To keep your kiwi juice fresh and flavorful, simply pop it in the fridge until you’re ready to enjoy it later! Storing kiwi juice properly is essential to preserving its taste and nutritional value.
Here are three tips to help you store your kiwi juice in the fridge:
-
Use an airtight container: Always transfer your kiwi juice to an airtight container to prevent it from oxidizing and losing its nutrients.
-
Label the container: Be sure to label the container with the date you made the juice and the expiration date. This will help you keep track of when to use it before it goes bad.
-
Store in the back of the fridge: For maximum freshness, store your kiwi juice in the back of the fridge where the temperature is most consistent. Avoid storing it in the door, as the temperature fluctuates more there.
Now that you know how to properly store your kiwi juice, the next step is to learn how to freeze it for longer storage.
Freeze for Longer Storage
Now, if you want to store your freshly juiced kiwi for longer than a few days, you can freeze it. Freezing techniques may vary, but I recommend pouring the juice into an ice cube tray and freezing it for a few hours until solid.
Once frozen, transfer the kiwi juice cubes into a resealable freezer bag and label it with the date. With this method, you can keep your kiwi juice for up to 3 months.
When you’re ready to use the frozen kiwi juice, simply take out the desired amount of cubes and thaw them in the refrigerator for a few hours or overnight. Avoid thawing at room temperature, as it may cause the juice to lose its texture and quality.
Thawed kiwi juice may have a slightly different taste and color, but it’s still packed with nutrients and deliciousness.
With your freshly juiced or frozen kiwi juice, you can now enjoy the health benefits of this flavorful fruit.
Health Benefits of Kiwi Juice
You’ll be surprised to know that just one cup of kiwi juice contains more vitamin C than an orange! Kiwis are also a great source of other nutrients such as vitamin K, vitamin E, folate, and potassium.
These nutrients have been linked to various health benefits such as improved immune function, better digestion, and reduced risk of chronic diseases.
Aside from its nutritional benefits, kiwi juice also has some potential side effects such as allergic reactions for some individuals. It’s important to consume kiwi juice in moderation and consult with a healthcare professional if you have any concerns.
Incorporating kiwi juice into your diet can be easy and delicious with recipes such as kiwi and banana smoothies, kiwi salsa, or simply adding kiwi slices to your morning yogurt or oatmeal. Give kiwi juice a try and enjoy its many health benefits!
Frequently Asked Questions
Can I juice the kiwi seeds along with the flesh?
Juicing kiwi seeds has pros and cons. They add nutrients and fiber but can also make the juice gritty. To avoid this, remove the seeds before juicing. Tips for preparing kiwi for juicing: peel and chop into small pieces.
Is it better to use a specific type of juicer for juicing kiwis?
When juicing kiwis, a masticating juicer is better than a centrifugal one. Masticating juicers extract more juice and preserve nutrients, but may take longer. I did a taste test comparison and found masticated juice to be smoother. Kiwi juice can be frozen, but it’s best to store it in an airtight container and defrost it in the fridge.
How long does it take to juice a kiwi?
I timed myself juicing a kiwi and it took about 30 seconds. You can juice the seeds, but they may make the juice slightly gritty. Kiwis are high in vitamin C and fiber, and can also be eaten whole or sliced in salads.
Can I mix kiwi juice with other fruits or vegetables?
Yes, you can mix kiwi juice with other fruits or vegetables to create delicious and nutritious combinations. Some of the best pairings include strawberry, banana, apple, spinach, and kale. Kiwi juice benefits include boosting immunity and supporting digestion.
How long can I store kiwi juice in the fridge before it goes bad?
Storing kiwi juice can be tricky, but I’ve learned a few tips to keep it fresh longer. The shelf life of kiwi juice in the fridge is around 2-3 days. To extend it, add lemon juice or freeze it in ice cube trays. Happy juicing!
Conclusion
All in all, juicing a kiwi isn’t a difficult task at all. With just a few simple steps, you can enjoy a refreshing glass of kiwi juice that’s packed with nutrients and vitamins. Not only is it a tasty drink, but it also offers a wide range of health benefits that can help improve your overall well-being.
Did you know that kiwis are one of the most nutrient-dense fruits out there? In fact, according to a study published in the Journal of Agricultural and Food Chemistry, kiwis contain more vitamin C per gram than oranges! This means that by drinking just one glass of kiwi juice, you’re giving your body a powerful boost of antioxidants that can help fight off disease and keep you feeling healthy and energetic.
So, don’t hesitate to give this delicious fruit a try and see for yourself just how amazing it can make you feel!
Susannah expertise lies in researching and compiling evidence-based content on juicing, nutrition, and overall health. She is committed to ensuring that The Juicery World offers accurate, up-to-date, and trustworthy information to empower readers to take control of their health. Susannah’s goal is to inspire individuals to embrace juicing as a way to nourish their bodies and live their best lives.