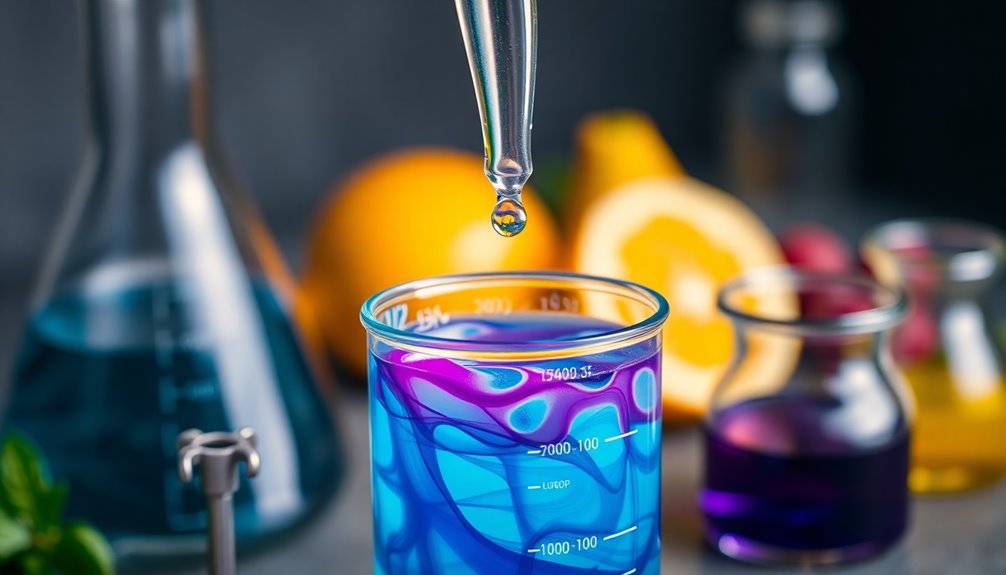

To make e-juice, start by gathering your essential ingredients: vegetable glycerin (VG), propylene glycol (PG), flavor concentrates, and nicotine if desired. Use an e-liquid calculator for accurate measurements. Mix VG and PG in a clean container, then add nicotine and flavor concentrates. Shake thoroughly to ensure even mixing. Transfer your blend to sterilized bottles, seal them tightly, and let the e-juice steep in a cool, dark place for a few days. You’ll discover more tips as you go! After the steeping period, your e-juice should be well-infused with flavor, ready for use. If you’re adventurous in the kitchen, you might also want to explore how to make juice popsicles, which can be a refreshing treat during warm weather. Just remember to use safe, food-grade ingredients for any recipes you try at home to ensure a delightful and enjoyable experience!
Key Takeaways
- Gather essential ingredients: VG, PG, nicotine (optional), and reputable flavor concentrates before starting the mixing process.
- Use an e-liquid calculator for precise measurements of nicotine strength and VG/PG ratio to ensure consistency.
- Carefully measure and mix VG, PG, nicotine, and flavor concentrates in a clean beaker for even distribution.
- Store the mixed e-juice in sterilized bottles, seal tightly, and steep in a cool, dark place for 4-5 days.
- After steeping, fill your vape tank with the DIY e-juice and adjust flavors or nicotine levels as needed for a personalized experience.

Making your own e-juice can be a rewarding experience that allows you to customize flavors and nicotine levels to your preference. If you're looking to dive into the world of DIY vaping, you'll need to gather some essential ingredients. Start by sourcing vegetable glycerin (VG), propylene glycol (PG), nicotine (if desired), and flavor concentrates from reputable vape retailers. Choosing high-quality ingredients is crucial, as it directly impacts the flavor and safety of your e-juice.
Before you begin mixing, you'll want to determine the precise measurements of each ingredient. This is where an e-liquid calculator comes in handy. You can input your desired nicotine strength and VG/PG ratio to get exact amounts for each component. It's important to get this step right to ensure you enjoy a balanced vaping experience.
Once you have your calculations, you're ready to move on to the mixing phase. Measure and mix the base liquids (VG and PG) in a clean beaker, using syringes for accuracy. This method prevents any mess and helps you get precise measurements. After measuring the VG and PG, it's time to add the calculated amounts of nicotine and flavor concentrates. Mixing these ingredients together is where the magic happens, so make sure to blend them thoroughly. You might want to use a small whisk or shake the container gently to ensure everything is well combined.
Once you've mixed the ingredients thoroughly, transfer the e-juice into sterilized storage bottles. Securely seal the bottles to prevent any leaks and shake them well to promote even distribution of flavors and nicotine. It's vital that you do this step properly, as uneven mixing can lead to inconsistent vaping experiences.
After transferring the e-juice, it's time to let it steep. Allow the e-juice to steep in a cool, dark place for at least 4-5 days. This steeping process enhances the flavor, allowing the different components to meld together beautifully. While your e-juice is steeping, you should label the bottles with the creation date and ingredient details. This helps you keep track of your batches and ensures you know what you're vaping.
After the designated steeping period, your DIY e-juice is ready for use. You can fill your vape tank and enjoy the fruits of your labor. Remember, making your own e-juice isn't just about saving money; it's about creating a personalized vaping experience tailored to your tastes.
With practice, you'll get a feel for what flavors work well together and how to adjust your nicotine levels to your liking. So, grab those ingredients, fire up the calculator, and start mixing your very own e-juice today!
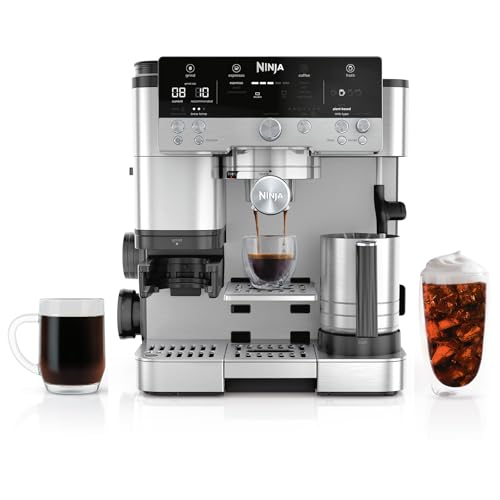
Ninja Luxe Café Premier 3-in-1 Espresso Machine, Drip Coffee, & Cold Brew
- 3-in-1 Brewing System: Espresso, drip coffee, cold brew
- Multiple Coffee Styles: Double/quad espresso, classic/rich/iced drip, cold pressed/regular cold brew
- Customizable Sizes: 6 to 18 oz options
As an affiliate, we earn on qualifying purchases.
Frequently Asked Questions
What Are the 4 Ingredients in Vape Juice?
The four main ingredients in vape juice are Propylene Glycol (PG), Vegetable Glycerin (VG), nicotine, and flavor concentrates.
PG's thin texture enhances flavor and provides a throat hit, while VG adds sweetness and boosts vapor production.
Nicotine, which you can choose to include based on your preference, comes in various strengths.
Lastly, flavor concentrates, making up 5% to 20% of the mix, let you customize your vaping experience with different tastes.
Is It Safe to Make Your Own E-Liquid?
Yes, it can be safe to make your own e-liquid if you use high-quality ingredients and follow safety practices.
You should always wear gloves and work in a clean area. Handle nicotine with caution, as it's toxic in concentrated forms, and store it out of children's reach.
Using the right equipment ensures accurate measurements and prevents contamination.
What Can You Use as Juice for a Vape?
You can use a mixture of Propylene Glycol (PG) and Vegetable Glycerin (VG) as juice for your vape.
These bases can be combined in different ratios to suit your preferences.
Add flavored concentrates specifically designed for vaping to create unique tastes, and if you want nicotine, you can include nicotine shots in various strengths.
Just remember to avoid essential oils or non-vaping concentrates, as they can be harmful when inhaled.
How Is Eliquid Made?
To make e-liquid, you mix vegetable glycerin (VG) and propylene glycol (PG) in specific ratios for the base.
Then, you can add nicotine shots to customize strength.
Flavor concentrates come next, typically ranging from 5% to 20% of your mixture.
You'll need to measure everything accurately using syringes or a scale to ensure the right mix.
After blending, steep the mixture in a cool, dark place for a few days to enhance the flavors.
Conclusion
As you stand over your freshly mixed e-juice, the sweet aroma dances in the air, igniting your senses. You've crafted a unique blend that's all your own, a little bottle of flavor waiting to be unleashed. With each puff, you'll savor the fruits of your labor, a cloud of satisfaction enveloping you. So go ahead, take that first inhale, and let the vibrant taste transport you to a world where creativity and flavor collide. Enjoy the journey!