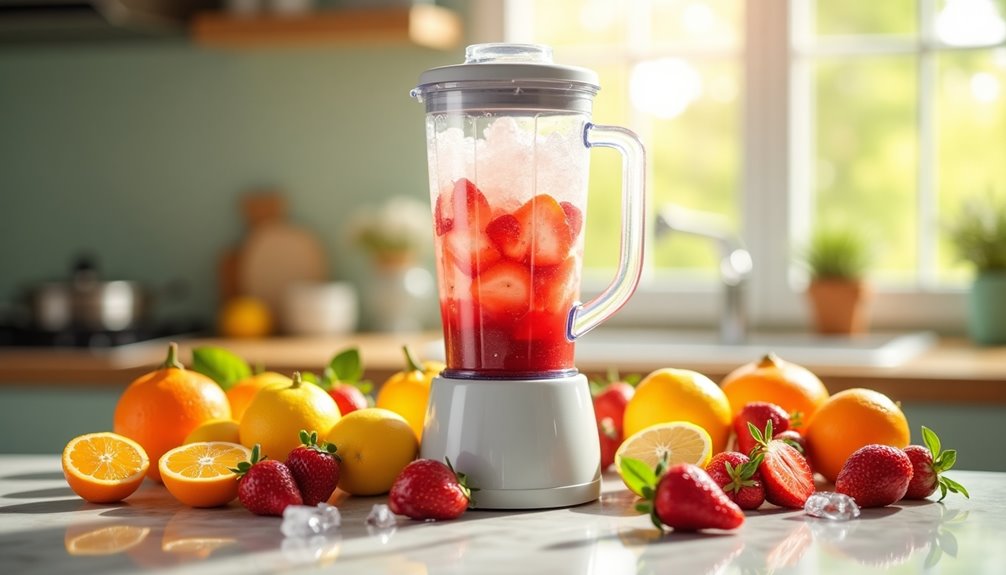
I really enjoy fresh fruit juice, especially during the summer when the weather is warm. Occasionally, I end up with more fruit than I can consume before it spoils, which is when frozen juice becomes a lifesaver!
Not only is it a great way to preserve the nutrients and flavor of your favorite fruits, but it’s also a refreshing treat on a hot day. Making frozen juice is surprisingly easy and requires just a few simple steps.
In this article, I’ll guide you through the process, from selecting the perfect fruits to experimenting with different flavor combinations. Whether you’re looking to stock up for the summer or simply want to try something new, learning how to make frozen juice is a skill you won’t regret mastering.
So, let’s get started!
Key Takeaways
- Choose fresh and ripe fruits and vegetables
- Experiment with different flavors and ingredients
- Use a high-speed blender to blend until smooth
- Freeze at -10°C to -18°C for several hours or overnight
Gather Your Ingredients
Get ready to experience a burst of refreshing flavor by grabbing all your juicy ingredients! To make frozen juice, you’ll need to choose your favorite fruits and vegetables. The variety options are endless, so pick ones that you enjoy eating.
Some popular choices include strawberries, blueberries, oranges, lemons, limes, kale, spinach, and carrots. Remember that the more variety you have, the more nutritional benefits you’ll get from your frozen juice.
When selecting your ingredients, make sure they’re fresh and ripe. The riper the fruit, the sweeter it’ll be, resulting in a more delicious juice. Also, make sure to wash your fruits and vegetables thoroughly before using them.
Once you have your ingredients ready, it’s time to prepare your fruit.
Prepare Your Fruit
To prepare your fruit, first wash it thoroughly to remove any dirt, debris, or pesticides. Juice selection is also important, as some fruits may not freeze and thaw well. Once your fruit is clean, remove any stems or seeds, and finally chop it into small pieces. Cutting techniques will vary depending on the type of fruit you are using. For example, for citrus fruits, you may want to slice off the top and bottom to create a flat surface, then slice away the skin and pith, leaving only the flesh. For berries, you may simply need to remove the stems and leaves.
When preparing your fruit for frozen juice, it’s important to remember that the quality of your fruit will affect the final product. Choose fruits that are ripe, sweet, and flavorful. Avoid fruits that are too tart or bitter, as they may not freeze and thaw well. Once your fruit is prepared, you’re ready to move on to the next step: blending. By blending your fruit, you’ll create a smooth and consistent mixture that will freeze and thaw evenly.
Blend Your Fruit
Once your fruit is perfectly prepared, it’s time to blend it into a delicious and refreshing beverage that will tantalize your taste buds. First, choose your blender wisely. A high-speed blender is recommended for optimal blending, but if you don’t have one, a regular blender will do the job.
Begin by placing your prepared fruit into the blender, along with any additional ingredients, such as water or sweeteners, if desired. Next, blend the fruit until it becomes smooth and creamy. The length of time will depend on the type of fruit and the consistency you desire, but typically it takes about 1-2 minutes.
Flavor options are endless – try adding different fruits, herbs or spices to create a unique flavor. Additionally, frozen fruit can be used for a thicker, slushy consistency. Not only is making your own frozen juice a delicious treat, it also provides nutritional benefits, such as vitamins and antioxidants.
To choose your freezing method, consider the amount of time you have and your desired consistency. A quick freeze will result in a slushy-like consistency, while a longer freeze will create a firmer texture. There are a variety of containers that can be used for freezing, such as ice cube trays, popsicle molds, or even plastic bags.
Once you’ve chosen your freezing method, pour the blended juice into your container(s) and place them into the freezer. In no time, you’ll have your own homemade frozen juice to enjoy! Be sure to leave some space at the top of the containers, as liquids expand when they freeze. If you’re interested in making frozen juice concentrate, simply reduce the amount of water used in the blending process to create a more concentrated mixture. When you’re ready to enjoy, just thaw and add water to your desired strength!
Choose Your Freezing Method
Now that your blend’s ready, it’s time to decide how to freeze it to achieve a perfect texture for your taste buds. There are different methods of freezing juice, each with its pros and cons. Here are some tips to help you achieve the perfect texture in frozen juice:
-
Ice cube tray method: Pour your juice blend into ice cube trays and freeze for a few hours. This method is great for small portions, and it allows you to easily mix and match different flavors.
-
Popsicle mold method: Pour your juice blend into popsicle molds and freeze for a few hours. This method is perfect for creating refreshing and healthy summer treats.
-
Freezer bag method: Pour your juice blend into a freezer-safe bag, remove any excess air, and freeze flat. This method is great for larger portions, and it allows you to easily store and transport your frozen juice.
Using these tricks and hacks, you’ll be able to achieve the perfect texture in your frozen juice. Now, it’s time to move on to the next section and freeze your juice.
Freeze Your Juice
Okay, so now that I’ve chosen my preferred freezing method for my juice, it’s time to actually freeze it.
The first thing I need to do is make sure that my freezing container is covered. This will prevent any outside flavors or smells from contaminating my juice.
If I’m using popsicle molds, I also need to insert the sticks at this time.
Then, I’ll need to freeze my juice for several hours or overnight, depending on the specific recipe and the desired consistency.
Cover Your Freezing Container
Before you pour the juice into the container, don’t forget to cover it with a lid or plastic wrap to prevent freezer burn. This will help to keep the juice fresh and tasty, so you can enjoy it whenever you want.
There are many benefits of covering your freezing container, including:
- Preventing freezer burn: Covering the container will prevent air from getting in, which can cause the juice to become discolored and develop an off taste.
- Keeping the juice fresh: By covering the container, you’ll be able to keep the juice fresh for longer periods of time, so you won’t have to worry about it spoiling.
- Using the best materials: When choosing a lid or plastic wrap, it’s important to choose materials that are freezer-safe and won’t crack or break in the cold.
- Easy storage: Covered containers are easier to stack and store in the freezer, so you can maximize your freezer space.
Now that your container is covered, you can go ahead and insert sticks (if using popsicle molds) to make delicious frozen juice popsicles.
Insert Sticks (if using popsicle molds)
Don’t forget to insert sticks into the popsicle molds if you want a fun way to enjoy your freshly frozen juice. Using popsicle molds is a great option for making frozen juice because they come with built-in stick holders. However, if you don’t have popsicle molds, you can still create your own stick holders using alternative options like wooden skewers or even plastic spoons.
When using popsicle molds, there are a few tips and tricks to keep in mind. Firstly, make sure to leave enough space at the top of the mold to allow for expansion as the juice freezes. Secondly, try not to twist the sticks when inserting them into the mold as this can cause the juice to spill out. And lastly, consider adding pieces of fruit or herbs to the mold before pouring in the juice for an added burst of flavor and visual appeal. Once the sticks are in place, it’s time to freeze the juice for several hours or overnight.
Freeze for Several Hours or Overnight
To freeze your popsicles, simply place the molds in the freezer for several hours or overnight. It’s important to freeze your popsicles at the right temperature to achieve the perfect texture. The ideal range is between -10°C and -18°C, which ensures that they freeze evenly and have a smooth texture.
Here are some tips for long-term storage and serving suggestions for your frozen juice popsicles:
-
Once your popsicles are frozen, remove them from the molds and transfer them to a freezer-safe container or resealable bag for long-term storage.
-
To prevent your popsicles from sticking together, place a piece of parchment paper between each one before storing.
-
When serving, remove the desired number of popsicles from the freezer and let them sit at room temperature for a few minutes to soften slightly before enjoying.
-
For added fun, try dipping your popsicles in melted chocolate or sprinkling them with your favorite toppings before serving.
Now that your popsicles are frozen and stored, it’s time to learn how to remove them from the molds without any mishaps.
Remove Your Frozen Juice
So, now that my juice is frozen solid, it’s time to remove it from the container.
First, I’ll check if I need to run warm water over the outside of the container to loosen the frozen juice.
Then, I’ll gently remove the frozen juice from the container using a butter knife or spatula.
Finally, I’ll place the frozen juice on a plate or tray and store it in the freezer until I’m ready to enjoy it.
Run Under Warm Water (if necessary)
If your frozen juice is stuck, simply run it under warm water to loosen it up and make it easier to pour. This is especially important if you prefer your juice at room temperature, as frozen juice can be difficult to work with.
By using warm water, you can quickly thaw your frozen juice and enjoy all the benefits of room temperature juice, without having to wait for it to thaw naturally. It’s important to note that this method can also be used for different types of frozen treats, such as ice cream or sorbet.
By running the container under warm water for a few minutes, you can loosen the frozen treat and make it easier to scoop or serve. Once you’ve loosened the frozen juice or treat, gently remove it from the container and enjoy!
Gently Remove from Container
Gently pull the container away from the edges and carefully release the thawed juice to prevent any spills. Remember, slow and steady wins the race!
Removing frozen juice from its container can be tricky, but with a few tips, it can be done with ease. Here are some tips for preventing juice from sticking to the container:
- Run the container under warm water for a few seconds to loosen the juice.
- Use a butter knife to gently loosen the edges of the juice from the container.
- Place the container in a bowl of warm water for a few minutes to further loosen the juice.
Once the juice has been removed from the container, place it on a plate or tray to catch any drips.
Place on a Plate or Tray
Once you’ve successfully removed the thawed juice from its container, simply place it on a plate or tray to catch any potential drips.
Using a plate or tray to freeze juice has several benefits. Firstly, it allows for easy clean-up in case of any spills or leaks. Secondly, it prevents the juice from sticking to the container, making it easier to remove next time. Lastly, it allows for creative ways to serve frozen juice, such as arranging the frozen juice cubes on a decorative tray for a party or adding fresh fruit slices for a colorful presentation.
When serving frozen juice from a plate or tray, there are several tips to keep in mind. It’s important to use a plate or tray with raised edges to prevent the juice from spilling over. Additionally, it’s recommended to place the plate or tray in the freezer for a few minutes before adding the juice to ensure that it’s cold enough to freeze the juice quickly. To add some flavor and color to the frozen juice, consider adding some fresh herbs or edible flowers on top before freezing.
After placing the juice on the plate or tray, it’s time to store it in the freezer.
Store Your Frozen Juice
When I make frozen juice, I always make sure to store it properly so that I can enjoy it later. The first step is to transfer the juice to a freezer bag or container, making sure to leave some space for expansion.
Then, I label the bag or container with the date and flavor of the juice to keep track of it. Finally, I store it in the freezer until I’m ready to enjoy it.
Properly storing frozen juice can ensure that it stays fresh and delicious for months to come.
Transfer to a Freezer Bag or Container
To get the juice ready for freezing, pour it into a resealable freezer bag or container, sealing it tightly to prevent any leaks and keeping it safe as a bug in a rug. You can use any type of container you prefer, but I recommend using a container that is specifically designed for freezing, as it will prevent freezer burn and keep the juice fresh for longer. Alternatively, you can also use ice cube trays or popsicle molds to freeze the juice for creative serving suggestions. Simply pour the juice into the molds, freeze them, and enjoy a refreshing treat on a hot summer day.
When transferring the juice to a freezer bag or container, it’s important to label it with the date and flavor to keep track of its freshness. This will also make it easier to find the flavor you want when you’re ready to use it. In the next section, we’ll discuss the importance of labeling and how it can help you stay organized and reduce waste.
Label with Date and Flavor
Don’t forget to label your frozen juice with the date and flavor. This way, you can easily find your favorite flavor and avoid wasting any of your delicious homemade concoction.
Labeling is important because it helps you remember when you made your frozen juice. It also helps prevent any confusion about what flavor it is. Here are some creative flavor ideas and tips for labeling your frozen juice:
- Use colorful stickers or labels to make your frozen juice stand out in the freezer.
- Write the date and flavor of your frozen juice on the label to help you keep track of what you have.
- If you have multiple flavors, consider using different shapes or colors for each flavor to make it even easier to identify.
- Don’t forget to include any special ingredients or modifications you made to the recipe on the label. This way, you can recreate it in the future.
Now that you’ve labeled your frozen juice, it’s time to store it in the freezer.
Store in the Freezer
Now that we’ve labeled our frozen juice with the date and flavor, it’s time to store it in the freezer. Long term storage is essential to keep the juice fresh and prevent it from spoiling. The freezer is an excellent option for this, as it will help maintain the quality of the juice for several months.
However, it’s important to take some precautions to prevent freezer burn, which can affect the taste and texture of the juice over time. To avoid this, make sure to store the juice in an airtight container, leaving enough room for the juice to expand as it freezes. Also, try to keep the temperature of the freezer consistent, avoiding any drastic changes in temperature that could cause ice crystals to form.
By following these steps, you can ensure that your frozen juice will stay fresh and delicious until you’re ready to enjoy it.
As we’ve learned, storing our frozen juice properly is crucial to keeping it fresh and tasty. But how do we go about thawing it when we’re ready to drink it? Let’s move on to the next step and find out.
Thaw Your Frozen Juice
Once your frozen juice has defrosted, it’s like an icy cocoon has transformed into a refreshing and revitalizing elixir. Thawing your frozen juice is a simple process that can be done in a few different ways. Here are some tips for quick thawing:
- Place the frozen juice in the refrigerator overnight.
- Run the frozen juice container under warm water for a few minutes.
- Microwave the frozen juice container on low power for 30-second intervals, stirring in between, until thawed.
- Place the frozen juice container in a bowl of warm water for 15-20 minutes.
- Use a citrus juicer to thaw the juice directly into a glass.
Once your juice is thawed, it can be used in a variety of recipes, such as smoothies, marinades, and cocktails. It’s important to note that the flavor and texture may be slightly different from fresh juice, but still delicious nonetheless.
With your thawed juice, you can experiment with new recipes and enjoy the benefits of a homemade and healthy beverage.
Next, we’ll discuss how to enjoy your frozen juice, including some creative recipe ideas.
Enjoy Your Frozen Juice
To savor the full flavor of your thawed juice, try mixing it with sparkling water and ice for a refreshing summer drink. This is a great way to enjoy the benefits of drinking frozen juice while keeping yourself hydrated during hot days.
You can also serve this drink to your guests as an alternative to sugary sodas or alcoholic beverages. When serving frozen juice to guests, it’s important to keep it at a consistent temperature. You can use a pitcher with ice to keep the juice cold and refreshing.
Another tip is to experiment with different flavors and variations to add a unique twist to your drink. Try adding fresh fruit or herbs to your juice for an extra burst of flavor. With these tips, you can create a delicious and healthy beverage that everyone will enjoy.
Experiment with Different Flavors and Variations
I love experimenting with frozen juice flavors and variations!
One of my favorite things to do is to try new fruit combinations, like mixing orange and pineapple or adding a splash of cranberry to my apple juice.
For a creamier texture, I sometimes add a dollop of yogurt or a splash of milk. And of course, I always adjust the sweetness to my taste by adding more or less sugar or honey.
It’s amazing how many different and delicious combinations you can come up with just by playing around with the ingredients!
Try New Fruit Combinations
Experiment with different fruit blends to create unique and delicious frozen juice flavors. Flavor pairing suggestions include combining sweet fruits like strawberries and mangoes with tart fruits like pineapple and grapefruit, or mixing tropical fruits like papaya and passionfruit with citrus fruits like oranges and lemons. Adding herbs like mint or basil can also enhance the flavor profile of your frozen juice.
Not only can experimenting with different fruit combinations create tasty frozen juice flavors, it can also provide various health benefits. For example, incorporating berries like blueberries or raspberries into your frozen juice can provide antioxidants and anti-inflammatory properties. Additionally, adding citrus fruits like oranges or grapefruits can boost your immune system with vitamin C. With so many fruit options to choose from, the possibilities for creating delicious and nutritious frozen juice blends are endless.
To add creaminess to your frozen juice, consider adding yogurt or milk. This can create a smooth texture and add a touch of richness to your beverage.
Add Yogurt or Milk for Creaminess
You can achieve a creamy texture in your frozen juice by adding yogurt or milk. These dairy products not only add a smooth consistency to your beverage but also provide a good source of protein and calcium. However, if you’re lactose intolerant or vegan, you can try yogurt alternatives such as almond, soy, or coconut milk.
When blending your frozen juice with yogurt or milk, it’s important to follow a few tips to ensure a perfect consistency. First, add the liquid gradually while blending to avoid making the mixture too thin. Second, choose a high-fat yogurt or milk to achieve a creamier texture. Third, use a blender with a powerful motor to blend the ingredients thoroughly.
By following these tips, you can create a delicious and nutritious frozen juice with a velvety-smooth texture. Adjust the sweetness to your taste to make it even more enjoyable.
Adjust Sweetness to Your Taste
Adjusting the sweetness level of your creamy beverage can enhance its flavor profile and cater to your taste preferences. When making frozen juice with yogurt or milk, it’s important to remember that not everyone has the same sweet tooth.
Some prefer their drinks to be less sweet, while others want them to be sweeter. Thus, it’s essential to adjust the sweetness level according to your taste.
To adjust the sweetness level, you can add more or less sugar, honey, or maple syrup to your drink. However, keep in mind that adding too much sweetener can overpower the taste of the other ingredients. To avoid this, start with a small amount, and gradually add more until you reach the desired sweetness level.
Flavor experimentation is also another way to adjust the sweetness level of your frozen juice. You can try adding different fruits or spices, such as ginger or cinnamon, to enhance the taste of your drink without adding extra sweetness.
Frequently Asked Questions
Can I use store-bought juice instead of fresh fruit for this recipe?
Using concentrate can be convenient, but the benefits of using fresh fruit outweigh the ease. The flavor and nutritional value are superior. Store-bought juice may contain extra sugars and preservatives.
How long will the frozen juice last in the freezer?
The frozen juice can last up to eight months in the freezer if stored at an optimal temperature of 0°F. However, the freezing duration may vary depending on the type of juice and the packaging used.
Is it safe to refreeze the juice if it has been thawed and then refrozen?
Refreezing thawed juice is not recommended due to spoilage concerns, taste changes, and texture issues. Homemade juices without preservatives are more susceptible to spoilage. Consider alternatives or follow proper storage tips and consume within recommended time frame.
Can I add sugar or other sweeteners to the juice before freezing?
Yes, you can add sugar or other sweeteners to the juice before freezing. However, keep in mind that freezing temperature can affect the sweetness level. It’s recommended to taste the juice before freezing and adjust the sweetness accordingly.
How can I make the juice smoother and less chunky after blending?
To make juice smoother and less chunky after blending, try using blending techniques such as pulsing or adding alternative ingredients like yogurt or avocado. Experiment with different ratios to find the perfect consistency for your taste preferences.
Conclusion
In conclusion, making frozen juice is a simple and enjoyable process that can be done in the comfort of your own home. You can create a delicious and healthy treat that is perfect for any occasion by following the steps outlined above. The possibilities are endless, whether you prefer a classic orange juice or something more exotic like a mixed berry blend.
So why not give it a try? Homemade frozen juice is not only a great way to cool down on a hot summer day, but it’s also a fun and creative way to experiment with different flavors and variations. Who knows, you might just discover your new favorite recipe!
So grab your blender, your favorite fruits, and get started on your frozen juice adventure today.
Cindy thoroughly researches juicing trends, techniques, and recipes to provide readers with practical advice and inspiration. Her writing style is accessible, engaging, and designed to make complex concepts easy to understand. Cindy’s dedication to promoting the advantages of juicing shines through her work, empowering readers to make positive changes in their lives through the simple act of juicing.