
To clean your juicer in under 5 minutes, quickly gather your supplies like brushes and a cloth, then disassemble the main parts—like the feed chute and pulp chamber. Rinse off all residue and use a soft brush or sponge to scrub crevices and filters. Rinse everything thoroughly, dry with a towel, and reassemble the parts. Staying efficient with these steps guarantees your juicer stays clean and ready for the next use; learn more for seamless tips.
Key Takeaways
- Disassemble the juicer quickly, removing all parts like the feed chute, screw, and mesh for easier access.
- Rinse all components under warm running water to remove pulp and juice residue immediately after use.
- Use soft brushes or sponges with mild dish soap to scrub crevices and filters, then rinse thoroughly.
- Pat dry each part with a microfiber cloth to prevent water spots and bacterial growth.
- Reassemble the juicer and store in a dry, cool place for quick, hygienic readiness.
Gather Your Cleaning Supplies

To effectively clean your juicer, start by gathering all the necessary supplies. You’ll need basic cleaning supplies like soft brushes, sponges, and a mild dish soap to scrub away residue. Having a clean towel or microfiber cloth on hand helps dry parts quickly. Don’t forget to set out some storage containers if you plan to rinse and store parts temporarily. These containers keep small accessories organized and prevent parts from getting lost. Make sure your cleaning supplies are within reach before disassembling the juicer, so you can clean it efficiently. Proper maintenance ensures your juicer stays in good working condition and prolongs its lifespan. By preparing everything beforehand, you’ll save time and avoid scrambling for tools mid-clean. Having the right cleaning supplies and storage containers ready ensures a smooth, quick cleaning process.
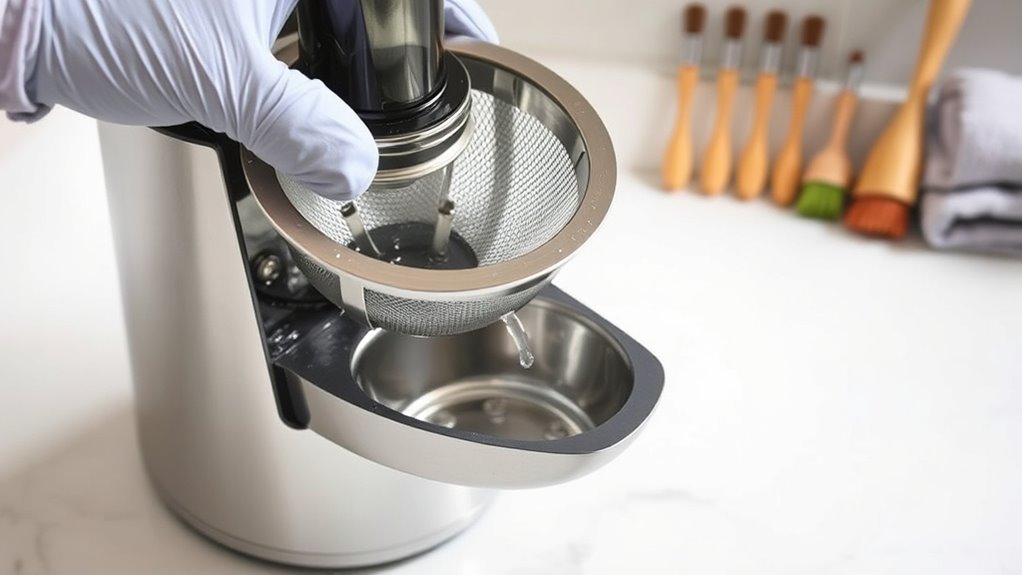
Disassemble the Juicer Efficiently
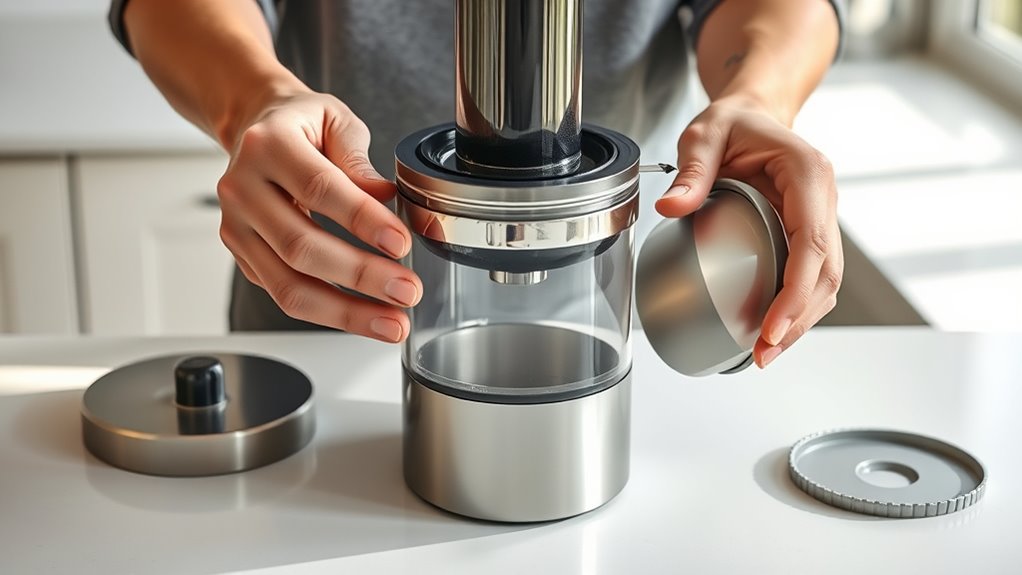
Start by unplugging your juicer to guarantee safety before disassembly. Carefully remove the top cover and feed chute to access the internal parts. Detach the juicing screw or blade assembly, paying attention to how parts fit together for easy reassembly. As you disassemble, keep track of small components like gaskets and filters. While handling the motor housing, be mindful of motor maintenance and avoid exposing electrical components to water. This step is essential for electrical safety, preventing damage or short circuits. Proper disassembly also helps prevent damage to internal parts during cleaning. Use gentle pressure to avoid breaking parts, and consult your user manual if needed. Taking your time now guarantees a smooth cleaning process later and helps maintain your juicer’s longevity. Proper disassembly makes cleaning quick and safe, especially when considering the importance of electrical safety during maintenance. Incorporating AI safety measures can further ensure your appliance operates reliably over time. Additionally, understanding the GMC tuning principles can assist in maintaining the overall performance of your equipment.
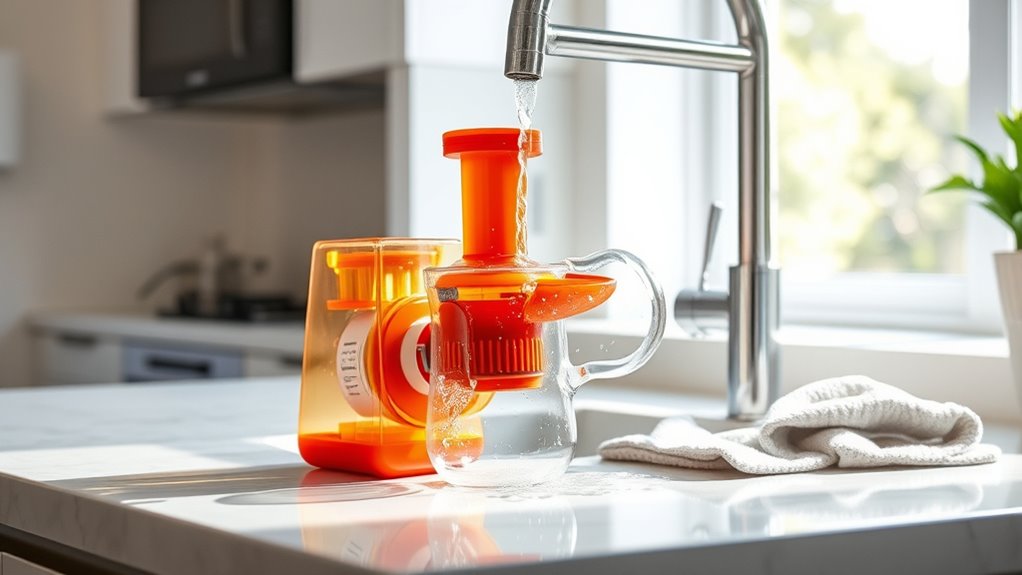
Rinse Off Residual Pulp and Juice

After disassembling your juicer, start by removing any remaining pulp from the parts. Rinse each piece thoroughly to wash away juice residue and pulp. This step helps guarantee your juicer stays clean and ready for the next use. Regular cleaning not only maintains the appliance’s performance but also helps prevent buildup that can affect the efficiency of your small kitchen appliances. Be sure to manage cookie preferences, which can enhance your overall browsing experience.
Remove Remaining Pulp
Have you ever noticed pulp and juice clinging to the parts of your juicer after you’re done? Rinsing off residual pulp and juice guarantees your machine stays clean and ready for the next use. To effectively remove remaining pulp, focus on pulp removal from all surfaces, paying attention to crevices and hard-to-reach spots. Use a soft brush or cloth to loosen stubborn bits, ensuring no residue is left behind. This step simplifies residue cleanup and prevents buildup that could affect performance or taste. Take a few extra seconds to wipe down the juicer thoroughly, removing any remaining pulp and juice. Doing so ensures your juicer remains hygienic, functions smoothly, and minimizes cleaning time in the future. Regular cleaning also helps prevent bacterial growth, which can occur if pulp residues are left to sit. Incorporating proper cleaning techniques can further enhance the longevity and hygiene of your appliance. Additionally, using specialized brushes designed for small parts and crevices can make the cleaning process even more efficient. Quick and thorough pulp removal keeps your machine in top shape, supporting your overall personal development by fostering healthy habits.
Wash Juicer Parts
To effectively rinse off residual pulp and juice, remove each juicer part and hold it under running water. Use cleaning techniques that target all surfaces, ensuring no pulp or juice remains. Scrub gently with a soft brush or sponge if necessary, especially around crevices and blades. Proper rinsing is vital for juicer maintenance, preventing buildup and odors. Focus on thorough cleaning to keep your juicer functioning ideally and extend its lifespan. Pay attention to the filter, strainer, and other small parts, as these areas tend to trap residue. Regularly washing your juicer parts with this method makes cleaning quick and effective, ensuring your juicer stays in top shape. Additionally, cleaning your self watering plant pots regularly can prevent soil buildup and promote healthy plant growth. Incorporating regular filter replacement as recommended for your specific model will also help maintain optimal performance and air quality. Being mindful of cleaning frequency can further enhance the longevity of your juicer and its components.
Use a Quick Brush or Sponge for Scrubbing
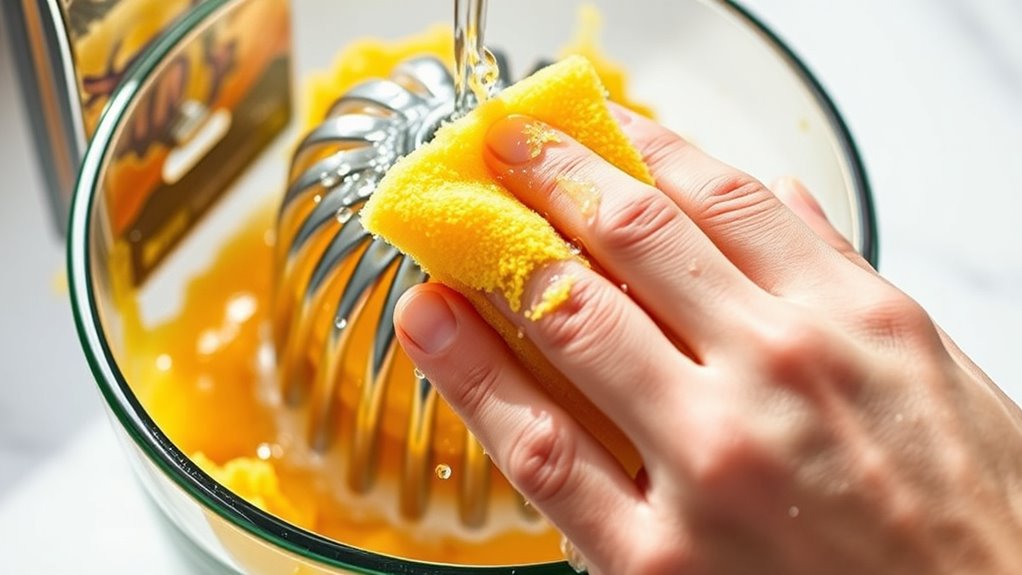
Using a quick brush or sponge makes scrubbing your juicer efficient and straightforward. These tools are essential for effective scrubbing techniques, helping you remove pulp and residue quickly. Keep a small brush or non-abrasive sponge nearby for fast cleaning sessions. Focus on the juicer’s crevices and mesh screen, applying gentle pressure to loosen stuck particles. Quick cleaning hacks like this save you time and prevent buildup. Use warm water and a bit of dish soap on your brush or sponge to enhance cleaning power. Rinsing thoroughly afterward ensures no soap residue remains. This method keeps your juicer hygienic and ready for your next use without the hassle of lengthy scrubbing. Regular maintenance, similar to car tuning, helps maintain your appliance’s optimal performance and longevity. It’s a simple, effective step to maintain your appliance’s performance and prevent damage. Incorporating routine cleaning also aligns with the importance of a healthy lifestyle, ensuring your juicer remains a safe and reliable part of your daily routine. Additionally, using an air purifier in your kitchen can help reduce airborne contaminants and keep your environment fresher while you clean. Proper cleaning with the right tools can also help in reducing allergens, creating a healthier kitchen space.
Rinse and Dry the Components
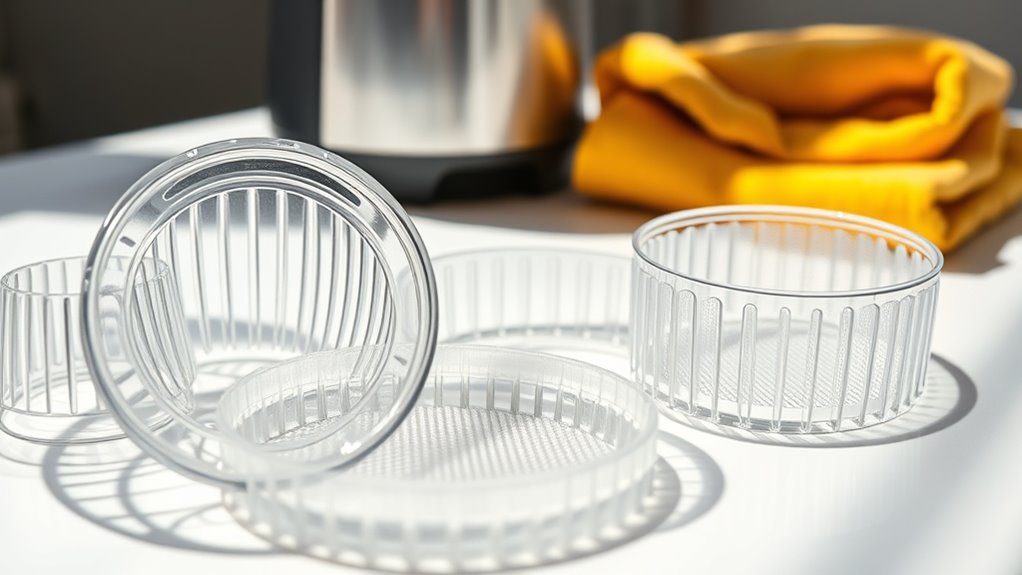
After scrubbing, remove any remaining pulp from the components. Rinse them with warm water to wash away any leftover residue. A thorough rinse helps prevent bacterial growth and keeps your juicer in top shape. To ensure the longevity of your appliance, it’s also important to regularly inspect and maintain the components. Finally, towel dry each part thoroughly to prevent water spots and keep your juicer in top shape. Ensuring all components are completely dry can also help maintain the appliance’s long-term investment and performance.
Remove Residual Pulp
Once you’ve finished juicing, it’s important to remove any residual pulp by rinsing the components thoroughly. Pulp buildup can clog your juicer and make residue removal more difficult if it’s left to dry. Start by disassembling the parts and rinsing each piece under running water. Use your fingers or a soft brush to gently scrub away any pulp stuck in crevices. Focus on cleaning the mesh screen and juicing chamber to prevent pulp from drying and hardening. This step ensures all residue is washed away, reducing the risk of mold or bacteria growth. After rinsing, shake off excess water and dry the components with a clean towel or let them air dry to maintain your juicer’s performance and longevity.
Use Warm Water Rinse
To effectively rinse your juicer components, start by filling a basin or sink with warm water—not hot, as extreme heat can damage certain parts. The right water temperature ensures thorough cleaning without risking damage. Rinsing after each use helps maintain ideal cleaning frequency and prevents residue buildup. During the rinse, you can:
- Gently scrub any stubborn pulp spots with a soft brush
- Swirl parts in the warm water to loosen debris
- Avoid using harsh detergents that could affect water temperature sensitivity
Using warm water quickly dissolves remaining juice and pulp, making drying easier later. Remember, regular rinsing with the correct water temperature keeps your juicer in top shape and minimizes cleaning time. Proper rinsing is key to a quick, effective clean.
Towel Dry Thoroughly
Even if your juicer looks clean after rinsing, it’s essential to towel dry each component thoroughly. Use a microfiber towel to gently pat dry all parts, ensuring no moisture remains. This prevents water spots and reduces the risk of mold or bacteria growth. Focus on corners and crevices where water can hide, and avoid rubbing too hard, which could damage delicate surfaces. Gentle patting with a microfiber towel absorbs water quickly and efficiently. Take your time to dry each piece completely before reassembling or storing your juicer. This simple step helps maintain your juicer’s cleanliness and prolongs its lifespan. Once dry, your juicer is ready for next use or safe storage, saving you time and effort in future cleanings.
Reassemble and Store Your Juicer
After thoroughly cleaning your juicer, carefully reassemble all the parts in the correct order, ensuring each piece fits securely. Proper reassembly is key to maintaining your juicer’s performance. Once assembled, consider storage tips to keep your appliance ready for use. Store your juicer in a dry, cool place to prevent mold or damage. To keep it clean and ready for the next use, you might want to cover it or place it in a designated cabinet. Remember, good storage extends the life of your juicer. For quick access, keep the main parts together and avoid clutter. Regularly check for any residual moisture or dust before storing. These simple steps help maintain cleaning techniques and keep your juicer in prime condition for your next fresh juice.
Frequently Asked Questions
Can I Clean My Juicer in the Dishwasher?
You might wonder if your juicer is dishwasher compatible, but it depends on the model. Check for dishwasher compatibility labels or instructions. If it’s safe, use the appropriate cleaning cycle options, usually a gentle or delicate cycle, to prevent damage. Remove any parts that aren’t dishwasher safe first. Always refer to your juicer’s manual to guarantee proper cleaning and prevent any issues with your appliance.
How Often Should I Deep Clean My Juicer?
Did you know that neglecting deep cleaning can cause bacteria to multiply faster than you’d think? You should deep clean your juicer at least once a week to prevent buildup of juice residue and mold. Regular cleaning keeps it functioning smoothly and extends its lifespan. If you juice daily, consider deep cleaning more frequently—perhaps every 3-4 days—to maintain hygiene and peak performance.
Are There Specific Cleaning Products to Avoid?
You should avoid using chemical cleaners and abrasive scrubbers on your juicer, as they can damage delicate parts and leave residues. Instead, stick to warm water and mild dish soap for cleaning. If needed, use a soft brush or cloth to scrub away pulp and residue. This approach keeps your juicer safe, clean, and ready for your next healthy juice without risking corrosion or lingering chemicals.
What’s the Best Way to Prevent Mold Buildup?
Imagine your juicer as a tiny garden, where mold can sprout if not cared for properly. To prevent mold buildup, you should dry all parts thoroughly after cleaning, especially in hidden crevices. Use proper storage tips—keep your juicer in a cool, dry place and cover it loosely. Regularly inspecting and cleaning your juicer helps maintain mold prevention, ensuring fresh, safe juice every time you blend.
How Do I Clean Hard-To-Reach Parts Effectively?
To clean hard-to-reach parts effectively, you should use precise brush techniques with small brushes or toothbrushes to reach tight spots. Make sure to sanitize those areas thoroughly using appropriate sanitizing methods, like a vinegar solution or a mild disinfectant. Regularly inspect and scrub stubborn residues, and don’t forget to rinse well afterward. This guarantees your juicer stays hygienic and prevents mold buildup, keeping your appliance safe and efficient.
Conclusion
With just a few quick steps, you can keep your juicer sparkling and ready for your next healthy blend. Think of your cleaning routine as giving your favorite kitchen gadget a little pampering—no fuss, just a gentle touch. A clean juicer not only looks good but also guarantees every sip is pure and delicious. So, take those extra minutes to care for your device; it’s the secret to endless fresh, tasty juice adventures.

Susannah expertise lies in researching and compiling evidence-based content on juicing, nutrition, and overall health. She is committed to ensuring that The Juicery World offers accurate, up-to-date, and trustworthy information to empower readers to take control of their health. Susannah’s goal is to inspire individuals to embrace juicing as a way to nourish their bodies and live their best lives.