Connect with us

Juice Tips and Tricks

How Do You Get Grape Juice Out Of Clothes

Published

on

We have all been there: enjoying a delicious glass of grape juice when suddenly it spills on our clothes. It can be frustrating and seem difficult to clean, but fret not! With the right steps, getting rid of grape juice stains from your clothing can be a breeze.

First, it’s important to act quickly. As soon as the spill happens, grab a cloth and begin blotting the stain. The longer the juice sits, the harder it will be to remove.

Once you’ve blotted as much of the juice as possible, it’s time to move onto the next step: rinsing with cold water.

Keep reading to learn the rest of the steps to effectively remove grape juice stains from your clothes.

Key Takeaways

  • Act quickly to remove grape juice stains from clothing
  • Soak in cold water and vinegar for at least 30 minutes
  • Use stain remover and check care label before washing
  • Prevention is key: use stain-resistant fabric spray and wear bib/apron when drinking grape juice

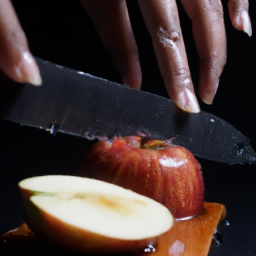
Blot the Stain Immediately

Don’t panic, just grab a paper towel and blot that grape juice stain ASAP! Blotting techniques are essential to get as much of the stain out as possible before it sets in.

Start by gently blotting the stain with a clean and dry paper towel. Avoid rubbing the stain as it can spread the grape juice further into the fabric. Instead, press down on the stain to absorb as much of the juice as possible.

Advertisement

The importance of quick action can’t be stressed enough. The longer you wait to treat the stain, the harder it’ll be to remove.

If you’re out and about and don’t have access to a paper towel, you can use a cloth napkin, a tissue, or even a slice of bread to blot the stain.

Once you’ve blotted the stain as much as possible, move on to the next step and rinse the fabric with cold water.

Rinse with Cold Water

First, start by running icy water over the stained area to prevent the juice from setting into the fabric like a stamp on an envelope. It’s important to use cold water instead of warm or hot water because heat can actually set the stain permanently.

Here are four benefits of using cold water for stain removal:

Advertisement
  1. Cold water helps to prevent the stain from spreading.
  2. It helps to loosen the stain from the fabric.
  3. It’s gentle on the fabric and won’t cause damage.
  4. It’s easily accessible and doesn’t require any special equipment.

To properly rinse clothing for stain removal, hold the stained area under a faucet or use a bowl of cold water to pour over the stain. Make sure the water is running through the back of the fabric to push the stain out instead of pushing it further into the fibers.

Once you’ve rinsed the area thoroughly, move on to applying a stain remover.

Applying a stain remover is the next step in removing grape juice from clothes.

Apply a Stain Remover

When it comes to removing tough stains like grape juice from clothes, I’ve found that applying a stain remover can be really helpful.

There are two options when it comes to stain removers: you can use a commercial product or make your own at home.

Commercial stain removers can be found at most stores and are specifically designed to tackle tough stains, while making your own can be a more natural and cost-effective option.

Advertisement

Use a Commercial Stain Remover

To effectively remove grape juice stains from your clothes, you can try using a commercial stain remover that’s specifically designed for tough stains. There are many benefits to using natural stain removers, but sometimes a commercial product is necessary for those stubborn stains.

When choosing a commercial stain remover, it’s important to compare the effectiveness of different products. Look for one that’s specifically designed for removing grape juice stains and has good reviews from other users.

When using a commercial stain remover, always follow the instructions on the label. Apply the remover directly to the stain and let it sit for the recommended amount of time. Then, wash the garment in the washing machine as usual.

If the stain is still visible, repeat the process or try a different product. If you prefer to make your own stain remover, there are several options you can try.

Make Your Own Stain Remover

If you’re feeling crafty, whip up your own stain remover using DIY stain remover recipes that use natural stain removal techniques.

Advertisement

One common recipe is to mix equal parts baking soda and water to form a paste. Spread the paste on the stained area, let it sit for 30 minutes, and then rinse it off with cold water.

Another recipe is to mix 1/4 cup of white vinegar, 1 tablespoon of dish soap, and 2 cups of water. Apply the mixture to the stain, let it soak for 15 minutes, and then rinse it off with cold water.

These DIY stain remover recipes are effective, affordable, and eco-friendly. They use simple ingredients that you probably already have in your kitchen, and they don’t contain any harsh chemicals.

So next time you spill grape juice on your clothes, don’t panic. Just mix up a batch of DIY stain remover and treat the stain with natural stain removal techniques.

Once you’ve applied the stain remover, move on to the next step: soak the stain in cold water for at least 30 minutes to help lift the remaining stain from the fabric.

Advertisement

Soak the Stain

First, try soaking your stained clothes in cold water and vinegar to help lift the grape juice from the fabric. This is one of the pre-treatment options that you can do before washing your clothes.

Simply fill a basin or sink with cold water and add a cup of vinegar. Then, place the stained clothing into the water and let it soak for at least 30 minutes. The vinegar will help break down the stain while the cold water prevents the stain from setting further into the fabric.

If the grape juice stain is particularly stubborn, you may need to try alternative stain removal techniques such as using a specialized stain remover or laundry detergent. However, before trying any harsh chemicals on your clothing, always refer to the manufacturer’s instructions and test on a small, inconspicuous area first.

Once you have successfully soaked and treated the grape juice stain, it is time to wash the clothing as usual.

Wash the Clothing

Now it’s time to toss those stained clothes in the washing machine and say goodbye to that pesky grape juice stain for good! But wait, before you do that, it’s important to know some stain removal and laundry techniques to ensure that the stain is completely removed.

Advertisement

First, check the care label on your clothing to determine the appropriate water temperature and washing cycle. Then, pretreat the stain with a stain remover or laundry detergent before placing it in the machine. For tougher stains, you may need to soak the clothing in a mixture of warm water and laundry detergent for a few hours before washing.

To better understand how to remove grape juice stains, take a look at the table below. It provides a quick and easy guide on how to treat stains based on the type of fabric.

Fabric Type Treatment
Cotton Pretreat with laundry detergent and wash on warm
Synthetic Pretreat with stain remover and wash on cold
Wool Soak in cold water and use a wool-specific stain remover before washing on cold
Silk Spot clean with a gentle fabric cleaner and air dry

Now that you know how to properly wash your stained clothing, it’s time to check the stain after washing to ensure that it’s completely gone.

Check the Stain

After tossing your stained clothing in the washing machine, don’t forget to double-check for any lingering traces of the grape juice stain.

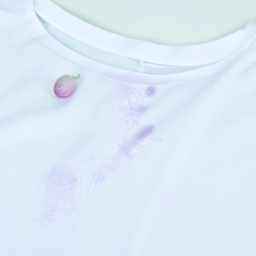
Grape juice stains are notorious for being difficult to remove, so it’s important to identify any remaining marks before putting the clothing in the dryer. To identify grape juice stains, look for a dark purple or red spot on the fabric. The stain may also feel sticky or have a sweet smell.

Advertisement

When dealing with grape juice stains, it’s important to take precautions to avoid spreading the stain. Avoid rubbing the stain, as this can cause it to spread and set deeper into the fabric. Instead, gently blot the stain with a clean cloth or paper towel to remove as much of the juice as possible.

If the stain is still visible, apply a stain remover or a mixture of vinegar and baking soda before washing the clothing again. With these precautions in mind, you can successfully remove grape juice stains from your clothing.

Moving on to the next step, repeating the process, it’s important to continue checking for any remaining traces of the stain until it is completely gone.

Repeat the Process

To ensure that every last bit of the grape juice stain is removed, I suggest checking the clothing and repeating the process until the fabric is completely clean and free of any lingering marks. Repetition benefits the cleaning process, as it gives the cleaning agent enough time to work on the stain and break it down.

If the first attempt does not fully remove the grape juice stain, try applying the cleaning solution again and letting it sit for a longer period of time. Alternatively, you can also try using a different cleaning solution, such as rubbing alcohol or white vinegar, to remove the grape juice stain from the clothing.

Advertisement

Make sure to spot test the solution on an inconspicuous area of the fabric before applying it to the stained area. Once the grape juice stain is removed, it’s important to dry the clothing properly to prevent any mildew or mold growth.

Dry the Clothing

Once the stain has been fully removed, make sure to properly dry the clothing to avoid any potential for mildew or mold growth. It’s better to be safe than sorry! When it comes to drying grape juice stains on clothes, there are two main options: air dry or tumble dry.

Air drying can be a great option for delicate fabrics or if you’re worried about shrinkage. Simply lay the garment flat on a clean towel and let it dry naturally. However, if you’re in a rush or prefer to use a dryer, tumble drying can also work well. Just make sure to use a low heat setting and avoid over-drying the clothing.

Best Techniques for Drying Grape Juice Stains on Clothes Tips for Preventing Grape Juice Stains from Setting in Clothes
Option 1: Air dry Use a stain-resistant fabric spray before wearing clothes
Lay garment flat on clean towel Use a bib or apron when drinking grape juice
Allow to dry naturally Treat stains as soon as possible
Option 2: Tumble dry Blot stains with a clean cloth or paper towel before washing
Use a low heat setting Avoid rubbing stains, as this can push them further into the fabric

After drying the clothing, it’s important to check for any residual stains. Even if the stain appears to be fully removed, it’s possible that some pigment may still be present. In the next section, we’ll explore techniques for ensuring that the stain is completely gone.

Check for Residual Stains

Make sure you don’t miss this crucial step – checking for any remaining stains on your clothing after removing grape juice stains. Grape juice stains can come in different types, such as fresh or dried, and they can be quite stubborn to get rid of.

Advertisement

Even if you think you’ve successfully removed the grape juice stain, it’s important to check for any residual stains that may still be present. The importance of checking for residual stains lies in preventing the stain from becoming permanent. If left untreated, the stain may set in and become more difficult to remove.

So, make sure to examine your clothing thoroughly for any remaining grape juice stains before proceeding to the next step. Speaking of which, let’s move on to some prevention tips to avoid getting grape juice stains in the first place.

Prevention Tips

Want to avoid getting those pesky purple stains on your favorite clothes? Here are some tips to prevent grape juice stains from happening in the first place!

First, consider investing in stain-resistant fabrics. These fabrics are designed to repel liquids and prevent stains from setting in. Look for clothing made from materials like polyester or nylon, which are known for their stain resistance properties.

If you do find yourself in a situation where grape juice is the only option, try using grape juice alternatives like cranberry or pomegranate juice. These juices have a similar taste and color to grape juice but are less likely to leave behind stains.

Advertisement

Another option is to dilute the grape juice with water to reduce its staining potential. And if all else fails, be sure to treat any stains immediately with a stain remover before washing the garment.

Frequently Asked Questions

Can grape juice stains be removed from all types of fabrics?

Fabric compatibility is key when removing grape juice stains. There are alternative solutions for each type of fabric, but it’s important to act fast. With attention to detail, any stain can be removed with ease.

How long should the stain be soaked in stain remover before washing?

When it comes to removing tough stains from clothes, stain remover effectiveness and soaking time are key. It’s important to follow the instructions on the product, but I’ve found that soaking for at least 30 minutes before washing yields the best results.

What is the best type of stain remover to use for grape juice stains?

When dealing with grape juice stains, chemical stain removers tend to be more effective than natural ones. However, DIY options like vinegar or baking soda can work well if used immediately and in large quantities.

Can hot water be used to rinse out the stain instead of cold water?

As the saying goes, "hot water sets stains."Using hot water for grape juice stains can actually make it worse. It’s best to pre-treat the stain before washing with cold water and stain remover.

Advertisement

How can I prevent grape juice stains from occurring in the first place?

To prevent grape juice stains, I avoid wearing light-colored clothes while drinking it. If spilled, I immediately blot the stain with a paper towel and apply a mixture of vinegar and dish soap. Alternative solutions include using a stain repellent spray or wearing a bib.

Conclusion

Well, that was quite a spill! I was enjoying a nice glass of grape juice when suddenly, it ended up all over my shirt. Luckily, I remembered the steps to remove the stain.

First, I made sure to blot the stain immediately with a clean cloth to absorb as much of the juice as possible. Then, I rinsed the affected area with cold water to prevent the stain from setting in.

Next, I applied a stain remover and let it sit for a few minutes before soaking the stain in cold water overnight. The next day, I washed the clothing in the washing machine and repeated the process if necessary.

Once the stain was removed, I made sure to dry the clothing thoroughly and checked for any residual stains.

Advertisement

In the future, I’ll be sure to use a bib or be more careful when drinking grape juice to prevent any more spills. But for now, I’m happy to have successfully removed the stain thanks to these helpful steps.

Cindy thoroughly researches juicing trends, techniques, and recipes to provide readers with practical advice and inspiration. Her writing style is accessible, engaging, and designed to make complex concepts easy to understand. Cindy's dedication to promoting the advantages of juicing shines through her work, empowering readers to make positive changes in their lives through the simple act of juicing.

Continue Reading
Advertisement

Juice Tips and Tricks

How To Make Ash Gourd Juice

Published

on

By

Hello! I am excited to talk to you about how I prepare ash gourd juice. Ash gourd, also known as winter melon or white gourd, is an important ingredient in many Asian cuisines and offers numerous health benefits when juiced. It is low in calories, high in dietary fiber, and contains essential nutrients like vitamin C, calcium, and potassium.

Before we dive into the recipe, let’s talk about the importance of selecting the right ash gourd. You want to choose a firm, heavy gourd with a smooth and unblemished skin. The skin should be a light green color, and the gourd should feel dense when you hold it.

Once you have your perfect ash gourd, it’s time to start making the juice!

Key Takeaways

  • Selecting a ripe ash gourd with the right size is important for quality and quantity.
  • Properly preparing ash gourd by cleaning, cutting, peeling, and removing seeds is crucial for taste and increased bioavailability of nutrients.
  • Adding additional ingredients such as lemon, mint, ginger, basil, honey, or jaggery can enhance flavor and provide additional health benefits.
  • Storing in airtight container in fridge and consuming within 2-3 days maintains freshness and nutritional value.

Selecting the Right Ash Gourd

When it comes to making ash gourd juice, selecting the right ash gourd is crucial. As someone who’s made this juice multiple times, I can tell you that identifying ripe ash gourd and choosing the right size are two key factors to consider.

Ripe ash gourd is usually pale green or white in color, with a hard exterior and a hollow interior filled with seeds. It’s also important to choose an ash gourd that’s not too big or too small, as this can affect the taste and texture of the juice.

Identifying Ripe Ash Gourd

As you search for the perfect ash gourd to make juice, keep an eye out for one that feels heavy for its size and has a smooth, pale green exterior. Here are some tips to help you identify a ripe ash gourd:

Advertisement
  1. Look for a dull sound when you tap the gourd. If it sounds hollow, it’s not ripe yet.
  2. Check the stem of the gourd. If it’s dry, it means the gourd is ripe.
  3. The skin of a ripe ash gourd is hard and can’t be easily pierced with a fingernail.
  4. Ripe ash gourds have a slightly sweet scent.

Using ripe ash gourd to make juice has many benefits. Ash gourd juice is rich in vitamins and minerals that can help improve digestion, boost immunity, and aid in weight loss. It’s also low in calories, making it a great addition to your diet. So, be sure to select a ripe ash gourd for your juice to reap these nutritional benefits.

When it comes to choosing the right size of ash gourd, there are a few things to keep in mind.

Choosing the Right Size

Picking the perfect size of ash gourd is like finding a golden nugget in a river of pebbles. Size considerations are important because it determines how much juice you can extract from the fruit. A small ash gourd may not yield enough juice while a large one may be too heavy and difficult to handle.

A medium-sized ash gourd is ideal for making juice as it provides a good balance of quantity and quality. Apart from size, health benefits are also a factor to consider when choosing an ash gourd. The fruit is low in calories, high in fiber, and rich in vitamins and minerals. It’s known to have anti-inflammatory properties and may help regulate blood sugar levels.

By choosing the right size of ash gourd, you can reap these health benefits while enjoying a refreshing and nutritious drink. Now, let’s move on to the next step of cleaning and preparing the ash gourd.

Cleaning and Preparing the Ash Gourd

Before making ash gourd juice, it’s important to properly clean and prepare the ash gourd.

Advertisement

First, I usually cut the ash gourd into manageable pieces and peel off the tough outer layer with a knife or vegetable peeler.

Then, I scoop out the seeds and discard them.

These steps ensure that the ash gourd is ready to be used for making juice.

Cutting and Peeling

To easily prepare the ash gourd, start by slicing off the ends and then peeling the skin with a vegetable peeler. It’s important to practice knife safety when handling the gourd, so make sure to use a sharp knife and keep your fingers away from the blade. Additionally, sanitation practices should be followed by washing the gourd thoroughly before cutting.

Once the skin is removed, cut the ash gourd in half lengthwise with a sharp knife. Use a spoon to scoop out the seeds and discard them. This step will ensure that the juice doesn’t have a bitter taste and will also make it easier to blend.

Advertisement

With the seeds removed, the ash gourd is now ready to be cut into smaller pieces for juicing.

Removing the Seeds

Now that we’ve cut and peeled the ash gourd, it’s time to remove the seeds. Seed removal techniques can vary depending on the size and texture of the gourd. For small and tender gourds, you can simply scoop out the seeds using a spoon. However, for larger and tougher gourds, you may need to use a knife to cut around the seeds and then remove them.

It’s important to remove the seeds as they can be bitter and affect the taste of the juice. Aside from improving the taste, removing the seeds from ash gourd also has health benefits. The seeds contain compounds that can interfere with the absorption of nutrients in the body. By removing them, you can increase the bioavailability of the nutrients in the juice.

Additionally, ash gourd seeds have been traditionally used in Ayurvedic medicine to treat various ailments such as diabetes and urinary tract infections. Incorporating the seeds into your juice can provide these added health benefits.

Moving on to the next step, let’s choose additional ingredients to enhance the flavor and nutritional value of the juice.

Advertisement

Choosing Additional Ingredients

One important thing to keep in mind when choosing additional ingredients for ash gourd juice is to make sure they complement the natural sweetness of the ash gourd. This will not only enhance the flavor of the juice but also provide additional health benefits.

Some popular flavor combinations for ash gourd juice include adding mint leaves for a refreshing taste or ginger for a spicy kick. When selecting additional ingredients, it’s important to consider their health benefits as well.

For example, adding lemon juice can help boost your immune system and improve digestion. Alternatively, adding honey can provide antibacterial properties and soothe a sore throat. By choosing the right combination of ingredients, you can create a delicious and nutritious ash gourd juice.

Now that we’ve selected our ingredients, let’s move on to blending the ash gourd juice.

Blending the Ash Gourd Juice

Get ready to blend a delicious concoction that’ll have your taste buds doing a happy dance! Now that you’ve got all the ingredients, it’s time to blend the ash gourd juice.

Advertisement

There are a few blending techniques that can help you achieve the perfect texture for your juice. First, start by blending the ash gourd until it’s smooth and creamy. Then, add in the additional ingredients one at a time, blending in between to ensure that everything is well combined. You can also experiment with different flavor combinations by adjusting the amount of ingredients you add or swapping out one ingredient for another.

Once everything is blended to your liking, it’s time to move on to the next step of straining the juice. Straining the juice will help remove any pulp or seeds that may be left in the mixture. This step is important to achieve a smooth and consistent texture for your juice.

So, grab a strainer or cheesecloth and strain the blended mixture into a clean container. With the juice now strained, it’s time to sit back, relax, and enjoy the delicious and refreshing taste of ash gourd juice!

Straining the Juice

To achieve a smooth and delicious texture for your ash gourd juice, all you need to do is strain the mixture using a strainer or cheesecloth. This process removes any remaining pulp or seeds that may affect the flavor and consistency of your drink.

Here are some tips to improve the flavor and alternative straining methods you can try:

Advertisement
  • Use a fine-mesh strainer for a smoother texture and to remove any tiny particles.
  • Squeeze the cheesecloth gently to extract as much juice as possible without forcing any pulp or seeds through.
  • Add a pinch of salt to enhance the sweetness of the juice.
  • Consider using a nut milk bag for a more eco-friendly and reusable alternative to cheesecloth.

By straining your ash gourd juice properly, you can ensure a refreshing and delightful drink that is perfect for any time of the day.

Now that we’ve achieved a smooth and delicious texture, let’s move on to adding finishing touches to make our juice even more special.

Adding Finishing Touches

Now that I’ve strained the ash gourd juice, it’s time to give it some finishing touches.

One way to elevate the drink is by adding garnishes, such as mint leaves or a slice of lemon.

Another important aspect is to make sure the drink is chilled, either by adding ice cubes or refrigerating it beforehand.

These simple additions can make all the difference in creating a refreshing and enjoyable beverage.

Advertisement

Garnishes

Don’t forget to add a slice of lemon or a sprig of mint to your refreshing glass of ash gourd juice for that extra burst of flavor. Not only do these garnish pairings add an aesthetically pleasing touch to your drink, but they also offer their own set of health benefits.

Lemon, for example, is a great source of vitamin C and can help boost your immune system while mint is known for its ability to aid in digestion. To take your ash gourd juice to the next level, consider trying out different garnish pairings such as ginger or basil.

Ginger is known for its anti-inflammatory properties and can help alleviate nausea while basil is a natural stress reliever. Experiment with different combinations to find the perfect garnish pairing for you.

Now that your drink is perfectly garnished, it’s time to move on to the next step: ice and chill.

Ice and Chill

Once you’ve selected your preferred garnish pairing, it’s time to cool down your refreshing ash gourd juice by adding some ice and letting it chill in the fridge for a bit. Adding flavors to your juice is always a good idea, but don’t forget that ice also adds a subtle flavor that can enhance your drink.

Advertisement

You can also opt to use flavored ice cubes, like mint or lemon, to add an extra kick to your juice. Aside from adding flavor, chilling your juice has health benefits too. Cold drinks can help soothe your digestive system and reduce inflammation in your body.

Additionally, cold ash gourd juice can help reduce stress and anxiety, making it the perfect way to unwind after a long day. So, add some ice to your ash gourd juice and enjoy its refreshing taste and health benefits.

Now that your juice is chilled, it’s time to move on to storing it.

Storing the Juice

To keep the freshness intact, seal the bottle of ash gourd juice tightly and store it in the fridge until consumption, like a treasure in a safe. Preservation methods like this are crucial to maintaining the nutritional value of the juice. Moreover, the refrigeration process helps to keep the juice from going bad and developing harmful bacteria.

Here are three tips for storing ash gourd juice to ensure its freshness and quality:

Advertisement
  1. Use an airtight container: This will prevent the juice from getting exposed to air and will help keep it fresh for longer.

  2. Store it in the fridge: The cool temperature of the fridge will prevent bacteria from growing in the juice and prolong its shelf life.

  3. Consume it within 2-3 days: As with any fresh juice, it’s best to consume the ash gourd juice as soon as possible to get the maximum health benefits.

As a result, once you’ve stored the ash gourd juice using these guidelines, you can enjoy the refreshing drink with confidence.

So, let’s move on to the next section to learn about some drinking and serving suggestions.

Drinking and Serving Suggestions

When it comes to drinking and serving ash gourd juice, I find that the time of day plays a big role in how enjoyable it is. I prefer to drink it in the morning because it’s refreshing and helps me start my day on a healthy note.

As for accompaniments, I find that it pairs well with a light breakfast or snacks like nuts and seeds. Overall, ash gourd juice is a great addition to a healthy and balanced diet.

Time of Day

Whether you’re looking for a refreshing morning drink or an evening beverage to wind down, ash gourd juice is a great option. It can be enjoyed at any time of the day, depending on your preference and needs.

Advertisement

Here are some factors to consider when deciding whether to drink ash gourd juice in the morning or evening:

  1. Morning vs. Evening: Some people prefer to drink ash gourd juice in the morning as it can help jumpstart their day and provide a burst of energy. Others prefer to drink it in the evening as it can have a calming effect and aid in relaxation.

  2. Health Benefits vs. Taste Preference: If you’re drinking ash gourd juice primarily for its health benefits, then it may be best to consume it in the morning when your body is in need of nutrients. On the other hand, if taste is your main concern, then you may prefer to drink it in the evening when you can savor its flavor.

  3. Personal Routine: Your daily routine may also dictate when you drink ash gourd juice. If you have a busy morning and need a quick and healthy breakfast, then drinking it in the morning may be the best option. Alternatively, if you have a relaxing evening routine and like to wind down with a drink, then ash gourd juice may be the perfect choice.

  4. Climate: The climate can also play a role in when you drink ash gourd juice. In hot and humid climates, drinking it in the morning may be more refreshing, while in cooler weather, you may prefer to drink it in the evening for its warming properties.

Incorporating ash gourd juice into your daily routine is easy and versatile. Whether you drink it in the morning or evening, it can be enjoyed on its own or paired with a number of accompaniments.

Accompaniments

Adding different flavors to your refreshing glass of ash gourd juice can enhance your taste buds and give you a unique experience. If you’re looking for a little extra kick, try pairing your ash gourd juice with mint leaves or ginger.

The mint leaves give a cool and refreshing taste, while ginger adds a spicy kick that complements the mild flavor of the ash gourd. For those who prefer a sweeter taste, adding a small amount of honey or jaggery can do the trick.

But it’s not just about the taste. These accompaniments also offer additional health benefits. Mint leaves are known to aid in digestion and have anti-inflammatory properties, while ginger has been used for centuries to treat nausea and reduce muscle pain. Honey and jaggery are natural sweeteners that also offer antioxidant properties.

Advertisement

So, not only will you be enjoying a delicious drink, but you’ll also be boosting your health at the same time.

Frequently Asked Questions

What are the health benefits of ash gourd juice?

I’ve researched the nutritional composition and health benefits of ash gourd juice. It’s low in calories, high in fiber, and rich in vitamins and minerals. However, excessive consumption may cause potential side effects like diarrhea and abdominal discomfort.

Can I use a different type of gourd for this recipe?

I wondered if I could use a different gourd for juice. After experimenting, I found that bottle gourd and cucumber make good alternatives. However, the taste is different from ash gourd.

How long will the ash gourd juice last in the fridge?

The ash gourd juice can last up to 2-3 days in the fridge if stored properly. Preservation methods include adding lemon juice or storing in an airtight container. A recommended serving size is 1 cup per day.

Can I add sweeteners or other flavorings to the juice?

Yes, adding sweeteners is a personal preference. However, ash gourd juice is naturally low in calories and high in nutrients like vitamin C and antioxidants, making it a healthy choice.

Advertisement

Is ash gourd juice safe for pregnant women and children to consume?

Pregnancy precautions should be taken when consuming ash gourd juice as its safety during pregnancy is not established. Children can safely consume small amounts, but excessive intake may lead to digestive issues.

Conclusion

Wow, making ash gourd juice was much easier than I thought it’d be! The process may seem daunting, but it’s actually quite simple if you follow the steps.

The key to a delicious ash gourd juice is selecting the right gourd, cleaning and preparing it properly, and choosing the right additional ingredients. Once you’ve blended and strained the juice, you can add your own finishing touches and store it for later.

Incorporating ash gourd juice into your diet can have numerous health benefits, including improved digestion and hydration. Plus, it’s a refreshing and tasty way to get your daily dose of nutrients.

So why not give it a try? With a little bit of practice, you’ll be able to make the perfect glass of ash gourd juice in no time!

Advertisement

Continue Reading

Juice Tips and Tricks

How Do You Convert 4 Ounces Of Juice To Milliliters

Published

on

By

As someone who is dedicated to promoting health and nutrition, I understand the importance of understanding the nutritional value and properties of the foods we consume. Being able to accurately convert measurements, such as ounces to milliliters, is essential to ensure that we are getting the proper nutrients for our well-being.

In this article, I will guide you through the process of converting 4 ounces of juice to milliliters. Whether you are a health enthusiast, a professional chef, or simply looking to improve your cooking skills, this information will come in handy.

By following the steps outlined in this article, you will not only be able to convert 4 ounces of juice to milliliters, but you will also gain a deeper understanding of the properties and composition of the foods that you consume.

So, let’s get started!

Key Takeaways

  • The conversion factor for ounces to milliliters is 1 oz = 29.5735 mL.
  • To convert ounces to milliliters, multiply by the conversion factor.
  • Cancelling out units is important for accurate conversions.
  • Knowledge of common conversions and abbreviations can save time and prevent mistakes.

Understanding the Difference between Ounces and Milliliters

Don’t get confused between ounces and milliliters – it’s easy to mix them up! Understanding measurements is important when it comes to cooking and baking.

Ounces are a unit of volume commonly used in the United States, while milliliters are used in most other countries. When it comes to converting units accurately, it’s important to know the difference between these two units of measurement.

Advertisement

To convert 4 ounces of juice to milliliters, you need to know the conversion factor. One fluid ounce is equal to approximately 29.5735 milliliters. Therefore, 4 ounces of juice would be equal to approximately 118.294 milliliters.

Knowing the conversion factor is essential when converting between different units of measurement. It helps to ensure that you are precise and accurate in your calculations.

Knowing the Conversion Factor

To figure out how much juice you have in milliliters, it’s important to know the conversion factor. The conversion factor for converting ounces to milliliters is 1 ounce = 29.5735 milliliters.

This means that for every ounce of juice, you have 29.5735 milliliters of juice. To convert 4 ounces of juice to milliliters, you simply need to multiply 4 by the conversion factor of 29.5735.

Examples of using this conversion factor include accurately measuring out a recipe that requires a specific amount of juice in milliliters, or converting nutritional information on a food label from ounces to milliliters. Understanding this conversion factor and its applications can be helpful in various situations where precise measurements are necessary.

Advertisement

Knowing the conversion factor is just the first step in converting ounces of juice to milliliters. In the next section, we’ll discuss how to set up the equation to make the calculation easier and more accurate.

Setting Up the Equation

So, when I need to convert ounces to milliliters, I always start by writing the amount in ounces. This is an important step because it helps me keep track of the units I’m working with throughout the conversion process.

Once I have the amount in ounces, I then write out the conversion factor, which is the ratio of milliliters to ounces. This helps me set up the equation and ensures that I’m making an accurate conversion.

Being precise and knowledgeable about these key points allows me to provide practical advice and recommendations for those seeking a healthier diet.

Writing the Amount in Ounces

With just 4 oz of juice, you can already quench your thirst on a hot day. However, if you want to know how much juice it is in milliliters, you’ll need to convert it.

Advertisement

Common juice types, such as orange and apple juice, are often sold in ounces in the United States. But in many other countries, milliliters are used as the standard unit of measurement.

Converting ounces to other units of measurement, such as milliliters, is a straightforward process that requires only basic math skills. To convert 4 oz of juice to milliliters, you’ll need to write the amount in ounces as a fraction and then multiply it by the conversion factor.

The conversion factor for converting ounces to milliliters is 29.5735, which means that 1 oz is equivalent to 29.5735 ml. Therefore, 4 oz of juice is equal to 118.294 ml (4 x 29.5735).

Writing the conversion factor is an important step in converting ounces to milliliters.

Writing the Conversion Factor

By including the conversion factor, you can effortlessly transform your measurements from ounces to milliliters, like a magician pulling a rabbit out of a hat.

Advertisement

The conversion factor for fluid ounces to milliliters is 1 fluid ounce = 29.5735 milliliters. This means that if you have 4 ounces of juice, you can multiply it by the conversion factor to get the equivalent amount in milliliters, which would be 118.294 milliliters.

It’s important to be familiar with common conversions and unit abbreviations to make these calculations easier. For example, in addition to fluid ounces and milliliters, other common conversions include teaspoons to milliliters, tablespoons to fluid ounces, and cups to milliliters.

Knowing the appropriate unit abbreviations for these conversions can also save time and prevent mistakes. By using the correct conversion factor and unit abbreviations, you can quickly and accurately convert between different units of measurement in the kitchen and beyond.

And with these conversions under your belt, you can move onto the next step in understanding measurements: cancelling out units.

Cancelling Out Units

To convert 4 ounces of juice to milliliters, you simply need to cancel out the units of measurement and substitute with the appropriate conversion factor.

Advertisement

Unit conversion techniques are essential when dealing with measurements in different systems. One common unit conversion error is forgetting to cancel out the original unit of measurement before multiplying by the conversion factor. This results in incorrect answers and can be avoided by always being mindful of the units involved in the calculation.

Cancelling out units is the process of eliminating the original unit of measurement by dividing it out of the equation. This leaves only the desired unit of measurement, making it easier to solve the conversion.

In this case, we can cancel out ounces by dividing 4 by 1, since 1 fluid ounce is equal to 29.5735 milliliters. The resulting answer is 118.294 milliliters.

Solving the equation correctly ensures that the conversion is accurate and reliable, making it easier to measure ingredients and maintain a healthy diet.

Solving the Equation

Solving the equation correctly is essential in ensuring accurate and reliable conversions, making it easier to measure ingredients and maintain a healthy diet. Common mistakes in converting measurements include forgetting to cancel out units and using the wrong conversion factor. To avoid these errors, it’s important to have a clear understanding of the relationship between the units being converted and to double-check calculations before moving on.

Advertisement

Real-world examples can help illustrate the importance of accurate conversions. For instance, if a recipe calls for 4 ounces of juice and you accidentally use milliliters instead of fluid ounces, you may end up with a drink that is too sweet or too diluted.

In addition, incorrect conversions can have serious consequences in fields such as medicine, where dosages must be precise. By taking the time to solve the equation correctly and check your calculations, you can ensure that your measurements are accurate and reliable.

By double-checking your answer, you can catch any errors that may have been made during the conversion process. This can be done by using a different conversion method or simply rechecking your work. With accurate measurements, you can confidently prepare recipes and maintain a healthy diet.

Checking Your Answer

Make sure to double-check your answer when checking measurements, as even small errors can have serious consequences. When converting ounces to milliliters, precision is crucial.

A small miscalculation or misreading can result in a significant difference in the amount of liquid, which can affect the intended outcome of a recipe or even the health of the consumer.

Advertisement

One common mistake to avoid when converting ounces to milliliters is using an incorrect conversion factor. Another is misreading the measurement on the scale or measuring cup.

It’s important to use accurate instruments and to check, double-check, and triple-check the numbers before proceeding. Precision is key when it comes to converting measurements, and taking the extra time to ensure accuracy can save time, money, and even lives.

Now, let’s move on to the next step of rounding your answer.

Rounding Your Answer

When converting measurements, rounding your answer is like putting the finishing touches on a painting – it may seem like a small detail, but it can greatly impact the final product.

When dealing with liquid measurements, it’s important to pay attention to the decimal places in rounding. For example, if you’re converting 4 ounces of juice to milliliters, the answer would be 118.294118 milliliters. However, you can’t measure out .294118 milliliters, so you would round to the nearest whole number, giving you 118 milliliters.

Advertisement

It’s also important to consider significant figures in rounding, especially when dealing with scientific measurements. Significant figures are the number of digits that carry meaning in a measurement. For example, if you’re measuring 3.45 milliliters, the 3 and 4 are significant figures, while the 5 is not. When rounding, you should keep in mind the number of significant figures in the original measurement. In the case of converting 4 ounces of juice to milliliters, the answer should be rounded to three significant figures, giving you 118 milliliters.

Moving on to converting other amounts, there are many online conversion calculators available that can help you with the process. It’s important to remember to pay attention to the units you’re measuring in, as well as any specific instructions for rounding or significant figures.

With a little practice, converting measurements can become second nature and help you make healthier choices in the kitchen.

Converting Other Amounts

To easily convert different measurements in your cooking, all you need is an online conversion calculator and to pay attention to the units and rounding instructions.

Converting larger volumes can seem intimidating, but it’s actually quite simple. For example, if you want to convert 4 ounces of juice to milliliters, you can use a conversion calculator to find that it’s equal to 118.294 milliliters.

Advertisement

Similarly, if you need to convert a recipe that calls for 1 cup of milk to milliliters, you can use the same calculator to find that it’s equal to 236.588 milliliters.

It’s also important to know how to convert between different units of measurement. For example, if a recipe calls for 1/2 teaspoon of salt and you only have a tablespoon measure, you can use a conversion calculator to find that 1 tablespoon is equal to 3 teaspoons. Therefore, you would use 1/6 of a tablespoon to get 1/2 teaspoon of salt.

By understanding how to convert between different units of measurement, you can make sure that your recipes turn out perfectly every time. With these tips and tricks for converting units, you’ll be able to confidently tackle any recipe that comes your way.

Tips and Tricks for Converting Units

When it comes to converting units, there are a few tips and tricks that can make the process much easier. Personally, I find that using online conversion tools, such as unit converters or apps, can be incredibly helpful.

Additionally, keeping a conversion chart handy can be a great reference when you’re in a pinch. These resources can help you quickly and accurately convert units, making it easier to measure and track your food intake.

Advertisement

Using Online Conversion Tools

Well, ain’t it a hoot – online conversion tools can take the hassle out of figuring out how many milliliters are in 4 ounces of juice.

Here are a few tips to help you get started:

  1. Find a reputable online conversion tool. There are plenty of them out there, so do your research and find one that you feel comfortable using.

  2. Enter the quantity you want to convert and select the appropriate units. In this case, you would enter ‘4’ and select ‘ounces’.

  3. Choose the units you want to convert to. In this case, you would select ‘milliliters’.

  4. Hit ‘convert’ and voila! You now have your answer in milliliters.

Using online conversion tools can be a quick and easy way to convert between different units of measurement. However, it’s important to keep in mind that these tools are not infallible, and there may be slight variations in the conversions depending on the tool you use.

In the next section, we’ll explore another method for converting units – using conversion charts.

Using Conversion Charts

Hey, wanna know a fun way to convert units? Try using conversion charts!

Advertisement

Commonly used conversion charts are readily available online, and they can help you convert between different units of measurement. Whether you need to convert ounces to milliliters or pounds to kilograms, conversion charts can simplify the process and save you time.

Using conversion charts is straightforward. Simply find the unit of measurement you want to convert from, such as ounces, and follow the row across until you reach the unit you want to convert to, such as milliliters. The chart will provide the conversion factor, or the number you need to multiply the original amount by to get the new amount.

With a little practice, using conversion charts can become second nature and help you quickly and accurately convert units of measurement.

Practice Makes Perfect

To get better at converting ounces to milliliters, I’ve found that practicing often is key. It’s important to familiarize yourself with the conversion factor (1 oz = 29.5735 mL) and use it consistently.

One helpful tip for memorization is to create flashcards or use online quizzes to test your knowledge. This can help reinforce the conversion factor and make it easier to recall when needed.

Advertisement

Additionally, it’s crucial to avoid common mistakes when converting ounces to milliliters. One mistake to watch out for is using the wrong conversion factor, as there are different factors for different types of measurements (e.g. fluid ounces vs. dry ounces). Another mistake is rounding too early in the conversion process, which can lead to inaccurate results.

By practicing regularly and being mindful of common mistakes, converting ounces to milliliters can become a simple and efficient task.

Frequently Asked Questions

What types of juice can be converted from ounces to milliliters?

Did you know that popular juice brands often recommend serving sizes of 8-12 ounces? When converting ounces to milliliters, keep in mind that 1 fluid ounce is equivalent to approximately 29.5735 milliliters.

Why is it important to understand the difference between ounces and milliliters?

Understanding the difference between ounces and milliliters is crucial for accurate measurements in cooking and baking. Unit conversion errors can greatly impact recipes, resulting in undesirable outcomes. As a knowledgeable and practical individual, I advise using precise measurements to achieve optimal results and a healthier diet.

Can you use the same conversion factor for all types of liquids?

Applying correct conversion factors is crucial when converting between ounces and milliliters, but it’s important to keep in mind liquid density and its impact on conversion. As someone knowledgeable about food properties and health, I can provide practical recommendations for a healthier diet.

Advertisement

How can you check if your conversion is correct?

When converting measurements, common conversion errors can occur. To double check, use a reliable conversion chart and verify calculations. As someone knowledgeable about food properties and health, I can provide practical tips for accurate conversions.

Are there any common mistakes to avoid when converting units?

Common pitfalls when converting units include forgetting to convert between metric and imperial systems, using incorrect conversion factors, and misreading or misinterpreting units. To ensure accurate conversions, double-check calculations, use reliable sources for conversion factors, and always clarify units of measurement. As a nutrition expert, I am precise, knowledgeable, and practical in my approach to recommending healthier food choices.

Conclusion

Well, there you have it – converting 4 ounces of juice to milliliters is a piece of cake! By following the steps outlined in this article, anyone can easily convert between these two measurement units.

It’s empowering to be able to do these types of calculations on your own, especially when it comes to making healthy choices about what you eat and drink. In fact, being able to convert between units is just one small step towards a healthier lifestyle.

By becoming more precise and knowledgeable about the properties and composition of various foods and their impact on human health, we can make more informed decisions about what we put into our bodies.

Advertisement

So go ahead, practice your conversions and take control of your health – it’s worth the effort! And who knows, maybe one day you’ll be able to convert units in your sleep…now that’s a hyperbole!

Continue Reading

Juice Tips and Tricks

How Are Juice Concentrates Made

Published

on

By

Juice concentrates encapsulate the lively essence of life in a bottle, crafted by extracting the juice from fruits or vegetables, refining, straining, and then condensing it into a thick, concentrated form. This results in a potent, flavorful concentrate that is utilized in a variety of ways, from mixing cocktails to intensifying the flavors of sauces and marinades.

The process of making juice concentrates can seem daunting, but it is actually quite simple and straightforward. By following a series of steps, fruit and vegetable juices can be transformed from their natural state into a more concentrated, versatile form that can be used in a variety of applications.

In this article, I will guide you through the process of making juice concentrates, from the extraction of juice to the final concentration, and explain the different types of concentrates that are available, as well as their pros and cons. Whether you are a professional chef, a home cook, or just someone who enjoys the taste of fresh juice, this article will provide you with all the information you need to know about how juice concentrates are made.

Key Takeaways

  • Juice concentrates are made by extracting juice from fruits or vegetables and reducing it down to a thick, concentrated form.
  • Clarification of juice is important to remove impurities and achieve a clear liquid for further processing.
  • Concentrating juice involves removing water from the juice to increase its concentration levels.
  • Juice concentrates offer a convenient and nutrient-dense option for those on the go, but may be high in sugar and calories if they contain added sugars or are made from fruits with naturally high sugar content.

Extraction of Juice

Now you’re gonna take those ripe fruits and crush ’em up to release all the juice inside.

Juice extraction techniques play a crucial role in determining the quality and yield of the final product. There are several methods of extracting juice from fruits, but the most common ones include pressing, pulping, and enzymatic extraction.

Pressing involves applying pressure to the fruits to extract juice, while pulping involves grinding the fruits into a pulp and then squeezing out the juice. Enzymatic extraction is a more modern technique that uses enzymes to break down the fruit cells and release the juice.

Advertisement

Regardless of the technique used, the goal is to optimize juice yield while maintaining the desired flavor and aroma profile. Once the juice is extracted, the next step is to clarify it to remove any impurities and achieve a clear liquid for further processing.

Clarification of Juice

Before the juice concentrate’s production, the extracted juice undergoes a process of clarification to remove any impurities or solids. This step is crucial to ensure that the final concentrate has a clear and consistent quality. There are several juice clarification techniques, such as settling, centrifugation, and filtration, that can be used depending on the type of juice and the desired end product.

Clarification of juice has several benefits for concentrate production. Removing impurities and solids not only improves the appearance of the juice but also prevents potential issues during the concentration process. Impurities can interfere with the concentration process and affect the overall quality of the final product.

Additionally, clarified juice has a longer shelf life than unclarified juice, which is important for the storage and transportation of the concentrate. With the juice now clarified, it can proceed to the next step of filtration, where any remaining impurities are removed.

Filtration of Juice

To filter the juice, you’ll need to choose the appropriate method based on the type of fruit or vegetable used.

Advertisement

For instance, if you’re processing juice from citrus fruits like oranges, lemons, or limes, you can use membrane filtration. This method separates the juice from the pulp and other solids by passing it through a porous membrane. The membrane pores are small enough to capture the solids, but large enough to allow the liquid to pass through. This process results in a clear and smooth juice, free from any impurities.

Another method for filtration is reverse osmosis. This method is commonly used for fruits and vegetables with high sugar content, like grapes or apples. Reverse osmosis uses a semi-permeable membrane that separates the water from the juice. This process removes water and concentrates the juice, resulting in a more flavorful and potent product.

After filtration, the juice is ready for the next step of juice concentrate production, which is the concentration of juice.

Concentration of Juice

You can intensify the flavor of your fruit or vegetable extract by reducing the amount of water, using evaporation techniques akin to boiling off excess water in a pot to thicken a sauce. Concentrating juice involves removing water from the juice to increase its concentration levels. This is achieved through various methods such as vacuum evaporation, reverse osmosis, or freezing.

Vacuum evaporation involves heating the juice to a specific temperature, then subjecting it to a vacuum to lower the boiling point of water and evaporate it. Reverse osmosis works by passing the juice through a semi-permeable membrane that separates water from the concentrate. Freezing is another method where the juice is frozen, and the ice is then removed to leave behind a concentrated juice.

Advertisement

These methods are used to increase the concentration of juice and enhance its flavor and shelf life. As we move onto the subsequent section about the types of juice concentrates, it’s important to note that the method used depends on the type of juice concentrate being produced.

Types of Juice Concentrates

Now, let’s explore the different varieties of concentrated juices available in the market. Juice concentrates are made using various processing methods, resulting in different types of concentrates. Some of the common types of juice concentrates are:

  • Frozen Concentrate: This is made by extracting the juice from the fruit and then removing the water content through a process of freezing and thawing. The resulting concentrate is then packaged and sold. Frozen concentrates are popular for their long shelf life and convenience.

  • Clarified Concentrate: This is made by removing the pulp and solids from the juice through filtration. The remaining liquid is then concentrated through a process of evaporation. Clarified concentrates are popular in the juice industry due to their versatility and ability to blend well with other juices.

  • Powdered Concentrate: This is made by spray-drying the juice, resulting in a fine powder. The powder is then reconstituted with water before consumption. Powdered concentrates are popular due to their long shelf life and ease of transportation.

These different types of concentrates are made using different processing methods, depending on the type of fruit and the desired end product.

Industry trends indicate a growing demand for natural and organic juice concentrates, as consumers become more health-conscious and seek out products with fewer additives and preservatives.

As we move on to the next section about the differences between juice concentrates and fresh juices, it’s important to note that each type of juice has its own unique properties and benefits.

Advertisement

Differences between Juice Concentrates and Fresh Juices

When it comes to juice, there are two main options: fresh or concentrate. As someone who’s health-conscious, I want to make sure I’m getting the most nutrients possible from my juice.

Fresh juices are often touted as being the best option for nutrient content. But I’m curious about the differences between fresh and concentrate when it comes to flavor and shelf-life as well.

So, what are the main differences between juice concentrates and fresh juices?

Nutrient content

As the saying goes, "good things come in small packages,"and that holds true for juice concentrates as they pack a punch of nutrients in just a small amount. While fresh juices may contain more vitamins and minerals, juice concentrates still offer an array of benefits.

For instance, they’re more shelf-stable and have a longer lifespan, making them a more cost-effective option in the long run. Additionally, the process of concentrating the juice can actually increase the concentration of certain nutrients, such as antioxidants, making them more potent.

Advertisement

However, there are also drawbacks of nutrient content in juice concentrates. One major issue is that some concentrates may be high in sugar and calories, particularly if they contain added sugars or are made from fruits with naturally high sugar content such as grapes. It’s important to read labels carefully and choose products that are 100% juice without added sugars.

In the end, while fresh juices may have a slight edge in nutrient content, juice concentrates still offer a convenient and nutrient-dense option for those on the go. Moving on to the next topic, let’s explore the flavor aspects of juice concentrates.

Flavor

You’ll love the burst of flavor that juice concentrates bring to your palate. The flavor profile of juice concentrates is carefully crafted to ensure that it’s consistent and appealing to a wide range of taste preferences.

To achieve this, manufacturers use a combination of natural and artificial flavors, depending on the type of juice concentrate being made. Here are three ways that manufacturers create the perfect flavor profile for juice concentrates:

  1. Blending: Different varieties of fruits are combined to create a unique flavor profile. For example, a peach and mango juice concentrate may be blended to create a sweet and tangy flavor.

  2. Concentration: By removing the water content from the juice, the flavor is intensified, creating a more concentrated taste.

  3. Adjusting pH levels: The acidity or alkalinity of the juice can be adjusted to enhance the flavor. For example, adding citric acid to a grape juice concentrate can create a more tart and refreshing taste.

As important as flavor is, it’s also crucial for juice concentrates to have a long shelf-life.

Advertisement

Shelf-life

Now that we’ve covered how flavor is incorporated into juice concentrates, let’s discuss an important factor that affects the quality of juice concentrates: shelf-life.

Since juice concentrates are made by removing water from the juice, they have a longer shelf-life than regular juice. However, shelf-life can still be a concern for juice concentrates. Without proper preservation techniques, the concentrate can spoil or lose its flavor over time.

To extend the shelf-life of juice concentrates, preservatives are often added. These preservatives can prevent the growth of bacteria and fungi that can lead to spoilage. Additionally, packaging techniques can also play a role in preserving the quality of the juice concentrate. For example, airtight packaging can help prevent oxidation and maintain the flavor and color of the concentrate.

As we move onto the next section about the applications of juice concentrates, it’s important to keep in mind the importance of shelf-life and preservation techniques in ensuring the quality of the concentrate for its intended use.

Applications of Juice Concentrates

Using juice concentrates in your recipes provides a convenient and cost-effective way to enhance the flavor and nutrition of your dishes. Juice concentrates are a concentrated form of juice that’s made by extracting the water from fresh fruit or vegetable juice.

Advertisement

The resulting concentrate can be used in a variety of applications, from beverage production to cooking and baking. One of the primary benefits of using juice concentrates is their ability to enhance the flavor of your recipes. Since the concentrate is a concentrated form of juice, it contains a higher concentration of the natural flavors and aromas found in the original fruit or vegetable.

Additionally, using juice concentrates can be more cost-effective than using fresh juice, since the concentrate can be stored for longer periods of time and doesn’t require refrigeration until it’s opened.

Transitioning into the subsequent section about the pros and cons of juice concentrates, it’s important to note that while juice concentrates offer many benefits, there are also some potential drawbacks to consider.

Pros and Cons of Juice Concentrates

If you’ve ever bought a can of soda or a packaged snack, chances are you’ve consumed products made with juice concentrate. While these concentrates offer convenience and cost-effectiveness, it’s important to consider the potential drawbacks of relying on these processed ingredients.

One of the biggest concerns with juice concentrates is their storage methods. Because they are highly concentrated, they must be stored carefully to prevent spoilage. Once the concentrate is opened, it must be refrigerated and used within a certain time frame to avoid spoilage.

Advertisement

Another issue with juice concentrates is their production sustainability. These concentrates are often made from fruits that are grown in large quantities and transported long distances to processing plants. This can lead to concerns about the environmental impact of producing and transporting the concentrate. Additionally, the production process may involve the use of chemicals and other additives that can have negative impacts on the environment.

While juice concentrates can be a useful ingredient for many food and beverage products, it’s important to consider these potential drawbacks and look for ways to minimize their impact on the environment.

Frequently Asked Questions

What are some common additives used in juice concentrates?

As someone who has studied the additive effects of common additives on flavor and color in juice concentrates, I can tell you that it’s important to compare taste and nutritional differences between concentrate and fresh juice. Some common additives include preservatives, colorants, and sweeteners.

How do juice concentrates affect the nutritional content of the juice?

Oh boy, where do I even start with the impact of juice concentrates on health? Let’s just say that the processing techniques involved in making them can strip away essential nutrients and leave you with a sugary concoction that’s more like a treat than a healthy beverage.

What is the shelf life of juice concentrates?

The shelf life of juice concentrates can be extended through long term storage and preservation techniques. These methods involve reducing moisture content, controlling temperature, and adding preservatives. Properly stored juice concentrates can maintain their quality for up to two years.

Advertisement

Can juice concentrates be reconstituted with water to make a drinkable juice?

Reconstituted juice quality depends on factors such as water quality, mixing ratio, and personal taste preferences. It may not taste the same as freshly squeezed, but can still be a convenient and enjoyable option.

Are there any environmental concerns associated with the production of juice concentrates?

The production of juice concentrates raises environmental concerns about sustainability. The process requires significant amounts of water, energy, and chemicals. Additionally, the transportation of concentrates over long distances contributes to carbon emissions.

Conclusion

In conclusion, I’ve learned that juice concentrates are made through a complex process that involves extraction, clarification, filtration, and concentration. The resulting product is a highly concentrated form of juice that can be used in a variety of applications, from beverages to food products.

While there are some differences between juice concentrates and fresh juices, the former offers many advantages in terms of convenience, shelf life, and affordability. However, it’s important to note that there are also some drawbacks to using juice concentrates, such as the potential loss of nutrients and flavor during processing.

Additionally, not all juice concentrates are created equal, as there are different types that vary in quality and composition. Overall, I believe that juice concentrates are a valuable ingredient in the food and beverage industry, but it’s important to carefully consider their use and choose high-quality products.

Advertisement

Continue Reading

Trending