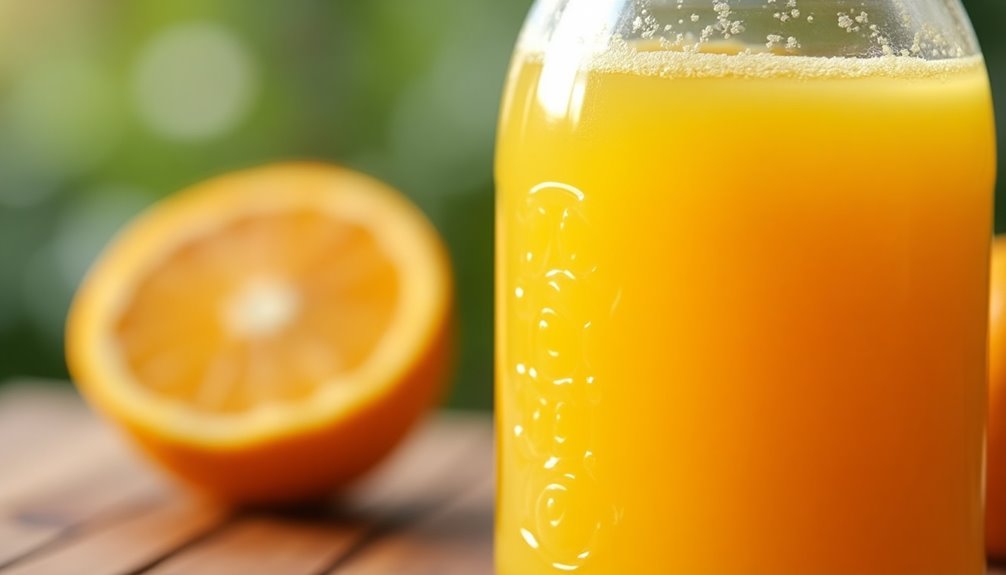
Connect with us

Juice Tips and Tricks

How Good Is Orange Juice After Opening

Published

on

Did you know that half of Americans drink orange juice at least once a week? With its delicious taste and health benefits, it’s no surprise that many people choose orange juice as their go-to beverage. But once you open a bottle of orange juice, how long do you have before it becomes unsafe to drink?

In this article, I will delve into the shelf life of orange juice, its nutritional value, and how to tell if it has gone bad. I will also provide safety considerations, tips for extending its shelf life, different types of orange juice, and how to store it safely. Finally, I will answer the burning question: how long does orange juice last after opening, and what are the best ways to use up any leftover juice?

So, let’s get started.

Key Takeaways

  • Freshly squeezed orange juice has a shorter shelf life than pasteurized orange juice.
  • Proper refrigeration and handling can extend the shelf life of orange juice.
  • Expired orange juice can be used in various recipes, but it’s crucial to be aware of potential safety hazards.
  • Orange juice is high in sugar and calories, so moderation is key to reaping its health benefits.

The Shelf Life of Orange Juice

So, you’ve just opened a carton of orange juice and you’re wondering how long it will last. Well, the shelf life of orange juice can vary depending on factors such as storage temperature and the type of packaging used.

To preserve freshness, it’s recommended to refrigerate orange juice at a temperature between 32-40°F. If kept at room temperature, the juice will only last for a few hours before it begins to spoil.

The type of packaging used also plays a role in the shelf life of orange juice. For example, juice stored in a tetra pack carton can last up to a year if unopened, while juice in a clear plastic bottle will only last a few days after opening. In addition, exposure to light and air can also affect the quality of the juice.

Advertisement

Therefore, it’s best to consume orange juice within a few days after opening to ensure maximum freshness and nutritional value. Speaking of nutritional value…

The Nutritional Value of Orange Juice

The nutritional benefits of a freshly squeezed glass of citrus fruit nectar can be maintained for a considerable amount of time. Orange juice is a great source of vitamin C, which is essential for the immune system. It also contains folate, potassium, and thiamine. These nutrients are important for overall health, and they can be found in other juice alternatives, but not at the same level as orange juice.

Orange juice benefits include reducing inflammation, improving heart health, and lowering the risk of kidney stones. However, it’s important to note that orange juice is high in sugar and calories, so it should be consumed in moderation.

Overall, if you’re looking for a healthy beverage option, orange juice is a great choice.

In the next section, we’ll discuss how to tell if orange juice has gone bad.

Advertisement

How to Tell if Orange Juice has Gone Bad

To figure out if your orange juice has gone bad, you should take a sniff. If the juice smells sour or off, it may have gone bad. Another way to check is by looking at the color and texture. If the juice appears darker or thicker than usual, it may have started to spoil. It’s important to note that fresh orange juice typically has a shelf life of 5-7 days once opened, so it’s best to consume it within that timeframe.

But what if you’ve missed the window and your orange juice has expired? Don’t worry, there are still ways to use it up. Expired orange juice can actually be used in a variety of recipes, such as marinades, salad dressings, and baked goods. Additionally, adding orange juice to your diet can provide numerous health benefits, including boosting your immune system and aiding in digestion. So the next time you have some expired orange juice, don’t throw it away – get creative and add it to your favorite recipes for a delicious and nutritious twist.

When it comes to expired orange juice, it’s important to keep safety considerations in mind. While it may still be usable in recipes, consuming expired juice can pose health risks, especially for those with weakened immune systems. It’s always best to err on the side of caution and discard any juice that appears to have gone bad.

Safety Considerations

When dealing with expired orange juice, it’s crucial to keep in mind the potential safety hazards that can arise. Possible contaminants such as bacteria, mold, and yeast can grow in the juice when it’s left unrefrigerated for too long or exposed to air. These contaminants can cause illnesses such as food poisoning or stomach infections.

It’s important to check the expiration date on the orange juice and properly handle it to avoid any potential safety risks. Proper handling includes refrigerating the orange juice immediately after opening it and consuming it within 7-10 days. It’s also important to avoid touching the spout of the container with your mouth or any other object that may be contaminated. If the juice has an unusual odor, appearance, or taste, it’s best to dispose of it immediately.

Advertisement

By following these safety measures, you can ensure that your orange juice is safe to drink and prevent any potential illnesses. Moving on to the next section, here are some tips for extending the shelf life of orange juice.

Tips for Extending the Shelf Life of Orange Juice

When it comes to extending the shelf life of orange juice, there are a few tips that I always keep in mind.

First and foremost, refrigeration is key. Keeping orange juice at a consistent temperature of 40°F or below can help prevent the growth of harmful bacteria.

Freezing is also an option, but it’s important to note that the texture and flavor may be affected.

Lastly, using preservatives can help to maintain the quality of the juice for a longer period of time. However, it’s important to use them in moderation and follow all instructions carefully.

Advertisement

Refrigeration

If you don’t refrigerate your orange juice after opening, it will only last for about 1-2 days before going bad. This is because orange juice is a perishable product that is prone to spoilage due to the presence of microorganisms.

When you leave orange juice at room temperature, these microorganisms can multiply rapidly, causing the juice to spoil even faster. Alternative storage methods, such as keeping the juice in a thermos or airtight container, can help preserve its freshness for a short period of time. However, these methods are not as effective as refrigeration and can lead to flavor changes.

It’s important to note that even if you refrigerate your orange juice after opening, it still has a limited shelf life of 5-7 days.

Transitioning to the subsequent section about freezing, it’s worth noting that freezing is a great way to extend the shelf life of orange juice. By freezing the juice, you can actually preserve its nutritional value and flavor for up to 8 months. However, there are some important considerations to keep in mind when freezing orange juice, which we’ll discuss in the next section.

Freezing

Previously, we discussed the importance of refrigerating orange juice after opening to maintain its freshness and quality. However, another option for preserving orange juice is freezing it. Freezing orange juice can extend its lifespan for up to six months, giving you more time to enjoy this delicious and nutritious beverage.

Advertisement

When freezing orange juice, it’s important to transfer it into a freezer-safe container that is airtight. This will prevent any freezer burn or contamination from other foods in the freezer. Once frozen, orange juice can be thawed in the refrigerator or at room temperature. It’s important to note that after thawing, the texture and taste of the orange juice may change slightly, but it will still be safe to consume. Frozen orange juice can also be used in recipes, such as smoothies or cocktails, adding a refreshing and tangy flavor.

To further explore the benefits of orange juice, I have provided a table below that highlights its nutritional value and potential health benefits. Orange juice is an excellent source of vitamin C, which helps support a healthy immune system and may reduce the risk of chronic diseases. Additionally, it contains folate, potassium, and antioxidants that can benefit heart health and overall wellness. Incorporating orange juice into your diet can be a delicious way to boost your nutrient intake and reap its health benefits.

Moving forward, if freezing or refrigeration is not an option, using preservatives can also help maintain the freshness and quality of orange juice. Let’s explore this option in the next section.

Using Preservatives

To maintain the freshness and quality of your orange juice for longer periods, you can use preservatives. These are substances that are added to the juice to prevent spoilage and extend its shelf life. Some common preservatives used in orange juice include sodium benzoate and potassium sorbate.

While preservatives can be effective in prolonging the shelf life of orange juice, there are alternatives to using them. For example, you can store your juice in airtight containers in the refrigerator, or freeze it for later use. Moreover, some people may be concerned about the potential health effects of consuming preservatives. However, studies have shown that when used in small amounts, preservatives are safe for consumption.

Advertisement

Moving on to the next topic, it’s important to consider the different types of orange juice available in the market.

Different Types of Orange Juice

You’ll love learning that freshly squeezed orange juice contains up to 50% more Vitamin C than its pasteurized counterpart. This is because freshly squeezed orange juice is made from different types of orange varieties, which are richer in nutrients than the ones used for pasteurized orange juice.

Some of the most common orange varieties used for freshly squeezed juice include Valencia, Navel, and Blood oranges. Drinking orange juice daily can provide numerous health benefits, including boosting the immune system, reducing inflammation, and improving heart health.

However, it’s important to note that not all orange juice is created equal. Some types of orange juice, such as those that contain added sugars or artificial flavors, can negate the health benefits of drinking orange juice. When choosing orange juice, it’s important to read the label carefully and opt for 100% pure orange juice.

In the next section, I’ll discuss how to store orange juice safely to ensure that it remains fresh and nutritious.

Advertisement

How to Store Orange Juice Safely

As I’ve mentioned before, there are different types of orange juice available in the market. But no matter which type you prefer, it’s important to know how to store orange juice safely to maintain its quality and freshness.

To keep your orange juice fresh and safe for consumption, here are some tips to follow:

  • Always refrigerate orange juice after opening.
  • Keep the juice in a tightly sealed container to prevent contamination.
  • Avoid exposing the juice to light and air, as it can lead to oxidation and spoilage.
  • Check the expiration date of the juice before purchasing and consuming it.

Aside from simply drinking orange juice, there are also creative recipes you can make using it. One popular method is making DIY orange juice concentrate. This involves reducing fresh orange juice on the stove until it becomes thick and concentrated, which can then be used in various recipes such as marinades, sauces, and desserts. By making your own concentrate, you can control the amount of sugar and additives that go into your recipes.

Now that we know how to store orange juice safely and have some ideas for creative recipes, the next step is to understand how long orange juice lasts after opening.

How Long Orange Juice Lasts After Opening

If you’re like most people, you’ve probably wondered how much time you have to enjoy your favorite citrus beverage once it’s been opened. The truth is, once you’ve opened a bottle of orange juice, it can only last a few days in the refrigerator. This is because the juice is exposed to air, which can cause it to spoil quickly.

The exact length of time will depend on a variety of factors, such as the type of orange juice, the storage conditions, and whether or not the juice has been pasteurized. But why is it so important to consume orange juice right after opening it?

Advertisement

For starters, orange juice is high in vitamin C, which is an essential nutrient that helps support a healthy immune system. By drinking orange juice regularly, you can help reduce your risk of developing infections and other illnesses. Additionally, orange juice is a good source of antioxidants, which can help protect your cells from damage caused by free radicals.

So, if you want to reap the benefits of consuming orange juice regularly, it’s best to drink it soon after opening the bottle. When it comes to leftover orange juice, there are a few ways you can use it up before it goes bad.

One idea is to use it as a marinade for chicken or fish, which can add a zesty flavor to your meals. Another option is to mix it into smoothies or cocktails for a refreshing beverage. Whatever you choose to do with your leftover orange juice, just make sure to use it up quickly to avoid wasting this nutritious drink.

The Best Ways to Use Leftover Orange Juice

Got some zesty citrus that’s starting to turn? Don’t let that liquid gold go to waste – here are some creative ways to use up that leftover sunshine in your fridge!

When it comes to ways to use leftover orange juice, the possibilities are endless. One easy option is to freeze the juice in an ice cube tray and use the cubes to add a burst of citrus flavor to water, cocktails, or smoothies. You can also use orange juice as a base for marinades or dressings, or add it to your morning oatmeal or yogurt for a fruity twist.

Advertisement

If you’re feeling more adventurous, there are plenty of creative recipes with orange juice that you can try. Orange juice can be used to make a tangy glaze for meats or roasted vegetables or as a secret ingredient in baking recipes – it pairs especially well with chocolate and spices like cinnamon and cloves. You can even make your own homemade popsicles by mixing orange juice with other fruit juices or yogurt.

So next time you have some leftover orange juice, don’t just let it sit in your fridge – get creative and try out some new recipes!

Frequently Asked Questions

Can orange juice be frozen?

Yes, orange juice can be frozen. However, the process can affect its nutritional value. Freezing can cause a loss of Vitamin C and a change in taste and texture. It is best to consume fresh orange juice for optimal nutritional benefits.

Is freshly squeezed orange juice healthier than store-bought?

Freshly squeezed orange juice has higher nutritional value than store-bought due to the absence of added sugars and preservatives. In contrast, store-bought juice is often pasteurized, which can decrease vitamin content.

Can I mix different types of orange juice together?

I have found that blending different types of orange juice can be a tasty option, but it may affect the nutritional value. It’s important to consider the sugar content and potential additives in each juice before mixing.

Advertisement

How long does orange juice last in a plastic bottle versus a glass bottle?

Based on studies, orange juice lasts longer in glass bottles due to their durability and ability to prevent air from entering. Plastic bottles have a higher risk of chemical leaching and environmental impact. Taste difference is negligible.

Can I drink expired orange juice if it still tastes okay?

I do not recommend drinking expired juice, even if it tastes okay. Consuming expired juice can pose safety concerns and lead to foodborne illness. Following proper juice storage best practices can help prevent this issue.

Conclusion

In conclusion, I’ve learned that orange juice can last for a considerable amount of time if stored properly. The shelf life of orange juice varies depending on the type and packaging, but generally, it can last for up to two weeks in the refrigerator after opening.

However, it’s essential to check for any signs of spoilage such as changes in taste, color, and smell before consuming. As the adage goes, "Waste not, want not."Leftover orange juice can be used in various ways, including making smoothies, marinades, and sauces.

It’s also crucial to remember the safety considerations when handling orange juice to prevent contamination and foodborne illnesses. With proper storage and handling, orange juice can be a nutritious and refreshing addition to one’s diet.

Advertisement

Cindy thoroughly researches juicing trends, techniques, and recipes to provide readers with practical advice and inspiration. Her writing style is accessible, engaging, and designed to make complex concepts easy to understand. Cindy's dedication to promoting the advantages of juicing shines through her work, empowering readers to make positive changes in their lives through the simple act of juicing.

Continue Reading
Advertisement

Juice Tips and Tricks

How To Make Jersey Mike’s Juice

Published

on

By

I have always loved the taste of Jersey Mike’s juice, and after trying multiple times, I have finally perfected the recipe.

If you haven’t tried it yet, you’re in for a treat. This refreshing juice is made with a blend of oranges, apples, pineapples, and carrots, making it a delicious and nutritious way to start your day.

To make Jersey Mike’s juice at home, you’ll need a few simple ingredients and a blender. In this article, I’ll walk you through the steps to make this delicious juice, including tips for adjusting the flavor to your liking and storing it properly.

Whether you’re looking for a healthy breakfast option or a refreshing drink to enjoy throughout the day, Jersey Mike’s juice is a great choice.

So let’s get started!

Advertisement

Key Takeaways

  • Jersey Mike’s juice is made with oranges, apples, pineapples, and carrots, and can be adjusted with sweeteners like honey or different fruits.
  • Blending techniques include layering ingredients in the correct order and pulsing the blender, and the juice can be strained for a smoother texture.
  • Storing the juice properly includes refrigerating immediately, using an airtight glass container, and labeling with the date, and freezing is an option for long term preservation.
  • Jersey Mike’s juice is refreshing and nutritious, providing numerous health benefits and serving as a great alternative to sugary drinks.

Gather Your Ingredients

Gathering your ingredients for making Jersey Mike’s juice is essential, so don’t forget to grab all the necessary items before you begin. You’ll need fresh oranges, lemons, limes, and grapefruits — make sure they’re ripe and juicy. If you can’t find the citrus fruits you need, you can substitute with bottled juice, but fresh juice is always better.

In addition to the citrus fruit, you’ll need sugar and water. You can also substitute sugar with honey or agave nectar if you prefer. Before starting, make sure your blender’s clean and ready to use.

Prepping your blender is the next step to making the perfect Jersey Mike’s juice.

Prepping Your Blender

Before blending, make sure your blender is clean and dry to prevent contamination or damage. Here are some cleaning and maintenance tips I follow to keep my blender in top shape:

  1. Disassemble the blender and clean each part separately, including the lid, jar, blade, and any other detachable parts.

  2. Wash each piece with warm soapy water and a soft sponge, avoiding abrasive materials that may scratch the blender’s surface.

  3. Rinse each piece thoroughly with water and dry them with a clean towel.

  4. Reassemble the blender and store it in a cool, dry place.

By following these simple steps, you can ensure your blender stays in great condition for years to come.

Now that your blender is ready to go, let’s move on to the next step of preparing the juice.

Advertisement

Preparing the Juice

Now that your blender is all set, let’s start whipping up some deliciously refreshing juice! When it comes to preparing the juice, there are a few important blending techniques to keep in mind. First, it’s important to layer the ingredients in the blender in the correct order. Start with the liquid ingredients, followed by the softer fruits and vegetables, and finish with the harder ingredients like ice and frozen fruits. This will ensure that all the ingredients blend evenly and smoothly.

Another important blending technique is to pulse the blender rather than blend continuously. This will prevent the juice from becoming too frothy or over-blended, which can affect the taste and texture. If you prefer a smoother juice, you can strain it through a fine mesh sieve or cheesecloth before serving. Additionally, if you don’t have a blender, there are fresh juice alternatives such as a juicer or hand-held citrus press that can still produce delicious and healthy juice.

Now that we have the juice blended to perfection, it’s time to adjust the flavor to your liking.

Adjusting the Flavor

Once the juice is blended, it’s time to tweak the flavor to your liking. Adding sweetener is a great way to make the juice more palatable. I like to use honey to add a touch of sweetness. It blends well with most fruits and gives the juice a subtle sweetness without overpowering the natural flavors.

For a tangy kick, try adding a squeeze of lemon juice. It’s a great way to brighten up the flavor and add a little zing to your juice.

Advertisement

Experimenting with different fruits is also a great way to adjust the flavor of your juice. Some fruits are naturally sweeter than others, so you may need to add less sweetener to achieve the desired taste. For example, adding a ripe banana to your juice will add natural sweetness and creaminess. Or, adding a handful of berries will add a tartness that pairs well with sweeter fruits like pineapple or mango.

Once you’ve adjusted the flavor to your liking, it’s time to move on to storing the juice.

Storing the Juice

To keep your freshly blended Jersey Mike’s juice at its best, it’s important to store it properly. Here are some tips:

  1. Refrigerate your juice immediately after making it. This will slow down the oxidation process and prevent spoilage.

  2. Use a glass container with an airtight lid to store your juice. This will help to preserve the nutrients and prevent contamination.

  3. Label your container with the date you made the juice. This will help you keep track of how long it’s been in the fridge.

  4. For long term preservation, consider freezing your juice. Pour your juice into ice cube trays and freeze. Once frozen, transfer the cubes to a freezer-safe container and store in the freezer for up to 6 months.

If you don’t have a lot of fridge space or want an alternative storage method, you can also consider using a vacuum sealer. This will remove all the air from the container and help to prevent oxidation and spoilage. Just be sure to follow the manufacturer’s instructions for proper use.

Now that you know how to store your Jersey Mike’s juice properly, let’s move on to some serving suggestions.

Advertisement

Serving Suggestions

Let’s explore some delicious ways to enjoy your freshly blended Jersey Mike’s juice. Whether you’re hosting a party or simply looking for a refreshing beverage to pair with your meal, there are plenty of options to choose from. Here are a few juice pairing ideas to get you started:

Party Drinks Juice Pairing Ideas
Margaritas Pineapple Juice
Mojitos Lime & Mint Juice
Sangria Mixed Berry Juice
Bellinis Peach Juice
Mimosas Orange Juice

These classic party drinks are a great complement to the sweet and tangy flavors of Jersey Mike’s juice. For a non-alcoholic option, try pairing our juice with sparkling water or adding it to a smoothie bowl for a healthy and delicious breakfast. Now that you have some ideas for serving your Jersey Mike’s juice, let’s learn about the health benefits it provides.

Health Benefits of Jersey Mike’s Juice

Discover how our freshly blended juice can contribute to your health with its array of nutritional benefits. Jersey Mike’s Juice isn’t just delicious, it’s packed with nutrients that can help detoxify your body and boost your immune system.

Our juice is made with fresh fruits and vegetables that are rich in vitamins, minerals, and antioxidants, making it an excellent choice for those looking to improve their health. One of the key benefits of Jersey Mike’s Juice is its detoxifying properties. The combination of fruits and vegetables in our juice can help flush toxins from your body, leaving you feeling rejuvenated and refreshed.

Additionally, our juice contains immune-boosting ingredients that can help strengthen your body’s natural defense mechanisms. Whether you’re looking to kick-start a healthy lifestyle or simply want to add more nutrients to your diet, Jersey Mike’s Juice is the perfect choice.

Advertisement

By choosing Jersey Mike’s Juice over other beverages, you can enjoy a delicious drink that also provides numerous health benefits. In the next section, we’ll compare our juice to other popular drinks on the market and show you why Jersey Mike’s Juice is the clear winner when it comes to nutrition.

Comparison with Other Beverages

You’ll be amazed at how Jersey Mike’s Juice stacks up against other juice options in terms of nutritional value. Its blend of fresh fruits and vegetables provides a powerful punch of vitamins, minerals, and antioxidants that can help boost your overall health and well-being.

Juice options in the market today are often packed with added sugars, artificial flavors, and preservatives, which can be detrimental to our health in the long run. Jersey Mike’s Juice, on the other hand, is free from these harmful additives and is made with only the freshest ingredients.

Taste preferences also play a significant role when it comes to choosing a beverage. Some people prefer sweet, sugary drinks, while others prefer something more tart or sour. Jersey Mike’s Juice offers a perfect balance of flavors, with its blend of fruits and vegetables resulting in a refreshing and delicious taste.

It is a great alternative to sugary drinks and is perfect for those who want to enjoy a tasty and healthy beverage. So, the next time you’re looking for a refreshing drink, consider giving Jersey Mike’s Juice a try.

Advertisement

Frequently Asked Questions

How long does it take to make Jersey Mike’s juice?

The preparation steps for Jersey Mike’s juice vary depending on the recipe, but generally take a few minutes to complete. Equipment needed may include a blender or juicer. Proper storage and refrigeration can extend the juice’s shelf life.

Can I use a regular blender instead of a high-speed one?

Yes, you can use a regular blender instead of a high-speed one for making juice. However, you may need to modify the recipe to ensure a smoother consistency. Consider blending ingredients in smaller batches and adding more liquid as needed. Experiment with blender options to find what works best for you.

Is it necessary to strain the juice after blending?

Straining the juice after blending is not necessary, but it can improve juice consistency. Some nutrients and fiber may be lost during the straining process, affecting the nutritional value.

Can I add other fruits or vegetables to the juice recipe?

Yes, you can modify the juice recipe by adding other fruits or vegetables. Incorporating alternative ingredients such as kale, spinach, or ginger can enhance the nutritional benefits of the juice. Experiment with different combinations to find your preference.

How often should I drink Jersey Mike’s juice to reap its health benefits?

To maximize the Benefits of Jersey Mike’s Juice for Weight Loss and get an Energy Boost, I drink it every morning. It jumpstarts my day and keeps me full until lunch. Plus, the natural sweetness is a delicious treat!

Advertisement

Conclusion

Overall, making Jersey Mike’s juice is a relatively simple process that can be easily done at home with the right ingredients and tools. By following the steps outlined in this article, you can create a delicious and refreshing drink that is packed with health benefits.

Whether you’re looking to boost your immune system, improve your digestion, or simply enjoy a tasty beverage, Jersey Mike’s juice is a great option. So why not give it a try and see for yourself? As the old saying goes, "you won’t know until you try."

So grab your blender, gather your ingredients, and get ready to enjoy a fresh and flavorful drink that is sure to become a new favorite.

Continue Reading

Juice Tips and Tricks

How To Make Jelly From Juice

Published

on

By

As a fan of all things sweet and fruity, I have always been intrigued by the idea of making my own jelly using juice. I have encountered several methods, but my objective was to find the correct process and pass that information along to you.

So, after some research and trial and error, I’ve come up with a foolproof method for making homemade jelly from your favorite juice.

First things first, you’ll need to gather your ingredients and equipment. Don’t worry, it’s nothing too complicated. You’ll need juice, pectin, sugar, jars with lids, and a large pot for cooking.

Once you have everything you need, it’s time to get started on making your delicious homemade jelly. So, let’s dive in and I’ll guide you through the process step by step.

Key Takeaways

  • Making homemade jelly requires juice, pectin, sugar, jars with lids, and a large pot.
  • Boil the juice to concentrate flavors and add pectin and sugar. Troubleshoot by adjusting the amount of pectin/sugar or juice and test with a spoon or candy thermometer.
  • Store the jars in a cool, dark place and label them with the date made. They can be stored for up to a year at room temperature or 6 months in the fridge, or frozen for up to 2 years.
  • Homemade jelly can be used in a variety of ways, such as a glaze for meats, appetizer with brie cheese, mix into BBQ sauce, drizzle over ice cream, or fill thumbprint cookies. Creative presentation ideas include using different shapes and sizes of jars and adding fruit slices to the bottom. Alternative ingredients like honey or maple syrup can be used instead of sugar.

Gather Your Ingredients and Equipment

Before you start, make sure you’ve got everything you need: a pot, juice, sugar, pectin, and jars. Creative presentation is also important, so consider using different shapes and sizes of jars or adding fruit slices to the bottom for a pop of color. If you want to try something different, you can also experiment with alternative ingredients like honey or maple syrup instead of sugar.

Once you’ve gathered all your ingredients and equipment, it’s time to prepare your juice.

Advertisement

Prepare Your Juice

To start, you’ll need some fresh fruit and a juicer to extract the liquid gold that will serve as the base for your delicious spread. Imagine the juicer as a miner, sifting through the rough exterior of the fruit to reveal the valuable treasure within.

When selecting your juice, it’s important to choose a flavor that you enjoy and that will complement the other ingredients in the recipe. Popular options include grape, apple, and strawberry, but feel free to experiment with different fruits to create your own unique flavor.

Once you have your juice, it’s time to prepare it for the jelly-making process. Start by pouring your juice into a large saucepan and bringing it to a boil over medium heat. This will help to concentrate the flavors and make it easier to add the pectin and sugar in the next step.

With your juice prepared, it’s time to move on to the next step of the jelly-making process: adding pectin and sugar.

Add Pectin and Sugar

Now that you’ve boiled your fruit nectar, it’s time to add the pectin and sugar to give your spread its signature texture and sweetness.

Advertisement

First, I usually stir in the pectin, which dissolves into the liquid and thickens it slightly. This step is crucial to achieve the desired jelly consistency.

Then, I slowly pour in the sugar, stirring continuously until it’s fully incorporated and the mixture is smooth. The amount of sugar you add will depend on your personal taste, and there are various flavor variations you can experiment with, such as adding spices or herbs.

As you stir in the sugar, you’ll notice the aroma of the fruit intensifying, making your mouth water in anticipation of the final product.

Once everything is well combined, you can start thinking about the next step: cooking your mixture. This will help set the jelly and give it the perfect texture.

Cook Your Mixture

As you cook the mixture, the flavors will meld together and the scent will fill your kitchen, making your mouth water with anticipation for the finished product. Keep stirring the mixture constantly to prevent it from burning or sticking to the bottom of the pot.

Advertisement

The mixture will slowly start to thicken as the pectin and sugar mix together with the juice. You can adjust the consistency by cooking it for a longer or shorter time depending on how thick you want your jelly to be.

If you encounter any problems, such as the mixture not thickening or becoming too thick, there are a few troubleshooting techniques you can try. If the mixture is not thickening, try adding more pectin or sugar to the mixture. If the mixture is becoming too thick, try adding more juice to the mixture to thin it out.

Once the mixture has reached the desired consistency, remove it from the heat and move on to the next step of testing your jelly to ensure that it has set properly.

Test Your Jelly

Now that I’ve cooked my jelly mixture, it’s time to test it.

There are two ways I can do this: using the spoon test or using a candy thermometer.

Advertisement

To perform the spoon test, I’ll dip a spoon into the jelly and watch how it drips off. If it drips in sheets or with a jelly-like consistency, it’s ready.

Alternatively, I can use a candy thermometer to check the temperature of the jelly. It should reach 220°F (104°C) for it to set properly.

Use the Spoon Test

Quickly check the consistency of your jelly with the Spoon Test. Simply dip a spoon into the hot jelly mixture and hold it up to eye level. If the jelly drips off the spoon in a sheet or gels together on the spoon, it’s ready to be canned. However, if it drips off the spoon in drops, it needs to be cooked longer.

The Spoon Test is a quick and easy way to ensure that your jelly will set properly and have the perfect texture. Using the Spoon Test can evoke a sense of excitement and satisfaction as you see the jelly come together on the spoon. It can also spark creativity as you think of alternative methods for using the jelly, such as spreading it on toast or using it as a glaze for meats.

Additionally, experimenting with different flavor variations can add a personal touch to the jelly and make it even more enjoyable to eat. However, if you’re aiming for a specific texture, it’s important to use a candy thermometer to ensure that the jelly reaches the correct temperature.

Advertisement

Use a Candy Thermometer

To ensure that your homemade jelly has the perfect texture, you’ll want to use a candy thermometer. Using a candy thermometer allows for accuracy in temperature control, which is crucial in achieving the desired consistency of your jelly.

Jelly making requires bringing the juice and sugar mixture to a precise temperature, typically between 220 and 225 degrees Fahrenheit. Without a thermometer, it can be difficult to know when the mixture has reached the correct temperature, leading to over or undercooked jelly.

While a candy thermometer is the most accurate way to control the temperature, there are alternatives. Some people use a meat thermometer or a digital thermometer, but these may not be as precise as a candy thermometer. It’s important to note that not using a thermometer at all can lead to inconsistent results.

However, the drawback of using a candy thermometer is that it may not be suitable for all types of pots or pans. Additionally, it may take some practice to get the hang of using a thermometer to make jelly.

Now that you’ve achieved the perfect texture for your jelly, it’s time to fill your jars.

Advertisement

Fill Your Jars

Don’t forget to tightly pack your jars with the colorful and sweet juice, ensuring that each spoonful of jelly will transport you to a moment of pure joy.

Here are some tips to keep in mind when filling your jars:

  1. Use a funnel to avoid any spills or messes.
  2. Leave about 1/4 inch of headspace at the top of each jar.
  3. Wipe off any excess jelly from the rim of the jar before placing the lid on top.
  4. Label each jar with the date and flavor of the jelly, and consider adding some jar decoration for a personal touch.

Once you have all your jars filled, it’s time to seal them up and let the jelly set.

To seal your jars, carefully screw on the lids and place them in a large pot of boiling water. Make sure the water covers the jars by at least an inch, and let them boil for about 10 minutes.

This process will create a vacuum seal and ensure that your jelly stays fresh for months to come.

Seal Your Jars

Once you’ve filled your jars with the delicious jelly, it’s time to seal them up and ensure their safety. Before sealing, it’s important to check each jar for any cracks or chips that could compromise the seal. Also, make sure to wipe the rims of the jars clean to remove any jelly residue that could prevent a proper seal.

Advertisement

To seal your jars, simply place a lid on top of each jar and then screw on the band until it’s just tight enough to hold the lid in place. Don’t overtighten the bands, as this could cause the lid to buckle and prevent a proper seal.

Once all the jars are sealed, it’s time to store them properly. Keep your jars in a cool, dark place, such as a pantry or cupboard, to prevent exposure to sunlight and heat which can cause the jelly to spoil.

Now that your jars are sealed and stored, it’s time to move on to the next step and process them for long-term storage.

Process Your Jars

Now you’re ready to take the next step in preserving your delicious jelly: processing your jars to ensure long-term storage. This step is crucial in making sure your jelly stays fresh for a long time. Below is a table that outlines the sterilization techniques and safety precautions you need to follow before processing your jars.

Sterilization Techniques Safety Precautions
Boiling jars and lids for 10 minutes Use tongs to handle hot jars and lids
Heating jars in an oven at 225°F for 10 minutes Do not touch the jars or lids with bare hands
Using a dishwasher on the hottest cycle Empty dishwasher immediately after cycle and do not touch jars or lids with bare hands

After processing your jars, you may want to decorate them and choose labels to make them look more appealing. This is entirely optional, but it can add a personal touch to your homemade jelly. Once you’ve completed this step, you’re ready to move on to the next section on how to store your jelly.

Advertisement

Store Your Jelly

To keep your homemade jelly fresh and tasty for as long as possible, you’ll need to store it properly. One of the best ways to store jelly is in sterilized jars with tight-fitting lids. Make sure to label the jars with the date you made the jelly so you know when it’s time to use it.

You can store your jelly at room temperature for up to a year, but for longer shelf life, consider refrigerating or freezing it. If you choose to refrigerate your jelly, it can last up to 6 months. Just make sure to keep it in an airtight container or jar to prevent any odors from affecting the taste.

For longer storage, freezing your jelly is the best option. It can last up to 2 years in the freezer without losing its flavor or texture. When you’re ready to use your jelly, just thaw it overnight in the refrigerator and it will be ready to enjoy!

Enjoy Your Delicious Homemade Jelly!

Savor the fruity goodness of your homemade jelly by spreading it on toast or mixing it into yogurt for a delectable treat. But don’t stop there! Get creative and use your homemade jelly in various ways to impress your friends and family.

Here are some serving suggestions:

Advertisement
  • Use it as a glaze for roasted pork or chicken.
  • Spread it over a wheel of brie cheese before baking for a delicious appetizer.
  • Mix it into your favorite BBQ sauce for a sweet and tangy flavor.
  • Drizzle it over vanilla ice cream for a fruity dessert.
  • Use it to fill thumbprint cookies for a burst of flavor in every bite.

With these creative presentation ideas, you can turn your homemade jelly into a versatile ingredient that can be used in a variety of dishes. Impress your guests with your culinary skills and let the fruity goodness of your homemade jelly shine through.

Frequently Asked Questions

How long does it take for the jelly to set?

I find that jelly usually takes about 4-6 hours to set. If it’s not setting properly, try reducing the amount of liquid or adding more pectin. To switch up the flavors, experiment with different fruit juices or add in herbs like mint or lavender.

Can I use artificial sweeteners instead of sugar?

Artificial sweeteners can be used as an alternative to sugar in jelly making. They offer the benefits of being low in calories and not affecting blood sugar levels. However, they may not set as well as sugar.

Can I use frozen juice instead of fresh juice?

Yes, frozen juice can be used as an alternative to fresh juice when making jelly. However, the flavor may differ slightly due to the freezing process. It’s important to thaw the juice completely before using it in the recipe.

How do I prevent my jelly from crystallizing?

As they say, an ounce of prevention is worth a pound of cure. To prevent crystallization in jelly, try adding lemon juice or using pectin in the correct ratios. Troubleshoot common mistakes like overcooking or not enough sugar.

Can I add fruit chunks to my jelly?

Yes, adding fruit chunks to jelly is possible but may affect the consistency and shelf life. Fruitless jelly alternatives include using gelatin or pectin and adding texture with alternative ingredients like nuts or coconut flakes.

Advertisement

Conclusion

Well, that’s it! I’ve successfully made my own homemade jelly from juice. It was a fun and rewarding process that required some patience and attention to detail.

The result is a delicious spread that I can enjoy on toast, pancakes, or even as a glaze for meats.

But wait, there’s more! I can’t wait to experiment with different flavors and juices to create unique and tasty combinations. Maybe I’ll try adding some herbs or spices for an extra kick.

The possibilities are endless and I’m excited to continue my jelly-making journey. If you’re up for a fun and delicious challenge, give it a try yourself and see what creations you can come up with!

Advertisement

Continue Reading

Juice Tips and Tricks

How To Make Grapefruit Juice Taste Better

Published

on

By

After consuming grapefruit juice for many years, I understand that it may not be to everyone’s taste right away. However, due to its many benefits such as reducing inflammation and aiding in weight loss, it is definitely worth exploring ways to appreciate its flavor.

In this article, I’ll share my tips for making grapefruit juice taste better.

First, it’s important to understand the benefits of grapefruit juice. Not only is it packed with vitamins and antioxidants, but it can also help regulate blood sugar levels and improve digestion. By making grapefruit juice taste better, you’ll be more likely to incorporate it into your daily routine, reaping all of these benefits.

So let’s get started!

Key Takeaways

  • Experiment with different grapefruit varieties and mix with other fruits and herbs for a unique flavor combination
  • Add natural sweeteners like honey or maple syrup to balance flavor and dilute with water or sparkling water for a refreshing texture
  • Consider flavor pairing with alcohol, such as vodka, gin, and tequila, and serve chilled for enhanced flavor and aroma
  • Taste test to find the perfect balance of sweetness and tartness, and garnish with fresh fruit or herbs like mint, basil, cucumber, and pomegranate seeds to enhance flavor and appearance.

Understand the Benefits of Grapefruit Juice

You’re gonna love the benefits of grapefruit juice – it’s packed with health benefits and nutritional value that will keep you feeling great!

Grapefruit juice is a rich source of vitamins C and A, which are essential antioxidants that help your body fight off illness and disease. These vitamins also aid in collagen production, which helps keep your skin looking youthful and healthy.

Advertisement

Not only that, but grapefruit juice is also a great source of potassium, which helps regulate blood pressure and reduces the risk of stroke. It’s also low in calories and high in fiber, making it a great addition to any healthy diet.

Now that you understand the amazing benefits of grapefruit juice, let’s move on to choosing the right grapefruits to make your juice taste even better.

Choose the Right Grapefruits

Picking the cream of the crop when it comes to grapefruits is key to crafting a zesty and flavorful juice that’ll knock your socks off.

When selecting grapefruits, it’s important to pay attention to their ripeness levels and flavor profiles. Choosing grapefruits that are too ripe may result in a juice that’s overly sweet, while unripe grapefruits may have a bitter taste.

To ensure that your grapefruit juice has the perfect balance of sweetness and tartness, opt for grapefruits that’re slightly firm to the touch and have a bright, vibrant skin color. Additionally, you can experiment with different varieties of grapefruit, such as pink or red grapefruits, to add a unique flavor profile to your juice.

Advertisement

By choosing the right grapefruits, you can elevate the taste of your grapefruit juice and make it a refreshing and delicious beverage that you can enjoy any time of the day.

Experiment with Different Flavor Combinations

Try mixing different fruits and herbs with your grapefruit to create a unique and refreshing flavor combination that will tantalize your taste buds. Flavor pairing is an art, and it takes some experimenting to find the perfect flavor combination.

You can add some chopped mint leaves, or a slice of cucumber, to your grapefruit juice for a refreshing taste. Adding a pinch of salt can also balance out the bitterness of the grapefruit and enhance the sweetness.

Taste testing is an important part of the process. You can start by adding a small amount of the flavor pairing, and then gradually increase it until you find the perfect blend. You can also try different ratios of grapefruit juice to the added ingredients until you find the right balance.

By experimenting with different flavor combinations, you can create a delicious and unique grapefruit juice that you’ll love.

Advertisement

To further enhance the flavor, we can use natural sweeteners.

Use Natural Sweeteners

If you want to add some sweetness to your grapefruit drink, using natural sweeteners like honey or maple syrup is a great option. Alternative sweeteners are a healthier choice than refined sugar, which can lead to blood sugar spikes and crashes.

Honey is a good choice because it has a unique flavor profile that complements the tanginess of grapefruit. Maple syrup is also a great option, as it adds a rich sweetness that complements the bitterness of grapefruit. These natural sweeteners can be added in small amounts to balance the grapefruit’s flavor without overpowering it.

When using natural sweeteners, it’s important to experiment with different flavor profiles to find the right balance. Some people prefer a sweeter taste, while others prefer a more subtle sweetness. It’s also important to remember that a little goes a long way. Start with a small amount and gradually add more until you achieve the desired taste.

Once you’ve found the right balance, you can adjust the concentration to suit your taste preferences.

Advertisement

Adjust the Concentration

To adjust the concentration of your grapefruit drink, you’ll want to start by adding a small amount of water and gradually increasing it until it reaches your desired strength.

Here are some tips for dilution:

  1. If you want to add fizz to your grapefruit juice, try mixing it with sparkling water or soda. This will give your drink a refreshing and bubbly texture.

  2. Get creative with mix-ins! Try adding a splash of cranberry juice or a sprig of fresh mint to your grapefruit drink. This will add a new dimension of flavor and make your drink more interesting.

  3. Balancing acidity is key when it comes to grapefruit juice. If your drink is too tart, try adding a pinch of salt or a teaspoon of honey to balance out the acidity.

If you’re looking to serve your grapefruit drink as a mocktail or cocktail base, consider flavor pairing with alcohol. Vodka, gin, and tequila all pair well with grapefruit juice. And don’t forget to add ice to your drink for a refreshing finish.

Add Ice

Don’t forget to grab a handful of ice cubes and let them clink into your glass, creating a refreshing and cooling effect on your grapefruit drink. Adding ice to your grapefruit juice not only helps to cool it down, but it also offers a range of benefits.

The ice cubes dilute the juice slightly, making it less overpowering for those who don’t like the strong taste of grapefruit. Plus, the added water from the ice cubes can help you stay hydrated and refreshed throughout the day.

Advertisement

If you’re not a fan of adding ice to your grapefruit juice, there are other alternatives you can try. For example, you can freeze some grapefruit juice into ice cubes and add those instead. This will keep your drink cool without watering it down. Another option is to chill the grapefruit juice in the refrigerator before serving. This ensures that your drink is cool and refreshing without the need for ice.

Ultimately, the choice is yours, but adding ice to your grapefruit juice is an easy and effective way to make it taste better.

As you enjoy your grapefruit juice with ice, remember that serving it chilled is just as important. Keeping your drink cold enhances the flavor and makes it more enjoyable to drink. So, make sure to store your grapefruit juice in the refrigerator, or even better, in the freezer, for a quick and easy way to cool it down.

By doing so, you’ll be able to savor every sip of your delicious and refreshing grapefruit juice.

Serve Chilled

Adding ice is a great way to make grapefruit juice more palatable, but there’s an even better solution – serving it chilled. The benefits of chilling can’t be overstated. Not only does it improve the taste, but it also enhances the aroma and gives the juice a refreshing feel. And let’s not forget the importance of presentation.

Advertisement

Drinking a cold, refreshing glass of grapefruit juice is much more appealing than a lukewarm one. It’s easy to chill grapefruit juice. Simply put it in the fridge for a couple of hours before serving. If you’re in a hurry, you can add some ice cubes to speed up the process. But if you have the time, chilling the juice in the fridge is the better option. It allows the flavors to meld together and creates a more enjoyable drinking experience.

So, next time you’re making grapefruit juice, remember to chill it for a better taste and presentation.

Transitioning to the next section, it’s important to note that there are various ways to prepare grapefruit juice. Trying different preparation methods can enhance the flavor and help you find the perfect recipe for your taste buds.

Try Different Preparation Methods

You can switch up the way you prepare your grapefruit juice and experiment with different methods to enhance its flavor and find your perfect recipe, y’all.

Here are some ideas to get you started:

Advertisement
  • Juice pairing: Consider pairing your grapefruit juice with other juices like orange or pineapple to balance out its tartness.
  • Citrus alternatives: If you’re not a fan of grapefruit’s bitter taste, try using other citrus fruits like lemon or lime to add a tangy flavor to your juice.
  • Infusions: Infuse your grapefruit juice with herbs like mint or basil, or spices like ginger or cinnamon, to add a unique twist to your drink.

By trying out different preparation methods, you can discover the perfect recipe that suits your taste buds. Once you’ve found your ideal taste, you can then move on to the next step – garnishing your juice with fresh fruit or herbs.

Garnish with Fresh Fruit or Herbs

Enhance your grapefruit juice experience by adding a pop of color and flavor with a fresh fruit or herb garnish. Not only does this make your drink look more visually appealing, but it can also add depth to the flavor profile.

Some creative garnish ideas to try include adding a sprig of fresh mint or basil, a slice of cucumber, or even a few pomegranate seeds. These additions can help balance out the tartness of the grapefruit and give your juice a more complex taste.

Additionally, pairing grapefruit juice with cocktails can be a fun way to experiment with different flavors. Try adding a splash of gin or vodka to your juice and garnishing with a twist of lemon or lime for a refreshing and zesty cocktail. The possibilities are endless when it comes to garnishing and pairing grapefruit juice, so don’t be afraid to get creative and try new things.

To enjoy your grapefruit juice in the healthiest way possible, consider pairing it with a nutritious meal. This can help enhance the benefits of the juice and provide your body with the necessary nutrients it needs to thrive.

Enjoy with a Healthy Meal

Now that we’ve talked about garnishing grapefruit juice with fresh fruit or herbs, let’s move on to another way to make it taste better: enjoying it with a healthy meal.

Advertisement

Not only does pairing grapefruit juice with the right foods enhance its flavor, it also adds nutritional value to your meal.

When it comes to pairing suggestions, grapefruit juice goes well with a variety of foods.

For a light and refreshing breakfast option, try pairing it with yogurt and granola or oatmeal.

The tangy flavor of the grapefruit juice complements the creamy texture of the yogurt and the crunch of the granola.

If you’re looking for a heartier meal, grapefruit juice is a great addition to salads, especially those with a citrus-based dressing.

Advertisement

The acidity of the grapefruit juice helps to cut through heavier ingredients like avocado or bacon.

In addition to its flavor-enhancing properties, grapefruit juice is also a great source of vitamins and minerals.

It’s high in vitamin C, which can boost your immune system, and it also contains potassium, which can help regulate blood pressure.

By pairing grapefruit juice with healthy foods, you can create a well-rounded meal that is both delicious and nutritious.

So next time you’re looking for a way to make your grapefruit juice taste better, try pairing it with a healthy meal.

Advertisement

Your taste buds and your body will thank you.

Frequently Asked Questions

Are there any grapefruit varieties that should be avoided for making juice?

When choosing grapefruit for juicing, avoid red or pink varieties as they are sweeter and less acidic. Opt for white or yellow grapefruit instead. Look for fruits that are heavy for their size and have smooth, thin skin.

Can grapefruit juice be mixed with alcohol?

Yes, grapefruit juice can be mixed with alcohol to create delicious cocktails. Some popular grapefruit juice cocktail recipes include the Greyhound, Salty Dog, and Paloma. Be cautious when mixing with certain medications as it can have adverse effects.

How long does grapefruit juice last in the fridge?

Like a seed in the soil, grapefruit juice should be stored in a cool, dark place. Once opened, it lasts about 7-10 days in the fridge. To extend shelf life, try freezing it in an ice cube tray for later use.

Can grapefruit juice be frozen for later use?

Yes, grapefruit juice can be frozen for later use. However, the process may affect the flavor and texture. To preserve the grapefruit flavor, squeeze fresh juice and freeze in an airtight container for up to 3 months.

Advertisement

Are there any health risks associated with drinking grapefruit juice?

Did you know that grapefruit juice can interact with certain medications? Potential interactions aside, it’s also rich in nutrients such as vitamin C and potassium, providing numerous nutritional benefits to those who can safely consume it.

Conclusion

In conclusion, making grapefruit juice taste better is all about finding the right balance of flavors and personal preferences. By understanding the benefits of grapefruit juice and choosing the right grapefruits, we can create a delicious and nutritious drink.

Experimenting with different flavor combinations and using natural sweeteners can enhance the flavor profile and make it more enjoyable. Adjusting the concentration, serving chilled, trying different preparation methods, and garnishing with fresh fruit or herbs can also elevate the experience.

Whether enjoyed on its own or paired with a healthy meal, grapefruit juice can be a refreshing and satisfying addition to any diet. So, go ahead, get creative, and savor the flavors of this citrus delight!

Advertisement

Continue Reading

Trending