Juice Tips and Tricks
How Much Juice Does One Lime Make
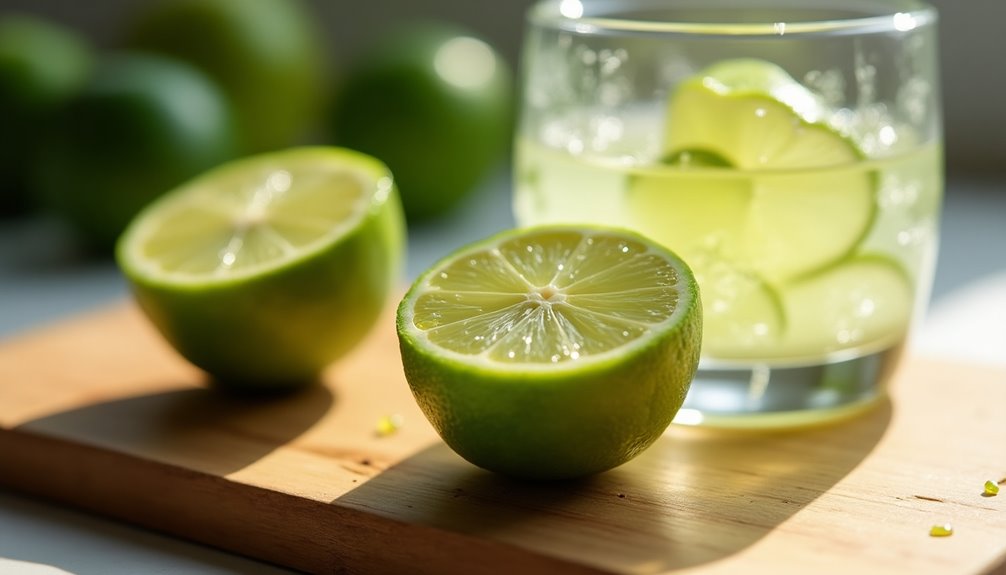
Limes are a versatile ingredient perfect for cooking, baking, and making drinks. Whether you’re mixing up a refreshing margarita or adding a tangy kick to your marinade, lime juice is a popular choice. One common question when using limes is how much juice you can get from one lime.
As someone who loves to cook and experiment in the kitchen, I decided to dive into the science behind lime juice production and share my findings.
Several factors can affect how much juice one lime makes, including the lime’s size, ripeness, and the type of juicing tool used. It can be frustrating to buy a bag of limes only to find that they yield minimal juice. However, with the right techniques and tools, you can maximize your lime juice output and add a burst of citrus to your favorite dishes.
Join me as we explore the art of juicing limes and discover how to get the most out of this flavorful fruit.
Key Takeaways
- Slightly soft, bright green limes are best for juicing.
- Tools for juicing include squeezer, electric juicer, fork, handheld reamer, and blender.
- Proper lime selection is crucial for optimal juicing results.
- Expect 1-2 tablespoons of juice per lime.
Factors Affecting Lime Juice Production
Let’s talk about what factors can affect how much juice your lime yields! First and foremost, the ripeness of the lime will have a significant impact on how much juice it produces. A lime that’s fully ripened will be juicier and more flavorful than one that’s underripe or overripe.
When selecting limes, look for ones that’re slightly soft to the touch and have a bright green skin. These’ll typically yield the most juice.
Another factor to consider is the juicing method you use. Hand squeezing a lime’ll yield less juice than using a juicer or a citrus press. A juicer’ll extract more juice by breaking down the lime’s fibers, while a citrus press’ll squeeze the lime more thoroughly than you can by hand.
By using the right tools and techniques, you can maximize the amount of juice you get out of each lime. Now, let’s move on to discussing the tools you’ll need for juicing limes.
Tools for Juicing Limes
Using a citrus squeezer, you’ll easily extract the tangy liquid from these small green fruits. Here are some tools and techniques I recommend for juicing limes:
-
Lime squeezer: This handheld tool is specifically designed to extract juice from limes and other small citrus fruits. It works by pressing the lime half against a ridged surface and squeezing the handles together to extract the juice.
-
Electric juicer: If you’re juicing a large quantity of limes, an electric juicer can save time and effort. Simply cut the limes in half and place them in the juicer, which will automatically extract the juice.
-
Fork: In a pinch, a fork can be used to extract lime juice. Cut the lime in half and use the fork to twist and press the lime against a bowl or container to extract the juice.
-
Handheld reamer: Similar to a lime squeezer, a handheld reamer can be used to extract juice from limes and other citrus fruits. Simply insert the reamer into the lime half and twist to extract the juice.
-
Blender: For recipes that require a large amount of lime juice, such as marinades or dressings, a blender can be used to extract the juice. Cut the limes into quarters and blend with a small amount of water, then strain the liquid through a fine mesh sieve.
Now that you have your tools ready, let’s move on to preparing the limes for juicing.
Preparing Limes for Juicing
Before juicing limes, it’s important to wash them thoroughly to remove any dirt or debris that may be on the skin. Proper lime selection is also crucial for optimal juicing results. Choose limes that are firm and heavy for their size, with smooth and shiny skin. Avoid limes that feel dry or have soft spots, as they may not yield as much juice.
When preparing limes for juicing, start by cutting off the ends with a sharp knife. Then, slice the lime in half lengthwise. To get the most juice out of the lime, use squeezing techniques that involve applying pressure to the center of the fruit. You can also use a citrus juicer to extract the juice.
If you prefer pulp-free juice, use a small spoon or citrus reamer to remove the pulp before juicing. These techniques will help you get the most juice out of your limes and ensure that your drinks and dishes have the perfect balance of acidity.
Next, let’s explore some techniques for juicing limes.
Techniques for Juicing Limes
To get the most out of your limes, you’ll want to try different squeezing techniques that involve applying pressure to different parts of the fruit. This will help increase juicing efficiency and ensure that you get as much juice as possible from each lime.
Here are three techniques you can try:
-
Cut the lime in half crosswise and then squeeze each half with your hand. This technique is great for small to medium-sized limes and allows you to control the amount of pressure you apply.
-
Use a citrus juicer to extract the juice from the lime. This technique is ideal if you have larger limes or need to juice a lot of them quickly. The juicer will apply pressure evenly across the entire fruit, which can help you get more juice out of each lime.
-
For maximum juicing efficiency, try rolling the lime on a hard surface before cutting it open. This will help break down the membranes inside the fruit and release more juice. This technique is especially helpful for juicing larger or less ripe limes.
When it comes to measuring lime juice, you’ll want to make sure that you have an accurate way to do so.
Measuring Lime Juice
When it comes to measuring lime juice, there are a few key points to keep in mind. First, it’s important to understand the difference between measuring by volume and measuring by weight.
Additionally, it’s useful to know how to convert the number of limes needed to a specific amount of juice. Finally, being able to adjust recipes based on the amount of juice you have on hand can help you make the most of your lime juice.
Volume vs. Weight
Imagine you’re holding a lime in your hand – did you know that the amount of juice it produces is measured by volume, not weight? When it comes to measuring lime juice, volume conversion is the key factor. This means that the volume of the lime juice is measured in milliliters (mL), rather than its weight in grams (g).
In order to convert the weight of a lime to its volume, we have to consider the density comparison between the two. Here are three important things to keep in mind when comparing volume and weight for measuring lime juice:
- Density: the density of lime juice is approximately 1.03 g/mL, which means that 1 milliliter of lime juice weighs 1.03 grams.
- Precision: using a precise measuring tool, such as a graduated cylinder, is essential to accurately measure the volume of lime juice.
- Variability: the amount of juice that a lime produces can vary based on its size, ripeness, and freshness, which can affect the volume of juice extracted.
Now that we understand the importance of volume conversion and density comparison when measuring lime juice, let’s explore how to convert limes to juice.
Converting Limes to Juice
Now that we’ve got our hands on some fresh limes, let’s squeeze them into a tangy, citrusy elixir. But how much juice can we expect to get from one lime? The answer is about 1-2 tablespoons of lime juice per lime, depending on its size and ripeness.
To extract the most juice from your limes, try rolling them on a hard surface before cutting them in half and juicing them. This helps to break down the membranes and release more juice. You can also use a citrus juicer or a hand-held reamer to get the most out of your limes.
And if you don’t have any limes on hand, you can substitute with lemon juice, vinegar, or even white wine in some recipes.
With this knowledge of lime juice extraction techniques, we can adjust our recipes accordingly to get the perfect balance of tangy flavor.
Recipe Adjustments
To get the perfect balance of tangy flavor in your recipe, you’ll need to make adjustments based on the amount of lime juice you want to use. If you don’t have enough limes to make the desired amount of juice, there are recipe substitutions and lime juice alternatives you can use.
For example, you can use lemon juice as a substitute for lime juice in most recipes. However, keep in mind that lemon juice has a stronger flavor than lime juice, so you may need to use less of it to achieve the same level of tanginess.
Another alternative to lime juice is bottled lime juice, which can be found in most grocery stores. This is a convenient option if you don’t have fresh limes on hand or if you need a larger quantity of juice. However, bottled lime juice may not have the same level of freshness and flavor as freshly squeezed lime juice, so you may need to adjust the amount you use to achieve the desired flavor in your recipe.
When you have finished making adjustments to your recipe and have the perfect amount of lime juice, you may be wondering what to do with any leftover juice. In the next section, I’ll explain the best ways to store lime juice to ensure it stays fresh and flavorful for future use.
Storing Lime Juice
Preserve that precious lime juice by promptly putting it in an airtight container to prolong its potency. Lime juice has a limited shelf life, particularly when exposed to air and light. If stored properly, lime juice can last for up to a week in the refrigerator. It is important to choose the right container for storing lime juice. Glass containers, such as mason jars or glass bottles, are ideal for storing lime juice as they do not react with the acid in the juice. Plastic containers or bags can also be used, but they may not be as effective in preventing oxidation.
To further extend the shelf life of lime juice, consider freezing it. Lime juice can be frozen in ice cube trays, then transferred to a freezer-safe container once frozen. This allows for easy portioning and use in future recipes. When using frozen lime juice, it is important to thaw it in the refrigerator and use it promptly.
Using lime juice in cooking is an excellent way to add acidity and brightness to dishes. But before we delve into that, let’s first explore the benefits of using fresh lime juice in cooking.
Using Lime Juice in Cooking
Enhance the flavor profiles of your dishes by incorporating fresh lime juice into your cooking. It adds a zesty and tangy kick to any recipe. Lime juice is packed with nutrients such as vitamins C and A, flavonoids, and antioxidants, making it a healthy and flavorful addition to any meal. Lime juice also has antibacterial properties that can help prevent foodborne illnesses. Therefore, it’s a great ingredient to use in raw dishes like ceviche or salsa.
There are different types of lime juice available in the market, each with its own distinct flavor and acidity level. For instance, key lime juice has a strong and tart flavor that’s perfect for making pies and desserts. On the other hand, Persian lime juice has a milder taste and is commonly used in cooking savory dishes like rice, soups, and stews. By experimenting with different types of lime juice and incorporating them into your recipes, you can create unique and delicious flavor combinations. These flavor combinations will impress your guests and elevate your cooking to the next level.
Incorporating lime juice into your cooking is just one way to enjoy the benefits of this versatile citrus fruit. In the next section, we’ll explore how to use lime juice in beverages to create refreshing and flavorful drinks.
Using Lime Juice in Beverages
I love using lime juice in my beverages! Not only does it add a zesty flavor, but it also has health benefits.
Lime juice is commonly used in cocktails and mocktails, as well as infused water and tea. Its high vitamin C content can help boost the immune system, while its antioxidants can help fight against free radicals in the body.
Cocktails and Mocktails
If you’re making a delicious cocktail or mocktail, one lime can provide enough juice to give your drink a zesty kick. Lime juice is a popular ingredient in many cocktails and mocktails due to its tart and acidic flavor that pairs well with a variety of other ingredients.
Lime juice can also be used to balance out the sweetness of sugary drinks, and it can add a refreshing and bright taste to any beverage. When using lime juice in cocktails or mocktails, it’s important to experiment with flavor combinations and garnishes to create a unique and enjoyable drink.
Some popular combinations include lime juice with rum, tequila, or gin, and garnishes such as mint or jalapeño can add an extra layer of flavor. With just one lime, you can elevate the taste of your beverage and impress your guests with your mixology skills.
Moving on to infused water and tea, there are many ways to incorporate lime juice into these drinks as well.
Infused Water and Tea
Discover new ways to add a zesty twist to your infused water and tea by incorporating the refreshing tartness of lime. Infused water has become increasingly popular for its hydrating and detoxifying benefits. By adding lime to your water, you not only enhance the flavor but also boost its nutritional value.
Lime contains vitamin C, which acts as a natural antioxidant, protecting your cells against free radicals that can cause damage. Additionally, lime has citric acid, which promotes healthy digestion and can help prevent kidney stones.
When it comes to tea infusions, lime pairs well with a variety of flavors. For a tropical twist, try infusing your tea with lime and pineapple. If you’re looking for a classic combination, lime and ginger make a perfect match. Lime can also add a refreshing twist to green tea, which is known for its many health benefits, including reducing the risk of heart disease and stroke.
By adding lime to your tea, you not only enhance the flavor but also reap the benefits of this citrus fruit. As we explore the health benefits of lime, it’s important to note that incorporating lime into your infused water and tea is just one small step towards a healthier lifestyle.
Health Benefits
I hope you enjoyed learning about infused water and tea! Now, let’s delve into the nutritional value and immune-boosting properties of lime juice.
Limes are a great source of vitamin C, which is a powerful antioxidant that helps protect our cells from damage caused by free radicals. In fact, one lime contains about 32% of our daily recommended intake of vitamin C.
This vitamin also helps support our immune system by stimulating the production of white blood cells that fight off infection and disease.
In addition, limes contain other beneficial nutrients such as potassium, folate, and flavonoids which have anti-inflammatory and anti-cancer properties.
So next time you’re looking for a healthy boost, consider adding lime juice to your meals or drinks! Speaking of which, lime juice can add a refreshing zing to many recipes.
From marinades and dressings to cocktails and desserts, the possibilities are endless. So let’s explore some delicious ways to incorporate lime juice into your culinary creations!
Recipes Featuring Lime Juice
You’ll love the zesty flavor that a single lime can add to your favorite recipes, and did you know that on average, one lime produces about 2 tablespoons of juice?
Lime juice can be used as a substitute for vinegar or other acidic ingredients in recipes, and it also works great as a marinade for meats and seafood. Adding lime juice to your dishes can elevate the flavor profile and give a refreshing twist to your meals.
Try using it in dressings, sauces, and even desserts for a tangy kick. But before you start squeezing those limes, make sure to read on for some tips and tricks for juicing them effectively.
Tips and Tricks for Juicing Limes
When it comes to juicing limes, there are a few key tips and tricks that can help you get the most juice out of your fruit. First and foremost, it’s important to select limes that are ripe and juicy.
Additionally, proper storage can help prolong the life of your limes and ensure they’re ready for use when you need them. Once you have your limes ready, it’s important to clean your juicing tools thoroughly to ensure maximum juice extraction.
Buying and Storing Limes
To get the most juice out of your limes, make sure to choose ones that are firm and heavy for their size. When choosing fresh limes, look for those with smooth, unblemished skins. Avoid overripe limes as they’ll be dry and have less juice.
Quality limes should have a bright green color and no soft spots. Proper storage is also key to keep your limes fresh and juicy. Store them in a cool, dry place away from direct sunlight.
Limes can also be stored in the refrigerator for up to two weeks. When refrigerated, they’ll be easier to juice and will yield more juice. Now that we’ve covered choosing fresh limes and proper storage, let’s move on to getting the most juice out of your limes.
Getting the Most Juice
Now that we have our limes, it’s time to get the most juice out of them. The amount of juice yield you can get from a lime can vary depending on several factors, such as its ripeness, size, and juicing techniques used.
To demonstrate this, here’s a table that shows the estimated juice yield of an average-sized lime using different juicing techniques:
Juicing Technique | Estimated Juice Yield |
---|---|
Hand-squeezing | 1-2 tablespoons |
Manual juicer | 2-3 tablespoons |
Electric juicer | 4-5 tablespoons |
Citrus press | 4-6 tablespoons |
As you can see, using an electric juicer or citrus press can give you the most juice yield, but hand-squeezing and manual juicing can still be effective if you don’t have the equipment. It’s also important to note that if you want to get the most juice out of your limes, make sure they are at room temperature and roll them on a hard surface before cutting to break up the juice sacs.
Now that we know how to get the most juice out of our limes, it’s important to clean our juicing tools properly to prevent any bacteria growth.
Cleaning Your Juicing Tools
Congratulations, you’ve successfully juiced your limes! But before you start celebrating, let’s talk about the not-so-fun part: cleaning your juicing tools. Cleaning efficiency is crucial if you want to extend the lifespan of your juicing tools and ensure they work at their best.
Proper maintenance is also necessary to prevent any bacterial growth or contamination that may affect the quality of your juice.
To clean your juicing tools, start by disassembling them and rinsing the parts under warm water. Use a brush with soft bristles to remove any leftover pulp or seeds that may be stuck in the crevices.
If there are any stubborn stains, you can soak the parts in a mixture of warm water and vinegar for a few minutes before scrubbing them again. Make sure to dry the parts completely before reassembling them.
By following these steps, you can maintain the cleaning efficiency of your juicing tools and ensure that they work optimally every time you use them.
Frequently Asked Questions
How long does it take for a lime to produce juice after it has been cut?
After cutting a lime, it takes mere seconds for juice to be extracted with the best lime juicers. The yield of lime juice varies depending on the size and ripeness of the lime, but can range from 1-2 tablespoons.
Can lime juice be frozen for later use?
I’ve found that lime juice can be frozen for up to 6 months, but it may lose some flavor. Optimal storage is in an airtight container. Freezing options include ice cube trays or freezer bags.
What are some common mistakes people make when juicing limes?
When juicing limes, it’s important to use the right technique to extract the maximum amount of juice. Avoid squeezing too hard or using a dull juicer. Also, different lime varieties may have varying levels of acidity and sweetness.
Are there any health benefits to drinking lime juice?
Drinking lime juice has numerous health benefits, including aiding digestion, boosting immunity, and reducing inflammation. Lime juice can be used in a variety of recipes, from marinades to cocktails, and adds a tangy, refreshing flavor to any dish.
What is the difference between fresh lime juice and bottled lime juice in terms of taste and nutritional value?
Fresh lime juice has a distinct, tangy taste due to its high vitamin C content. Bottled lime juice may lack flavor and have added preservatives. Nutritional content varies, with fresh lime juice containing more antioxidants and nutrients.
Conclusion
In conclusion, I’ve found that one lime can produce approximately 1-2 tablespoons of juice. However, this can vary depending on factors such as the size and ripeness of the lime, as well as the juicing technique used. It’s always a good idea to have multiple limes on hand when a recipe calls for a specific amount of juice, just to be sure you have enough. If you’re ever uncertain about how much juice in a lime you’re working with, you can also give it a gentle roll on the counter before cutting into it, which helps release more juice. Ultimately, the best way to gauge how much liquid you’ll get is by experimenting with different types of limes and juicing methods.
Despite the variability in juice production, limes are a versatile and flavorful addition to many dishes and beverages. From refreshing limeade to zesty guacamole, there are countless ways to incorporate lime juice into your culinary creations.
By using the proper tools and techniques, you can maximize the amount of juice extracted from each lime and enjoy the full potential of this citrus fruit. So go ahead, squeeze a lime and add a burst of flavor to your next dish or drink.
As the famous saying goes, when life gives you limes, make something delicious!
Cindy thoroughly researches juicing trends, techniques, and recipes to provide readers with practical advice and inspiration. Her writing style is accessible, engaging, and designed to make complex concepts easy to understand. Cindy’s dedication to promoting the advantages of juicing shines through her work, empowering readers to make positive changes in their lives through the simple act of juicing.
Juice Tips and Tricks
How To Make Celery Juice For High Blood Pressure
I have been managing hypertension for several years, experimenting with various medications and lifestyle adjustments to control it. Recently, I discovered the potential benefits of celery juice in aiding high blood pressure, so I am eager to incorporate it into my routine.
I was pleasantly surprised by the results, and now I want to share my experience and knowledge with others who may be struggling with this condition.
High blood pressure, also known as hypertension, is a common condition that affects millions of people worldwide. It occurs when the force of blood against the walls of your arteries is consistently too high, which can lead to serious health problems such as heart disease, stroke, and kidney failure.
While there are many medications available to manage high blood pressure, lifestyle changes such as diet and exercise can also be effective. In this article, I will be sharing how to make celery juice for high blood pressure, as well as other lifestyle changes that can help manage this condition.
Key Takeaways
- Celery contains unique compounds called phthalides that can help regulate blood pressure by relaxing the muscles in the walls of blood vessels.
- To make celery juice for high blood pressure, select firm, bright green stalks with leaves that are not wilted, rinse thoroughly, and cut into smaller pieces that will fit in a high-quality juicer.
- Experiment with flavor variations by adding lemon, ginger, or other fruits and vegetables to celery juice for additional health benefits such as boosting immunity and aiding digestion.
- Celery juice may interact with certain medications, so it’s important to speak with a healthcare provider before adding it to the diet.
Understanding High Blood Pressure
You may be wondering why high blood pressure is a concern and how it affects your body. High blood pressure, or hypertension, is a condition where the force of blood against the walls of your arteries is consistently too high. Over time, this can damage your arteries, leading to serious health problems such as heart disease, stroke, and kidney failure.
Unfortunately, hypertension often has no symptoms, which is why it’s sometimes called the ‘silent killer’. There are several causes of high blood pressure, including genetics, age, and lifestyle factors such as being overweight, not getting enough exercise, and eating a diet high in salt and processed foods.
Fortunately, there are also many lifestyle changes you can make to help manage your blood pressure. These include eating a healthy diet rich in fruits, vegetables, and whole grains, maintaining a healthy weight, staying physically active, reducing stress, and limiting alcohol and tobacco use. By making these changes, you can help lower your blood pressure and reduce your risk of developing serious health problems.
As we transition into discussing the benefits of celery juice for high blood pressure, it’s important to note that incorporating natural remedies into your lifestyle changes can also be helpful in managing hypertension.
The Benefits of Celery Juice for High Blood Pressure
I’m excited to dive into the benefits of celery juice for high blood pressure!
Did you know that celery is packed with important nutrients like vitamin K, vitamin C, and potassium?
But what really sets celery apart is its unique phthalides, which have been shown to help regulate blood pressure.
Let’s explore how this humble vegetable can help us achieve better heart health.
Nutritional Content of Celery
The nutritional content of celery is impressive, as it contains high amounts of vitamin K, vitamin C, and potassium, which have all been linked to lower blood pressure levels. The health benefits of consuming celery extend beyond blood pressure regulation, as it’s also a great source of fiber, antioxidants, and other essential vitamins and minerals.
Here are some nutritional facts about celery that you should know:
- One cup of chopped celery contains only 16 calories, making it a great low-calorie snack option.
- Celery is 95% water, which means it can help keep you hydrated throughout the day.
- The high fiber content in celery can help improve digestion and prevent constipation.
- Celery is also a good source of folate, which is essential for healthy fetal development during pregnancy.
All of these nutritional benefits make celery a great addition to any diet, especially for those looking to improve their blood pressure levels. But how exactly does celery help regulate blood pressure? Let’s explore the role of phthalides in the next section.
Phthalides and Blood Pressure Regulation
By consuming celery, you can benefit from its phthalides, which have been shown to aid in the regulation of cardiovascular health. Phthalides are compounds found in celery that relax the muscles in the walls of our blood vessels, allowing for increased blood flow and reduced blood pressure.
According to a study published in the Journal of Medicinal Food, participants who consumed celery extract experienced a significant decrease in both systolic and diastolic blood pressure levels. This is great news for those seeking natural remedies for hypertension.
Incorporating celery juice into your diet can provide you with these phthalides and their blood pressure regulating benefits. But before you start juicing, it’s important to select and prepare your celery correctly.
How to Select and Prepare Celery for Juicing
To ensure maximum health benefits, it’s important to carefully select and prepare your celery before juicing. When selecting celery, look for firm, bright green stalks with leaves that are not wilted. Avoid celery that appears yellow or brown, as it may be past its prime.
Organic celery is preferable, as conventionally grown celery may contain high levels of pesticides. Before juicing, rinse the celery thoroughly under cool running water and remove any dirt or debris. If desired, trim the root end and any brown or wilted portions of the stalks.
Cut the celery into smaller pieces that will fit easily into your juicer. By taking these steps to select and prepare your celery, you can ensure that your celery juice is not only delicious, but also highly nutritious. Now, let’s move on to how to make celery juice at home.
How to Make Celery Juice at Home
If you want to reap the full benefits of celery, it’s essential to know how to prepare and juice it properly.
Juicing celery is a straightforward process that requires a few simple steps. First, rinse the celery thoroughly to remove any dirt or debris. Then, cut the celery into smaller pieces that can fit into your juicer. For best results, use a high-quality juicer that can extract as much juice as possible.
When juicing celery, there are a few techniques you can use to enhance the flavor and texture. Some people prefer to juice celery with other fruits and vegetables, such as apples, cucumbers, or ginger. This can add extra nutrients and flavor to your juice. Others prefer to add a squeeze of lemon or lime to their celery juice to give it a tangy kick. Experiment with different flavor variations to find the one that works best for you. You can also try adding herbs like mint or parsley for a refreshing twist, further improving the taste of celery juice. Blending with a few ice cubes before serving can make the juice more enjoyable on a hot day. Ultimately, improving the taste of celery juice depends on finding the right combination of ingredients that suit your palate.
To incorporate celery juice into your daily routine, there are many ways to enjoy it. You can drink it in the morning as a healthy start to your day or sip it throughout the day as a refreshing beverage. Some people prefer to mix their celery juice with other juices or smoothies to create a more complex flavor profile. Whatever your preference, drinking celery juice regularly can help lower your blood pressure and improve your overall health.
Incorporating Celery Juice into Your Daily Routine
Incorporating celery juice into your daily routine is like adding a burst of freshness and vitality to your day. I suggest starting with a morning routine where you drink a glass of celery juice before eating or drinking anything else. This helps your body absorb the nutrients more efficiently and jumpstarts your digestion for the day.
To keep things interesting, try experimenting with flavor variations. You can add a slice of lemon or ginger for a citrusy kick or a pinch of turmeric for its anti-inflammatory properties. You can also mix in other fruits and vegetables like apples, carrots, or cucumbers for added flavor and nutrition. With these simple additions, you can turn your plain celery juice into a delicious and healthy drink.
As you begin to incorporate celery juice into your daily routine, it’s important to keep in mind some tips and tricks for making the best celery juice.
Tips and Tricks for Making the Best Celery Juice
Hey, buddy! Want to know the secrets to whipping up the tastiest and healthiest celery juice ever? Look no further because I’ve got some tips and tricks for making the best celery juice. But before we get started, let’s talk about juicer maintenance. It’s essential to clean your juicer after each use to prevent bacteria buildup and ensure optimal performance. Refer to the manufacturer’s instructions for cleaning and maintenance tips.
Now, let’s dive into the fun part – celery juice variations. While plain celery juice is excellent for high blood pressure, you can spice things up by adding other ingredients like lemon, ginger, or cucumber. Not only do they add flavor, but they also bring additional health benefits. Check out the table below for some celery juice variations that you can try.
Celery Juice Variation | Ingredients | Health Benefits |
---|---|---|
Celery-Lemon | Celery, Lemon | Boosts immunity, aids digestion |
Celery-Ginger | Celery, Ginger | Reduces inflammation, improves circulation |
Celery-Cucumber | Celery, Cucumber | Hydrates, promotes healthy skin |
Incorporate these variations into your daily routine to keep things exciting. And with a little juicer maintenance, you’ll be on your way to making the best celery juice ever. Now, let’s transition into the next section about other lifestyle changes for managing high blood pressure.
Other Lifestyle Changes for Managing High Blood Pressure
When it comes to managing high blood pressure, making lifestyle changes is crucial. I’ve found that incorporating regular exercise and physical activity into my routine has been helpful. Stress reduction and relaxation techniques, such as deep breathing and meditation, have also been effective in managing my blood pressure. These lifestyle changes may require some effort, but the benefits are worth it for a healthier life.
In addition to drinking celery juice, adjusting my diet has also been important. I’ve reduced my intake of sodium and processed foods, while increasing my consumption of fruits, vegetables, and whole grains. It’s important to work with a healthcare provider to develop a personalized plan for managing high blood pressure. With a combination of lifestyle changes and medication, it is possible to keep blood pressure under control and reduce the risk of complications.
Exercise and Physical Activity
You can easily improve your overall health by simply adding more physical activity to your daily routine, which will greatly benefit your high blood pressure. Whether it’s indoor or outdoor exercise, regular physical activity can help control your blood pressure.
Engaging in group fitness activities can also be a great way to stay motivated and accountable, while also providing an opportunity to socialize and make new friends.
In addition to its positive effects on blood pressure, exercise has numerous other benefits for your health. It can help you maintain a healthy weight, improve your mood, and reduce your risk of chronic diseases such as heart disease and diabetes.
So, make sure to prioritize physical activity in your daily routine to reap all of its health benefits.
Now, let’s explore some stress reduction and relaxation techniques.
Stress Reduction and Relaxation Techniques
To effectively manage stress levels and promote relaxation, it’s important to incorporate techniques such as mindfulness meditation and deep breathing exercises into your daily routine. These methods can have a profound impact on your overall well-being and health.
Mindfulness meditation involves focusing your attention on the present moment, accepting your thoughts and feelings without judgment, and allowing yourself to become more aware of your physical sensations. Deep breathing exercises, on the other hand, involve taking slow, deep breaths that fill your lungs and release tension from your body.
Here are four techniques to help you get started:
-
Mindful Breathing: Find a quiet place where you can sit comfortably. Close your eyes and focus your attention on your breath. As you inhale, feel your stomach expand, and as you exhale, feel your stomach contract. Continue to do this for several minutes, allowing your mind to become calm and focused.
-
Body Scan: Lay down on your back and close your eyes. Focus your attention on each part of your body, starting at your toes and moving up to the top of your head. As you focus on each part, tense and then relax the muscles. This exercise can help release tension from your body.
-
Gratitude Practice: Take a few minutes each day to reflect on what you’re grateful for. This can help shift your focus from negative thoughts to positive ones, and help you develop a more positive outlook on life.
-
Progressive Muscle Relaxation: This technique involves tensing and then relaxing your muscles. Start at your toes and work your way up to your head, tensing each muscle group for a few seconds before releasing the tension. This exercise can help reduce muscle tension and promote relaxation.
Incorporating these techniques into your daily routine can help reduce stress and promote relaxation. However, it’s important to remember that these techniques aren’t a substitute for professional medical advice. In the next section, we’ll discuss precautions and possible side effects to be aware of when managing high blood pressure.
Precautions and Possible Side Effects
Before trying any new treatment, it’s important to understand the potential risks involved. When it comes to celery juice for high blood pressure, there are a few precautions to keep in mind.
Firstly, celery juice may interact with certain medications, so it’s important to speak with a healthcare provider before adding it to your routine.
Additionally, some people may experience allergic reactions or digestive issues when consuming celery juice.
Interactions with Medications
Although celery juice is generally considered safe, it’s important to note that it can potentially interact with certain medications, such as blood thinners and diuretics. If you’re taking any prescription medication, it’s best to consult with your healthcare provider before adding celery juice to your diet.
Some of the medication reactions that may occur with celery juice include:
- Increased risk of bleeding: Celery juice contains compounds that may have blood-thinning effects, which could increase the risk of bleeding when taken with blood-thinning medications.
- Excessive diuresis: Celery juice is a natural diuretic, which means it can increase urine production and lead to a loss of fluids and electrolytes. This effect may be amplified when taken with diuretic medications, leading to dehydration and electrolyte imbalances.
- Decreased blood pressure: Celery juice may lower blood pressure, which can be beneficial for people with hypertension. However, taking it with medications that also lower blood pressure could lead to an excessive drop in blood pressure, causing dizziness, lightheadedness, or fainting.
It’s important to take these medication reactions and dosage concerns into account when incorporating celery juice into your diet for high blood pressure.
In the next section, I’ll discuss some of the possible allergic reactions and digestive issues that may arise from consuming celery juice.
Allergic Reactions and Digestive Issues
Allergic reactions and digestive issues can occur when consuming celery juice, so it’s important to be aware of the potential risks. Common triggers for allergic reactions include itching, hives, and swelling, while digestive issues can range from bloating to diarrhea. If you experience any of these symptoms after consuming celery juice, it’s important to stop drinking it and seek medical attention.
Management strategies for allergic reactions and digestive issues include avoiding celery juice altogether or slowly introducing it into your diet to assess your tolerance. Additionally, you can try cooking celery instead of consuming it raw, as this may reduce the likelihood of a reaction. It’s also important to read labels carefully and avoid products that contain celery if you have a known allergy.
It’s important to monitor your blood pressure regularly, especially if you have high blood pressure. By making celery juice a part of your daily routine, you can potentially lower your blood pressure and improve your overall health. However, it’s crucial to be aware of the potential risks and address any allergic reactions or digestive issues promptly.
Monitoring Your Blood Pressure
Keep an eye on your blood pressure readings regularly to take control of your health and prevent potential health risks. Blood pressure tracking is crucial to monitor the effectiveness of lifestyle modifications aimed at lowering high blood pressure.
You can easily track your blood pressure at home using a blood pressure monitor or by visiting your healthcare provider regularly. Lifestyle modifications such as maintaining a healthy diet, regular exercise, and stress management can significantly lower your blood pressure.
However, it’s essential to monitor your blood pressure regularly to ensure that these modifications are working for you. By tracking your blood pressure, you can identify any potential issues early on and take action to prevent further health risks.
Now that we’ve discussed the importance of monitoring your blood pressure, let’s move on to the final thoughts and resources section.
Final Thoughts and Resources
Don’t forget to check out the additional resources provided below to learn more about maintaining a healthy lifestyle and reducing the risk of cardiovascular disease. These resources can provide you with more information on managing high blood pressure, including tips on exercise, diet, and stress management.
It’s important to remember that managing high blood pressure is not just about taking medication, but also about making lifestyle changes. In my personal experience, making small changes to my daily routine, such as incorporating more physical activity and eating a balanced diet, has greatly improved my overall health and lowered my blood pressure.
Remember to always consult with your healthcare provider before making any significant changes to your lifestyle or starting a new exercise or diet plan. With the right support and resources, managing high blood pressure is possible and can greatly improve your quality of life.
Frequently Asked Questions
Can celery juice completely cure high blood pressure?
While celery juice has been shown to lower blood pressure, it is not a guaranteed cure. Incorporating celery juice into a balanced diet offers various benefits for overall health, but consuming too much can lead to potential side effects.
Is it necessary to use a juicer for making celery juice or can it be made with a blender?
I suggest using a juicer for celery juice, as it yields a smoother consistency and is more efficient. However, a blender can work if you strain the juice afterwards. Here are some celery juice recipes for high blood pressure.
Can celery juice interact with any medications used for treating high blood pressure?
Hey there! Did you know that celery juice can interact with certain medications used for treating high blood pressure? It’s important to always check with your doctor and follow their recommended dosage to avoid any potential drug interactions.
How long does it take for celery juice to start showing positive effects on high blood pressure?
Based on scientific evidence, celery juice can lower high blood pressure within a week. Beyond hypertension, it also offers benefits for digestion, skin, and inflammation. Incorporate it into your diet for overall health.
Are there any specific types of celery that are better for making juice for high blood pressure?
When it comes to lowering blood pressure, some celery varieties are better than others due to their higher nutritional benefits. However, there are also alternative options to celery that can aid in reducing hypertension.
Conclusion
So, there you have it – everything you need to know about making celery juice for high blood pressure. It’s a simple process that can have a profound impact on your health.
Celery juice is a natural way to lower blood pressure, thanks to its high potassium content and ability to reduce inflammation. Plus, it’s easy to incorporate into your daily routine and can be a refreshing addition to your diet.
As you start to make celery juice a regular part of your routine, it’s important to also make other lifestyle changes to manage high blood pressure. One interesting statistic to keep in mind is that nearly half of all adults in the United States have high blood pressure, according to the American Heart Association.
By making simple changes like juicing celery, eating a healthy diet, and exercising regularly, you can reduce your risk of developing this common condition and improve your overall health.
Remember to monitor your blood pressure regularly and work with your healthcare provider to develop a plan that’s right for you. And if you experience any side effects or have concerns about incorporating celery juice into your diet, be sure to speak with your doctor.
With the right information and a commitment to making healthy choices, you can take control of your health and enjoy a better quality of life.
Cindy thoroughly researches juicing trends, techniques, and recipes to provide readers with practical advice and inspiration. Her writing style is accessible, engaging, and designed to make complex concepts easy to understand. Cindy’s dedication to promoting the advantages of juicing shines through her work, empowering readers to make positive changes in their lives through the simple act of juicing.
Juice Tips and Tricks
How To Make Coconut Juice
Hello! If you enjoy tropical beverages, you’re in luck. In this guide, I will demonstrate how to create a delicious and refreshing coconut juice at home. Not only is coconut juice extremely hydrating, but it’s also easy to make with just a few simple steps. If you’re feeling adventurous and want to impress your friends at your next event, I can also provide instructions on preparing **jungle juice**—an exciting and tasty party drink! But first, let’s focus on making that perfect glass of fresh coconut juice.
Not only is coconut juice a tasty beverage, but it’s also packed with incredible health benefits that will have you feeling great all day long. Coconuts are an amazing source of hydration, electrolytes, and nutrients, making them a perfect choice for a post-workout drink or a healthy way to start your day.
Plus, making coconut juice at home is surprisingly easy and cost-effective. With just a few simple steps, you can have a refreshing glass of coconut juice that’s bursting with flavor and nutrition. So, let’s get started!
Key Takeaways
- To make coconut juice, start by selecting ripe coconuts that are heavy for their size and have a distinct sound when tapped.
- Clean the coconuts thoroughly and remove the meat from the shell to access the coconut water.
- Enhance the flavor of the coconut juice by adding fruits, sweeteners, herbs, and spices, and boost the nutritional value by adding chia seeds and fresh lime juice.
- Properly store the coconut juice in airtight containers or plastic wraps to maintain its freshness and flavor. Freezing coconut water in ice cube trays can also extend its shelf life.
Benefits of Coconut Juice
Coconut juice is a refreshing and hydrating drink that’s packed with electrolytes and nutrients, making it a great choice for post-workout recovery or a hot summer day. As a hydration source, coconut juice is a natural alternative to sports drinks that are often loaded with sugar and artificial ingredients. It helps replace fluids and minerals lost through sweating, making it an ideal drink for those who lead an active lifestyle.
In addition to being a hydration source, coconut juice is also an electrolyte replacement. Electrolytes are essential minerals that regulate the body’s fluid balance, muscle contractions, and nerve function. Coconut juice contains potassium, sodium, and magnesium, which are all electrolytes that help maintain proper body function.
So, if you’re looking for a natural and healthy way to replenish your body after a workout or a long day in the sun, coconut juice is the way to go. And the first step in making delicious coconut juice is choosing the right coconuts.
Choosing the Right Coconuts
To get the perfect coconut for your refreshing drink, you’ll need to feel for a certain weight and listen for a specific sound when tapping it – can you hear it?
When selecting fresh coconuts, it’s important to choose ones that feel heavy for their size. This indicates that they are full of water and the meat inside is still fresh. A ripe coconut will also have a distinct sound when tapped. You should hear a deep, resonating thud. If it sounds hollow, then it may be overripe or dried out.
Identifying ripe coconuts is crucial in making delicious coconut juice. Look for coconuts with a brown, hairy exterior. If the exterior is green, then it’s not ripe yet. You can also tell if a coconut is ripe by shaking it to hear if there is water inside.
Once you have selected the perfect coconuts, it’s time to prepare them for juicing.
Preparing the Coconuts
Once you’ve got the right coconuts, it’s time to start getting them ready for some delicious, refreshing goodness.
The first step in preparing the coconuts is to clean them thoroughly. I usually start by washing them with warm water and a little bit of soap to remove any dirt or debris. After rinsing them off with clean water, I let them dry for a few hours before moving on to the next step.
Next, it’s time to remove the coconut meat from the shell. This can be done using a variety of tools, depending on your preference. Some people use a sharp knife to carefully cut away the meat, while others prefer to use a coconut scraper or grater to shred the meat off the shell.
Once the meat has been removed, it’s time to move on to enhancing the flavor of the coconut juice.
Enhancing the Flavor
So, after preparing the coconuts and extracting the juice, it’s time to take the flavor to the next level!
Personally, I love experimenting with different fruits to add a touch of freshness and sweetness. Additionally, adding sweeteners like honey or agave can balance out the natural tanginess of the coconut water. Lastly, incorporating herbs and spices like mint, ginger, or lemongrass can provide a unique and refreshing taste that will leave your taste buds wanting more.
Let’s dive into the world of flavor-enhancing and take your coconut juice to the next level!
Adding Fruits
Fruitfully flavor your coconut juice by blending in your favorite fruits. From sweet berries to creamy bananas, the possibilities are endless. You can even add a hint of tangy citrus to give your drink a zesty twist. Fruit combinations are perfect for adding a burst of flavor to your coconut juice, making it even more refreshing and satisfying.
To make it easier for you to experiment with different fruit combinations, here is a table of suggested fruits and serving ideas:
Fruit | Serving Ideas | Flavor Profile |
---|---|---|
Strawberries | Sliced or pureed | Sweet, slightly tart |
Blueberries | Whole or pureed | Tangy, slightly sweet |
Raspberries | Sliced or pureed | Tart, slightly sweet |
Bananas | Sliced or mashed | Creamy, sweet |
Oranges | Sliced or juiced | Zesty, tangy |
With these options, you can customize your coconut juice to your liking. Adding fruits not only enhances the flavor but also increases the nutritional value. So go ahead and experiment with your own fruit combinations to create a delicious and healthy drink. Next, we’ll explore how to add sweeteners to your coconut juice to further enhance the taste.
Adding Sweeteners
To sweeten up your drink, you’ll want to add a touch of sweetness with your preferred sweetener. There are many options to choose from, including natural sweeteners and artificial sweeteners. Here are some examples of sweeteners you can use:
-
Honey – a natural sweetener that adds a rich, floral flavor to your coconut juice.
-
Stevia – a calorie-free sweetener that comes from a plant and has become a popular alternative to sugar.
-
Agave nectar – a natural sweetener that has a low glycemic index and can be used in small amounts to sweeten your coconut juice.
-
Sugar – a classic sweetener that adds a simple sweetness to your drink. However, it’s important to use it in moderation as it can be high in calories.
Adding a sweetener to your coconut juice can enhance the flavor and make it more enjoyable to drink. Once you’ve added your preferred sweetener, you can then move on to adding herbs and spices to give your drink an extra kick.
Adding Herbs and Spices
After experimenting with different sweeteners, I decided to take my coconut juice recipe to the next level by adding herbs and spices. Herbal infusions have been used for centuries to add flavor and a variety of health benefits to drinks.
I started by steeping a few sprigs of fresh mint in hot water, and then adding the resulting infusion to the coconut water. The mint added a refreshing burst of flavor and also helped to calm my stomach.
Next, I decided to try creating a spice blend to add a little kick to my coconut juice. I mixed together cinnamon, ginger, and a pinch of cayenne pepper, and added it to the coconut water. The cinnamon and ginger added warmth and depth, while the cayenne pepper gave the juice a subtle heat. It was a perfect balance of flavors that made me feel like I was sipping a tropical cocktail.
Now, let’s talk about how to improve the nutritional value of your coconut juice by adding some key ingredients.
Improving Nutritional Value
If you want to boost the nutritional value of your coconut juice, you should try adding some chia seeds or a splash of fresh lime juice. Chia seeds are packed with fiber, protein, and omega-3 fatty acids, making them an excellent addition to any meal planning.
Adding a tablespoon of chia seeds to your coconut juice can help you feel fuller for longer and can even help regulate your blood sugar levels. On the other hand, fresh lime juice is rich in vitamin C, which can boost your immune system and help your body absorb iron from plant-based foods.
Incorporating these simple additions to your coconut juice can provide some incredible nutritional benefits. Not only can you enjoy a refreshing and hydrating beverage, but you can also feel good about the nutrients you’re providing your body.
The next section will focus on how to properly store your coconut juice to ensure it stays fresh and delicious for as long as possible.
Storing Coconut Juice
Properly storing your freshly squeezed coconut juice is essential to maintaining its freshness and flavor. After extracting the juice from the coconut, strain it through a fine mesh strainer to remove any remaining pulp or debris.
Then, pour the juice into a clean, airtight container. It’s important to store coconut juice in the refrigerator at a temperature of 40°F or below to prevent spoilage.
When stored properly, coconut juice can last up to five days in the refrigerator. However, if you want to extend its shelf life, you can freeze the juice in ice cube trays or freezer-safe containers. Simply thaw the frozen juice in the refrigerator before using it in recipes.
Now that you know how to properly store coconut juice, let’s move on to how you can use it in recipes to add flavor and nutrition to your dishes.
Using Coconut Juice in Recipes
I absolutely love using coconut juice in my recipes! Whether it’s for a refreshing smoothie, a tropical cocktail, or for cooking savory dishes, coconut juice adds a deliciously sweet and nutty flavor.
In smoothies, it’s the perfect base for mixing with fruits and veggies. In cocktails, it adds a unique twist to classic drinks. And in cooking, it can be used to marinate meats or add flavor to rice and quinoa dishes.
Let’s dive into the different ways we can use coconut juice in our recipes!
Smoothies
One easy way to enjoy coconut juice is by blending it with your favorite fruits to make refreshing smoothies. Smoothie recipes using coconut juice can be easily found online, and they’re a great way to get a burst of nutrients and hydration in one drink.
Adding coconut juice to your smoothies can provide several nutritional benefits, including antioxidants, electrolytes, and vitamins. It can also help improve digestion and boost your energy levels.
Some popular coconut juice smoothie combinations include pineapple, mango, and banana, or strawberry, blueberry, and spinach. The possibilities are endless, and you can customize your smoothie to suit your taste and nutritional needs. Plus, coconut juice adds a subtle sweetness and tropical flavor to the drink, making it a delicious and healthy way to start your day.
As for cocktails, there are many ways to incorporate coconut juice into your favorite drinks, such as piña coladas or coconut margaritas.
Cocktails
Moving on from smoothies, let’s talk about cocktails! There are so many variations of cocktails that you can make using coconut juice. As someone who loves to experiment in the kitchen, I find it really fun to mix and match different ingredients to create unique and delicious drinks.
Here are some ideas for coconut juice cocktails that you can try at home:
-
Coconut Margarita – Mix coconut juice with tequila, lime juice, and agave syrup for a tropical twist on a classic margarita.
-
Pineapple Coconut Mojito – Muddle fresh mint with pineapple chunks, add coconut juice, rum, lime juice, and club soda for a refreshing summer drink.
-
Coconut Piña Colada – Blend coconut juice, pineapple juice, and rum with ice for a frozen treat that will transport you to a beach in the Caribbean.
-
Coconut Lime Daiquiri – Shake coconut juice, lime juice, white rum, and simple syrup with ice for a tangy and sweet drink that’s perfect for hot days.
If you’re not in the mood for alcohol, you can also make coconut juice mocktails by simply omitting the liquor and adding more juice or soda. These drinks are just as delicious and refreshing, and they’re perfect for kids and non-drinkers.
Now, let’s move on to the next section where we’ll talk about cooking with coconut juice.
Cooking
Get ready to experience the ultimate explosion of flavor in your dishes with the addition of coconut! This versatile ingredient can be used in a variety of cooking techniques, from sautéing to baking, and offers a range of flavor profiles that can enhance both sweet and savory dishes. Whether you’re making a creamy coconut curry or adding coconut flakes to your morning oatmeal, the possibilities are endless.
To help you incorporate coconut into your cooking, here’s a table outlining some popular coconut products and their uses:
Coconut Product | Uses |
---|---|
Coconut Milk | Creamy base for curries, soups, and smoothies |
Coconut Oil | Great for sautéing, baking, and as a dairy-free butter substitute |
Shredded Coconut | Adds texture and flavor to baked goods, granolas, and salads |
Coconut Flour | Gluten-free alternative to wheat flour in baking |
Coconut Aminos | Soy-free alternative to soy sauce in marinades and dressings |
By experimenting with these coconut products and cooking techniques, you can unlock a whole new world of flavors and take your dishes to the next level. Now, let’s move on to the benefits of making coconut juice at home.
Benefits of Making Coconut Juice at Home
I love making my own coconut juice at home for several reasons. First and foremost, it’s cost-effective. Buying pre-made coconut juice from the store can be quite expensive, but making it at home is much more affordable.
Secondly, making coconut juice at home ensures its freshness. I know exactly what goes into it and can control how long it sits in the fridge.
Lastly, I can customize it to my liking by adding different fruits or sweeteners. Making your own coconut juice at home is not only easy and fun, but it also has many benefits.
Cost-Effective
Saving money on coconut juice can be easy by using reusable straws and buying coconuts in bulk. Instead of purchasing pre-made coconut water from the store, I prefer making it at home with affordable ingredients and a DIY approach.
Here are some tips on how to make coconut juice cost-effective:
- Buy coconuts in bulk: Purchasing coconuts in bulk is cheaper than buying them individually. This is especially useful if you plan on making coconut juice on a regular basis.
- Reusable straws: Using reusable straws instead of disposable ones not only saves money but is also more environmentally friendly.
- Use all parts of the coconut: Instead of throwing away the coconut meat after extracting the water, use it to make coconut milk or even coconut flour.
- Make large batches: Making a large batch of coconut juice at once can save time and money in the long run.
By following these tips, you can make delicious coconut juice at home without breaking the bank. Plus, making it yourself ensures that you know exactly what goes into your drink and can avoid any unnecessary additives.
Now, let’s move on to the next section to learn about the importance of freshness in making coconut juice.
Freshness
To ensure the best flavor in your drink, it’s important to consider the freshness of the ingredients used. For example, if you are using coconuts that have been sitting on a shelf for weeks, the taste of the resulting juice may be compromised. Preserving freshness is key to making delicious coconut juice. One way to do this is by storing the coconuts properly. Keep them away from direct sunlight and at room temperature to slow down the ripening process. Another method is to use airtight containers or plastic wraps to seal the coconut meat. This will help extend the shelf life and maintain the quality of the fruit.
To further extend the shelf life, you can also freeze the coconut water in ice cube trays. This way, you’ll always have fresh coconut juice on hand whenever you want it. However, it’s important to note that freezing can alter the taste and texture of the juice, so it’s best to consume it within a few weeks. By keeping these tips in mind, you can ensure that your coconut juice is bursting with flavor and freshness. And now, let’s move on to the next step of customization.
Customization
You can elevate your drink experience by tailoring it to your taste preferences. Adding different flavors to your coconut juice can make a huge difference in the way you enjoy it. One great customization idea is to make flavored ice cubes.
You can freeze some fresh fruits, such as berries, or even some herbs, like mint, with water to add a twist to your drink. When the ice cubes melt, they will infuse your coconut juice with a unique and refreshing taste.
Another way to customize your coconut juice is to experiment with different serving vessels. Instead of a regular glass, try using a coconut shell or a mason jar. Not only will this make your drink look more enticing, but it will also add a touch of personality to your beverage.
You can even garnish your drink with some fresh fruit slices or a sprig of mint to make it even more visually appealing. To ensure that your coconut juice is safe to consume, it’s important to take some necessary precautions.
Safety Precautions
Before you end up resembling a human piñata, it’s crucial to remember to wear protective gear such as gloves and goggles while cracking open a coconut. The tough outer shell of the coconut can be quite tricky to open, and without proper protection, you might end up with cuts and bruises on your hands and face.
Once you have your protective gear on, it’s time to move on to the next step. Hand hygiene and kitchen sanitation are also essential when making coconut juice. Before handling the coconut, make sure to wash your hands thoroughly with soap and water.
Also, ensure that your kitchen area is clean and free from any contaminants. Once you have opened the coconut and extracted its juice, make sure to store it in a clean container and refrigerate it immediately to prevent any spoilage.
By following these simple safety precautions, you can enjoy a refreshing glass of coconut juice without any worries.
Frequently Asked Questions
How long does it take to make coconut juice from start to finish?
It takes only a few minutes to make coconut juice, but the key to improving its taste is adding a pinch of salt and a squeeze of lime. Leftover coconut water should be stored in the refrigerator to prevent spoilage.
Can I use any type of coconut to make coconut juice?
Yes, you can use various types of coconuts to make coconut juice. Young coconuts are best for juice, but mature coconuts can also be used. Coconut juice variations include adding fruit or herbs. Different ways to use coconut juice in recipes include smoothies, cocktails, and marinades.
How many coconuts do I need to make a certain amount of coconut juice?
To make a certain amount of coconut juice, it depends on the size and freshness of the coconuts. Generally, one coconut yields about 1.5-2 cups of juice. Mixing different types of coconuts is possible.
Is it necessary to strain the coconut juice before drinking?
I always strain my coconut juice to remove any pulp, but there is a Straining Debate. Some say it’s more nutritious with the pulp, but straining makes it easier to drink. There are also Health Benefits, like hydrating and aiding digestion.
Can I freeze coconut juice for later use?
Yes, you can freeze coconut juice for later use. It’s best to store it in an airtight container and consume it within 6 months for optimal freshness. Freezing options provide convenience and extend the shelf life of coconut juice.
Conclusion
In conclusion, making coconut juice at home is a simple and rewarding process. It not only offers numerous health benefits, but it also allows you to control the ingredients and flavor. As someone who loves the taste of fresh coconut juice, I couldn’t resist trying it out for myself and was pleasantly surprised with the results.
Coincidentally, on the day I decided to make coconut juice, the weather was scorching hot and I was in desperate need of a refreshing drink. The cool and crisp taste of the coconut juice was exactly what I needed to quench my thirst and invigorate my body. I also loved that I was able to experiment with different flavors and add-ins, such as lime and mint, to create a personalized and unique drink.
Overall, making coconut juice at home is a fun and healthy activity that anyone can do. By following the steps outlined in this article, you can enjoy the benefits of this delicious drink while also impressing your friends and family with your culinary skills.
So go ahead and give it a try – you won’t regret it!
Cindy thoroughly researches juicing trends, techniques, and recipes to provide readers with practical advice and inspiration. Her writing style is accessible, engaging, and designed to make complex concepts easy to understand. Cindy’s dedication to promoting the advantages of juicing shines through her work, empowering readers to make positive changes in their lives through the simple act of juicing.
Juice Tips and Tricks
How To Make Concentrate Juice
I really enjoy creating my own homemade juice concentrate! It’s an easy and affordable way to savor tasty, revitalizing beverages without the added sugar and preservatives typically found in store-bought choices. Additionally, it’s a fantastic way to utilize surplus fruit that might otherwise end up being discarded.
In this article, I’ll walk you through the steps to make your own concentrate juice from start to finish. We’ll cover everything from gathering your ingredients to experimenting with different fruits and flavors. Whether you’re looking to make homemade prune juice or try your hand at other fruits like apples, oranges, or berries, the process is both fun and simple. Along the way, I’ll also share tips on preserving your juice and adjusting the sweetness to your liking. Get ready to enjoy fresh, flavorful juices right from your own kitchen!
Trust me, once you start making your own concentrate juice, you’ll never want to go back to the store-bought stuff!
Key Takeaways
- Homemade concentrate juice is simple, cost-effective, and healthier than store-bought options
- Fruit selection and preparation is important, and cooking fruit before blending can enhance flavor
- Straining techniques can separate juice from pulp and seeds
- Concentrate juice can be infused with flavors, stored in various ways, and used in smoothies or as a sweetener
Gather Your Ingredients
Grab your fruit and sugar, it’s time to start making some delicious concentrate juice! Before starting, decide on the flavor combinations you want to create and gather the necessary fruits. Popular options include orange, grapefruit, lemon, lime, strawberry, raspberry, and peach. You can also mix different fruits together to create unique flavor combinations.
Once you have your fruits, it’s time to prepare them for juicing. Wash them thoroughly and remove any stems, seeds, or pits. Cut larger fruits, such as oranges or peaches, into smaller pieces to fit into your juicer. Experiment with different juicing techniques, such as using a citrus press for citrus fruits or blending softer fruits like strawberries and raspberries.
Now you’re ready to move on to the next step of making your concentrate juice.
Prepare Your Fruit
Before starting, it’s important to ensure that your fruit is ripe and juicy, like a basketball that’s ready to be dunked. Select fruits that are in season and ripe, as they’ll have the most flavor and sweetness.
Some fruits that are great for making concentrate juice include oranges, lemons, limes, grapefruits, pineapples, and watermelons. Once you’ve selected your fruit, wash them thoroughly and remove any bruised or damaged parts. Cut them into small pieces that will fit in your juicer.
Juicing tips: If you’re using citrus fruits, you can remove the skin and pith with a sharp knife. However, if you prefer a more bitter taste, you can leave some of the pith in.
Now that your fruit is prepared and ready to go, it’s time to move on to the next step: cooking your fruit.
Cook Your Fruit
To cook your fruit, you’ll want to start by placing the small pieces in a pot with a small amount of water and bringing it to a boil, allowing the fruit to soften and release its juices. Alternative methods such as roasting or microwaving the fruit can also be used to cook the fruit before blending it into a concentrate. However, cooking the fruit on the stove is the most popular and effective method.
Cooking the fruit has several benefits. First, it helps to break down the fruit and release its natural sugars, resulting in a sweeter and more flavorful juice. Second, cooking the fruit can help to kill any bacteria or parasites that may be present, making the juice safer to consume. Once your fruit is cooked, it’s time to strain your mixture to remove any pulp or seeds.
Strain Your Mixture
Well, isn’t it lovely to strain the mixture and watch all the unwanted pulp and seeds disappear before your eyes? Straining your mixture is an important step in making concentrate juice. It separates the juice from the pulp and seeds, resulting in a smooth and clear liquid that’s perfect for drinking or using as a base for other recipes.
There are various straining techniques you can use, such as using a cheesecloth, fine mesh strainer, or a juicer. Each method has its own advantages and disadvantages, but the key is to find the one that works best for you.
Aside from removing unwanted bits, straining also allows you to infuse your concentrate juice with different flavors. You can add herbs, spices, or even other fruits to your juice before straining to give it a unique taste. For instance, you can add a bunch of fresh mint leaves to your apple juice or a dash of cinnamon to your orange juice. The possibilities are endless, and experimenting with different flavor infusions is a fun way to personalize your concentrate juice.
Now that you’ve strained your mixture and added some flavor, it’s time to store your concentrate juice properly to keep it fresh and ready for future use.
Store Your Concentrate Juice
Now that you’ve created your deliciously smooth and flavorful juice, it’s important to properly store it to ensure it stays fresh and tasty for as long as possible. Here are some storing options for your concentrate juice that will help with long-term preservation:
-
Refrigeration: Store your juice concentrate in an airtight container, and keep it in the refrigerator. This will help to slow down the oxidation process, which can cause your juice to lose its flavor and nutrients.
-
Freezing: Freezing is another excellent option for long-term storage. You can either freeze your concentrate juice in ice cube trays or in a freezer-safe container. Just make sure to label your containers with the date of storage, so you know when it’s time to use it up.
-
Canning: Canning is a great option if you want to store your juice concentrate for an extended period of time. You’ll need to use a pressure canner to ensure that your concentrate juice is safely preserved.
By following these storing options, you can ensure that your concentrate juice stays fresh and tasty for as long as possible.
In the next section, we’ll discuss how to thaw and use your concentrate juice.
Thaw and Use Your Concentrate Juice
Now that I’ve successfully made and stored my concentrate juice, it’s time to thaw and use it.
To make sure the juice maintains its quality, I have some thawing tips that I always follow.
Additionally, I have some recipe ideas that incorporate the concentrate juice that I’m excited to try out.
Thawing Tips
Thawing your concentrate juice can be a breeze if you let it sit in warm water like a cozy bath. This is one of the most popular thawing techniques for concentrated juice. Simply place the can or carton of juice in a bowl of warm water, ensuring that the water level is below the rim of the container. Leave it for a few minutes until the juice softens and becomes liquid. Avoid using hot water as it can damage the container and may alter the taste of the juice.
Another tip to keep in mind is to shake the container before opening it. This helps to distribute the flavors evenly. You can also experiment with different flavor combinations by adding fresh fruits or herbs to your thawed juice.
For instance, you can mix orange concentrate with a few slices of kiwi and a sprig of mint to make a refreshing and healthy drink. Thawing your concentrate juice is just the first step to creating delicious and refreshing drinks.
Let’s now move on to some recipe ideas that you can try out with your thawed juice.
Recipe Ideas
One delicious way to use your thawed juice is by whipping up a fruity smoothie with fresh ingredients. Smoothies are a great way to incorporate more fruits and vegetables into your diet while also satisfying your sweet tooth. Here are some flavor combinations to try:
Fruit | Vegetable | Additional Ingredients |
---|---|---|
Strawberry | Spinach | Greek yogurt, honey, almond milk |
Mango | Carrot | Orange juice, ginger, turmeric |
Pineapple | Kale | Coconut water, lime juice, chia seeds |
Not only do these smoothies taste great, but they also have numerous health benefits. For example, the strawberry and spinach smoothie is high in vitamin C, fiber, and iron, while the mango and carrot smoothie is packed with vitamin A and antioxidants. Pineapple and kale, on the other hand, are both rich in vitamin C and anti-inflammatory properties.
As you experiment with different fruits and flavors, don’t be afraid to try new combinations and adjust the ingredients to your liking. The possibilities are endless!
Experiment with Different Fruits and Flavors
You can try mixing and matching various fruits and flavors to create unique and delicious concentrate juice blends. Some fruit pairing suggestions include combining strawberries and oranges for a sweet and tangy blend, or mixing blueberries and raspberries for a refreshing and antioxidant-packed juice.
By experimenting with different fruits, you can not only create delicious flavors but also reap the benefits of homemade juice, which can be healthier than store-bought options that often contain added sugars and preservatives.
In addition to fruits, you can also incorporate different flavors such as herbs, spices, and even vegetables into your concentrate juice. For instance, mint leaves can add a refreshing twist, while ginger can lend a spicy kick. Adding a small amount of carrot or beet can also provide a boost of nutrients and natural sweetness.
With so many options to choose from, you can customize your concentrate juice to fit your taste preferences and nutritional needs.
Customize Your Sweetness
Customizing your sweetness is easy by adding honey or agave nectar to your fruit and flavor blends. Depending on your taste preferences, you can adjust the sweetness level to your liking.
Here are some ways to customize your sweetness:
- Start with a small amount of sweetener and gradually add more until you reach your desired level of sweetness.
- Use different types of sweeteners to experiment with flavors.
- Try using natural sweeteners like stevia or maple syrup for a healthier option.
- If you prefer a less sweet juice, try adding a squeeze of lemon or lime juice to balance out the sweetness.
- Keep in mind that some fruits are naturally sweeter than others, so adjust your sweetener accordingly.
By customizing your sweetness, you can create a juice that is tailored to your taste buds. Once you’ve found the perfect level of sweetness, it’s time to move on to the next step and try different methods of making concentrate juice.
Try Different Methods
I’ve experimented with different methods to make concentrated juice, and two of the most effective ones are using a slow cooker and a blender.
Using a slow cooker involves heating the juice and letting it simmer for several hours until it reduces to the desired consistency.
On the other hand, blending the fruits and vegetables can extract their juices quickly and efficiently, and the resulting concentrate can be further strained to remove any remaining pulp or seeds.
Both methods have their advantages and can produce delicious and healthy concentrated juice.
Slow Cooker
If you’re looking for an effortless way to make delicious concentrate juice, the slow cooker is the ultimate solution that’ll make your taste buds dance with joy.
Unlike traditional methods that require constant attention and stirring, the slow cooker allows you to simply dump your fruits and vegetables into the pot, set it to low heat, and let it cook for several hours.
The result is a rich, concentrated juice that’s bursting with flavor and nutrients. While slow cooker alternatives exist, such as using a stovetop or oven, the slow cooker is the easiest and most convenient option.
Plus, it’s incredibly easy to clean – simply remove the ceramic insert and wash it with warm, soapy water. For tough stains, soak it overnight with a mixture of baking soda and water.
With a slow cooker, you can enjoy fresh, homemade concentrate juice without the hassle or mess of traditional methods.
Moving on to the next method, the blender’s another great tool for making concentrate juice. With its powerful blades and quick processing time, the blender can create a smooth, silky juice in a matter of seconds.
Blender
The blender is the ultimate solution for those craving a smooth, velvety drink that’ll leave their taste buds begging for more. With its powerful motor and sharp blades, this kitchen gadget can easily transform fruits and vegetables into delicious smoothies or purees in just a matter of seconds.
Here are some reasons why the blender is the perfect tool for making homemade concentrate juice:
- Blenders can easily break down tough fibers and seeds in fruits and vegetables, resulting in a smoother and more consistent texture.
- Blenders are versatile and can be used to make a variety of drinks, from simple fruit smoothies to complex green juices.
- Blenders are easy to clean and maintain, making them a convenient choice for busy individuals.
- Blenders are affordable and can be found in most households, making them an accessible tool for anyone looking to make their own concentrate juice.
- Blenders can be used to create custom blends that cater to specific taste preferences or dietary needs.
With the blender, making homemade concentrate juice has never been easier. Whether you prefer a fruity smoothie or a vegetable puree, this kitchen gadget can help you create a delicious and nutritious drink that you can enjoy any time of the day.
Enjoy Your Homemade Concentrate Juice!
One fantastic benefit of making your own concentrate juice is being able to enjoy a fresh and delicious beverage anytime you want. Not only is it healthier and more cost-effective than store-bought juice, but it also gives you the freedom to customize the flavor to your liking. You can experiment with different fruits and ratios until you find the perfect combination that suits your taste buds.
Tips for juicing on a budget include buying fruits in season, purchasing them in bulk, and using fruits that are slightly overripe. Overripe fruits may not be as visually appealing, but they’re perfect for juicing because they’re sweeter and have a softer texture, making them easier to extract the juice from.
Another tip is to consider purchasing frozen fruits instead of fresh ones, as they’re often cheaper and just as nutritious as fresh ones. With these tips in mind, you can enjoy your homemade concentrate juice without breaking the bank.
Frequently Asked Questions
Can you make concentrate juice without cooking the fruit?
Yes, I have a no-cook concentrate juice recipe that utilizes fresh fruit. Using fresh fruit for concentrate juice retains more nutrients and flavor. Simply blend and strain the fruit, then freeze the juice in ice cube trays for later use.
How long can concentrate juice be stored in the freezer?
I have found that concentrate juice can be stored in the freezer for up to 6 months, if kept in an airtight container. It is important to follow best storage practices to ensure the quality of the juice.
Can you use frozen fruit to make concentrate juice?
Did you know that frozen fruit contains just as much nutrients as fresh fruit? While frozen fruit can be used to make concentrate juice, using fresh fruit is often preferred for its superior taste and texture.
What is the ratio of fruit to water for making concentrate juice?
To make concentrate juice, I recommend using a fruit water ratio of 3:1. This will ensure a strong fruit flavor without it being too diluted. Other concentrate juice making tips include using fresh fruit and simmering it on low heat for an hour.
Can concentrate juice be used as a base for cocktails or smoothies?
Using concentrate juice as a base for cocktails or smoothies is like having a versatile tool in my toolbox. With endless mixing options for cocktails and the benefits of added nutrients in smoothies, concentrate juice is a go-to ingredient.
Conclusion
So there you have it, folks! Making your own concentrate juice is a simple and fun process that can result in delicious and nutritious drinks. By using fresh fruit and customizing your sweetness and flavors, you can create a beverage that perfectly suits your taste preferences.
But why stop at just one fruit? Why not mix and match to create unique and exciting flavor combinations? The possibilities are endless and the results are sure to impress. So why not give it a try and see what kind of amazing concentrate juice you can come up with?
The only limit is your imagination.
Cindy thoroughly researches juicing trends, techniques, and recipes to provide readers with practical advice and inspiration. Her writing style is accessible, engaging, and designed to make complex concepts easy to understand. Cindy’s dedication to promoting the advantages of juicing shines through her work, empowering readers to make positive changes in their lives through the simple act of juicing.
-
Popular Juice Brands4 weeks ago
10 Top-Rated Organic Juice Brands to Try
-
Popular Juice Brands4 weeks ago
9 Best No-Sugar-Added Popular Juice Brands
-
Health Benefits of Juice2 weeks ago
How Much Bottled Lemon Juice Equals 1 Lemon
-
Vegetable Juices4 weeks ago
12 Top Organic Vegetable Juice Brands Reviewed
-
Juice Tips and Tricks1 week ago
How Long Does Lemon Juice Last After Expiration Date
-
Juice Tips and Tricks2 weeks ago
How Long Does Juice Last After Juicing
-
Juice Tips and Tricks2 weeks ago
2 Lemons Equal How Much Juice
-
Vetted3 months ago
15 Best Juices for Diabetics: Refreshing Options That Won’t Spike Your Blood Sugar