Connect with us

Juice Tips and Tricks

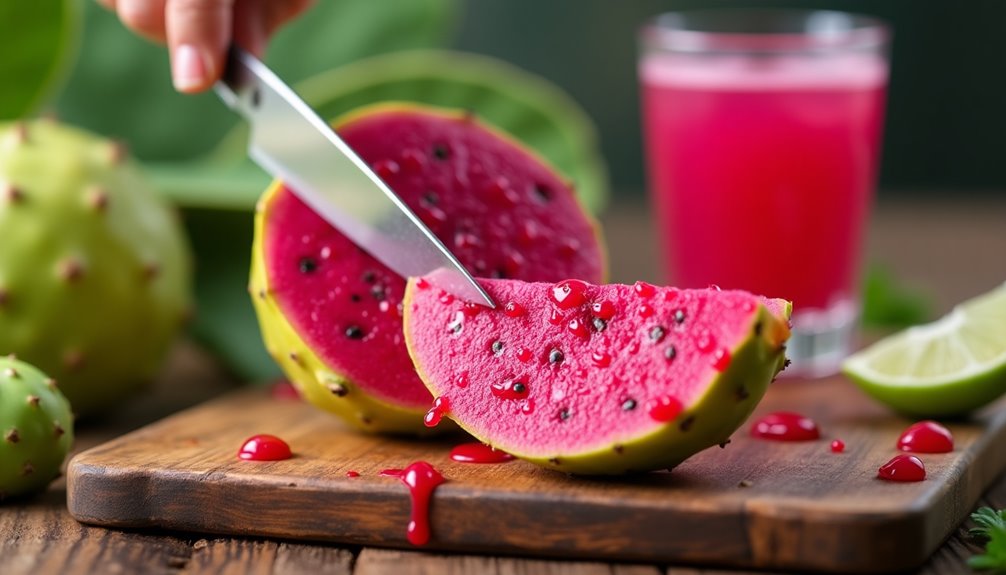
How To Juice A Prickly Pear

Published

on

Juicing has become one of my favorite ways to incorporate more fruits and vegetables into my diet. I recently came across the prickly pear, a delicious fruit from a cactus that has a variety of health benefits.

Not knowing how to juice it initially, I did some research and discovered that it is actually quite simple. In this article, I will share with you my process for juicing prickly pears and how to enjoy the juice in creative ways. First, it’s important to ensure you’re working with ripe prickly pears, as they will yield the best flavor and juice. Once you’ve mastered this method, you might find that juicing ripe pears at home is just as easy and delicious. The vibrant juice can be enjoyed on its own or mixed into smoothies, cocktails, or even salad dressings for a refreshing twist.

Prickly pear juice is known for its ability to boost the immune system, aid in digestion, and even regulate blood sugar levels. Not to mention, it’s a low-calorie option that is perfect for those looking to cut down on sugar and carbs.

The prickly pear fruit itself may look intimidating with its spiky exterior, but once you know how to prepare it, juicing becomes a breeze. So, if you’re interested in trying something new and healthy, keep reading to learn how to juice a prickly pear.

Key Takeaways

  • Look for bright, vibrant colors and a slightly soft texture when selecting prickly pears.
  • Use a sharp knife or tongs to remove spines and a sharp knife or vegetable peeler to peel the skin.
  • Prickly pear juice can be made using a juicer, blender, or by squeezing by hand and can be mixed with spirits and flavors to create unique cocktails.
  • Store prickly pear juice in an airtight container in the fridge or freeze in ice cube trays for later use in mocktails, smoothies, and marinades.

Understanding the Health Benefits of Prickly Pear Juice

You’ll be happy to know that drinking prickly pear juice can provide you with a plethora of health benefits. These benefits include reducing inflammation and improving digestion. Prickly pears are high in fiber, antioxidants, and vitamin C, making them a great addition to any healthy diet. Studies have shown that consuming prickly pear can also aid in managing blood sugar levels and cholesterol.

However, it’s important to note that consuming too much prickly pear juice can have potential health risks. The fruit contains oxalic acid, which can interfere with the absorption of calcium and lead to kidney stones. It’s important to consume prickly pear juice in moderation and speak to a healthcare provider if you have any concerns about incorporating it into your diet.

Advertisement

Now that we’ve covered the nutritional value and potential health risks of prickly pear juice, let’s move on to selecting the perfect prickly pear.

Selecting the Perfect Prickly Pear

When it comes to selecting the perfect prickly pear, it’s important to know what to look for.

As someone who has experience with this, I always make sure to identify ripe prickly pears by looking for bright, vibrant colors and a slightly soft texture.

Additionally, it’s crucial to avoid any damaged or overripe fruit, which can impact the taste and quality of the juice.

Identifying ripe prickly pears

Once they’re as soft as a ripe avocado, you can be sure that the prickly pears are ready to be juiced. Identifying ripeness is crucial to ensure that you get the best flavor and juice yield from the fruit. Common varieties of prickly pears include the red-purple skinned fruit with deep red flesh and the green-yellow skinned fruit with pale yellow flesh. Regardless of the variety, the fruit should be plump, firm, and free from blemishes or bruises.

Advertisement

To help you identify ripe prickly pears, refer to the table below:

Characteristics Ripe Fruit
Skin Vibrant color, plump and firm
Spines Less sharp and more flexible
Flesh Soft and juicy, sweet aroma
Seeds Dark and hard

It’s important to avoid damaged or overripe fruit as this can affect the quality of the juice. Look for fruits that are just ripe, with a slight give when gently squeezed. Overripe fruits may appear wrinkled or have soft spots, while damaged ones may have visible cuts or bruises. By selecting the right fruits, you’ll be on your way to making a delicious prickly pear juice.

Avoiding damaged or overripe fruit

To ensure the best quality of your final product, it’s crucial to carefully select only firm, plump, and undamaged fruit when harvesting. Avoiding damaged or overripe fruit is key to achieving the best flavor and yield.

Here are some tips for harvesting prickly pears:

  • Look for fruit that’s bright in color and firm to the touch.
  • Avoid fruit with soft spots or areas of discoloration.
  • Check for signs of insect damage or mold growth.
  • Harvest fruit that’s still attached to the plant and use pruning shears to avoid damaging the spines.

By following these tips, you can ensure that your prickly pears are at their peak ripeness and ready for juicing.

Once you’ve selected your fruit, it’s time to move on to the next step of preparing the prickly pear.

Advertisement

Preparing the Prickly Pear

Now that I’ve selected the perfect prickly pear, it’s time to prepare it for juicing.

The first step is to remove the spines, which can be done using a sharp knife or tongs.

Then, I need to peel the skin, which can be a bit tricky as the skin is thick and tough.

Removing the spines

Be careful when handling the prickly pear, those spines can really hurt you! To remove them, it’s important to wear protective gear such as gloves and long sleeves. If you don’t have these items, there are alternative methods to remove the spines. For example, you can use a piece of duct tape to gently lift them off the surface of the fruit. Another option is to place the prickly pear in the freezer for a few hours, which will cause the spines to become brittle and easier to remove.

Once the spines are removed, the prickly pear is ready to be peeled. It’s important to handle the fruit carefully as it can still have small, hair-like spines called glochids on its surface. To avoid getting them in your skin, use tongs or a fork to hold the fruit in place while peeling it.

Advertisement

Peeling the skin

As you start peeling the skin off, the prickles will reveal a smooth and succulent flesh. But before we get to that, let’s talk about the skin peeling techniques.

You can use a sharp knife to cut off both ends of the fruit and then make a lengthwise cut down the skin to remove it. Alternatively, you can use your hands and gently pull the skin off, starting from the top and working your way down.

Now, let’s talk about the benefits of prickly pear skin. While most people discard the skin, it’s actually packed with nutrients such as fiber, antioxidants, and vitamin C. Eating the skin can also help regulate blood sugar levels and improve digestion. So, don’t be afraid to consume the skin along with the flesh when juicing a prickly pear.

Moving on to the next step, extracting the juice, you can either blend the fruit and strain it through a cheesecloth or use a juicer. Both methods work well, but using a juicer can save time and eliminate the need for straining. For the freshest taste, consume the juice immediately or store it in an air-tight container in the fridge for up to 48 hours. If you’re looking for more apple juice tips for pp size, make sure to select ripe, sweet apples for the most flavorful and abundant juice yield.

Extracting the Juice

First, grab your prickly pear and slice off the top and bottom using a sharp knife, then make a deep cut lengthwise down the fruit.

Advertisement

Next, peel off the skin carefully using a vegetable peeler or a sharp knife.

Now that your prickly pear is peeled, it’s time to extract the juice. To extract the juice, there are several techniques you can use. Here are some options:

  • Use a juicer: This is the easiest and most efficient method. Simply cut the prickly pear into small pieces and feed them through the juicer.
  • Use a blender: Cut the prickly pear into small pieces and blend them until smooth. Strain the mixture through a fine mesh sieve to remove any pulp or seeds.
  • Squeeze by hand: Cut the prickly pear in half and squeeze out the juice over a bowl or container. This method may take longer and require more effort, but it works just as well.

Once you have extracted your prickly pear juice, you can use it in a variety of ways, including adding it to cocktails for a unique flavor.

Now that we have our juice, let’s move on to the next step of mixing it into a delicious drink.

Mixing Your Prickly Pear Juice

Once you’ve extracted the sweet nectar, it’s time to mix it with your favorite spirits and flavors to create a refreshing and unique cocktail. There are many mixing techniques to choose from, depending on your preferences and the flavors you want to highlight.

For a simple yet flavorful cocktail, try mixing prickly pear juice with tequila and lime juice for a classic margarita with a twist. You can also mix it with vodka and a splash of cranberry juice for a refreshing and fruity cocktail.

Advertisement

If you want to get more creative with your prickly pear juice, try experimenting with different flavor combinations. For example, you can mix it with coconut water and rum for a tropical and refreshing drink, or with ginger beer and bourbon for a spicy and bold cocktail. The possibilities are endless, so don’t be afraid to try new things and find your own perfect prickly pear cocktail.

As you finish mixing your prickly pear juice to perfection, it’s important to know how to store it properly to keep it fresh.

Storing Your Prickly Pear Juice

To keep your prickly pear nectar fresh and delicious for longer, make sure to store it in an airtight container in the fridge, allowing you to savor the sweet and tangy flavors whenever you please. There are several storing techniques and preservation methods that you can use to extend the shelf life of your prickly pear juice.

One effective way to store your prickly pear juice is to pour it into an airtight glass bottle or jar, leaving about an inch of space at the top to allow for expansion. Then, place the container in the fridge and consume within 3-5 days. Another option is to freeze the juice in ice cube trays and store the cubes in a freezer-safe bag or container. When you’re ready to enjoy the juice, simply thaw a few cubes in the fridge overnight or place them in a glass of water for a refreshing prickly pear drink. With these preservation methods, you can enjoy the health benefits and delicious taste of prickly pear juice for weeks to come.

Now that you know how to store your prickly pear juice, let’s explore some creative ways to enjoy it beyond just drinking it straight.

Advertisement

Creative Ways to Enjoy Prickly Pear Juice

Now that you know how to store your prickly pear juice, let’s explore some creative ways to enjoy it!

One way to enjoy prickly pear juice is by making prickly pear mocktails. Simply mix the juice with your favorite spirit, such as tequila or vodka, and add some fresh lime juice for a refreshing and unique cocktail.

Another option is to make prickly pear smoothies by blending the juice with frozen fruit, yogurt, and honey for a healthy and delicious breakfast or snack. If you’re feeling adventurous, you can also use prickly pear juice in marinades for grilled meats or vegetables.

The sweet and tangy flavor pairs well with a variety of proteins and adds a unique twist to your usual grilling routine. Whatever way you choose to enjoy prickly pear juice, be sure to experiment and have fun with it!

Now that you know some creative ways to use prickly pear juice, let’s move on to some tips for cleaning up after juicing.

Advertisement

Tips for Cleaning Up

Keeping your kitchen clean after enjoying this delicious fruit can be a breeze with these helpful tips. Firstly, it is important to properly clean your juicer or blender immediately after use to prevent any leftover pulp from hardening and sticking. Use hot water and soap to thoroughly clean all parts of the machine. For tough, stuck-on pulp, use a brush or sponge to scrub away any residue.

Secondly, when disposing of any leftover prickly pear peels or pulp, it is important to properly dispose of it in the trash rather than down the sink or toilet. Prickly pear pulp can easily clog pipes and cause plumbing issues. Additionally, if you are composting, make sure to properly compost the peels and pulp by breaking them down into small pieces and mixing them with other compost materials.

In order to ensure a safe and enjoyable prickly pear juicing experience, it is important to take proper safety precautions when handling the fruit.

Safety Precautions When Handling Prickly Pears

It’s crucial to take proper precautions when handling these spiny fruits to avoid any potential injuries. Here are some important safety measures to keep in mind:

  1. Wear gloves: Prickly pears are covered in tiny spines that can easily get embedded in your skin. Wearing gloves will help protect your hands from getting pricked.

  2. Use tongs: If you don’t have gloves, use tongs to hold the prickly pear instead of your bare hands.

  3. Be careful when cutting: Use a sharp knife and be mindful of the spines on the fruit. Cut off the top and bottom of the fruit, then make a lengthwise incision to peel off the skin.

  4. First aid: If you do get pricked, use tweezers to remove the spines. Wash the affected area with soap and water, then apply a topical antibiotic cream to prevent infection.

By following these safety precautions, you can ensure a safe and enjoyable experience when handling prickly pears.

Advertisement

Frequently Asked Questions

Can you juice prickly pears with a regular juicer?

Yes, you can juice prickly pears with a regular juicer. There are various juicing methods, but prickly pears offer nutritional benefits such as high levels of antioxidants, fiber, and vitamin C.

Are prickly pears safe to consume if you are allergic to other types of cactus?

As someone with cross allergies to certain types of cactus, I take precautionary measures before consuming prickly pears. It’s best to consult with a doctor and start with a small amount to monitor any allergic reactions.

How long does it take for prickly pear juice to spoil?

How long can you store prickly pear juice? Once opened, refrigerate and consume within 5-7 days. Unopened bottles can last up to 6 months in a cool, dry place. Check for discoloration or off flavors before consuming.

Can you freeze prickly pear juice for later use?

Yes, you can freeze prickly pear juice for later use. To preserve the flavor, use airtight containers or freezer bags and leave some headspace for expansion. Thaw in the fridge before using.

What are some common mistakes to avoid when juicing prickly pears?

When juicing prickly pears, common mistakes include not wearing gloves, not properly cutting off the tough outer skin, and not removing the tiny spines. Best practices involve using a sharp knife, a high-powered blender, and straining the juice before drinking.

Advertisement

Conclusion

After juicing my first prickly pear, I can confidently say that it’s worth the effort due to its health benefits, unique taste, and vibrant color. It may seem intimidating at first, but selecting the perfect prickly pear and preparing it properly can result in a delicious and nutritious juice.

I was pleasantly surprised to learn about the various health benefits of prickly pear juice. It can lower cholesterol and aid in digestion, making it a great addition to your diet. Plus, its sweet and tangy flavor makes it a refreshing alternative to traditional juices.

Overall, I highly recommend giving prickly pear juice a try and experimenting with different mix-ins to find your perfect combination.

Susannah expertise lies in researching and compiling evidence-based content on juicing, nutrition, and overall health. She is committed to ensuring that The Juicery World offers accurate, up-to-date, and trustworthy information to empower readers to take control of their health. Susannah's goal is to inspire individuals to embrace juicing as a way to nourish their bodies and live their best lives.

Advertisement

Juice Tips and Tricks

How To Make Fizzy Juice

Published

on

By

Creating your own sparkling juice at home is an enjoyable and tasty way to indulge in a rejuvenating and nutritious drink.

With just a few simple ingredients and equipment, you can create your own unique flavor combinations and control the level of carbonation to your liking.

To make fizzy juice, you will need some basic kitchen tools like a blender or juicer, as well as a carbonation method such as a soda stream or carbonation tablets.

By following a few easy steps, you can enjoy a fizzy drink that is free of added sugars and artificial flavors, and can be customized to your taste preferences.

So, let’s get started on this exciting and tasty adventure of making fizzy juice at home!

Advertisement

Key Takeaways

  • Fizzy juice is a healthier alternative to store-bought sodas and can be customized for flavor and carbonation levels.
  • Proper storage and serving involve using airtight glass bottles, sterilizing them before filling, and leaving space for carbonation and expansion.
  • Homemade fizzy juice can be made using a SodaStream machine or natural carbonation method and can be enhanced with fruits, herbs, and spices.
  • Making fizzy juice cost-effectively involves using fresh ingredients, infusing water with fruits and herbs, and buying ingredients in bulk.

What is Fizzy Juice?

Ready to learn about fizzy juice? Let’s dive in and discover what this bubbly drink is all about!

Fizzy juice, also known as carbonated juice, is a type of beverage that is infused with carbon dioxide gas, creating a bubbling sensation and a unique taste. The history of carbonation dates back to ancient times when natural springs containing carbon dioxide were used for their medicinal properties.

Carbonation is known to have some health effects, such as aiding digestion and reducing nausea. However, excessive consumption of carbonated beverages has been linked to health problems like tooth decay and osteoporosis. It’s important to consume carbonated beverages in moderation and be mindful of their effects on the body.

Now that we know what fizzy juice is and its effects on health, let’s move on to the ingredients required to make this delicious drink.

Ingredients Required

So, when it comes to making fizzy juice, there are a few key ingredients you’ll need.

First, you’ll need to choose your juice option – whether that be apple, orange, cranberry, or any other flavor you prefer.

Advertisement

Next, you’ll need carbonated water or soda water to add the fizz.

Finally, you may want to add a sweetener of your choice, such as honey or sugar, though this is optional depending on your personal taste.

Juice Options

First, you’re probably wondering what juices you can use to make fizzy juice – and coincidentally, almost any type of juice will work! You can use single fruit juices like apple, orange, or pineapple, or mix it up with juice combinations like cranberry and grape or mango and passionfruit. The possibilities are endless, so don’t be afraid to get creative with your flavor experimentation.

To make the most out of your fizzy juice, here are a few tips to keep in mind:

  1. Use fresh and natural juices instead of artificial ones to avoid unwanted chemicals and preservatives.
  2. Experiment with different ratios of juice and carbonated water to find your preferred level of sweetness and fizziness.
  3. Add a splash of lemon or lime juice to enhance the taste and balance out the sweetness.
  4. Remember to stir gently to avoid losing too much of the carbonation.

Now that you know your juice options, let’s move on to the next step: adding carbonated water or soda water to your mix. The carbonation will add a fizzy, refreshing element to your drink, elevating the overall experience. Be sure to add the carbonated water right before serving to maintain the bubbles and prevent it from going flat. If you’re curious about how to mix jungle juice, it’s as simple as layering your juices, spirits, and soda water, then stirring gently to combine.

Carbonated Water or Soda Water

To elevate the quality of your beverage, you may opt to add carbonated water or soda water to your chosen juice. Carbonated water is simply water that’s been infused with carbon dioxide gas under high pressure, creating a bubbly sensation.

Advertisement

Soda water, on the other hand, has added minerals and sometimes a small amount of sodium bicarbonate for flavor. If you don’t have access to store-bought carbonated or soda water, you can also DIY your own carbonation at home using a soda siphon or a carbonation cap. However, be sure to follow the instructions carefully to avoid any accidents.

Once you have your carbonated or soda water ready, simply mix it in with your juice to give it a fizzy kick. To further enhance the flavor of your fizzy juice, you can add a sweetener (optional).

Sweetener (Optional)

Like a bee drawn to nectar, I understand the desire to add a touch of sweetness to your fizzy drink. Adding sweetener is entirely optional, and there are various options to choose from, including sugar, honey, agave, or even artificial sweeteners. Depending on your preferences, you can add a small amount to enhance the flavor without making it too sugary.

When it comes to flavor options, you can get creative with your sweeteners. For example, you can add a dash of vanilla extract or a squeeze of fresh lemon juice to add a unique taste to your fizzy drink. It’s all about experimenting and finding the perfect balance of sweetness and flavor.

Moving on to the equipment needed, you’ll need a few things to make your fizzy juice a success.

Advertisement

Equipment Needed

One essential piece of equipment needed for making fizzy juice is a carbonation machine. This machine allows you to create your own carbonated water, which can then be added to your juice mixture. Carbonation machines come in various sizes and styles, but they all work in a similar way by adding carbon dioxide to water.

There are also budget-friendly options available for those who don’t want to spend too much money on this essential tool. Another important piece of equipment needed for making fizzy juice is a juicer. This machine allows you to extract juice from fruits and vegetables, which can then be mixed with your carbonated water.

When choosing a juicer, look for one that is easy to use and clean, and that can handle a variety of fruits and vegetables. With these essential tools, you can start preparing your fizzy juice and enjoy a refreshing and healthy drink.

Preparation Steps

Alright, now that we’ve got our equipment ready, it’s time to prepare our fizzy juice.

The first step is to mix the juice and carbonated water in a ratio of your choosing.

Advertisement

Then, if desired, you can add a sweetener to taste.

Finally, fill your bottles and seal them tightly to keep the carbonation intact.

Mixing Juice and Carbonated Water

To mix your juice and carbonated water, start by pouring the juice into a glass. Then, slowly pour the carbonated water on top while stirring gently to ensure the fizziness is evenly distributed. When choosing your flavor combinations, consider the acidity of the juice and how it will react with the carbonation.

Tart juices like lemon or lime will result in a stronger fizz, while sweeter juices like apple or grape will produce a milder carbonation. To achieve the perfect carbonation technique, make sure your carbonated water is chilled before adding it to the juice. This will ensure that the carbon dioxide in the water is more readily absorbed by the juice.

Additionally, avoid shaking the carbonated water vigorously as this can cause it to lose some of its fizziness. Instead, gently stir the mixture while adding the carbonated water. Once your juice and carbonated water are mixed, you can move on to adding sweetener (optional).

Advertisement

Adding Sweetener (Optional)

If you have a sweet tooth, feel free to add sweetener to your juice and carbonated water mixture. There are a variety of sweetener alternatives to choose from, such as agave nectar, stevia, or even fruit juices. Keep in mind that adding too much sweetener can overpower the natural flavors of the juice and make the drink too sugary. It’s important to adjust sweetness levels to your liking by starting with a small amount and gradually increasing until it reaches your desired taste.

Once you’ve added sweetener to your fizzy juice, it’s time to fill your bottles and seal them tightly. Remember to leave some space at the top of the bottle to allow for carbonation and expansion.

In the next section, we’ll go over the final steps to ensure that your fizzy juice stays carbonated and delicious.

Filling Bottles and Sealing

After adding sweetener to the juice, it’s time to fill your bottles and get them ready for carbonation. Before filling the bottles, it’s essential to sterilize them properly to avoid any contamination that may affect the taste of your fizzy juice. You can sterilize the bottles by boiling them in water for ten minutes or using a sterilizing solution.

Once the bottles are sterilized and dried, you can fill them up with the juice, leaving about an inch of space at the top of the bottle to allow for carbonation. After filling the bottles, it’s crucial to seal them tightly to prevent any carbon dioxide from escaping. You can use a bottle capper or a cap that comes with a rubber seal to ensure a tight fit.

Advertisement

Now that your bottles are filled and sealed, it’s time to move on to the next step: carbonation options.

  1. Check carbonation levels: Before proceeding with carbonation, it’s crucial to check the carbonation levels of the juice. If the juice is too sweet, it may not carbonate well, and if it’s too acidic, it may carbonate too quickly.

  2. Natural carbonation: One way to carbonate your juice is to let it sit at room temperature for a few days. The natural yeast in the juice will convert the sugar into carbon dioxide, creating natural carbonation.

  3. Force carbonation: Another option is to force carbonate the juice using a carbonation machine or a soda siphon. This method involves injecting carbon dioxide into the juice under pressure, creating carbonation quickly.

  4. Adjust carbonation levels: Finally, it’s essential to adjust the carbonation levels according to your taste preferences. If the juice is too fizzy, you can release some of the carbon dioxide by opening the bottle cap slightly. If it’s not fizzy enough, you can add more carbon dioxide using a carbonation machine or soda siphon.

Now that you know the different carbonation options, it’s time to choose the method that works best for you and enjoy your homemade fizzy juice!

Carbonation Options

When it comes to carbonating my homemade fizzy juice, I have two main options: using a SodaStream machine or using the natural carbonation method.

Personally, I prefer the convenience and consistency of the SodaStream machine. It allows me to easily control the level of carbonation in my drinks and ensures that every batch is fizzy and refreshing.

However, for those who prefer a more hands-on approach, the natural carbonation method can be a fun and rewarding option to try.

Advertisement

Using a SodaStream Machine

To use your SodaStream machine, simply fill the bottle with your favorite juice, attach it to the machine, and press the button to carbonate it. The SodaStream machine provides a more convenient and efficient way to carbonate juice compared to other carbonation methods. It also allows you to control the level of carbonation you want, from lightly sparkling to heavily fizzy.

However, maintaining and cleaning your SodaStream machine is crucial to ensure its longevity and optimal performance. Here are three tips to keep your SodaStream machine in top shape:

  1. Regularly clean the carbonating bottle and the machine’s nozzle with warm water and mild soap to prevent clogging and buildup.

  2. Replace the carbonating bottle after every two years of use or when it shows signs of wear and tear to maintain the quality of your fizzy juice.

  3. Store the carbonator in a cool and dry place, away from direct sunlight, to prevent any damage or leakage.

Now that you know how to use and maintain your SodaStream machine, let’s explore another option for carbonating your juice – the natural carbonation method.

Natural Carbonation Method

Did you know there’s a natural way to carbonate your favorite beverages without using a machine? It’s true! There are several DIY carbonation techniques that can be used to achieve a fizzy drink.

The most common method involves the use of yeast. Yeast is a natural carbonation agent that converts sugar into carbon dioxide, which creates the bubbles in your drink. To use this method, simply mix your desired juice or other beverage with sugar and a small amount of yeast, then let it sit in a sealed container for several hours. The longer you let it sit, the more carbonated it will become.

Advertisement

It’s important to note that natural carbonation is different from artificial carbonation, which is what you get with a SodaStream or other carbonating machine. Artificial carbonation involves adding carbon dioxide gas to your drink, while natural carbonation relies on the natural process of fermentation to create the bubbles.

While both methods can be effective, many people prefer natural carbonation because it’s a more traditional and authentic way to make fizzy drinks.

Now that you know how to naturally carbonate your drinks, let’s move on to the next step: storing and serving your fizzy juice.

Storing and Serving

After refrigerating the fizzy juice, it’s time to pour it into glasses and watch the bubbles dance on the surface. To make the presentation more appealing, I recommend using colorful straws and garnishes like slices of fruit or herbs.

Here are three tips to keep in mind when storing and serving your fizzy juice:

Advertisement
  1. Use glass bottles or jars with airtight lids to store the juice. This will help preserve the carbonation for longer periods of time.

  2. Before serving, make sure to give the bottle a gentle shake to distribute the carbonation evenly throughout the juice.

  3. Serve the fizzy juice chilled to enhance the refreshing taste and fizziness.

Now that we’ve covered the proper way to store and serve fizzy juice, let’s move on to the exciting world of variations and flavors.

Variations and Flavors

Now let’s talk about how to add a variety of flavors to your fizzy juice. Personally, I like to experiment with adding different fruits to my carbonated water. It’s a great way to add natural sweetness and a burst of flavor without the added sugar.

Additionally, adding herbs and spices like mint, ginger, or basil can give your fizzy juice a unique and refreshing taste. Overall, the possibilities for creating your own customized fizzy juice are endless.

Fizzy Juice with Fruits

First, pick fresh and flavorful fruits like strawberries, raspberries, or peaches to create a fizzy and fruity juice that will tantalize your taste buds. Fruit combinations are endless, so don’t be afraid to experiment with different flavors like blueberry and lemon or mango and pineapple.

The possibilities are endless when it comes to creating a unique and refreshing fizzy juice that will leave you feeling satisfied and refreshed. To make a fizzy fruit juice, start by blending the fruit with a bit of water until it forms a smooth puree.

Advertisement

Next, add some sugar or honey to taste, and stir until dissolved. Finally, add some sparkling water or soda water to the mixture, and stir gently to combine.

Serve over ice and garnish with fresh fruit for an extra burst of flavor. With just a few simple steps, you can create a delicious and refreshing fizzy juice that’s perfect for any occasion.

Next, let’s move on to exploring the world of fizzy juice with herbs and spices.

Fizzy Juice with Herbs and Spices

Get ready to elevate your fizzy drink game by adding herbs and spices to your fruity concoctions. Herbal infusions and spice blends can add complexity and depth to your beverage, taking it to the next level.

Before you start experimenting with different flavor combinations, it’s important to understand the basics of herbal infusions and spice blends.

Advertisement

Herbal infusions involve steeping fresh or dried herbs in hot water to extract their flavor and aroma. Some popular herbs for infusions include mint, basil, and lavender.

Spice blends, on the other hand, involve mixing different spices together to create a unique flavor profile. Some popular spices for blends include cinnamon, ginger, and cardamom.

Once you have your infusion or blend, you can mix it with your favorite fruit juice and add carbonated water for that fizzy kick. Don’t be afraid to experiment with different flavor combinations to find your perfect match. For an extra nutritious twist, you could even make cabbage juice with blender and incorporate it into your mix for a surprising depth of flavor and added health benefits. The slight bitterness of the cabbage can balance sweeter juices, creating a unique and refreshing drink. Remember, the key is to stay open to new ingredients and have fun while crafting your homemade beverages!

Transitioning into the subsequent section about tips and tricks, remember that the amount of infusion or blend needed may vary based on personal preference, so start with small amounts and adjust accordingly.

With these tips in mind, you’re ready to create your own fizzy juice masterpiece.

Advertisement

Tips and Tricks

You’re probably a pro at drinking fizzy drinks, but did you know that making your own fizzy juice can be just as easy and way more satisfying? Here are some tips and tricks to make the process even smoother:

  • Experiment with different carbonation techniques to find your favorite level of fizziness.
  • Don’t be afraid to try unique flavor combinations like cucumber and mint or strawberry and basil.
  • Use fresh ingredients to enhance the taste and nutritional value of your fizzy juice.
  • Keep your equipment clean and well-maintained for optimal results.

By following these tips, you can create a fizzy juice that perfectly suits your preferences.

Plus, making your own fizzy juice at home has numerous benefits, such as saving money, reducing waste, and controlling the ingredients that go into your drink. So why not give it a try and see how delicious and refreshing homemade fizzy juice can be?

Benefits of Making Fizzy Juice at Home

Making fizzy juice at home can be a cost-effective way to enjoy a healthier alternative to store-bought sodas. By controlling the ingredients and sugar content, it’s possible to create a beverage that fits your dietary needs and preferences.

Plus, with customizable options like adding fruit or herbs, you can create unique flavors that can’t be found in any store.

Cost-Effective

Saving money on your fizzy juice ingredients doesn’t have to mean sacrificing taste or quality. There are simple ways to make your own fizzy juice without breaking the bank. Here are some budget-friendly ingredients and DIY carbonation alternatives that can help you save money while still enjoying your favorite fizzy drinks:

Advertisement
  • Use fresh fruits and herbs: Fresh fruits and herbs are not only healthier, but they’re also cheaper than store-bought juices. You can easily infuse water with your favorite fruits and herbs to create a refreshing and flavorful drink.
  • Try soda water instead of carbonated water: Soda water is a cheaper alternative to carbonated water. You can easily make soda water at home using a soda siphon or a soda maker.
  • Make your own syrups: Instead of buying expensive syrups, you can easily make your own at home using sugar, water, and your favorite fruits or herbs.
  • Use reusable bottles: Instead of buying expensive bottled drinks, invest in reusable bottles that you can fill with your own homemade fizzy juice.
  • Buy in bulk: Buying ingredients in bulk can save you money in the long run. You can even split the cost with friends or family to save even more.

Making your own fizzy juice at home not only saves you money, but it can also be a healthier alternative. In the next section, I’ll discuss some ways to make your fizzy juice even healthier without sacrificing taste.

Healthier Alternative

Feeling guilty about indulging in sugary drinks? Consider the nutritional benefits of incorporating natural ingredients into your favorite carbonated beverages.

By making your own fizzy juice, you can control the amount of sugar and additives, making it a healthier alternative to store-bought sodas. Not only can you reduce your sugar intake by making your own fizzy juice, but you can also add in beneficial ingredients such as fresh fruit, herbs, and even superfoods like chia seeds or spirulina.

These ingredients can provide essential vitamins, minerals, and antioxidants that aren’t typically found in traditional sodas. So, why not try making your own fizzy juice today and enjoy the health benefits that come with it? Don’t worry, there are plenty of customizable options to make it just the way you like it.

Customizable Options

You can easily elevate your homemade carbonated beverages to the next level by adding your favorite fruits, herbs, or even spices to create a unique and personalized flavor profile. Customizable options are what make fizzy juice an exciting and fun drink to experiment with.

There are endless possibilities when it comes to flavor combinations, and you can let your creativity run wild. Here are some ideas to inspire you:

Advertisement
  • Fruity combinations: Mix and match your favorite fruits to create a refreshing and fruity fizzy juice. Try combining strawberries and kiwis, watermelon and lime, or mango and pineapple.

  • For a tropical twist, add coconut water to your fizzy juice.

  • For a boost of antioxidants, add a handful of blueberries or raspberries to your drink.

  • Herbal and Spicy combinations: Herbs and spices can add a unique flavor and aroma to your fizzy juice. Try adding ginger, mint, basil, or rosemary to your drink.

  • For a spicy kick, add a pinch of cayenne pepper or a dash of hot sauce to your fizzy juice.

  • For a refreshing twist, add cucumber slices or lemon balm to your drink.

By adding your own twist to your fizzy juice, you can enjoy a drink that is tailored to your taste preferences. Customizable options allow you to experiment with different flavor combinations and create a drink that is uniquely yours. So, go ahead and try out different ingredients until you find your perfect fizzy juice recipe.

Frequently Asked Questions

How long does it take to carbonate the juice?

It depends on the carbonation time variability of your carbonation method, but typically it takes about 2-4 hours to carbonate juice. The benefits of sparkling water include improved digestion, hydration, and a refreshing taste.

Can I use any type of fruit to make fizzy juice?

Yes, any type of fruit can be used for making fizzy juice. Juice selection is based on personal preference, and flavor options are endless. It’s important to choose fresh, ripe fruit and use a quality carbonation system for best results.

How can I adjust the level of carbonation in my fizzy juice?

Adjusting the level of carbonation in fizzy juice involves experimenting with carbonation techniques, such as adjusting pressure or temperature. Flavor infusion can also affect carbonation. It’s like conducting a symphony, finding the perfect balance for a delightful drink.

Is it possible to make a sugar-free version of fizzy juice?

It is possible to make a sugar-free fizzy drink. Benefits of sugar-free drinks include reducing sugar intake and maintaining a healthy weight. Tips for reducing sugar intake in drinks include using natural sweeteners and opting for carbonated water instead of soda.

Advertisement

Can I use a soda maker to carbonate my juice instead of a carbonation machine?

When it comes to carbonating juice with a soda maker, there are alternatives to traditional carbonation machines. While a soda maker can work, it may not produce the same level of carbonation. Pros include affordability and convenience, but cons include potential for inconsistent results.

Conclusion

Well, congratulations! You’ve just learned how to make fizzy juice at home. You now possess the skills to impress your friends and family with your homemade carbonated drinks. Who needs to buy expensive soda when you can make your own? Not me, that’s for sure.

But let’s be real, making fizzy juice is not for everyone. It takes time and effort, and sometimes things can go wrong. So, if you’re feeling lazy or don’t want to deal with the hassle, just stick to buying ready-made soda.

But for those of you who want to be adventurous and try something new, go ahead and give it a shot! Who knows, you might just discover a new favorite drink.

Advertisement

Continue Reading

Juice Tips and Tricks

How To Make E Juice

Published

on

By

Creating your own e-liquid is akin to unleashing your inner mad scientist in your personal laboratory. By utilizing a few essential components and fundamental know-how, you have the ability to craft unique mixes that cater perfectly to your flavor preferences. This hobby is both enjoyable and gratifying for individuals seeking to cut costs, explore a variety of tastes, or regulate their vaping experience.

But before we dive into the nitty-gritty of making e juice, let me paint you a picture. Imagine being able to customize every aspect of your vaping experience, from the flavor and nicotine strength to the VG/PG ratio and throat hit. No more settling for whatever pre-made e juice happens to be on the shelf.

With a little bit of creativity and some basic DIY skills, you can create the perfect blend that hits all the right notes for you. So if you’re ready to become a vaping mastermind, let’s get started on making your own e juice.

Key Takeaways

  • Making DIY e-juice involves key ingredients and techniques such as steeping, choosing the right flavor profile, using flavor concentrates, and balancing ratios of PG and VG.
  • Proper safety and handling of ingredients, as well as precise measuring and mixing, are crucial for successful DIY e-juice.
  • Testing and adjusting e-juice for flavor, nicotine strength, and consistency is important, as well as troubleshooting common issues like burnt taste.
  • Safety considerations include careful handling of nicotine, proper storage of e-juice, and checking expiration dates for quality control.

Understanding the Basics of E-Juice

If you’re new to making e juice, it’s essential to understand the basics so you can create the perfect blend for your taste buds!

The first step is to understand how flavor extraction works. Many e-juice makers use a process called steeping, which involves letting the e-juice sit for a period of time to allow the flavors to blend together.

There are a few different steeping techniques, including warm water baths, ultrasonic cleaners, and just letting the juice sit in a cool, dark place for a week or two. Each method allows the flavors to meld together and reach their full potential over time. The key is patience, as rushing the process may result in less vibrant or balanced flavors. For those looking to add an extra twist, understanding how to make fizzy juice can elevate the experience by incorporating carbonation into the mix for a refreshing, bubbly sensation.

Advertisement

Another important factor in creating your own e juice is choosing the right flavor profile. This is where you can really get creative and cater to your own personal tastes.

Some people prefer fruity flavors, while others like more savory or dessert-inspired blends. Once you’ve chosen your flavor profile, you can start experimenting with different flavor combinations and ratios to find the perfect balance.

Remember, making your own e juice is all about trial and error, so don’t be afraid to try new things and tweak your recipes until you find the perfect blend.

Choosing Your Flavor Profile

When I’m choosing my flavor profile for e-juice, I consider whether I want a single flavor or a combination of flavors. Mixing multiple flavors can be challenging, but can lead to unique and complex tastes.

To find inspiration, I often look to popular food and beverage flavors, or even try to recreate my favorite desserts. Understanding the potency and characteristics of flavor concentrates is also essential in developing a successful and enjoyable e-juice recipe.

Advertisement

Single Flavor vs. Flavor Combinations

Additionally, it’s worth noting that nearly 90% of DIY e-juice makers prefer to use flavor combinations rather than just a single flavor. While single flavors may seem easier to work with, there are pros and cons to using flavor pairings.

Here are some emotions that may be evoked when considering the use of flavor combinations:

  • Excitement: There are endless possibilities when it comes to combining flavors, allowing for unique and complex blends that can’t be achieved with a single flavor.
  • Frustration: It can be difficult to find the right balance between flavors, as too much of one flavor can overpower the others and ruin the blend.
  • Satisfaction: When a successful flavor combination is achieved, it can be extremely satisfying and rewarding.
  • Experimentation: Trying out new flavor combinations can be a fun and exciting process, as it allows for creativity and exploration.
  • Nostalgia: Combining flavors that remind you of childhood treats or favorite desserts can bring back fond memories and add a personal touch to your e-juice.

When choosing to use flavor combinations, it’s important to consider the flavor pairings and how they will work together. Some flavors complement each other well, while others may clash and create an unpleasant taste. It’s recommended to start with simple pairings and gradually work towards more complex blends.

With the right combination of flavors, your e-juice can be a unique and delicious creation.

In finding inspiration for your e-juice, it’s important to consider not only the flavors you enjoy, but also the flavors that work well together. Experimenting with different flavor combinations can lead to exciting and unexpected results, and can help you create a flavor profile that’s truly your own.

Finding Inspiration for Your E-Juice

Explore different flavor combinations to create a unique and personalized e-juice that will excite your taste buds. One way to find inspiration for your e-juice is to start with a single flavor and experiment with different ratios.

Advertisement

For instance, if you love the taste of strawberry, you can mix it with other fruit flavors like blueberry or raspberry to create a unique blend. You can also try adding a touch of menthol or cream to enhance the flavor profile.

Another way to find unique flavors is by incorporating seasonal ingredients. For example, during the fall season, you can mix pumpkin spice with caramel to create a delicious pumpkin pie e-juice. During the summer, you can mix watermelon and lime for a refreshing and tangy flavor.

By experimenting with different flavors and ingredients, you can create an e-juice that is truly your own. You might start with a basic recipe and gradually tweak it to suit your taste preferences—perhaps by adjusting sweetness levels or introducing unique fruit combinations. For example, you can make dragon fruit juice as a vibrant base and then complement it with hints of mint or citrus for a refreshing twist. The possibilities are endless, allowing you to craft a signature blend that reflects your personal style.

Understanding flavor concentrates is essential to creating a successful e-juice.

Understanding Flavor Concentrates

To truly perfect my personalized e-juice, I needed to understand flavor concentrates and their application in my blends. These concentrates are highly concentrated flavorings that are mixed with a base liquid to create e-juice.

Advertisement

Understanding the mixing ratios is crucial to the overall taste of your e-juice. Typically, flavor concentrates should be mixed at a 10-20% ratio with your base liquid. However, this can vary depending on the specific concentrate and your desired flavor intensity.

Flavor intensity is another important factor to consider when working with concentrates. Some concentrates are more potent than others, so it’s important to start with a lower percentage and adjust accordingly. It’s also important to note that some flavors may overpower others, so you may need to adjust the ratio of each concentrate to achieve a balanced flavor profile.

Once you have a good understanding of mixing ratios and flavor intensity, you can move on to gathering your ingredients and creating your personalized e-juice.

Gathering Your Ingredients

When it comes to making my own e juice, the first step is gathering all the necessary ingredients. The key ingredients include base liquids, flavor concentrates, and nicotine. It’s important to have a good mixing calculator to ensure accuracy in the final product.

In this discussion, I’ll go into detail about each ingredient and how to properly gather and measure them for a successful e juice recipe.

Advertisement

Base Liquids

Mixing your own e juice can be a fun and exciting process, and the first step is choosing your base liquids. These base liquids are usually a combination of propylene glycol (PG) and vegetable glycerin (VG).

PG is a thin, clear liquid that carries flavor well and provides a throat hit, while VG is a thicker, sweeter liquid that produces large clouds of vapor. Mixing ratios of PG and VG can vary depending on personal preference, but most DIY e juice makers use a 50/50 or 70/30 ratio of PG to VG.

When choosing your base liquids, it’s important to take ingredient safety into consideration. Make sure to buy high-quality PG and VG that are specifically made for e juice. Don’t use any other types of glycols or glycerins, as they may contain harmful impurities. Additionally, be sure to handle these ingredients with care, as they can cause skin irritation if they come into prolonged contact with your skin.

With the right base liquids and mixing ratios, you’ll be well on your way to creating your own delicious e juice.

Moving on to the next section about flavor concentrates, it’s important to choose flavors that are safe for vaping.

Advertisement

Flavor Concentrates

Flavor concentrates are like the spices of e-liquid, adding unique and delicious notes to your homemade vape juice. Mixing techniques play a crucial role in achieving the desired flavor profile. It’s important to note that flavor concentrates are highly concentrated and should be used sparingly. Here are some tips to help you make the most out of your flavor concentrates:

  1. Start with a small amount: Begin by adding a small percentage of flavor concentrate to your base liquid and gradually increase the amount until you reach the desired flavor intensity.

  2. Flavor balancing: Some flavors may be overpowering, so it’s essential to balance them out by adding complementary or contrasting flavors. For instance, citrus flavors can be balanced by adding sweet or creamy flavors.

  3. Steeping: Allowing your e-liquid to steep for a few days can help the flavors blend together and develop a richer taste. It’s recommended to shake the e-liquid bottle daily during the steeping process.

  4. Quality over quantity: Investing in high-quality flavor concentrates can make a significant difference in the overall taste of your e-liquid.

Moving on to the next stage, incorporating nicotine into your e-liquid requires careful measurement and handling.

Nicotine

If you’re looking to add nicotine to your DIY vape concoction, it’s important to handle and measure it with care to ensure a safe and satisfying vaping experience.

First and foremost, you need to determine the nicotine strength that you want to use. Nicotine strength is measured in milligrams per milliliter (mg/mL). The most common strengths are 3mg/mL, 6mg/mL, 12mg/mL, and 18mg/mL, but you can find strengths that range from 0mg/mL to 36mg/mL.

Once you’ve determined the nicotine strength, it’s important to use safety precautions when handling it. Nicotine is a highly toxic substance and can be dangerous if it comes in contact with your skin, eyes, or is ingested. Wear gloves and eye protection when handling nicotine, and be sure to store it in a safe place away from children and pets.

Advertisement

With proper care and handling, adding nicotine to your DIY e-juice can be a safe and enjoyable experience.

In the next section, we’ll discuss how to use a mixing calculator to get accurate measurements for your nicotine and other ingredients.

Mixing Calculator

Using a mixing calculator can be a helpful tool to ensure precise measurements for your DIY vaping creations. These calculators allow you to input the amount of e-liquid you want to make, the desired nicotine level, and the flavor ratios you want to achieve.

Once you have entered this information, the calculator will tell you exactly how much of each ingredient you will need to create your perfect e-juice. One of the main advantages of using a mixing calculator is the ability to adjust nicotine levels to your liking.

For example, if you want a lower nicotine level in your e-juice, you can input that desired level into the calculator and it will adjust the amount of nicotine needed accordingly. Similarly, you can adjust the flavor ratios to achieve the perfect taste for your e-juice.

Advertisement

By using a mixing calculator, you can ensure that your DIY vaping creations are consistent and of the highest quality. When preparing your workspace, it’s important to take the necessary precautions to ensure a safe and clean environment for making e-juice.

Preparing Your Workspace

Before you begin, make sure your workspace is as clean as a surgical room and everything is within reach. Creating a clean workspace is essential to prevent any contamination that may affect the quality of your e-juice. Here are some tips on organizing your equipment:

  1. Use a dedicated workspace: Choose a spot that’s reserved solely for mixing your e-juice. Avoid mixing in areas where food’s prepared or where there’s a lot of foot traffic.

  2. Disinfect the workspace: Wipe down the surface with a disinfectant to eliminate any bacteria or germs that may be present.

  3. Keep your equipment organized: Arrange your equipment in an orderly manner to avoid any confusion or misplaced items.

  4. Wear gloves: Use gloves to prevent any contaminants from getting on your hands and ultimately into your e-juice.

Once your workspace is clean and organized, you can move on to the next step: mixing your e-juice. It’s important to be precise when measuring out your ingredients and following the recipe to ensure the best possible outcome.

Mixing Your E-Juice

Now that I’ve set up my workspace, it’s time to start mixing my e-juice. There are several techniques for mixing e-juice, but the most common is to use a scale to measure out the ingredients by weight. This ensures accuracy and consistency in your final product.

It’s also important to use clean equipment and work in a space free from distractions. When mixing your e-juice, it’s important to follow a recipe or create one of your own. Start by adding your base ingredients, such as propylene glycol and vegetable glycerin, to your mixing container. Then add your flavorings and nicotine, if desired.

Advertisement

Mix these ingredients thoroughly, using a spoon or a magnetic stir bar. Some mixers also use ultrasonic cleaners or hot water baths to help the ingredients mix together more effectively. Once your e-juice is mixed, it needs to steep for a period of time to allow the flavors to meld together.

There are several steeping methods, including leaving the e-juice in a cool, dark place for a week or more, or using a hot water bath to speed up the process. As you can see, mixing e-juice is a precise process that requires attention to detail and patience.

Now that my e-juice is mixed and steeped, the next step is to store it properly to ensure it stays fresh and flavorful.

Storing Your E-Juice

When it comes to storing your e-juice, there are a few key points to consider. First, it’s important to choose the right storage container, as certain materials can interact with the e-juice and affect its flavor or potency.

Secondly, proper storage techniques can help extend the shelf life of your e-juice and ensure it stays fresh for as long as possible.

Advertisement

Lastly, it’s important to pay attention to expiration dates and dispose of any expired e-juice to avoid potential health risks or decreased quality.

Choosing the Right Storage Container

Opting for the appropriate storage container is crucial in preserving the quality and flavor of your homemade e-juice. When it comes to choosing between glass and plastic containers, glass is the better option. Glass containers don’t interact with the e-juice, preventing any unwanted chemical reactions that may alter the flavor or potency of the mixture.

On the other hand, plastic containers can be porous and may absorb some of the flavorings or nicotine in the e-juice, leading to a less potent mixture over time. In addition to choosing the right material, it’s also important to consider whether the container is airtight or breathable.

Airtight containers prevent air from entering and potentially oxidizing the e-juice, which can cause it to lose flavor and potency. However, if the container is not breathable, it can also trap excess moisture, leading to mold growth.

Thus, it’s important to choose a container that strikes a balance between being airtight and breathable. With the right storage container, you can ensure your e-juice is well-protected and retains its quality over time.

Advertisement

In the next section, I’ll discuss how to store your e-juice properly to further preserve its flavor and potency.

Storing Your E-Juice Properly

To ensure your precious e-juice mixture stays fresh and delicious, proper storage techniques should be followed. First and foremost, it’s important to keep your e-juice away from heat, light, and air. Direct sunlight and high temperatures can cause the flavors to break down and oxidize, resulting in a less enjoyable vaping experience.

You should also avoid storing your e-juice in plastic containers, as the chemicals in plastic can leach into the juice and cause contamination. Instead, it’s recommended to store your e-juice in glass or stainless steel containers with airtight seals. This will help keep the juice fresh and prevent any contamination from outside sources.

It’s also a good idea to label your containers with the flavor and date it was made, so you can keep track of how long it’s been stored. By following these proper storage techniques, you can ensure that your e-juice will stay fresh and delicious for as long as possible.

As we’ve discussed proper storage techniques to keep your e-juice fresh, it’s important to also consider the shelf life and expiration dates of your mixture. While e-juice can technically last for years if stored properly, it’s recommended to use it within a year of purchase or creation. This is because the nicotine content can begin to degrade over time, resulting in a less satisfying vaping experience.

Advertisement

By paying attention to the expiration dates, you can ensure that you’re getting the most out of your e-juice and enjoying it to its fullest potential.

Shelf Life and Expiration Dates

Properly storing your e-juice in glass or stainless steel containers with airtight seals helps ensure its freshness, but it’s important to also consider the shelf life and expiration dates to fully enjoy your vaping experience. Here are some points to keep in mind regarding the shelf life and expiration dates of your e-juice:

  • Heat and light can significantly reduce the shelf life of your e-juice. Exposure to heat and sunlight can cause the flavor and nicotine content to degrade rapidly, making it taste unpleasant and less effective over time.

  • Always check the expiration date on your bottle of e-juice before using it. E-juice that has expired can also taste bad and may not be as effective as fresh e-juice.

  • Proper labeling of your e-juice bottles is important to ensure that you know when your e-juice was made and when it expires. This will help you keep track of your e-juice and avoid using expired or stale e-juice.

  • If you notice any changes in the flavor or consistency of your e-juice, it may be time to replace it. Using expired or stale e-juice can result in a less enjoyable vaping experience.

Taking care to properly store and label your e-juice can help ensure that you get the most out of your vaping experience. However, it’s also important to periodically test your e-juice to ensure that it still tastes and functions as expected.

Testing Your E-Juice

Once you’ve mixed your e-juice, it’s important to test it to ensure that it’s safe and enjoyable to vape. Quality control is essential when making your own e-juice, and this involves testing the flavor, nicotine strength, and overall consistency of your blend.

The first step is to perform a flavor test by sampling your e-juice with a clean atomizer. Take note of any off-flavors or harshness in the vapor, which can indicate issues with your recipe or mixing process.

Advertisement

Next, it’s important to test the nicotine strength of your e-juice. This can be done using a nicotine testing kit, which measures the concentration of nicotine in your blend. Additionally, you should check the consistency of your e-juice by examining its viscosity and color. If your e-juice is too thick or thin, you may need to adjust the ratio of PG and VG.

With these quality control measures in place, you can be confident that your e-juice is safe and enjoyable to vape. Now, let’s move on to troubleshooting common issues that can arise when making e-juice.

Troubleshooting Common Issues

If you’re experiencing issues with your homemade e-juice, don’t worry – troubleshooting common problems is easy.

One common e juice problem is over-flavoring, which can result in a harsh or unpleasant taste. To fix this issue, you can try diluting your e-juice with additional VG or PG, or reducing the amount of flavoring used.

Another issue is under-flavoring, which can result in a weak or tasteless e-juice. To fix this, you can try increasing the amount of flavoring used, or steeping your e-juice for a longer period of time.

Advertisement

Another common issue is a burnt taste, which can be caused by a few different factors. One cause could be a dry wick, which can be fixed by adding more e-juice to your tank or atomizer. Another cause could be too high of a wattage or voltage, which can be fixed by lowering the power output. Additionally, if you’re using a coil that has been used for a long time, it may need to be replaced.

These troubleshooting tips can help you address common issues with your homemade e-juice, ensuring that you can enjoy a great vaping experience. By following these tips and tricks for making great e-juice, you can take your vaping experience to the next level.

Tips and Tricks for Making Great E-Juice

When it comes to making great e-juice, I’ve found that experimenting with flavor combinations can make all the difference. By mixing and matching different flavors, I’ve been able to create unique and delicious blends that stand out from the rest.

Additionally, using sweeteners and enhancers can help bring out the full potential of certain flavors, while adding menthol or cooling agents can provide a refreshing and satisfying finish to any vape.

Experimenting with Flavor Combinations

Exploring different flavor combinations is the key to creating a unique and personalized e juice that satisfies your taste buds. It’s important to understand flavor balancing and how different flavor profiles can complement or clash with one another.

Advertisement

Start by experimenting with unexpected pairings, such as mixing fruit and dessert flavors or adding a touch of spice to your blends. Keep in mind that some flavors are stronger than others, so it’s important to use them in moderation to avoid overpowering the other ingredients.

When experimenting with flavor combinations, it’s important to take notes and keep track of your measurements. This will help you to recreate your favorite blends and make adjustments as needed. Don’t be afraid to try new things and think outside the box.

With a little creativity and experimentation, you can create a truly unique and satisfying e juice that reflects your personal taste preferences.

As you continue to perfect your flavor combinations, consider incorporating sweeteners and enhancers to add depth and complexity to your blends. These ingredients can help to balance out the flavors and make them more enjoyable to vape. But before adding any sweeteners or enhancers, it’s important to understand how they can affect the overall taste and quality of your e juice.

Using Sweeteners and Enhancers

Adding sweeteners and enhancers can significantly improve the taste of your DIY e-liquid. However, it’s crucial to understand that these additives can also alter the overall quality of your juice.

Advertisement

Sweetener alternatives such as stevia or monk fruit extract are popular choices because they offer a natural sweetness without adding calories or affecting blood sugar levels. On the other hand, artificial sweeteners like sucralose or aspartame can impart a chemical taste and may require more steeping time to blend with the other flavors.

When it comes to enhancer flavor combinations, the possibilities are endless. Some examples of enhancers include vanillin, which adds a creamy vanilla flavor, or ethyl maltol, which can provide a cotton candy-like sweetness. However, it’s important to use enhancers sparingly since they can easily overpower the other flavors in your mix.

Remember to experiment with different combinations and ratios to find the perfect balance for your palette.

As you move on to adding menthol or cooling agents, keep in mind that these additives can also affect the overall taste and quality of your e-liquid.

Adding Menthol or Cooling Agents

Enhancing the flavor of your DIY e-liquid with a refreshing kick is easy by adding menthol or cooling agents. If you’re not a fan of menthol, there are plenty of alternatives to choose from, such as Koolada and WS-23. These cooling agents provide a similar sensation to menthol, without the minty taste.

Advertisement

You can adjust the intensity of the menthol or cooling agent by experimenting with different concentrations. Start with a small amount and gradually increase until you achieve the desired level of coolness.

When adding menthol or a cooling agent to your e-juice, it’s important to note that it can mute other flavors. To avoid this, try adding a small amount of menthol or cooling agent to your base e-liquid first, and then adjust accordingly.

It’s also important to note that menthol or cooling agents can increase the throat hit of your e-liquid. If you prefer a smoother vape, try reducing the amount of nicotine or PG in your e-liquid. With a little experimentation, you can create a refreshing and satisfying e-liquid that’s perfect for summertime vaping.

Frequently Asked Questions

Can you use artificial sweeteners in e-juice?

Yes, artificial sweeteners can be used in e-juice, but there are pros and cons to consider. Pros include enhanced flavor and sweetness without calories, while cons include potential health concerns regarding artificial sweeteners such as aspartame and sucralose.

Is it necessary to steep e-juice before vaping?

Steeping e-juice allows the flavors to blend and mature, resulting in a smoother and more flavorful vaping experience. Methods include heat, time, or a combination of both. Skipping steeping can result in a harsh taste.

Advertisement

Can you make e-juice without nicotine?

Yes, it is possible to make e-juice without nicotine. There are many No Nicotine Recipes available online that use flavoring options such as fruit, candy, and dessert flavors to create a satisfying vaping experience.

How do you adjust the PG/VG ratio in e-juice?

Adjusting the viscosity of e-juice is key to achieving the perfect blend. By tweaking the ratio of PG to VG, I can customize the flavor and throat hit to my liking. It’s a delicate balance, but worth the effort for a truly personalized vaping experience.

What is the shelf-life of homemade e-juice?

The shelf-life of homemade e-juice can be extended by storing it in a cool, dark place away from direct sunlight. Preventing e-juice oxidation is also crucial by using air-tight containers and avoiding excessive exposure to air.

Conclusion

In conclusion, making your own e-juice can be a fun and rewarding experience. It allows you to customize your vaping experience and save money at the same time. However, it’s important to understand the basics of e-juice and have the right ingredients and tools before starting.

Remember to choose your flavor profile wisely and gather all necessary ingredients before preparing your workspace. Mixing the e-juice requires patience and attention to detail, but with practice, you can create a great-tasting product.

Advertisement

Storing and testing your e-juice is crucial to ensure its quality and safety. And if you encounter any issues, don’t worry – there are troubleshooting tips available.

Overall, making e-juice is a great way to personalize your vaping experience. With the right knowledge and ingredients, you can create a unique and enjoyable product that’s tailored to your tastes. So, get your ingredients ready, prepare your workspace, and start mixing – the possibilities are endless!

Continue Reading

Juice Tips and Tricks

How To Make Fresh Juice Last Longer

Published

on

By

As someone who enjoys making fresh juice, it can be quite disheartening when it spoils quickly. It’s frustrating to waste half a bottle of juice that has gone bad, especially considering the effort and money invested in gathering the ingredients. That’s why I have dedicated time to exploring different methods to extend the lifespan of my homemade juice.

In this article, I’ll share what I’ve learned about the spoilage process, choosing the right fruits and vegetables, preparing and storing your juice properly, using preservatives, vacuum sealing your juice, pasteurization techniques, monitoring juice freshness, and even reusing leftover pulp. With these tips, you’ll be able to enjoy your fresh juice for longer and waste less.

When it comes to fresh juice, it’s important to understand the spoilage process. Microorganisms like bacteria and fungi can start to grow in your juice as soon as it’s made, especially if it’s not stored properly. These microorganisms can cause spoilage, which can manifest as off flavors, odors, and even visible mold or yeast. The spoilage process can be accelerated by factors like temperature, exposure to light and air, and the pH of the juice.

By understanding the spoilage process, you can take steps to slow it down and make your fresh juice last longer.

Key Takeaways

  • Properly preparing fresh juice with the right blending techniques and ingredient combinations can help extend its shelf life.
  • Storing fresh juice in an airtight container and refrigerating it can prevent spoilage by delaying oxidation and exposure to air and light.
  • Natural preservatives like lemon juice, honey, and ginger can be used to inhibit the growth of bacteria and fungi and prolong the shelf life of fresh juice.
  • Freezing leftover pulp and reusing it can extend the life of juice and provide additional nutrients.

Understanding the Spoilage Process

You’re probably wondering why your fresh juice goes bad so quickly – well, let’s talk about the spoilage process and how to prevent it!

Understanding spoilage is crucial to keeping your fresh juice from going bad. The most common causes of spoilage are bacteria, yeast, and mold. These microorganisms thrive in warm and moist environments, making fresh juice a prime target for spoilage.

Advertisement

Preservation techniques can help extend the shelf life of your fresh juice. One of the most effective methods is pasteurization, which involves heating the juice to a high temperature to kill off any harmful microorganisms. Another method is adding preservatives, such as citric acid or ascorbic acid. However, these methods may alter the taste and nutritional value of the juice.

With this in mind, it’s important to choose the right fruits and vegetables to make your juice, as well as handle and store it properly.

Choosing the Right Fruits and Vegetables

When it comes to making fresh juice that lasts longer, choosing the right fruits and vegetables is crucial. Some produce may spoil faster than others, so it’s important to know which ones are best for juicing.

In addition to selecting the right produce, it’s also important to know how to pick ripe fruits and vegetables to ensure maximum juice yield and flavor.

Best Fruits and Vegetables for Longer Lasting Juice

To keep your juice fresh for longer, it’s important to choose the right fruits and vegetables.

Advertisement

I recommend opting for produce with a firmer texture like apples, carrots, and cucumbers. These ingredients have a lower water content which means they won’t oxidize as quickly and will keep your juice fresher for longer.

Additionally, consider the pairing recommendations for your juices. For example, carrots and apples are a great combination for a refreshing and nutrient-rich juice.

Juicing for maximum nutrient retention also involves using fresh, ripe produce. In the following section, I’ll share some tips on how to pick the best ingredients for your juice.

How to Pick Ripe Produce

It’s super important to choose the perfect produce when juicing, so don’t settle for anything less than the ripest, juiciest fruits and veggies. Proper handling and storage can help you get the most out of your produce.

Here are some tips for picking ripe produce and preserving freshness:

Advertisement
  • Look for fruits and vegetables that are firm to the touch, with no soft or mushy spots.
  • Check for vibrant colors and a fresh, clean smell.
  • Avoid produce that has been bruised, damaged, or has signs of mold or spoilage.

By following these guidelines, you can ensure that your juice is made with the freshest, most nutritious produce possible.

Once you’ve selected your ingredients, it’s time to prepare your juice.

Preparing Your Juice

One key step for keeping your fresh juice from spoiling quickly is properly preparing it. This involves using the right blending techniques and ingredient combinations.

When blending your fruits and vegetables, it’s important to start with the softer ingredients first, such as leafy greens or berries, and then add the harder ingredients like carrots or apples. This will ensure that everything is blended evenly and there are no chunks or clumps in your juice.

In terms of ingredient combinations, it’s important to choose fruits and vegetables that complement each other in terms of taste and nutrition. For example, pairing sweet fruits like pineapple or mango with bitter greens like kale or spinach can create a well-balanced and flavorful juice. Additionally, adding a splash of lemon or lime juice can help preserve the freshness of your juice.

With these techniques in mind, you can create a delicious and long-lasting juice that will keep you feeling energized and healthy.

Advertisement

Now, let’s move on to the next step: storing your juice properly.

Storing Your Juice Properly

You want to savor every sip of your homemade juice and make sure it stays fresh, so let’s explore some effective ways to store it properly.

First, it’s important to note that the way you store your juice can affect its taste and nutritional value. One of the juice storage hacks to keep your juice from going bad quickly is to store it in an airtight container. Oxygen can cause oxidation, which can affect the color, taste, and nutrient content of the juice. Therefore, it’s best to minimize the amount of air that gets into the container of juice.

Another effective way to store your juice is to keep it refrigerated. Juices can become a breeding ground for bacteria when left at room temperature for too long. By keeping your juice in the fridge, you can prevent the growth of harmful bacteria and keep your juice fresh for a longer period.

Remember to place the airtight container of juice in the coldest part of your fridge, which is usually the back of the bottom shelf. With these simple juice storage hacks, you can extend the shelf life of your juice and enjoy it for a few more days.

Advertisement

As you explore ways to store your juice properly, you might also consider using preservatives to extend its shelf life even further.

Using Preservatives

If you’re looking to extend the shelf life of your homemade juice, try using preservatives to keep it from spoiling too quickly. There are two types of preservatives you can use: natural and artificial.

Natural preservatives are derived from plants, herbs, or spices, while artificial preservatives are synthesized in a lab. While natural preservatives may seem like the healthier option, they can be less effective than their artificial counterparts. Some natural preservatives, such as citric acid and vinegar, can alter the taste of your juice.

However, there are many natural preservatives that can be used effectively without affecting the taste, such as honey, salt, and lemon juice. It’s important to note that natural preservatives may not extend the shelf life of your juice as long as artificial preservatives can, so it’s important to use them in combination with other storage methods, such as refrigeration or freezing.

When using natural preservatives, it’s important to use them correctly to ensure they are effective. For example, honey should be added to the juice before bottling, while salt should be added to the bottle before the juice is poured in. It’s also important to use the correct amount of preservative, as too little may not be effective and too much may alter the taste of your juice.

Advertisement

In the end, the type and amount of preservative you use will depend on your personal preference and how long you want to extend the shelf life of your juice. To further extend the shelf life of your juice, vacuum sealing is another effective method. By removing all the air from the container, you can slow down the oxidation process that causes your juice to spoil.

Vacuum Sealing Your Juice

Sealing your juice in a vacuum is a great way to keep it fresh for longer. The benefits of vacuum sealing are numerous, including preventing oxidation and preserving the nutrients and taste of the juice.

When you vacuum seal your juice, you remove all the air from the container, which in turn removes any bacteria or mold that might be present. This helps to keep the juice fresh and safe to drink.

If you don’t have a vacuum sealer, there are other alternatives you can use to preserve your juice. One option is to use an airtight container and to fill it to the top to minimize the amount of air inside. Another option is to use a plastic wrap to cover the container and press it down tightly to remove any excess air. These methods can be effective, but they might not be as effective as vacuum sealing.

When it comes to making fresh juice last longer, vacuum sealing is just one option. Another option is to use pasteurization techniques, which involve heating the juice to a high temperature to kill any bacteria or mold present. However, this process can also affect the taste and nutrients of the juice, so it’s important to consider which technique is best for your needs.

Advertisement

Pasteurization Techniques

When it comes to extending the shelf life of your homemade juice, pasteurization techniques can be a viable option. One technique is high temperature pasteurization, which involves heating the juice to a high temperature for a certain amount of time to kill off any harmful bacteria. This method can significantly increase the shelf life of your juice, but it may also affect the taste and nutritional value of the juice.

Another technique is flash pasteurization, which involves heating the juice to a lower temperature for a shorter amount of time. This method can help preserve the taste and nutritional value of the juice while still ensuring that harmful bacteria are eliminated. However, it may not extend the shelf life of the juice as long as high temperature pasteurization. It’s important to consider the pros and cons of each method when deciding which pasteurization technique to use for your homemade juice.

As important as it is to extend the shelf life of your juice, it’s equally important to monitor its freshness. In the next section, we’ll discuss some tips for keeping track of how long your juice has been stored and when it’s time to discard it.

Monitoring Juice Freshness

To keep track of how long you’ve had your homemade juice and ensure it’s still safe to drink, it’s a good idea to mark the date of when you first stored it and regularly give it a sniff and taste test. Juice freshness monitoring is crucial in maintaining the quality and safety of your homemade juice.

Here are some freshness indicators that you can use to determine if your juice is still good to drink:

Advertisement
  • Color: Fresh juice should have a vibrant and consistent color. If the color has significantly changed or has become murky, it may be an indication that the juice has gone bad.

  • Texture: Fresh juice should be smooth and pulp-free. If you notice any change in texture, such as separation or pulp buildup, it may be a sign that the juice is no longer fresh.

  • Smell: Fresh juice should have a pleasant aroma. If you detect any sour or unpleasant odors, it may be an indication that the juice has gone bad.

  • Taste: Fresh juice should taste sweet and tangy. If the taste is flat or has a bitter aftertaste, it may be a sign that the juice is no longer fresh.

By regularly monitoring the freshness of your juice, you can ensure that you’re consuming a safe and nutrient-dense beverage.

Now, let’s talk about how to reuse leftover pulp.

Reusing Leftover Pulp

So, let’s recap what we’ve learned so far about making fresh juice last longer: we’ve talked about using the right storage containers, keeping the juice cold, and avoiding exposure to air and light. Additionally, considering adding natural preservatives like lemon juice can further extend the juice’s freshness. When storing the juice in the fridge, it’s best to keep it at the coldest possible temperature without freezing, as this helps maximize coldpressed juice shelf life. Remember, proper storage practices can help maintain flavor, nutrients, and overall quality.

But there’s one more thing you can do to get the most out of your fresh juice: reuse the leftover pulp! By incorporating the pulp into recipes like muffins, smoothies, or veggie burgers, you can extend the life of your juice and get even more nutrients out of your produce.

Give it a try and see what you think!

Advertisement

Recap of Key Points

Let’s review the main takeaways for keeping your fresh juice tasty and drinkable for longer. First off, it’s important to understand the benefits of fresh juice and how it can help improve your overall health. Incorporating fresh juice into your daily routine can provide you with essential vitamins, minerals, and antioxidants that support your immune system and increase energy levels.

When it comes to making fresh juice last longer, one of the most effective ways is to store it properly. Keeping the juice in an airtight container and refrigerating it immediately after juicing can help delay the process of oxidation, which leads to spoilage. Additionally, adding a few drops of lemon juice to the juice can help preserve its freshness and flavor.

By following these simple steps, you can enjoy your fresh juice for up to 72 hours.

Now, let’s move on to additional tips for making fresh juice last longer.

Additional Tips for Making Fresh Juice Last Longer

To further extend the shelf life of fresh juice, there are additional tips that you can consider. One of them is juice infusion, which simply means adding natural preservatives to your juice. Examples of these preservatives include lemon juice, honey, and ginger. These ingredients not only help prolong the shelf life of your juice, but they also enhance its flavor and nutritional value.

Advertisement

Lemon juice, for example, is rich in vitamin C, which acts as an antioxidant that prevents the growth of bacteria and fungi that can spoil the juice. Honey and ginger, on the other hand, contain antimicrobial properties that inhibit the growth of microorganisms in your juice.

Another tip that you can try is freezing your fresh juice. Freezing is one of the most effective ways to preserve the quality and freshness of your juice for a longer period. To freeze your juice, pour it into an airtight container or a freezer bag and store it in the freezer.

You can also use ice cube trays to freeze small portions of your juice, which you can later use for smoothies or other recipes. However, keep in mind that freezing can affect the texture and flavor of your juice, so it’s best to consume it within three to six months. Thaw the frozen juice in the refrigerator or at room temperature before drinking it.

Frequently Asked Questions

Can I freeze fresh juice to make it last longer?

Yes, freezing fresh juice is a good way to preserve its nutrients. However, it’s important to use airtight containers to prevent freezer burn. Personally, I’ve found that ice cube trays work well for portion control.

How long can I store fresh juice in the refrigerator before it becomes unsafe to drink?

Fresh juice can be stored in the refrigerator for up to 3-5 days before it becomes unsafe to drink. Proper juice storage techniques, such as using airtight containers and refrigerating immediately after juicing, can extend the shelf life of fresh juice. It’s important to note that the exact duration of how long fresh juice lasts can vary depending on the ingredients used and how they were handled during preparation. Certain juices, especially those containing citrus, may last closer to five days, while others with more delicate ingredients might only be safe for three days. To maximize freshness and safety, always check for changes in taste, color, or smell before consuming.

Advertisement

Is it safe to drink juice that has been left out at room temperature for a few hours?

Drinking juice left at room temperature for a few hours is not safe due to bacterial growth. Proper juice storage is crucial to prevent contamination. Keep it refrigerated and consume within a few days for optimal safety.

Can I add additional fruits or vegetables to my juice after it has been prepared and stored?

Yes, I can add additional fruits or vegetables to juice after it’s prepared and stored. This allows for endless flavor combinations and the ability to tailor to my preferences. Adding ingredients may affect the shelf life, but that depends on the specific ingredients.

What is the best way to clean my juicer to prevent contamination and extend the life of my machine?

Maintaining my juicer is crucial to avoid contamination and extend its life. I use allusion in my cleaning tips to make it more interesting. I follow the manufacturer’s instructions, disassemble the parts, and clean them thoroughly with warm water and soap.

Conclusion

In conclusion, making fresh juice last longer requires careful consideration of various factors that influence spoilage. By choosing the right fruits and vegetables, preparing the juice properly, and storing it in the right conditions, you can extend its shelf life and enjoy it for longer. Additionally, using preservatives, vacuum sealing, and pasteurization can help preserve the juice’s freshness and flavor for an even longer period.

As with any culinary process, monitoring the freshness of your juice is crucial to avoid consuming spoiled or unsafe drinks. By paying attention to the color, texture, and smell of the juice, you can quickly identify any signs of spoilage and avoid the risks that come with consuming contaminated beverages.

Advertisement

Finally, don’t forget that the leftover pulp from your juicing process can also be reused in various recipes to minimize waste and make the most out of your ingredients. With these tips, you can enjoy delicious, healthy, and safely stored fresh juice for days to come.

Continue Reading

Affiliate disclaimer

As an affiliate, we may earn a commission from qualifying purchases. We get commissions for purchases made through links on this website from Amazon and other third parties.

Vetted

effortless juice extraction machines effortless juice extraction machines
Vetted3 months ago

15 Best Cold Press Juicers With Large Feed Chutes for Effortless Juice Extraction

Discover the 15 best cold press juicers with large feed chutes for effortless juice extraction, but which one will be...

top coffees for french press top coffees for french press
Vetted3 months ago

15 Best Coffees for French Press That Will Elevate Your Brewing Game

Imagine brewing the perfect cup of coffee with our top 15 picks for French press; you won't want to miss...

top cold press juicers reviewed top cold press juicers reviewed
Vetted3 months ago

15 Best Cold Press Juicers on Amazon: A Comprehensive Review for Health Enthusiasts

Discover the top 15 cold press juicers on Amazon that maximize nutrients and flavors; find out which models made the...

top cachoo juicers 2024 top cachoo juicers 2024
Vetted3 months ago

15 Best Cachoo Cold Press Juicers of 2025 – Our Top Picks for Fresh Juice Lovers

Find the perfect Cachoo cold press juicer for your kitchen in 2025 and discover the unique benefits that await your...

top organic coffees 2024 top organic coffees 2024
Vetted3 months ago

15 Best Organic Coffees of 2025 – Savor the Purest Brews

Get ready to indulge in the 15 best organic coffees of 2025, where exceptional flavors await—discover which brews made the...

top 15 easy clean juicers top 15 easy clean juicers
Vetted3 months ago

The 15 Best JE-60 Easy Clean Slow Cold Press Juicers of 2025 – Your Guide to Healthier Juicing

Discover the top 15 JE-60 Easy Clean Slow Cold Press Juicers of 2025 that transform your juicing experience—find out which...

best dual coffee makers best dual coffee makers
Vetted3 months ago

15 Best Dual Coffee Makers of 2025 – Brew Your Perfect Cup Every Time

Master the art of coffee brewing with the 15 best dual coffee makers of 2025, and discover which one will...

top cold press juicers 2024 top cold press juicers 2024
Vetted3 months ago

15 Best Cold Press Juicers for Pure Juice Lovers in 2025 – Expert Reviews & Recommendations

The 15 best cold press juicers for pure juice lovers in 2025 offer unmatched efficiency and nutrient retention, but which...

top espresso coffee grinders top espresso coffee grinders
Vetted3 months ago

15 Best Coffee Grinders for Espresso Lovers: Expert Reviews & Recommendations

Learn about the 15 best coffee grinders for espresso lovers, featuring expert recommendations that could elevate your brewing experience to...

top cold press juicers 2024 top cold press juicers 2024
Vetted3 months ago

15 Best Atsent Cold Press Juicers of 2025 – Fresh Juice at Your Fingertips

Discover the top 15 Atsent cold press juicers of 2025 that guarantee fresh juice at home; find out which model...

top espresso coffee beans top espresso coffee beans
Vetted3 months ago

15 Best Coffee Beans for Espresso That Will Elevate Your Brewing Game

Sip your way to espresso perfection with these 15 exceptional coffee beans that promise to transform your brewing game—discover the...

top cold press juicers 2024 top cold press juicers 2024
Vetted3 months ago

15 Best Prefix Cold Press Juicers of 2025: 10 Individual Suggestions You Can’t Miss

Navigate through the 15 best cold press juicers of 2025 and uncover top picks that will revolutionize your juicing experience—discover...

Trending