Connect with us

Juice Tips and Tricks

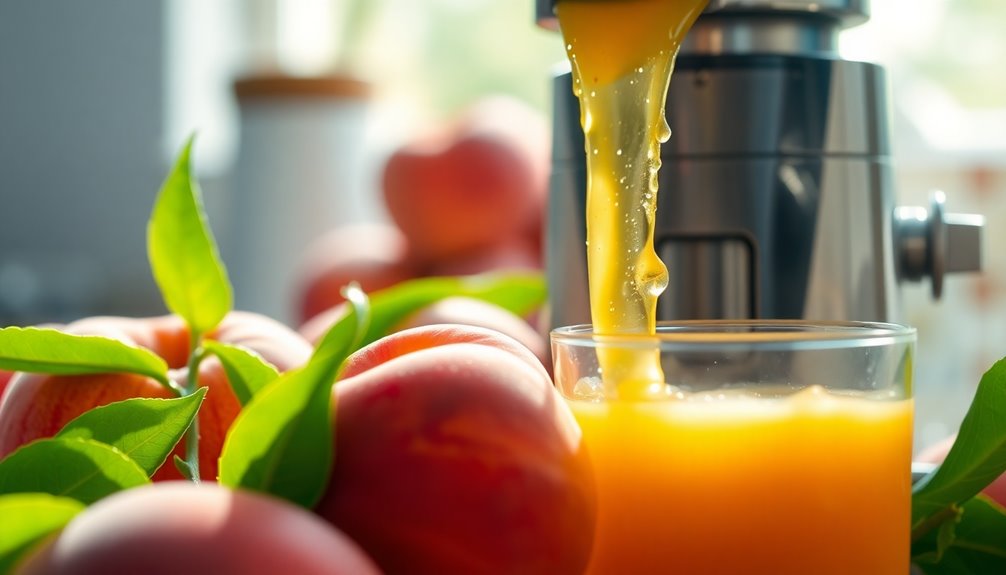
How To Juice Peaches

Published

on

I am very enthusiastic about making juice, and one of my favorite fruits to juice is peaches. Not only do they taste great, but they are also packed with important nutrients that are beneficial for our health.

Juicing peaches is a great way to get all those nutrients in a quick and easy way, without having to eat a whole bunch of peaches.

In this article, I’ll be sharing with you everything you need to know about how to juice peaches. We’ll talk about the benefits of juicing peaches, how to select the best peaches for juicing, how to prep them for juicing, and what equipment you’ll need.

I’ll also be sharing my favorite peach juice recipes, as well as tips for storing and serving your juice. Whether you’re a seasoned juicer or just starting out, this guide will provide you with all the information you need to make delicious and nutritious peach juice at home.

Key Takeaways

  • Select ripe but not too soft peaches that give slightly to the touch and have a fragrant aroma.
  • Properly prepping peaches involves more than just slicing them; a juicer, strainer, and proper technique are necessary for maximizing yield.
  • Peach juice can be sweetened with honey or mixed with other fruits like strawberries or raspberries to add variety and flavor.
  • Peach juice is packed with nutrients, boosts the immune system, promotes good vision and skin health, and regulates digestion, making it a great addition to any diet.

Benefits of Juicing Peaches

You’ll love juicing peaches because it packs a punch of vitamins and antioxidants, giving your body a boost of health and vitality. Peaches are rich in vitamin C, which is essential for maintaining a healthy immune system. It also contains vitamin A, which promotes good vision and skin health. Peaches are also a good source of fiber, which helps to regulate digestion and prevent constipation.

Juicing peaches can help you get all these nutrients in a concentrated form, making it an excellent addition to your diet. Aside from its health benefits, juicing peaches is also a good way to enjoy its delicious taste. It’s a refreshing drink that’s perfect for hot summer days. With its sweet, juicy flavor, you’ll surely love every sip.

Advertisement

Now that you know the health benefits of juicing peaches, let’s move on to the next section where we’ll talk about selecting the best peaches for juicing.

Selecting the Best Peaches for Juicing

When selecting the best peaches for your juicing recipe, it’s important to look for ones that are ripe but not too soft. There are several peach varieties that are great for juicing, including white peaches, yellow peaches, and donut peaches.

White peaches have a sweeter and less acidic taste compared to yellow peaches, while donut peaches have a unique flat shape and sweet taste. To determine the ripeness level of the peaches, gently press the fruit with your thumb. If it feels too hard, the peach is not yet ripe. If it feels too soft, the peach is overripe and may not produce as much juice. Look for peaches that give slightly to the touch and have a fragrant aroma.

Once you have selected your perfect peaches, it’s time to prep them for juicing. Transitioning into the subsequent section about prepping peaches for juicing, it’s important to note that the way you prepare your peaches can affect the quality and quantity of juice you get.

Prepping Peaches for Juicing

So, you think that just slicing the peaches will do the trick, huh? Think again. Properly prepping your peaches for juicing involves much more than just a simple cut.

Advertisement

One of the most important things to consider is the ripeness level of your peaches. You want to make sure that your peaches are ripe enough to be juiced but not overripe, as this can result in a mushy texture and a sour taste.

To peel your peaches, there are a few different techniques you can use. One option is to use a vegetable peeler to remove the skin. Another option is to blanch the peaches in boiling water for about 30 seconds, then transfer them to an ice bath to stop the cooking process. This will make the skin easier to peel off.

Once your peaches are peeled, make sure to remove the pit before juicing.

Now that we have properly prepped our peaches, let’s move on to the equipment needed for juicing.

Equipment Needed for Juicing

To properly extract the sweet nectar from ripe peaches, having the right equipment is key. There are several pieces of equipment that are necessary for juicing peaches.

Advertisement

The first is a juicer, which can be either a manual or electric juicer. A manual juicer is more affordable and easier to clean, but an electric juicer is faster and requires less effort.

Additionally, a strainer or sieve is essential for removing any pulp or seeds from the juice.

When juicing peaches, it’s important to use the right juicing technique to maximize the yield and minimize waste. One technique is to cut the peaches into slices and place them into the juicer, making sure to push them down gently.

Another technique is to use a blender to puree the peaches into a smoothie consistency and then strain the mixture through a sieve or cheesecloth. Regardless of the technique used, the end result should be a smooth and delicious peach juice that is perfect for any occasion.

Now that you have the right equipment and juicing techniques, it’s time to move on to the basic peach juice recipe.

Advertisement

Basic Peach Juice Recipe

Now that you’ve got your hands on the necessary equipment and the right juicing techniques, it’s time to whip up a basic peach juice recipe that will tantalize your taste buds.

Start by selecting ripe peaches that are sweet and juicy. Wash them thoroughly and remove the pits. Cut the peaches into small pieces and place them in the juicer. Turn on the juicer and let it do its job.

Once the juice is extracted, pour it into a glass and enjoy.

There are several variations of peach juice that you can try. You can add a little bit of honey or agave syrup to sweeten the juice, or you can mix it with other fruits such as strawberries or raspberries.

Peach juice can be served chilled or at room temperature. It’s a refreshing drink that’s perfect for a hot summer day.

Advertisement

In the next section, we’ll explore a peach and ginger juice recipe that’s both delicious and healthy.

Peach and Ginger Juice Recipe

I love experimenting with different juice recipes, and this Peach and Ginger Juice Recipe is one of my favorites! To make this delicious and refreshing drink, you’ll need just a few simple ingredients. These include fresh peaches, ginger root, lemon juice, and honey. Follow these step-by-step instructions to create a flavorful juice that’s perfect for any time of day.

Adjust the paragraph structure in the Input to logically group complete sentences on their own lines, with a double new line after. Use contractions.

Ingredients

You’ll need juicy, ripe peaches for the sweetest and most flavorful juice. When selecting peaches, make sure they are soft to the touch and have a fragrant smell. If they are too hard or have a green tint, they are not ripe enough and will not produce the best juice consistency.

To make peach juice, you only need a few simple ingredients. Check out the table below for a list of what you’ll need and some flavor combinations you can try. Once you have all of your ingredients ready, you can move on to the next section for step-by-step instructions on how to juice peaches.

Advertisement
Ingredient Amount Flavor Combinations
Ripe Peaches 4-5 Peach and Ginger, Peach and Mint, Peach and Basil
Lemon Juice 1 tbsp Peach and Lemon, Peach and Ginger
Honey 1-2 tbsp Peach and Honey, Peach and Basil
Water 1/2 cup N/A

Now that you have all of your ingredients, it’s time to start juicing those peaches!

Step-by-Step Instructions

First, gather all your ripe and fragrant peaches to create a delicious peachy drink. When juicing peaches, there are a few techniques you can use depending on the equipment you have.

For a manual juicer, cut the peaches into slices and press them down onto the juicer’s cone. If you have an electric juicer, cut the peaches into smaller pieces and feed them into the chute. Alternatively, you can blend the peaches and strain the mixture through a fine mesh sieve or cheesecloth to remove any pulp or chunks.

To add some variety to your peach juice, try experimenting with different flavor combinations. A popular option is to mix in some lemon juice for a tangy twist or a small amount of ginger for a subtle kick. You can also try adding a handful of fresh mint leaves or a splash of vanilla extract for an extra layer of flavor.

Once you’ve perfected your peach juice recipe, you can use it as a base for other drinks or even incorporate it into recipes for smoothies, cocktails, and desserts. Speaking of which, let’s move on to a delicious peach and pineapple juice recipe that’s sure to impress.

Advertisement

Peach and Pineapple Juice Recipe

I’m excited to share my recipe for peach and pineapple juice! This delicious juice is made with just two simple ingredients: fresh peaches and pineapple.

To make the juice, simply blend the fruit together and strain any pulp. It’s a refreshing and healthy drink that’s perfect for summer. For an extra boost of vitamins, try adding a handful of spinach or kale to the mix. Juicing kiwi at home is another great way to incorporate more nutrients into your drinks, as kiwi is rich in vitamin C and antioxidants. Experiment with different fruit combinations to find your perfect flavor balance!

Ingredients

To get started, gather fresh, ripe peaches that are fragrant and soft to the touch. It’s important to use ripe peaches as they contain the maximum amount of juice and flavor. If the peaches are not soft, leave them at room temperature for a few days until they ripen.

When it comes to juicing techniques, there are different methods you can use to extract the juice from the peaches. You can use a juicer or a blender to make peach smoothies. However, if you want to make pure peach juice, you can use a handheld juicer or a citrus press. These tools will help you extract the juice from the flesh of the fruit without including the pulp.

With the right ingredients and juicing techniques, you’ll be able to make delicious peach juice that’s perfect for hot summer days. So let’s move on to the next section and learn about the step-by-step instructions for juicing peaches.

Advertisement

Step-by-Step Instructions

Now that we have our ingredients ready, let’s move on to the fun part – juicing the peaches! Juicing peaches is a great way to enjoy the sweet, juicy taste of this popular fruit in a refreshing and healthy way. Not only does juicing help to preserve the nutrients and antioxidants found in peaches, but it also allows us to consume a larger quantity of fruit in one go. In this section, I will walk you through the step-by-step instructions for juicing peaches and highlight the health benefits of this delicious beverage.

Before we start, let’s take a look at the table below for a quick overview of the juicing process. Keep in mind that the quality and juiciness of your peaches will affect the amount of juice you are able to extract, so adjust the quantities accordingly. Now that we have our peaches washed and prepped, let’s begin by cutting them into smaller pieces and feeding them into the juicer. As the juice starts to flow, you can collect it in a separate container and discard the pulp. Once you have juiced all the peaches, give the juice a good stir and transfer it into a glass to enjoy. Not only is peach juice delicious, but it is also a great source of vitamin C, fiber, and potassium, among other nutrients that support immune function, digestion, and heart health. With that said, let’s move on to the next section where we will explore a delicious peach and mango juice recipe.

Peach and Mango Juice Recipe

For my next juice recipe, I’ve decided to mix two of my favorite fruits: peaches and mangoes. To make this delicious and refreshing juice, you’ll need fresh peaches, ripe mangoes, and some water.

Follow these step-by-step instructions to create a flavorful and healthy drink that’s perfect for any time of day.

Ingredients

Peaches are the star ingredient when it comes to juicing. They’re not only delicious but also add a sweet and refreshing flavor to any beverage.

Advertisement

When juicing peaches, it’s important to consider the juice consistency you want to achieve. If you prefer a thicker consistency, it’s recommended to use ripe peaches, while for a more liquid consistency, use slightly underripe peaches.

When juicing peaches, you can also experiment with flavor combinations. Peach and mango juice is a great example of a delicious combination that’s perfect for summer. You can also add other fruits such as strawberries or blueberries to create a more complex flavor profile.

The possibilities are endless when it comes to juicing peaches.

In the next section, I’ll provide step-by-step instructions on how to juice peaches to perfection.

Step-by-Step Instructions

Ah, the sweet satisfaction of extracting every last drop of nectar from these succulent fruits – let’s get juicing! Juicing peaches is a great way to enjoy all the health benefits that come with the fruit.

Advertisement

Peaches are packed with vitamins and minerals that are essential for our body. They contain vitamin C, which is great for boosting our immune system, and vitamin A, which is good for our eyesight. Peaches also contain potassium, which is important for our heart health.

When juicing peaches, it is important to choose the right variety. There are two main types of peaches: clingstone and freestone. Clingstone peaches have flesh that clings to the pit, while freestone peaches have flesh that easily separates from the pit. It is best to use freestone peaches for juicing as they are easier to work with and have more flesh.

Additionally, the riper the peach, the sweeter and more flavorful the juice will be. Now that we have extracted all the juice from our peaches, it’s time to store and serve it.

With proper storage, peach juice can last for up to three days in the refrigerator. It is best to store it in an airtight container to prevent oxidation. When serving, peach juice can be enjoyed on its own or mixed with other fruits and vegetables for a delicious and healthy drink.

Storing and Serving Peach Juice

When you’re ready to serve your freshly juiced peaches, all you need is a tall glass filled with ice and a sprig of mint to elevate the flavors. But before you pour out your peach juice, it’s important to know how to store it properly. Store your peach juice in an airtight container and refrigerate it immediately to prevent bacteria growth and spoilage. Peach juice can last up to 3 days in the refrigerator, but it’s best to consume it within the first 24 hours for maximum freshness and flavor.

Advertisement

Now that you have your fresh peach juice and serving ideas, it’s time to enjoy it! Take a look at the table below for some inspiration on how to serve your peach juice. Whether you’re looking for a healthy breakfast drink, a refreshing midday pick-me-up, or a fun cocktail, there’s a peach juice recipe for every occasion. So go ahead, get creative with your peach juice and enjoy the sweet taste of summer all year round! In the next section, we’ll explore some tips for juicing success to help you get the most out of your peaches.

Tips for Juicing Success

To make the most out of your juicy peaches, it’s important to follow these tips for juicing success. This will have you sipping on the sweet nectar of summer in no time.

First and foremost, avoid making juicing mistakes that can affect the taste and quality of your peach juice. One common mistake is not using ripe peaches. Juicing unripe peaches will result in a bitter and sour taste. Therefore, make sure your peaches are ripe and juicy before juicing them.

Another mistake is not cleaning your peaches properly. Make sure to wash them thoroughly to get rid of any dirt or pesticides.

Additionally, when juicing peaches, it’s important to experiment with different flavor combinations. Peach juice pairs well with other fruits such as strawberries, blueberries, and raspberries. You can also add a splash of lemon or lime juice to enhance the flavor of your peach juice.

Advertisement

By following these tips, you’ll be able to create a delicious and refreshing peach juice that you’ll want to sip on all summer long.

Frequently Asked Questions

Can I juice peaches with the skin on?

Yes, you can juice peaches with the skin on using various juicing techniques. The skin contains nutritional benefits, including fiber and antioxidants. However, make sure to thoroughly wash the peaches before juicing to remove any dirt or pesticides.

How long does peach juice stay fresh in the refrigerator?

Did you know that peach juice is packed with antioxidants and nutrients that can boost your overall health? To extend its shelf life, store peach juice in an airtight container in the fridge for up to five days. Alternatively, freeze it for later use.

What are some common mistakes to avoid when juicing peaches?

When juicing peaches, avoid over-ripened fruit and remove the pit before juicing. Experiment with adding other fruits or herbs to your peach juice recipes. Try using a masticating juicer for optimal juicing techniques.

Is it possible to freeze peach juice for later use?

Yes, it is possible to freeze peach juice for later use. To maintain its quality, I recommend using freezer-safe containers and leaving enough headspace for expansion. Label and date the containers for easy storage solutions.

Advertisement

Can I mix peach juice with other types of fruit juice?

Mixing peach juice with other fruit juices can provide a unique flavor and added nutrients. Pros include increased variety and health benefits. Cons may include overpowering flavors. Best fruits to mix with peach juice are mango, pineapple, and orange.

Conclusion

Well folks, I hope you’re ready to have your mind blown because juicing peaches is the best thing that’s ever happened to me! I mean, seriously, the benefits are endless.

Not only does it taste delicious, but it’s also packed with vitamins and minerals that are essential for a healthy lifestyle. And let’s not forget about the convenience factor. It’s a quick and easy way to get a serving of fruit without having to chop and eat a whole peach.

But wait, it gets even better. The possibilities for flavor combinations are endless! From peach and pineapple to peach and mango, the options are endless. And don’t even get me started on the equipment.

Juicers come in all shapes and sizes, making it easy to find one that fits your needs and budget.

Advertisement

So what are you waiting for? Go out and grab some fresh peaches and start juicing today! Trust me, your taste buds and body will thank you.

Juicing peaches has become a game-changer for my health and wellness journey, and I know it will for you too.

Cheers to peachy goodness!

Susannah expertise lies in researching and compiling evidence-based content on juicing, nutrition, and overall health. She is committed to ensuring that The Juicery World offers accurate, up-to-date, and trustworthy information to empower readers to take control of their health. Susannah's goal is to inspire individuals to embrace juicing as a way to nourish their bodies and live their best lives.

Advertisement

Juice Tips and Tricks

How To Draw Juice Wrld Easy

Published

on

By

I have always been a loyal Juice WRLD fan and have longed to sketch him. Unfortunately, I have found it challenging to accurately portray his distinctive style and features.

After much practice and research, I’ve finally figured out a simple and easy way to draw Juice WRLD that anyone can follow. In this article, I will guide you step-by-step on how to draw Juice WRLD with ease. Whether you’re a beginner or have some experience with drawing, this method will break down the process into manageable steps. By the end of this tutorial, you’ll have a clear understanding of *how to draw Juice WRLD* in a way that captures his signature look and style. So grab your pencils and let’s get started on this exciting artistic journey!

Imagine being able to draw Juice WRLD effortlessly and impress your friends with your artistic talent. Whether you’re a beginner or an experienced artist, this tutorial will help you create a stunning portrait of Juice WRLD in just a few simple steps.

So, gather your materials and let’s get started on drawing one of the most iconic musicians of our time.

Key Takeaways

  • Use a round head shape with a slight point at the bottom as a basic template for Juice WRLD’s portrait.
  • Pay close attention to capturing arm and hand movements in the drawing to emphasize the musician’s unique style.
  • Experiment with shading techniques to create highlights and shadows in the portrait.
  • Take inspiration from other musicians’ unique features and experiment with different styles and techniques to improve drawing skills.

Gather Your Materials

Now, you’ll wanna grab your markers and paper to get started on drawing Juice WRLD. To draw Juice WRLD, you’ll need a few materials.

Firstly, you’ll need a sheet of paper that’s smooth enough for you to draw on. You can use any type of paper that you have, but a plain white paper is usually the best option.

Advertisement

Secondly, you’ll need a set of markers to color and shade your drawing. You can use any color that you like, but it’s recommended to use colors that match the original image of Juice WRLD.

Once you’ve gathered all your materials, you need to prepare your workspace. Ensure that your work area is clean and clear from any distractions. Find a comfortable spot and a good light source to draw under.

Now that you’re ready, it’s time to start sketching the basic shape of the head.

Sketch the Basic Shape of the Head

As I start sketching the basic shape of Juice Wrld’s head, I envision a round shape with a slight point at the bottom, resembling a teardrop. This will create the foundation of the head and help me establish the proportions and angles of his face.

In order to accurately depict Juice Wrld, it’s important to understand the different angles and perspectives of his head. Here are some tips to keep in mind as you sketch:

Advertisement
  • Start with a light pencil sketch to adjust proportions as needed
  • Use reference photos to guide you in getting the overall shape right
  • Pay attention to the placement of the eyes, nose, and mouth
  • Experiment with different angles and perspectives to find the most accurate representation

Once you have the basic shape of the head down, it’s time to add facial features. By paying attention to detail and taking your time, you can create a realistic portrait of Juice Wrld that truly captures his unique features.

Add Facial Features

Now that I’ve sketched the basic shape of the head, it’s time to add facial features. The three key features are the eyes, nose, and mouth.

Eyes give the face expression and are essential in conveying emotion. The nose and mouth are also important for conveying expression and give the face character.

Let’s get started on adding these features to our drawing of Juice Wrld.

Eyes

First, you’ll want to draw two circular shapes for the eyes, making sure they’re slightly angled upwards to give Juice Wrld’s signature look. Once you’ve drawn the basic shape, you can start adding more detail. Here are some tips for drawing Juice Wrld’s eyes:

  • Draw the iris slightly off-centre to give it a more realistic look.
  • Use shading techniques to create depth and dimension.
  • Add highlights to the eyes to make them look more alive.
  • Pay attention to the eyebrows as they play a big role in conveying emotion.

Next, we’ll move on to drawing the nose. To do this, you’ll want to start by drawing a small triangular shape at the center of the face.

Nose

Get ready to capture the essence of Juice Wrld’s unique style by focusing on the intricate details of his nose. When drawing Juice Wrld, it’s important to pay attention to the shape of his nose. His nose is slightly curved, with a prominent bridge and a rounded tip.

Advertisement

To capture this, start by lightly sketching out the basic shape of his nose with a pencil. Then, use shading techniques to add depth and dimension to the nose. Pay attention to the areas where the light hits the nose and where it casts shadows. Use drawing techniques such as cross-hatching to create realistic shading.

When shading the nose, keep in mind the overall shape of Juice Wrld’s face. His face has a distinct angularity, so it’s important to capture this when drawing his nose. Use sharp, angular lines to define the edges of the nose, and soften them with shading to create a more natural look.

With these drawing and shading techniques, you can capture the unique shape and style of Juice Wrld’s nose and bring your drawing to life.

Next, we’ll move on to the mouth, where we’ll continue to incorporate these techniques to create a realistic depiction of Juice Wrld’s face.

Mouth

Capturing the essence of Juice Wrld’s unique style requires a keen eye for detail, particularly in the intricate contours and shading of his mouth. To draw Juice Wrld’s mouth, you need to pay close attention to the shape of his lips. His upper lip is slightly bigger than his lower lip and has a curved shape. His lower lip is thinner and has a more straight shape. It’s important to get the lip shape right to capture the essence of his style.

Advertisement

To create realistic shading on Juice Wrld’s lips, use a combination of techniques. Start by using a soft pencil to sketch the basic lip shape. Then, use a darker pencil to add shading to the areas where the lips meet and where the lower lip casts a shadow on the upper lip. Use a blending tool to blend the shading and create a smooth transition between light and shadow. Finally, add highlights to the lips using a white pencil to create a glossy finish.

With these shading techniques, you can bring Juice Wrld’s mouth to life on the page.

Now that we’ve captured the essence of Juice Wrld’s unique style by drawing his nose and mouth, it’s time to move on to the next step: drawing his hair and hat.

Draw the Hair and Hat

As I start sketching the hair and hat, I notice that Juice Wrld’s signature look is all about the details. To begin, I draw the outline of his hair using short, circular strokes. His hair is typically messy and voluminous, so I make sure to add plenty of texture with my pencil. To create depth, I incorporate various drawing techniques such as cross-hatching and stippling.

Once the hair is complete, I move on to the hat. Drawing the hat is all about shading techniques. I start by shading the underside of the brim, making sure to add subtle variations in tone to create a realistic effect. Then, I shade the rest of the hat, paying attention to the folds and creases. I use a combination of light and dark shades to create contrast and dimension.

Advertisement

With the hair and hat complete, it’s time to move on to the next step and sketch the body.

Sketch the Body

Now it’s time to sketch out the body of our Juice Wrld drawing. This is where we’ll start adding in the details of his clothing, arms, and hands.

First, I’ll focus on the clothing, making sure to capture the unique style of Juice Wrld’s wardrobe.

Then, I’ll move on to the arms and hands, carefully drawing their proportions and positioning.

With these key points in mind, we can create a dynamic and accurate representation of the rapper.

Advertisement

Clothing

To make drawing Juice WRLD easier, you should focus on adding simple details to his clothing, like his oversized hoodies and baggy pants. Juice Wrld’s fashion and style evolution was heavily influenced by his hometown of Chicago. He often wore streetwear brands like Supreme and Off-White, and his outfits were often a mix of vintage and modern styles.

His clothing was a big part of his persona and added to his overall image as a young, rebellious artist. When drawing Juice Wrld, pay attention to the details of his clothing, such as the way his hoodies drape over his body or the way his pants bunch up at the ankles. Adding these small details will make your drawing more accurate and help capture the essence of Juice Wrld’s style.

In addition, be sure to consider the emotional impact of clothing on Juice Wrld’s persona. His baggy clothing and oversized hoodies gave him a laid-back, relaxed vibe that contributed to his persona as a carefree, rebellious artist.

Moving on from clothing, let’s focus on drawing his arms and hands.

Arms and Hands

When you’re capturing Juice WRLD’s persona, pay attention to the way his arms and hands move as he performs on stage. Drawing techniques can help you create a realistic and dynamic portrayal of his gestures.

Advertisement

Start by sketching the basic shapes of his arms and hands, paying attention to the proportions and angles. Then, add more details and contours to give them volume and depth. Shading tips can also help you add dimension to your drawing.

Observe the way light falls on his arms and hands, and use shading techniques to create highlights and shadows. This will create a more realistic and three-dimensional effect. Once you’ve sketched and shaded his arms and hands, you can move on to adding details and shadows to the rest of your drawing, bringing it to life.

Add Details and Shadows

You’re really bringing Juice Wrld to life by adding those detailed shadows. Adding depth to your drawing is crucial to create a 3D effect.

One way to achieve this is by using shading techniques to create contrast and highlights. Blending colors together can also add texture to your drawing. It’s important to experiment with different styles and mediums to incorporate your personal style into the drawing.

Creating a background can also enhance the overall look of your drawing. Using reference images and practicing with other subjects can help you explore different poses and lighting techniques.

Advertisement

Don’t be afraid to play with lighting to add more depth and shadows to your drawing. Once you’re happy with the details and shadows, you can move on to finalizing your drawing.

Finalize Your Drawing

Now that your drawing is bursting with life, it’s time to add the finishing touches and make it shine like a diamond in the sky. Firstly, adding color to your drawing can make it pop and bring it to life. You can use colored pencils, markers, or watercolors to add vibrancy and depth to your artwork. Make sure to reference a photo of Juice WRLD to ensure that you are accurately capturing his skin tone, hair color, and clothing.

Next, highlighting and shading can add dimension to your drawing and make it look more realistic. Use a white colored pencil or marker to create highlights on areas that would naturally catch the light, such as the forehead, nose, and cheekbones. Use a darker pencil or marker to shade in areas that would naturally be in shadow, such as under the chin and around the eyes. Background details, such as a microphone or stage lights, can add context and interest to your artwork. Finally, consider framing options and tweaking the perspective to create a dynamic and eye-catching finished piece.

To continue improving your drawing skills, consider these tips for drawing other musicians.

Tips for Drawing Other Musicians

Enhance your artistic skills by exploring various techniques to capture the essence of different musicians in your drawings. Musician portraits can be challenging to draw, but they can also be incredibly rewarding.

Advertisement

When drawing musicians, it’s essential to study their unique features, such as their hairstyle, clothing, and accessories, to capture their essence accurately. One of the best ways to improve your artistic skills is by seeking artistic inspiration from other artists.

Look for different styles and techniques that you admire and try to incorporate them into your artwork. Experiment with different mediums, such as pencils, markers, or paint, to find the ones that work best for you.

With practice and patience, you can create stunning portraits of your favorite musicians that capture their unique style and personality.

Frequently Asked Questions

What are the lyrics to Juice WRLD’s most popular songs?

Exploring Juice Wrld’s most popular songs, I interpret his lyrics as a reflection of the struggles of modern youth. Like a vivid painting, his words depict raw emotion and pain, but also hope and resilience.

How did Juice WRLD get started in the music industry?

Juice Wrld’s music journey began with his early influences of rock and rap. He started uploading his music on SoundCloud and gained popularity with his unique style and lyrics. This led to a record deal with Interscope Records, and the rest is history.

Advertisement

What inspired Juice WRLD to write his music?

Musical influences and personal experiences were the main inspirations for Juice Wrld’s music. Growing up, he was influenced by various genres and artists, and his lyrics were often based on his own life experiences and emotions.

What are some of the challenges that Juice WRLD faced in his career?

Oh boy, where do I even start? Mental health struggles, drug addiction, fame, pressure, you name it. Juice Wrld faced a plethora of challenges in his career, but he always found a way to express himself through his music.

What other musicians were influential to Juice WRLD’s style and sound?

I found Lil Peep’s music early on and became friends with him before he passed. Future was another big influence on me. They both helped shape my sound and style.

Conclusion

So there you have it, folks. Drawing Juice WRLD may seem like a daunting task, but with the right techniques and a little bit of practice, it can be a fun and rewarding experience.

Remember to gather all your materials before starting, sketch the basic shapes of the head and body, and add details and shadows to bring your drawing to life.

Advertisement

But don’t stop there! You can use the same techniques to draw other musicians and artists that inspire you. Whether it’s Drake, Beyonce, or Post Malone, the possibilities are endless.

So grab your pencil and paper, and let your creativity flow. With a little bit of determination and effort, you can create a masterpiece that will impress your friends and family.

Happy drawing!

Continue Reading

Juice Tips and Tricks

How Long Is Fresh Pineapple Juice Good In The Fridge

Published

on

By

As someone who loves freshly squeezed pineapple juice, I often wonder about its shelf life in the refrigerator. The last thing I want is to get sick from drinking spoiled juice.

So, I did some research and found out exactly how long fresh pineapple juice can last and how to keep it fresh for as long as possible.

Fresh pineapple juice is not only delicious but also packed with nutritional benefits. It contains high levels of vitamin C, manganese, and bromelain, an enzyme that aids digestion and reduces inflammation.

However, the shelf life of fresh pineapple juice is relatively short compared to other juices, and it can quickly spoil if not stored properly.

In this article, I will explore the shelf life of fresh pineapple juice, how to store it, and how to tell if it has gone bad.

Advertisement

Key Takeaways

  • Fresh pineapple juice typically lasts 2-4 days in the fridge.
  • Appearance, smell, and taste are key indicators of spoilage.
  • Fresh pineapple juice should not be stored for longer than 5-7 days.
  • Frozen pineapple juice can last up to 6 months.

The Nutritional Benefits of Fresh Pineapple Juice

You’ll love how fresh pineapple juice packs a punch of nutrients, like vitamin C and bromelain, that can boost your immunity and aid digestion. Not only does it taste delicious, but it’s also a great source of antioxidants that can help protect your body from harmful free radicals.

Pineapple juice is also high in manganese, which is essential for bone health and metabolism. When it comes to making fresh pineapple juice, there are a variety of health benefits to enjoy. You can use it as a base for smoothies, or drink it on its own for a refreshing and nutritious beverage.

Some recipe ideas include combining pineapple juice with coconut water for a tropical twist, or adding in ginger for an extra zing. With so many options available, it’s easy to incorporate fresh pineapple juice into your diet and reap its many benefits.

Speaking of benefits, let’s talk about how long fresh pineapple juice stays fresh in the fridge.

The Shelf Life of Fresh Pineapple Juice

Hey, did you know that the clock is ticking on the life of your homemade pineapple juice? As much as we love our pineapple juice recipes and the health benefits of pineapple juice consumption, fresh pineapple juice has a limited shelf life.

Here are some things you should know to ensure that you make the most of your juice:

Advertisement
  • Fresh pineapple juice is highly perishable. Once you’ve extracted the juice, it will immediately start to lose its nutritional value and flavor.
  • The shelf life of fresh pineapple juice is typically 2-4 days when stored in the refrigerator.
  • Pineapple juice will last longer in the freezer, but it’s important to note that it will lose some of its nutritional value.

Given the short shelf life of fresh pineapple juice, it’s important to store it properly to maximize its freshness and flavor. So, how do you store fresh pineapple juice?

How to Store Fresh Pineapple Juice

Properly storing homemade pineapple juice is crucial to preserving its nutritional benefits and delicious flavor. The right storage method can extend the shelf life of fresh pineapple juice for up to five days in the refrigerator. To keep the juice fresh for as long as possible, it is essential to use the best containers and freezing techniques.

When it comes to storing fresh pineapple juice, glass containers are the best option. Glass is non-reactive, which means it won’t interact with the juice and change its flavor. Additionally, glass is airtight, which helps to keep the juice fresh for a more extended period. If you don’t have a glass container, you can use plastic, but make sure it’s food-grade and free of BPA. Another important tip is to keep the pineapple juice in the fridge as soon as possible after juicing it to prevent bacterial growth.

Container Type Pros Cons
Glass Non-reactive, airtight, keeps juice fresh longer Breakable, heavier, more expensive
Plastic (food-grade, BPA-free) Lightweight, affordable, shatterproof Can absorb flavors, not airtight, not as durable as glass

If you want to keep your pineapple juice fresh for longer, you can also freeze it. Pour the juice into an airtight container, leaving some space at the top, as the juice will expand when it freezes. Place the container in the freezer and thaw it in the fridge when you’re ready to drink it. However, keep in mind that freezing can affect the texture and flavor of the juice.

Knowing how to properly store fresh pineapple juice is key to getting the most out of this refreshing beverage. However, even with the best storage methods, pineapple juice can still spoil. In the next section, I’ll discuss the signs of spoilage to help you identify when your juice has gone bad.

Signs of Spoilage

When it comes to determining if fresh pineapple juice has spoiled, there are three key factors to consider: appearance, smell, and taste. As someone who regularly prepares and stores fresh juice, I’ve learned to pay close attention to these indicators in order to ensure that I’m consuming safe and flavorful juice.

Advertisement

By being attuned to changes in color, texture, aroma, and flavor, I can quickly identify any signs of spoilage and avoid consuming juice that has gone bad.

Appearance

You can tell if your fresh pineapple juice has gone bad by checking its appearance – if it looks cloudy or has any mold, it’s time to toss it out. Pineapple juice, like any fruit juice, can spoil over time, especially if it’s not stored properly. To ensure that your juice stays fresh for as long as possible, it’s important to keep it refrigerated and consume it within a few days of making it.

One way to get the most out of your pineapple is to use the core, which is often discarded. The core contains most of the fruit’s fiber and a good amount of its nutrients, making it a great addition to smoothies or juices. There are also plenty of recipes out there that incorporate fresh pineapple juice, such as marinades, cocktails, and even desserts. By using the juice in a variety of ways, you can make sure that none of it goes to waste. Now, let’s move on to the next step, which is checking the smell of your pineapple juice.

Smell

If your pineapple juice smells sour or rancid, it’s likely gone bad and should be discarded. The smell test is one of the easiest ways to determine if your juice is still good.

Pineapple juice that has been stored at the wrong temperature or for too long can start to ferment, which causes it to develop an unpleasant odor. This is why it’s important to make sure you always store your pineapple juice in the fridge, at a temperature of 40°F or below.

Advertisement

To ensure that your pineapple juice stays fresh for as long as possible, here are some tips to keep in mind:

  • Always store your juice in an airtight container to prevent exposure to oxygen, which can speed up the spoilage process.
  • Don’t store your juice for longer than 5-7 days, even if it still smells okay. After this time, the juice may start to lose its flavor and freshness.
  • If you notice any mold or unusual growth in your juice, discard it immediately.
  • Make sure your fridge is set to the correct temperature to prevent spoilage. A refrigerator thermometer can help you monitor the temperature.
  • If you’re unsure about the freshness of your juice, always err on the side of caution and throw it out.

If your pineapple juice has passed the smell test, the next step is to give it a taste to see if it’s still good.

Taste

Tasting the fermented notes in your stored pineapple juice can offer a unique and unexpected flavor profile to your drinks and recipes. However, it’s important to note that the taste of the juice will change as it ages.

Fresh pineapple juice has a sweet and tangy flavor, but as it sits in the fridge, the natural sugars in the juice will start to break down, causing the juice to become more acidic and sour. The longer you store the juice, the more pronounced this taste will become.

Despite the change in flavor, there are still many mixing options and serving suggestions that can make use of aged pineapple juice. The sourness of the juice can be balanced out by adding a sweetener, such as honey or agave syrup, or by mixing it with other fruits or juices. Aged pineapple juice can also be used in marinades and sauces, adding a tangy flavor to your dishes.

Factors that affect the shelf life of pineapple juice include storage temperature, exposure to air, and the presence of preservatives.

Advertisement

Let’s explore these factors in more detail in the next section.

Factors That Affect Shelf Life

When storing fresh pineapple juice in the fridge, factors such as temperature and exposure to air can greatly affect its shelf life, so it’s important to keep these in mind.

Pineapple juice is a delicate beverage that can spoil quickly if not stored correctly. Factors affecting flavor, such as oxidation and microbial growth, can cause the juice to become sour and unappetizing. To make pineapple juice last longer, consider the following:

  • Keep the juice in an airtight container to prevent exposure to air.
  • Store the juice at a temperature between 32°F to 40°F to slow down microbial growth.
  • Avoid storing the juice near other fruits, vegetables, or meat that may release ethylene gas, which can speed up the ripening process and cause spoilage.
  • Use the juice within a week of purchase to ensure freshness.
  • Freeze the juice in ice cube trays if you have excess, as frozen juice can last up to 6 months.

By following these guidelines, you can ensure that your fresh pineapple juice lasts longer and maintains its delicious taste. Store the juice in an airtight container in the refrigerator to preserve its freshness and prevent oxidation. Also, for optimal taste and nutrients, it’s best to consume it within 3-4 days. If you’re wondering about the time to wait after pineapple juice for the enzymes to fully activate in your system, approximately 30 minutes to an hour allows your body to absorb the health benefits effectively.

In the next section, I’ll provide tips for extending the shelf life of pineapple juice beyond these basic measures.

Tips for Extending Shelf Life

To make your pineapple juice last longer and avoid spoilage, you should try storing it in small, portioned containers that can easily fit in your freezer. This will help preserve the freshness and taste of your juice for up to six months.

Advertisement

Additionally, you can also try adding pineapple waste to your compost or using it in creative pineapple juice recipes, such as a refreshing pineapple and mint smoothie or a tropical pineapple and coconut cocktail.

When it comes to determining if your fresh pineapple juice has gone bad, there are a few key things to look out for. Keep an eye on the color and consistency of the juice, as well as any unusual smells or tastes. If you notice any changes, it’s best to err on the side of caution and discard the juice to avoid any potential health risks.

How to Tell If Fresh Pineapple Juice Has Gone Bad

If you’re wondering whether your pineapple juice has turned bad, keep an eye out for changes in color, texture, smell, or taste. Here are three things to look for:

  1. Mold or yeast growth – If you see any signs of fuzzy growth, discard the juice immediately. It can pose a health risk and make you sick.

  2. Off-putting odor – Fresh pineapple juice has a sweet, tropical smell. If it smells sour or rancid, it’s past its prime.

  3. Change in flavor – Pineapple juice should taste sweet and tangy. If it tastes bitter, sour, or flat, it’s gone bad.

If your fresh pineapple juice has gone bad, there are still ways to repurpose it. You can use it as a marinade for meat, add it to smoothies or cocktails, or make a DIY pineapple juice face mask recipe.

But if you’re not interested in repurposing it, the next section will cover how to dispose of it properly.

Advertisement

How to Dispose of Spoiled Pineapple Juice

Properly disposing of spoiled pineapple juice involves pouring it down the drain or toilet, making sure to flush it with plenty of water to prevent any lingering odors. It’s important to avoid any contact with the skin or eyes, as spoiled juice can cause irritation.

If you’re looking for more eco-friendly disposal options, consider composting the pineapple juice along with other organic waste in your garden.

If you’re feeling creative, there are also alternative uses for spoiled pineapple juice. One option is to use it as a marinade for meats such as chicken or pork. The acidity of the juice can help tenderize the meat and add a tropical flavor.

Additionally, you can use the juice in baking recipes such as pineapple upside-down cake or muffins. By getting creative, you can avoid wasting the juice and turn a potential problem into a delicious solution.

Alternative Uses for Spoiled Pineapple Juice

Now that we know how to properly dispose of spoiled pineapple juice, let’s talk about its potential uses. Don’t throw that bottle away just yet!

Advertisement

Spoiled pineapple juice can still be put to good use in a variety of creative recipes. One option is to use it as a marinade for meats such as chicken or pork. The acidity of the juice can help tenderize the meat and add a sweet and tangy flavor.

Another idea is to mix it with other juices or sparkling water to create a refreshing tropical drink. You can even use it as an ingredient in baking, such as adding it to muffins or cakes for a unique twist. With a little creativity and experimentation, there are endless possibilities for incorporating spoiled pineapple juice into your cooking and baking.

Frequently Asked Questions

Can I freeze fresh pineapple juice to extend its shelf life?

Yes, I recommend freezing fresh pineapple juice to extend its shelf life. It’s perfect for use in Pineapple juice cocktails. Make sure to store it in an airtight container and consume within 3 months for optimal taste and quality.

How long does it take for fresh pineapple juice to spoil if left out of the fridge?

If fresh pineapple juice is left out of the fridge, it can spoil quickly at room temperature due to the presence of bacteria. To avoid spoilage, refrigerate within two hours of juicing or use preserving techniques such as canning or freezing.

What are some common recipes that use fresh pineapple juice as an ingredient?

Pineapple juice cocktails make for a refreshing and healthy drink option. Drinking fresh pineapple juice provides a wealth of benefits, including improved digestion and a boost to the immune system. Try incorporating it into smoothies or as a mixer in your favorite cocktails.

Advertisement

Is there a difference in shelf life between homemade and store-bought fresh pineapple juice?

I have found that there is a difference in shelf life between homemade and store-bought fresh pineapple juice. While both options offer nutritional benefits, homemade juice may have a fresher flavor due to the lack of preservatives.

Can I mix fresh pineapple juice with other fruit juices to create a unique flavor?

I enjoy experimenting with different Pineapple juice pairings to create unique flavors. Mixing it with orange or cranberry juice adds a refreshing twist. However, it’s important to keep in mind the natural sweetness of the pineapple juice when selecting other fruits.

Conclusion

Well, that’s all you need to know about fresh pineapple juice and its shelf life. As someone who loves drinking this delicious and healthy juice, I always make sure to store it properly and consume it before it goes bad.

And now that I’ve shared all this information with you, I hope you’ll do the same. But before I go, let me share one interesting statistic that I came across during my research.

Did you know that according to the United Nations, pineapples were the most traded tropical fruit in the world in 2019? That’s right, this spiky fruit is not only popular among consumers but also among traders and exporters.

Advertisement

So, the next time you enjoy a glass of fresh pineapple juice, remember that you’re not alone in your love for this tropical fruit.

Continue Reading

Juice Tips and Tricks

How Much Juice Does A Lime Produce

Published

on

By

As a lover of cooking and baking, I’ve often pondered the juice content of a lime. This is a crucial factor in numerous recipes, ranging from guacamole to key lime pie, and having an idea of the expected juice amount can greatly impact the outcome.

After conducting some experiments in my kitchen, I’ve discovered some interesting findings about lime juice yield and how to maximize it. Factors such as the ripeness of the lime, the temperature of the fruit, and the method of extraction can all impact lime juice yield. Through careful measurement and analysis, I’ve found that the average lime can produce anywhere from 1 to 2 tablespoons of juice.

However, by following some simple tips and alternative extraction methods, you can increase the amount of juice you get from each lime and make the most out of this versatile citrus fruit. So, let’s dive into the science behind lime juice production and explore some delicious recipes that call for it.

Key Takeaways

  • Key limes produce less juice than Persian limes.
  • Heating and rolling the lime can increase juice extraction.
  • Electric juicers are more efficient in extracting juice than hand-squeezing.
  • On average, a lime produces 1-2 tablespoons of juice.

Factors that Affect Lime Juice Yield

Wanna know the secret to getting the most juice out of your lime? It all comes down to the factors that affect lime juice yield.

One of the most important factors is the cooking technique used. Heating up the lime can help break down the cellular structure of the fruit, releasing more juice. A popular method is to microwave the lime for about 10 seconds, or to roll it on a hard surface with the palm of your hand to soften it up.

Another important factor is the citrus acidity of the lime. The higher the acidity, the more juice the lime will produce. This is because the acid helps to break down the cell walls, making it easier to extract the juice. So, when selecting limes, it’s best to choose ones that are firm to the touch and feel heavy for their size, as they tend to be more acidic.

Advertisement

With these factors in mind, you can maximize your lime juice yield and get the most out of your citrus. Speaking of which, let’s take a look at the average lime juice yield.

Average Lime Juice Yield

In my experiments, I’ve found that the average lime juice yield varies depending on the type of lime and juicer used.

Comparing key limes to Persian limes, I’ve found that key limes yield a slightly lower amount of juice on average.

Additionally, when comparing hand-squeezed and electric juicers, I’ve found that electric juicers tend to yield a higher amount of juice.

Comparison of Key Lime and Persian Lime

Did you know that when it comes to juicing, the Key Lime produces less juice than the Persian Lime? In fact, studies have shown that the Key Lime has a lower juice yield compared to the Persian Lime. This can be attributed to the fact that Key Limes are smaller and have a thinner skin, resulting in less flesh and juice.

Advertisement

Additionally, Key Limes have a higher acidity level compared to the sweeter Persian Limes, making them less ideal for juicing. To further understand the difference between the two lime varieties, it’s important to consider their taste and acidity levels. Key Limes have a distinct tart and acidic flavor, which makes them popular in certain dishes such as Key Lime pie. On the other hand, Persian Limes have a milder and sweeter taste, which makes them a preferred choice for juicing.

It’s important to keep in mind these differences when deciding which lime to use for juicing. When it comes to juicing, there are various methods one can use, including hand-squeezing and electric juicers. Let’s explore the differences between the two methods in the next section.

Comparison of Hand-Squeezed and Electric Juicers

You’re about to discover the difference between hand-squeezing and using an electric juicer, like two different paths leading to the same destination, but with different experiences along the way. Let’s take a look at the pros and cons of each method and compare the cost difference.

Hand-squeezing lime juice is a traditional and simple way to get the job done. It requires a bit of elbow grease, but it’s a great way to make sure you’re getting every last drop of juice out of your lime. On the other hand, electric juicers are quick and efficient, but they can be expensive and take up a lot of counter space. Here’s a table to help you weigh the pros and cons and compare the cost difference:

Hand-squeezing Electric Juicer
Pros Inexpensive Quick and efficient
Easy to clean Consistent results
Portable Less elbow grease
Cons Time-consuming Expensive
Inconsistent results Takes up counter space
Requires more effort Difficult to clean

Now that you have a better idea of the pros and cons of each method and their cost comparison, let’s move on to some tips for maximizing your lime juice yield.

Advertisement

Tips for Maximizing Lime Juice Yield

Get the most out of your lime by giving it a good roll on the countertop before slicing it open and squeezing the juice into your recipe. This technique helps to break down the membranes inside the lime, which allows for easier juice extraction.

You can also try microwaving the lime for a few seconds before juicing it, which can help to soften it and increase the amount of juice you can get out of it.

It’s also important to choose the right lime variety for juicing. Key limes are smaller and have thinner skins than Persian limes, which means they have less juice but a stronger flavor. Persian limes, on the other hand, have more juice but a milder flavor.

By understanding the differences between lime varieties and using the right juicing technique, you can maximize the amount of juice you can extract from your limes.

As we move on to alternative lime juice extraction methods, keep in mind that these tips can also be applied to other citrus fruits.

Advertisement

Alternative Lime Juice Extraction Methods

If you’re looking for a quicker and more efficient way to extract lime juice, try using a citrus juicer. DIY lime presses may work for occasional lime juicing, but a citrus juicer is a better investment for frequent use.

There are different types of citrus juicers available in the market, but the most common ones are the electric and manual juicers. Electric juicers are more expensive but they’re faster and easier to use. Manual juicers, on the other hand, are cheaper and can be used anywhere without the need for electricity.

Another alternative method for extracting lime juice is by using a blender. Cut the limes into small pieces and blend them in a blender until smooth. Pour the blended mixture into a strainer to remove the pulp and seeds. The result is a smooth and pulp-free lime juice. However, this method may not be as efficient as using a citrus juicer, and some people may not like the texture of the juice.

Nonetheless, it is a good option if you don’t have a citrus juicer or if you need to extract a large amount of lime juice quickly. With these alternative methods, you can make the most out of your limes and get the most juice possible for your recipes that call for lime juice.

Recipes that Call for Lime Juice

Adding lime juice to your favorite recipes can enhance their flavor and give them a refreshing citrus twist. Lime juice is a versatile ingredient that can be used in a variety of recipes, from savory dishes to sweet desserts.

Advertisement

If you’re looking for a creative way to use lime juice, try making lime-based cocktails like margaritas or mojitos. Lime juice can also be substituted for lemon juice in many recipes, giving them a unique twist.

When using lime juice in recipes, it’s important to note that the acidity of the lime can affect the overall flavor of the dish. To balance out the acidity, consider adding a pinch of sugar or using less lime juice than the recipe calls for.

If you’re looking for a dessert recipe that uses lime juice, try making key lime pie. This creamy and tangy dessert is a classic American favorite and is perfect for any occasion.

Other uses for lime juice include cleaning, skin care, and even as a natural insect repellent. By incorporating lime juice into your daily routine, you can benefit from its many uses and enjoy its refreshing flavor in all aspects of your life.

Other Uses for Lime Juice

Incorporating lime juice into your daily routine can add a refreshing twist to your skincare routine. Lime juice has natural antibacterial properties, making it a great addition to your skincare routine. It can help prevent acne and blemishes while also brightening and evening out your skin tone. Lime juice can also be used as a natural exfoliant, helping to remove dead skin cells and leave you with a radiant glow. Additionally, the citrus scent of lime juice can leave you feeling energized and invigorated.

Advertisement

Aside from its skincare benefits, lime juice can also be used in a variety of other ways. Lime zest, for example, can be used to add flavor to dishes such as salads, soups, and marinades. Lime juice can also be incorporated into creative cocktails, such as margaritas or mojitos. Its tart flavor pairs well with sweet ingredients like agave or honey.

Whether you’re using it to enhance your beauty routine or to add flavor to your food and drinks, lime juice is a versatile ingredient with many uses.

Transitioning into the subsequent section about the history and origins of limes, it’s interesting to note that limes were originally grown in Southeast Asia and were brought to the Americas by Spanish explorers. Today, limes are grown in many parts of the world and are used in a wide variety of cuisines and beverages. From its humble beginnings, lime juice has become a beloved ingredient with a rich history and cultural significance.

History and Origins of Limes

After learning about other uses for lime juice, I became curious about the history and origins of limes. As I researched, I discovered that lime cultivation dates back to ancient times, with evidence of its use in India and Southeast Asia as early as 1000 BC.

Limes were brought to the Mediterranean by Arab traders and eventually made their way to the Americas during the colonial period. Limes have played a significant role in many cultures and have been used for medicinal purposes, as well as culinary applications.

Advertisement

In many countries, limes are a symbol of hospitality and are often used to welcome guests. Additionally, limes have been used in traditional medicine to treat a variety of ailments, such as scurvy and indigestion. Learning about the cultural significance of limes has given me a deeper appreciation for this versatile fruit and its impact on history and culture.

As I delve further into the world of limes, I’m excited to explore their nutritional benefits. With high levels of vitamin C and other beneficial nutrients, limes have the potential to provide numerous health benefits.

Nutritional Benefits of Limes

I find it fascinating to explore the nutritional benefits of limes. Firstly, limes are a great source of Vitamin C, which is essential for maintaining a healthy immune system.

Additionally, limes contain other nutrients such as potassium and folate, which have numerous health benefits.

Lastly, research suggests that consuming limes may aid in digestion, lower blood sugar levels, and promote heart health.

Advertisement

Vitamin C Content

Surprisingly, a lime contains about 30% of the recommended daily intake of vitamin C, making it a great source of this essential nutrient. As someone who’s health-conscious, I’m always on the lookout for foods that are rich in vitamins and minerals.

Here are a few reasons why the vitamin C content in limes is so beneficial:

  • Boosts immune function: Vitamin C is known to enhance the production of white blood cells, which are responsible for fighting off infections.

  • Helps prevent scurvy: Scurvy is a disease caused by a deficiency in vitamin C. Consuming limes, which are high in vitamin C, can help prevent this condition.

  • Promotes healthy skin: Vitamin C is essential for the production of collagen, which is a protein that keeps the skin firm and elastic.

Moving on to other nutrients, limes also contain small amounts of vitamins A and E, as well as minerals like calcium, potassium, and magnesium. These nutrients, along with the vitamin C content, make limes a great addition to any healthy diet.

Other Nutrients

Additionally, limes are a good source of vitamins A and E, as well as minerals such as calcium, potassium, and magnesium. These nutrients are essential for the proper functioning of our body.

Lime juice not only adds flavor to your food, but it also helps in preserving the nutrients present in the food. Maximizing the flavor of lime juice is important, and it can be achieved by squeezing fresh limes rather than using bottled juice.

Advertisement

When it comes to preserving nutrients, it’s important to handle the limes properly. Store them in a cool, dark place and avoid exposing them to sunlight for long periods of time.

When juicing limes, it’s best to use a hand-held juicer instead of an electric one, as the heat generated by the latter can destroy some of the nutrients.

By taking these steps, you can ensure that you’re getting the maximum amount of nutrients from your lime juice.

Limes not only add flavor to your food, but they’re also packed with essential nutrients. By maximizing the flavor of lime juice and preserving its nutrients, you can reap the many health benefits that limes have to offer.

Health Benefits

Limes are a fantastic source of vitamins and minerals that can provide numerous health benefits. Lime juice is loaded with Vitamin C, which is essential for boosting immune function, reducing inflammation, and promoting wound healing.

Advertisement

Moreover, lime juice is rich in flavonoids that possess antioxidant properties. This can help prevent cellular damage and reduce the risk of chronic diseases like cancer and heart disease.

In addition to these health benefits, lime juice can be used in a variety of recipes. It’s a popular ingredient in many cuisines around the world, adding a tangy and refreshing flavor to dishes like guacamole, ceviche, and salsa.

If you don’t have fresh limes on hand, you can use lime juice substitutes like lemon juice, white vinegar, or apple cider vinegar.

Now that we know about the health benefits of limes, let’s take a closer look at how to select and store them properly.

How to Select and Store Limes

When I’m selecting limes, I always look for ones that are heavy for their size and have smooth skin with no blemishes.

Advertisement

To ensure they stay fresh, I store them in a cool, dry place, away from direct sunlight.

Limes can last up to two weeks if stored properly, but it’s always best to use them as soon as possible for the most flavor and nutritional benefits.

Choosing Ripe Limes

To make sure you get the most juice out of your lime, make sure it feels heavy for its size and has a slightly soft exterior. When selecting ripe limes, color isn’t a reliable indicator of ripeness as limes can be green, yellow, or even orange when fully ripe.

Instead, gently press the lime with your thumb to feel for a slight give. This indicates that the lime is juicy and ready to use. When testing lime ripeness, it’s important to note that limes don’t ripen further once they’re picked.

Therefore, it’s crucial to select ripe limes at the store or farmers market. By choosing ripe limes, you’ll be able to extract more juice and get the most flavor out of your citrus. Proper storage methods are also important in maintaining the freshness of your limes.

Advertisement

Proper Storage Methods

Preserve the tangy flavor of your freshly picked citrus by storing them in a cool, dry place with good air circulation. Proper storage is essential in preserving the quality of your limes.

Optimal conditions for storing limes are between 45 to 50 degrees Fahrenheit with a humidity level of 85 to 90 percent. Keep in mind that storing limes at higher temperatures could cause them to dry out faster and lose their flavor.

To maintain the freshness of your limes, you need to store them in a container that can provide protection from the environment. Some good container options include a plastic bag with small holes for ventilation, a perforated plastic container, or a mesh bag. Avoid using sealed plastic bags or containers as they can trap moisture and promote mold growth.

Proper storage is just the first step in keeping your limes fresh. The next section will cover the shelf life of limes and how to tell if they’re still good to use.

Shelf Life

After learning about the proper storage methods for limes, it’s important to understand their shelf life. Limes have a limited lifespan and will expire if left unattended, so it’s crucial to consume or preserve lime juice before it goes bad.

Advertisement

The shelf life of limes largely depends on their ripeness at the time of purchase. Ripe limes typically have a shorter shelf life than unripe ones. On average, limes can last up to two weeks when stored at room temperature and up to a month when refrigerated.

However, as limes begin to age, their skin may start to shrivel and the juice may become less flavorful. To prevent expiring limes, it’s best to store them in a cool, dry place and consume them as soon as possible.

Alternatively, you can preserve lime juice by freezing it in an airtight container or by using it in recipes that call for lime juice, such as marinades or sauces. By doing so, you can extend the shelf life of your limes and ensure that they don’t go to waste.

Frequently Asked Questions

What are some common lime varieties used for juicing?

I prefer using Persian limes for juicing as they produce more juice than Key limes. I recommend using a lime squeezer for maximum extraction efficiency, as hand juicing can result in lower yields.

How does the ripeness of a lime affect its juice yield?

Ripeness impact on lime juice yield is significant. Through my juicing techniques, I found that ripe limes produce more juice than unripe ones. This was confirmed by data-driven analysis using a refractometer and pH meter.

Advertisement

Are there any tools or gadgets that can help extract more juice from a lime?

I’ve found that using a manual citrus press or an electric juicer can increase lime juice yield. Additionally, zesting the lime before juicing can release more oils and enhance flavor. Experimenting with different techniques and tools can lead to optimal results.

Can lime juice be frozen for later use?

I freeze lime juice in ice cube trays for later use. Benefits include saving time and money, and having fresh juice available year-round. Freezing methods vary, but I prefer to add a pinch of salt to enhance flavor.

What are some common substitutes for lime juice in recipes?

When substituting lime juice, consider using lemon juice, vinegar, or citric acid. Each has its own pros and cons. To make homemade lime juice concentrate, juice limes and reduce the liquid in a pot.

Conclusion

In conclusion, I’ve discovered that the average lime produces approximately 1-2 tablespoons of juice. However, this yield can vary greatly depending on factors such as ripeness, temperature, and juicing method. It’s important to keep these factors in mind when preparing recipes that call for lime juice. Additionally, the size of the lime can also affect the juice yield, with larger limes typically providing more juice. If you’re aiming for a more consistent result, it’s a good idea to have an extra lime or two on hand just in case. Ultimately, the juice yield from one lime can vary, so tasting and adjusting to achieve the desired flavor is key when cooking or preparing beverages.

One particularly interesting statistic that I came across is that lime juice has been found to contain high levels of citric acid, which can help to prevent the growth of bacteria and viruses. This means that incorporating lime juice into your diet can potentially boost your immune system and protect against illnesses.

Advertisement

So, the next time you reach for a lime, remember the potential health benefits that come along with it.

Continue Reading

Affiliate disclaimer

As an affiliate, we may earn a commission from qualifying purchases. We get commissions for purchases made through links on this website from Amazon and other third parties.

Vetted

effortless juice extraction machines effortless juice extraction machines
Vetted3 months ago

15 Best Cold Press Juicers With Large Feed Chutes for Effortless Juice Extraction

Discover the 15 best cold press juicers with large feed chutes for effortless juice extraction, but which one will be...

top coffees for french press top coffees for french press
Vetted3 months ago

15 Best Coffees for French Press That Will Elevate Your Brewing Game

Imagine brewing the perfect cup of coffee with our top 15 picks for French press; you won't want to miss...

top cold press juicers reviewed top cold press juicers reviewed
Vetted3 months ago

15 Best Cold Press Juicers on Amazon: A Comprehensive Review for Health Enthusiasts

Discover the top 15 cold press juicers on Amazon that maximize nutrients and flavors; find out which models made the...

top cachoo juicers 2024 top cachoo juicers 2024
Vetted3 months ago

15 Best Cachoo Cold Press Juicers of 2025 – Our Top Picks for Fresh Juice Lovers

Find the perfect Cachoo cold press juicer for your kitchen in 2025 and discover the unique benefits that await your...

top organic coffees 2024 top organic coffees 2024
Vetted3 months ago

15 Best Organic Coffees of 2025 – Savor the Purest Brews

Get ready to indulge in the 15 best organic coffees of 2025, where exceptional flavors await—discover which brews made the...

top 15 easy clean juicers top 15 easy clean juicers
Vetted3 months ago

The 15 Best JE-60 Easy Clean Slow Cold Press Juicers of 2025 – Your Guide to Healthier Juicing

Discover the top 15 JE-60 Easy Clean Slow Cold Press Juicers of 2025 that transform your juicing experience—find out which...

best dual coffee makers best dual coffee makers
Vetted3 months ago

15 Best Dual Coffee Makers of 2025 – Brew Your Perfect Cup Every Time

Master the art of coffee brewing with the 15 best dual coffee makers of 2025, and discover which one will...

top cold press juicers 2024 top cold press juicers 2024
Vetted3 months ago

15 Best Cold Press Juicers for Pure Juice Lovers in 2025 – Expert Reviews & Recommendations

The 15 best cold press juicers for pure juice lovers in 2025 offer unmatched efficiency and nutrient retention, but which...

top espresso coffee grinders top espresso coffee grinders
Vetted3 months ago

15 Best Coffee Grinders for Espresso Lovers: Expert Reviews & Recommendations

Learn about the 15 best coffee grinders for espresso lovers, featuring expert recommendations that could elevate your brewing experience to...

top cold press juicers 2024 top cold press juicers 2024
Vetted3 months ago

15 Best Atsent Cold Press Juicers of 2025 – Fresh Juice at Your Fingertips

Discover the top 15 Atsent cold press juicers of 2025 that guarantee fresh juice at home; find out which model...

top espresso coffee beans top espresso coffee beans
Vetted3 months ago

15 Best Coffee Beans for Espresso That Will Elevate Your Brewing Game

Sip your way to espresso perfection with these 15 exceptional coffee beans that promise to transform your brewing game—discover the...

top cold press juicers 2024 top cold press juicers 2024
Vetted3 months ago

15 Best Prefix Cold Press Juicers of 2025: 10 Individual Suggestions You Can’t Miss

Navigate through the 15 best cold press juicers of 2025 and uncover top picks that will revolutionize your juicing experience—discover...

Trending