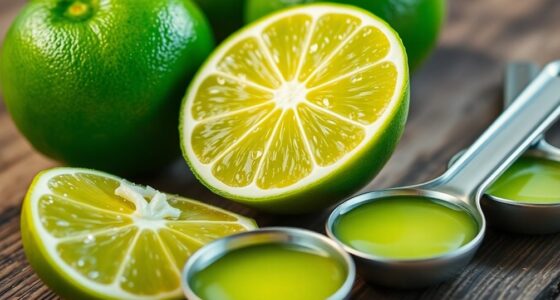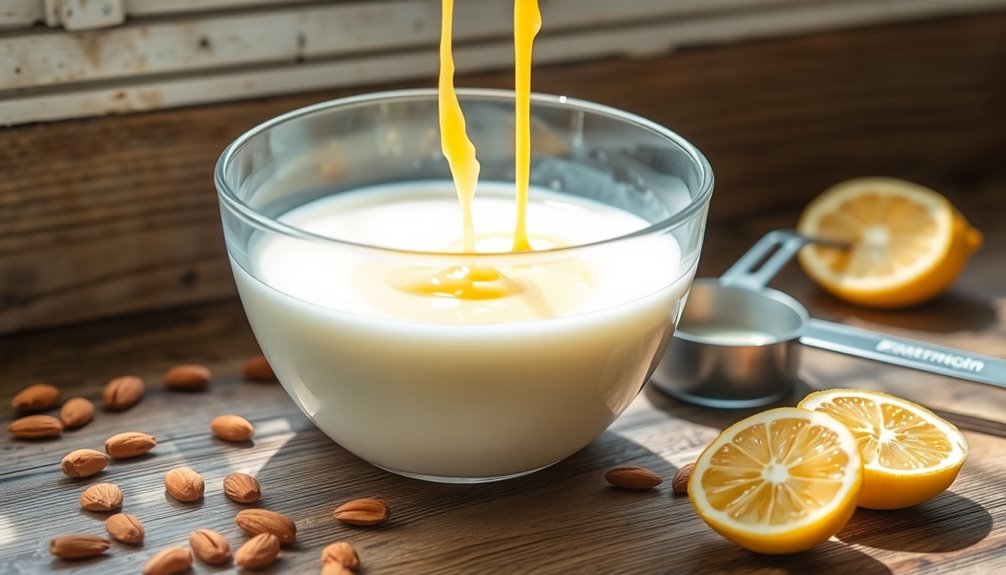
To make buttermilk with almond milk and lemon juice, combine 1 cup of unsweetened almond milk with 1 tablespoon of lemon juice in a measuring cup. Stir gently and let it sit at room temperature for 3-5 minutes. You'll notice it curdles slightly, mimicking the texture of traditional buttermilk. This dairy-free alternative is perfect for fluffy pancakes, moist muffins, and more. Stick around to discover how to use it in your favorite recipes!
Key Takeaways
- Combine 1 tablespoon of lemon juice or white vinegar with 1 cup of unsweetened almond milk in a measuring cup.
- Stir the mixture gently to ensure the ingredients are well combined.
- Let the mixture sit at room temperature for 3-5 minutes to develop a buttermilk-like texture.
- Observe slight curdling, which mimics traditional buttermilk consistency.
- Use this almond milk buttermilk as a 1:1 substitute in your favorite recipes.
If you're looking for a dairy-free alternative to traditional buttermilk, you can easily make your own using almond milk. This homemade vegan buttermilk is a simple and effective substitute for buttermilk in your favorite recipes. Whether you're whipping up pancakes, muffins, or quick breads, having a reliable non-dairy milk option on hand can elevate your baking game while keeping it plant-based.
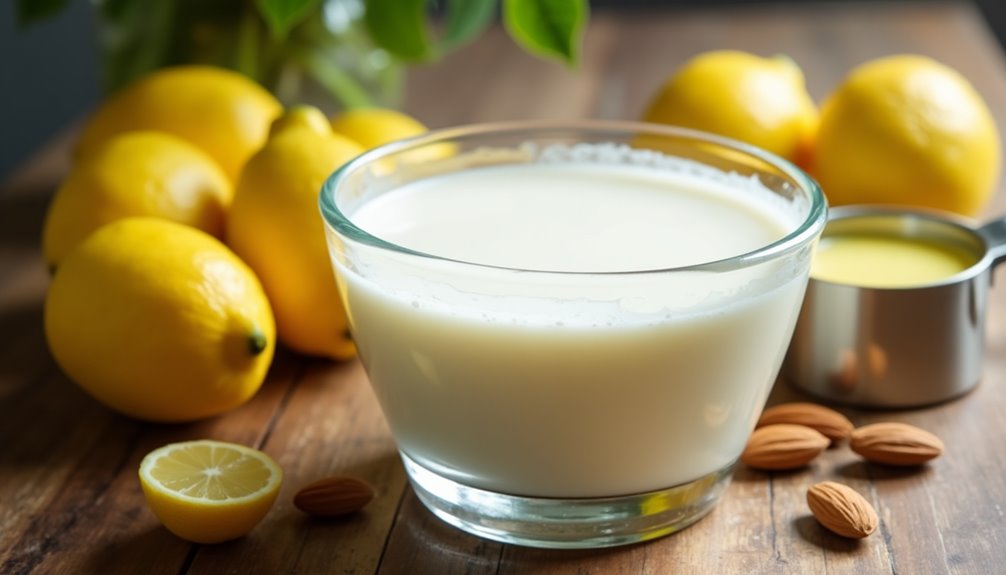
To create your homemade almond milk buttermilk, grab a measuring cup and combine 1 tablespoon of lemon juice or white vinegar with 1 cup of unsweetened almond milk. Make sure to use unsweetened almond milk; this helps maintain the right flavor balance in your baked goods. If you can find a barista version of almond milk, that's even better, as it tends to have a creamier consistency that can yield superior results.
Once you've mixed the lemon juice with the almond milk, stir the mixture gently, then let it sit at room temperature for about 3-5 minutes. During this time, the acid from the lemon juice will cause the almond milk to curdle slightly, mimicking the texture of traditional buttermilk.
This quick process transforms ordinary almond milk into a fantastic 1:1 substitute for buttermilk, allowing you to seamlessly incorporate it into your recipes. Whether you're making fluffy pancakes or moist muffins, using your homemade almond milk buttermilk will add a delightful tanginess that enhances the overall flavor. Just remember that this vegan version works best in recipes that call for buttermilk, so don't hesitate to experiment with it.
If you happen to have leftovers, you can store your almond milk buttermilk in an airtight container in the fridge for up to 3-4 days. This is perfect if you plan to bake multiple batches of your favorite treats over the week.
Alternatively, if you want to get ahead of your baking game, you can freeze the leftover buttermilk in ice cube trays. This allows you to have easy access to your homemade vegan buttermilk for up to 3 months. When you're ready to use it, simply thaw the desired amount and shake it well before incorporating it into your recipes.
Frequently Asked Questions
Can You Use Almond Milk to Make Buttermilk?
Yes, you can definitely use almond milk to make a buttermilk substitute.
Just combine unsweetened almond milk with an acid, like lemon juice or vinegar. Let it sit for a few minutes to curdle slightly; this'll give you that tangy flavor you need for baking.
While it won't thicken like traditional buttermilk, it still works great in recipes like pancakes and muffins, making it a perfect vegan option.
Will Almond Milk Curdle With Lemon Juice?
Did you know that around 60% of people prefer almond milk over dairy?
When you mix almond milk with lemon juice, it can indeed curdle! The acidity from the lemon juice interacts with the proteins in almond milk, leading to a thicker texture.
Just combine unsweetened almond milk with lemon juice and let it sit for about 5 minutes. You'll notice tiny bubbles forming, creating a vegan-friendly alternative for recipes needing buttermilk.
Does Lemon and Almond Milk Go Together?
Absolutely, lemon and almond milk go together!
When you combine them, the acidity of the lemon juice interacts with the almond milk, creating a unique flavor profile that’s both tangy and creamy. This blend can enhance your recipes, especially in baking. The tanginess of the lemon juice and the creaminess of the almond milk work together to elevate dishes, providing a delightful contrast that can surprise the palate. Additionally, if you want to experiment further, consider incorporating some juice yield from a lime for an extra citrusy kick that brightens up the overall taste. This combination not only adds depth but also makes your baked goods more vibrant and interesting.
Just remember to use unsweetened almond milk to keep the flavor balanced. Letting the mixture sit for a few minutes will also help achieve a nice consistency for your dishes!
Can I Use Milk and Lemon Juice Instead of Buttermilk?
You know what they say, "When life gives you lemons, make something delicious!"
Yes, you can absolutely use milk and lemon juice instead of buttermilk. Just mix one tablespoon of lemon juice with a cup of milk and let it sit for about five minutes.
This mixture will curdle, mimicking buttermilk's tangy flavor and thicker texture, perfect for your baking needs. Use it in a 1:1 ratio whenever a recipe calls for buttermilk!
Conclusion
By using almond milk and lemon juice, you've created a dairy-free buttermilk that's just as versatile and delicious. You've embraced creativity in the kitchen, you've catered to dietary needs, and you've empowered your cooking. Whether you're baking fluffy pancakes or making tangy dressings, you're now equipped with a simple substitution that opens up new culinary possibilities. So go ahead—enjoy your homemade buttermilk, celebrate your resourcefulness, and savor every bite of your delicious creations.

Cindy thoroughly researches juicing trends, techniques, and recipes to provide readers with practical advice and inspiration. Her writing style is accessible, engaging, and designed to make complex concepts easy to understand. Cindy’s dedication to promoting the advantages of juicing shines through her work, empowering readers to make positive changes in their lives through the simple act of juicing.