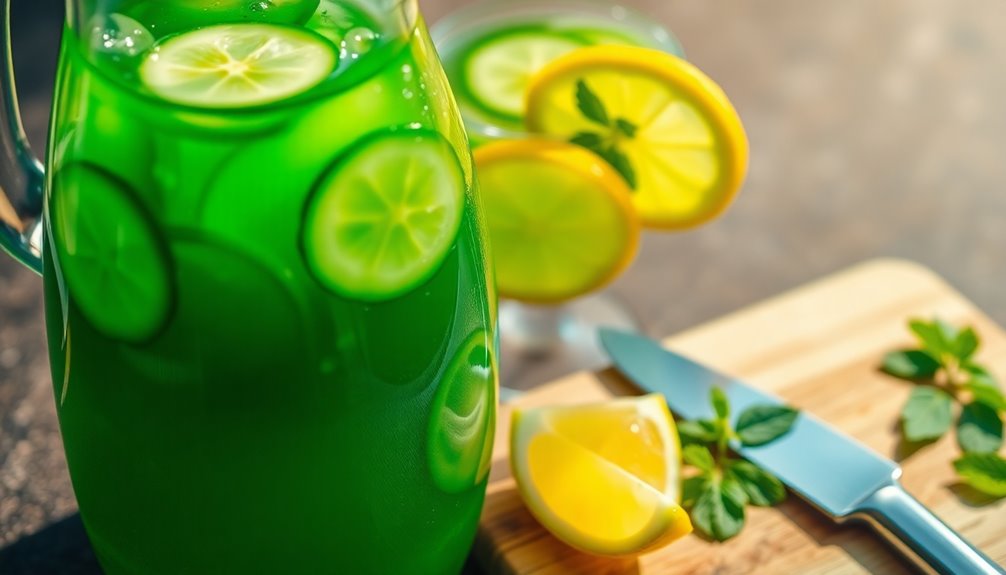
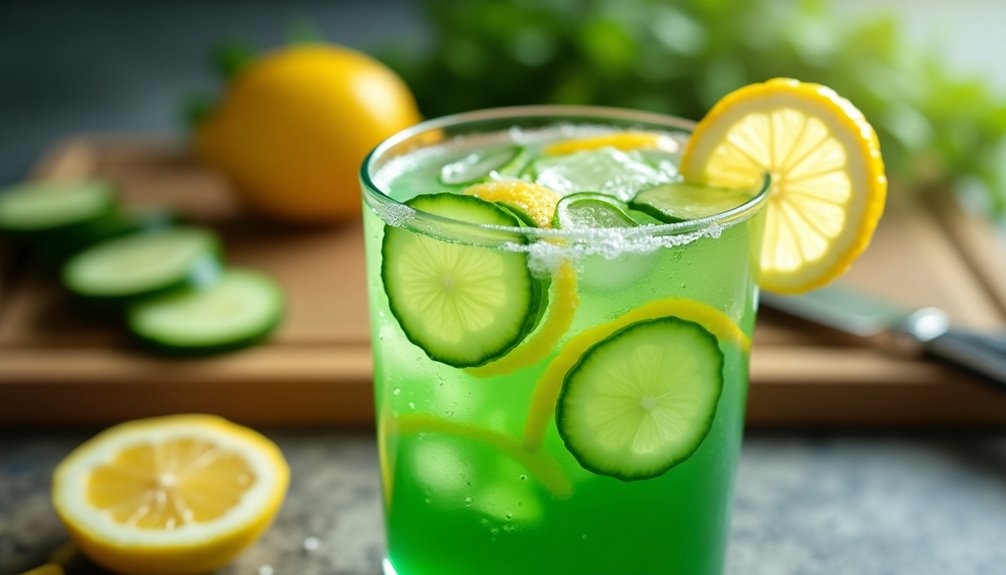
Connect with us

Juice Tips and Tricks

How To Make Cucumber Juice With Lemon

Published

on

Crafting a cucumber juice with lemon is akin to constructing a cool haven amidst a sizzling summer day. The mixture of cucumber’s soothing and moisturizing benefits with the sharp zest of lemon results in a tasty and nutritious beverage that is perfect for sipping at any moment throughout the day.

As someone who loves to experiment with new recipes and ingredients, I was excited to try making cucumber juice with lemon for the first time. Not only is it a great way to incorporate more fruits and vegetables into your diet, but it also has numerous health benefits that make it a worthwhile addition to your wellness routine.

In this article, I will guide you through the simple steps of making cucumber juice with lemon, share some variations you can try, and provide tips for getting the perfect blend every time.

So, let’s get started!

Key Takeaways

  • Choosing the right type of cucumber and using proper slicing techniques are important factors in making cucumber juice with lemon.
  • Lemon can be used as a sweetener and has several nutritional benefits, and a high-speed blender will give a smoother consistency.
  • Straining the juice will ensure a smooth and enjoyable drinking experience, and cucumber juice with lemon is low in calories and high in vitamins and minerals.
  • Adding other fruits and vegetables can create a unique flavor profile and boost nutritional value, and cucumber juice can be used as a base for salad dressings or as a marinade for chicken or fish.

Gather Your Ingredients

You’ll need to grab some cucumbers and a lemon to whip up this refreshing juice. Make sure to choose fresh, firm, and unblemished cucumbers.

As for the lemon, you can use any variety you like. Meyer lemons, for example, have a sweeter and less tart flavor than regular lemons, which can be a great option if you prefer a milder taste. If you don’t have a lemon on hand, you can also use lime or grapefruit juice as an alternative.

Advertisement

If you’re looking to change up the flavor of your cucumber juice, you can experiment with different lemon variations. For instance, you can try adding a splash of lemon juice to your cucumber juice along with some ginger or mint for an extra zing. Alternatively, you can use preserved lemons, which have a salty and tangy flavor that pairs well with cucumbers.

Once you’ve gathered your ingredients, it’s time to prep your cucumbers.

Prep Your Cucumbers

First, grab some fresh cucumbers from the market or your own garden and rinse them under cool water to remove any debris. When it comes to cucumber juice, slicing techniques and choosing the right type of cucumber are important factors to consider. For juicing, it’s recommended to use English or Persian cucumbers, as they have less seeds and a sweeter taste compared to regular cucumbers.

To prep your cucumbers, start by trimming off both ends. Then, depending on the size of your juicer, slice the cucumbers into thin rounds or long strips that can easily fit into the juicer chute. If you’re using a blender, you can also roughly chop the cucumber into smaller pieces. Keep in mind that the more you chop the cucumber, the easier it will be for the blender to blend it into a smooth consistency. With your cucumbers prepped and ready to go, it’s time to move onto the next step and blend your cucumbers with lemon.

Blend Your Cucumbers

Now that your cucumbers are prepped, it’s time to blend them with a tangy twist. You can use any blender you have at home to make cucumber juice, but a high-speed blender will give you a smoother consistency. Make sure to cut the cucumbers into small pieces before adding them to the blender. You can also add a little bit of water to help with blending.

Advertisement

When blending the cucumbers, start with a low speed and gradually increase to high speed. Blend for about 2-3 minutes or until the cucumber pieces are completely pureed. The consistency of your cucumber juice will depend on how well you blend it.

If you prefer a thinner consistency, you can strain the juice through a fine-mesh strainer to remove any pulp or seeds. To sweeten to taste (optional), you can add lemon juice or honey to the cucumber juice.

Sweeten to Taste (Optional)

For those with a sweet tooth, there’s no harm in adding a touch of honey to your blended cucumber concoction. However, if you’re looking for a healthier alternative, consider sweetening your cucumber juice with lemon.

Lemon not only adds a refreshing tang, but it also has several nutritional benefits. It’s high in vitamin C, which boosts the immune system, and it helps with digestion and detoxification.

When mixing your cucumber juice with lemon, there are a few techniques you can use to ensure that the flavors are evenly distributed. First, you can mix the lemon juice and honey (if using) in a separate bowl before adding it to the blended cucumbers. Alternatively, you can add the lemon juice and honey directly to the blender while it’s running.

Advertisement

Either way, make sure to taste the mixture before serving and adjust the sweetness to your liking. Now that your cucumber juice is perfectly sweetened, it’s time to strain it to remove any pulp or seeds.

Strain Your Juice

Just like removing the thorns from a rose before giving it as a gift, straining your blended cucumber and lemon concoction will ensure a smooth and enjoyable drinking experience. No one likes a lumpy or chunky juice consistency, so taking the extra step to strain your juice will elevate the overall quality of your drink.

There are several straining methods you can use, depending on the tools you have available and your personal preference. First, you can strain the juice through a fine mesh sieve. This method is simple and effective, as it catches the majority of the pulp and seeds. Another option is to use cheesecloth or a nut milk bag to filter out any remaining solids. This method may take a bit longer, but it results in an even smoother juice consistency. Whichever method you choose, be sure to press down on the solids to extract as much juice as possible.

With your cucumber and lemon juice now strained to perfection, it’s time to chill and serve. Adding ice cubes or freezing the juice beforehand will provide a refreshing and thirst-quenching beverage. Alternatively, you can mix in some sparkling water or soda for a bubbly twist. The possibilities are endless, but one thing’s for sure – your homemade cucumber and lemon juice will be a hit with friends and family alike.

Chill and Serve

Chilling and serving this refreshing and smooth cucumber juice with lemon will give you the perfect thirst-quencher on a hot summer day. To chill, simply put the juice in the refrigerator for about an hour or until it reaches your desired coldness. You can also add ice cubes to make it even colder.

Advertisement

Serving suggestions for this juice are endless. You can add a sprig of mint or basil for a refreshing twist, or even a slice of cucumber or lemon on the rim of your glass.

Cucumber juice with lemon is not only delicious but also packed with nutritional benefits. It’s low in calories and high in vitamins and minerals, making it a perfect addition to any healthy diet.

Moving on, let’s take a look at the health benefits of cucumber juice.

Health Benefits of Cucumber Juice

Indulging in a glass of cucumber juice with lemon can do wonders for your body by boosting your immune system, soothing inflammation, and aiding in digestion. Incorporating cucumber juice benefits into your diet can be an easy and tasty way to improve your overall health. Here are a few reasons why you should consider adding cucumber juice to your daily routine:

  • Cucumber juice is an excellent source of hydration and can help keep your skin looking healthy and glowing.
  • It contains antioxidants that can help protect your cells from damage and reduce the risk of chronic diseases.
  • Cucumber juice is low in calories and high in fiber, which can help keep you feeling full and aid in weight loss.
  • It also contains vitamins and minerals such as vitamin K, potassium, and magnesium, which are essential for maintaining good health.

Incorporating cucumber juice into your diet is a simple way to reap these benefits and improve your overall well-being. Now, let’s explore some variations of cucumber juice to keep things interesting.

Variations of Cucumber Juice

After learning about the various health benefits of cucumber juice, it’s time to explore the different variations that you can make.

Advertisement

While cucumber juice on its own is refreshing and hydrating, adding other fruits and vegetables can create a unique flavor profile and boost its nutritional value. Some popular juice combinations include cucumber and lemon, cucumber and mint, or cucumber and ginger.

Another way to enjoy cucumber juice is by incorporating it into your meals. For example, you can use it as a base for salad dressings or as a marinade for chicken or fish. Cucumber juice also pairs well with sparkling water or mixed with other healthy juices like carrot or beet.

When serving cucumber juice, consider adding a slice of cucumber, lemon, or mint as a garnish for an extra pop of flavor.

As we move into the next section, we’ll explore some tips for making the perfect cucumber juice at home.

Tips for Making the Perfect Cucumber Juice

When making cucumber juice, I always make sure to use fresh cucumbers to get the best flavor and nutrients.

Advertisement

To adjust the sweetness of the juice, I recommend adding natural sweeteners like honey or agave nectar to taste.

Additionally, don’t be afraid to experiment with different flavors by adding herbs like mint or basil, or other fruits and vegetables to create a unique and refreshing drink.

Use Fresh Cucumbers

Using fresh cucumbers in your juice will give it a crisp and refreshing taste that’ll leave you feeling revitalized. Not only does it taste great, but there are also many benefits to consuming cucumbers.

Here are a few reasons why you should use fresh cucumbers in your juice:

  • Cucumbers are high in water content, which makes them great for hydration.
  • They’re low in calories, making them a perfect addition to any diet.
  • Cucumbers are rich in antioxidants, which can help reduce inflammation in the body.
  • They contain vitamins and minerals such as vitamin K, magnesium, and potassium.

The best time to consume cucumbers is during the summer months when they’re in season and at their freshest.

By using fresh cucumbers in your juice, you can enjoy all of these benefits while also enjoying a delicious and refreshing beverage. To enhance the flavor, you can adjust the sweetness to taste using lemon or other natural sweeteners.

Advertisement

Adjust Sweetness to Taste

To truly customize the flavor of your refreshing cucumber juice with lemon, try experimenting with natural sweeteners until you find the perfect balance for your taste buds. While traditional sugar or honey are great options, you can also try alternative sweeteners like agave nectar, stevia, or maple syrup. These natural sweeteners are healthier alternatives to refined sugar and can add a unique depth of flavor to your drink.

Experimenting with ingredients is all about finding what works best for your taste buds. Start by adding a small amount of your chosen sweetener and then gradually increase until you reach your desired level of sweetness. Remember, you can’t take it away once it’s in there, so go slow.

Once you’ve found the perfect level of sweetness, move on to the next step and start experimenting with flavors to really make your cucumber juice with lemon stand out.

Experiment with Flavors

Now that we’ve discussed how to adjust the sweetness level of our cucumber and lemon juice, let’s move on to experimenting with different flavor combinations. Adding other fruits or vegetables can really enhance the taste of your juice and make it even more refreshing.

Some popular options include mint, ginger, pineapple, and even jalapeño for a spicy kick. Don’t be afraid to get creative and try out different combinations to find what works best for your taste buds.

Advertisement

In addition to experimenting with flavors, it’s also important to consider texture preferences. Some people prefer a smooth and creamy juice, while others prefer a more pulpy consistency. If you prefer a smoother texture, simply strain the juice through a fine mesh sieve or cheesecloth before serving.

If you prefer a more pulpy texture, skip the straining step and enjoy the fiber-rich goodness. Ultimately, it’s all about finding what works best for you and your taste buds.

So grab your cucumbers, lemons, and any other ingredients you’d like to add, and start experimenting to create your perfect cucumber and lemon juice.

Frequently Asked Questions

How long does cucumber juice last in the fridge?

I usually keep cucumber juice in the fridge for up to 3 days. After that, it may not taste as fresh. If you have leftover juice, try using it in smoothies or as a base for salad dressing. Make sure to check for any signs of spoilage before consuming.

Can I use a blender instead of a juicer to make cucumber juice?

Yes, you can use a blender to make cucumber juice. However, the taste may differ from using a juicer. The blender will produce a thicker consistency and may require straining. Juicers extract more juice and produce a smoother texture.

Advertisement

How many cucumbers do I need to make a cup of cucumber juice?

To make a cup of cucumber juice, I usually juice about 2-3 medium cucumbers. Cucumber juice benefits include hydration and potential antioxidant properties. To store cucumber juice, keep it refrigerated and consume within 2-3 days.

Is it necessary to peel the cucumbers before juicing them?

Peeling cucumbers isn’t necessary before juicing them, but it’s a personal preference. The skin contains fiber and nutrients, but it also has a bitter taste. Removing it won’t significantly affect the juice’s nutritional value.

Can I add other fruits or vegetables to my cucumber juice?

Adding ginger to cucumber juice can increase its anti-inflammatory properties and aid in digestion. The best time to drink cucumber juice with other fruits is in the morning on an empty stomach for optimal absorption of nutrients.

Conclusion

So there you have it, folks! Making cucumber juice with lemon is a simple and easy process that can provide numerous health benefits.

From aiding in digestion to promoting hydration, cucumber juice is a refreshing and nutritious addition to any diet. And with the added touch of lemon, this juice becomes a tasty treat that can be enjoyed any time of day.

Advertisement

As the old adage goes, "an apple a day keeps the doctor away."But why limit ourselves to just apples? By incorporating fresh fruits and vegetables into our diets, we can improve our overall health and well-being.

So go ahead and give cucumber juice with lemon a try – your body will thank you for it!

Cindy thoroughly researches juicing trends, techniques, and recipes to provide readers with practical advice and inspiration. Her writing style is accessible, engaging, and designed to make complex concepts easy to understand. Cindy's dedication to promoting the advantages of juicing shines through her work, empowering readers to make positive changes in their lives through the simple act of juicing.

Continue Reading
Advertisement

Juice Tips and Tricks

How To Make Jersey Mike’s Juice

Published

on

By

I have always loved the taste of Jersey Mike’s juice, and after trying multiple times, I have finally perfected the recipe.

If you haven’t tried it yet, you’re in for a treat. This refreshing juice is made with a blend of oranges, apples, pineapples, and carrots, making it a delicious and nutritious way to start your day.

To make Jersey Mike’s juice at home, you’ll need a few simple ingredients and a blender. In this article, I’ll walk you through the steps to make this delicious juice, including tips for adjusting the flavor to your liking and storing it properly.

Whether you’re looking for a healthy breakfast option or a refreshing drink to enjoy throughout the day, Jersey Mike’s juice is a great choice.

So let’s get started!

Advertisement

Key Takeaways

  • Jersey Mike’s juice is made with oranges, apples, pineapples, and carrots, and can be adjusted with sweeteners like honey or different fruits.
  • Blending techniques include layering ingredients in the correct order and pulsing the blender, and the juice can be strained for a smoother texture.
  • Storing the juice properly includes refrigerating immediately, using an airtight glass container, and labeling with the date, and freezing is an option for long term preservation.
  • Jersey Mike’s juice is refreshing and nutritious, providing numerous health benefits and serving as a great alternative to sugary drinks.

Gather Your Ingredients

Gathering your ingredients for making Jersey Mike’s juice is essential, so don’t forget to grab all the necessary items before you begin. You’ll need fresh oranges, lemons, limes, and grapefruits — make sure they’re ripe and juicy. If you can’t find the citrus fruits you need, you can substitute with bottled juice, but fresh juice is always better.

In addition to the citrus fruit, you’ll need sugar and water. You can also substitute sugar with honey or agave nectar if you prefer. Before starting, make sure your blender’s clean and ready to use.

Prepping your blender is the next step to making the perfect Jersey Mike’s juice.

Prepping Your Blender

Before blending, make sure your blender is clean and dry to prevent contamination or damage. Here are some cleaning and maintenance tips I follow to keep my blender in top shape:

  1. Disassemble the blender and clean each part separately, including the lid, jar, blade, and any other detachable parts.

  2. Wash each piece with warm soapy water and a soft sponge, avoiding abrasive materials that may scratch the blender’s surface.

  3. Rinse each piece thoroughly with water and dry them with a clean towel.

  4. Reassemble the blender and store it in a cool, dry place.

By following these simple steps, you can ensure your blender stays in great condition for years to come.

Now that your blender is ready to go, let’s move on to the next step of preparing the juice.

Advertisement

Preparing the Juice

Now that your blender is all set, let’s start whipping up some deliciously refreshing juice! When it comes to preparing the juice, there are a few important blending techniques to keep in mind. First, it’s important to layer the ingredients in the blender in the correct order. Start with the liquid ingredients, followed by the softer fruits and vegetables, and finish with the harder ingredients like ice and frozen fruits. This will ensure that all the ingredients blend evenly and smoothly.

Another important blending technique is to pulse the blender rather than blend continuously. This will prevent the juice from becoming too frothy or over-blended, which can affect the taste and texture. If you prefer a smoother juice, you can strain it through a fine mesh sieve or cheesecloth before serving. Additionally, if you don’t have a blender, there are fresh juice alternatives such as a juicer or hand-held citrus press that can still produce delicious and healthy juice.

Now that we have the juice blended to perfection, it’s time to adjust the flavor to your liking.

Adjusting the Flavor

Once the juice is blended, it’s time to tweak the flavor to your liking. Adding sweetener is a great way to make the juice more palatable. I like to use honey to add a touch of sweetness. It blends well with most fruits and gives the juice a subtle sweetness without overpowering the natural flavors.

For a tangy kick, try adding a squeeze of lemon juice. It’s a great way to brighten up the flavor and add a little zing to your juice.

Advertisement

Experimenting with different fruits is also a great way to adjust the flavor of your juice. Some fruits are naturally sweeter than others, so you may need to add less sweetener to achieve the desired taste. For example, adding a ripe banana to your juice will add natural sweetness and creaminess. Or, adding a handful of berries will add a tartness that pairs well with sweeter fruits like pineapple or mango.

Once you’ve adjusted the flavor to your liking, it’s time to move on to storing the juice.

Storing the Juice

To keep your freshly blended Jersey Mike’s juice at its best, it’s important to store it properly. Here are some tips:

  1. Refrigerate your juice immediately after making it. This will slow down the oxidation process and prevent spoilage.

  2. Use a glass container with an airtight lid to store your juice. This will help to preserve the nutrients and prevent contamination.

  3. Label your container with the date you made the juice. This will help you keep track of how long it’s been in the fridge.

  4. For long term preservation, consider freezing your juice. Pour your juice into ice cube trays and freeze. Once frozen, transfer the cubes to a freezer-safe container and store in the freezer for up to 6 months.

If you don’t have a lot of fridge space or want an alternative storage method, you can also consider using a vacuum sealer. This will remove all the air from the container and help to prevent oxidation and spoilage. Just be sure to follow the manufacturer’s instructions for proper use.

Now that you know how to store your Jersey Mike’s juice properly, let’s move on to some serving suggestions.

Advertisement

Serving Suggestions

Let’s explore some delicious ways to enjoy your freshly blended Jersey Mike’s juice. Whether you’re hosting a party or simply looking for a refreshing beverage to pair with your meal, there are plenty of options to choose from. Here are a few juice pairing ideas to get you started:

Party Drinks Juice Pairing Ideas
Margaritas Pineapple Juice
Mojitos Lime & Mint Juice
Sangria Mixed Berry Juice
Bellinis Peach Juice
Mimosas Orange Juice

These classic party drinks are a great complement to the sweet and tangy flavors of Jersey Mike’s juice. For a non-alcoholic option, try pairing our juice with sparkling water or adding it to a smoothie bowl for a healthy and delicious breakfast. Now that you have some ideas for serving your Jersey Mike’s juice, let’s learn about the health benefits it provides.

Health Benefits of Jersey Mike’s Juice

Discover how our freshly blended juice can contribute to your health with its array of nutritional benefits. Jersey Mike’s Juice isn’t just delicious, it’s packed with nutrients that can help detoxify your body and boost your immune system.

Our juice is made with fresh fruits and vegetables that are rich in vitamins, minerals, and antioxidants, making it an excellent choice for those looking to improve their health. One of the key benefits of Jersey Mike’s Juice is its detoxifying properties. The combination of fruits and vegetables in our juice can help flush toxins from your body, leaving you feeling rejuvenated and refreshed.

Additionally, our juice contains immune-boosting ingredients that can help strengthen your body’s natural defense mechanisms. Whether you’re looking to kick-start a healthy lifestyle or simply want to add more nutrients to your diet, Jersey Mike’s Juice is the perfect choice.

Advertisement

By choosing Jersey Mike’s Juice over other beverages, you can enjoy a delicious drink that also provides numerous health benefits. In the next section, we’ll compare our juice to other popular drinks on the market and show you why Jersey Mike’s Juice is the clear winner when it comes to nutrition.

Comparison with Other Beverages

You’ll be amazed at how Jersey Mike’s Juice stacks up against other juice options in terms of nutritional value. Its blend of fresh fruits and vegetables provides a powerful punch of vitamins, minerals, and antioxidants that can help boost your overall health and well-being.

Juice options in the market today are often packed with added sugars, artificial flavors, and preservatives, which can be detrimental to our health in the long run. Jersey Mike’s Juice, on the other hand, is free from these harmful additives and is made with only the freshest ingredients.

Taste preferences also play a significant role when it comes to choosing a beverage. Some people prefer sweet, sugary drinks, while others prefer something more tart or sour. Jersey Mike’s Juice offers a perfect balance of flavors, with its blend of fruits and vegetables resulting in a refreshing and delicious taste.

It is a great alternative to sugary drinks and is perfect for those who want to enjoy a tasty and healthy beverage. So, the next time you’re looking for a refreshing drink, consider giving Jersey Mike’s Juice a try.

Advertisement

Frequently Asked Questions

How long does it take to make Jersey Mike’s juice?

The preparation steps for Jersey Mike’s juice vary depending on the recipe, but generally take a few minutes to complete. Equipment needed may include a blender or juicer. Proper storage and refrigeration can extend the juice’s shelf life.

Can I use a regular blender instead of a high-speed one?

Yes, you can use a regular blender instead of a high-speed one for making juice. However, you may need to modify the recipe to ensure a smoother consistency. Consider blending ingredients in smaller batches and adding more liquid as needed. Experiment with blender options to find what works best for you.

Is it necessary to strain the juice after blending?

Straining the juice after blending is not necessary, but it can improve juice consistency. Some nutrients and fiber may be lost during the straining process, affecting the nutritional value.

Can I add other fruits or vegetables to the juice recipe?

Yes, you can modify the juice recipe by adding other fruits or vegetables. Incorporating alternative ingredients such as kale, spinach, or ginger can enhance the nutritional benefits of the juice. Experiment with different combinations to find your preference.

How often should I drink Jersey Mike’s juice to reap its health benefits?

To maximize the Benefits of Jersey Mike’s Juice for Weight Loss and get an Energy Boost, I drink it every morning. It jumpstarts my day and keeps me full until lunch. Plus, the natural sweetness is a delicious treat!

Advertisement

Conclusion

Overall, making Jersey Mike’s juice is a relatively simple process that can be easily done at home with the right ingredients and tools. By following the steps outlined in this article, you can create a delicious and refreshing drink that is packed with health benefits.

Whether you’re looking to boost your immune system, improve your digestion, or simply enjoy a tasty beverage, Jersey Mike’s juice is a great option. So why not give it a try and see for yourself? As the old saying goes, "you won’t know until you try."

So grab your blender, gather your ingredients, and get ready to enjoy a fresh and flavorful drink that is sure to become a new favorite.

Continue Reading

Juice Tips and Tricks

How To Make Jelly From Juice

Published

on

By

As a fan of all things sweet and fruity, I have always been intrigued by the idea of making my own jelly using juice. I have encountered several methods, but my objective was to find the correct process and pass that information along to you.

So, after some research and trial and error, I’ve come up with a foolproof method for making homemade jelly from your favorite juice.

First things first, you’ll need to gather your ingredients and equipment. Don’t worry, it’s nothing too complicated. You’ll need juice, pectin, sugar, jars with lids, and a large pot for cooking.

Once you have everything you need, it’s time to get started on making your delicious homemade jelly. So, let’s dive in and I’ll guide you through the process step by step.

Key Takeaways

  • Making homemade jelly requires juice, pectin, sugar, jars with lids, and a large pot.
  • Boil the juice to concentrate flavors and add pectin and sugar. Troubleshoot by adjusting the amount of pectin/sugar or juice and test with a spoon or candy thermometer.
  • Store the jars in a cool, dark place and label them with the date made. They can be stored for up to a year at room temperature or 6 months in the fridge, or frozen for up to 2 years.
  • Homemade jelly can be used in a variety of ways, such as a glaze for meats, appetizer with brie cheese, mix into BBQ sauce, drizzle over ice cream, or fill thumbprint cookies. Creative presentation ideas include using different shapes and sizes of jars and adding fruit slices to the bottom. Alternative ingredients like honey or maple syrup can be used instead of sugar.

Gather Your Ingredients and Equipment

Before you start, make sure you’ve got everything you need: a pot, juice, sugar, pectin, and jars. Creative presentation is also important, so consider using different shapes and sizes of jars or adding fruit slices to the bottom for a pop of color. If you want to try something different, you can also experiment with alternative ingredients like honey or maple syrup instead of sugar.

Once you’ve gathered all your ingredients and equipment, it’s time to prepare your juice.

Advertisement

Prepare Your Juice

To start, you’ll need some fresh fruit and a juicer to extract the liquid gold that will serve as the base for your delicious spread. Imagine the juicer as a miner, sifting through the rough exterior of the fruit to reveal the valuable treasure within.

When selecting your juice, it’s important to choose a flavor that you enjoy and that will complement the other ingredients in the recipe. Popular options include grape, apple, and strawberry, but feel free to experiment with different fruits to create your own unique flavor.

Once you have your juice, it’s time to prepare it for the jelly-making process. Start by pouring your juice into a large saucepan and bringing it to a boil over medium heat. This will help to concentrate the flavors and make it easier to add the pectin and sugar in the next step.

With your juice prepared, it’s time to move on to the next step of the jelly-making process: adding pectin and sugar.

Add Pectin and Sugar

Now that you’ve boiled your fruit nectar, it’s time to add the pectin and sugar to give your spread its signature texture and sweetness.

Advertisement

First, I usually stir in the pectin, which dissolves into the liquid and thickens it slightly. This step is crucial to achieve the desired jelly consistency.

Then, I slowly pour in the sugar, stirring continuously until it’s fully incorporated and the mixture is smooth. The amount of sugar you add will depend on your personal taste, and there are various flavor variations you can experiment with, such as adding spices or herbs.

As you stir in the sugar, you’ll notice the aroma of the fruit intensifying, making your mouth water in anticipation of the final product.

Once everything is well combined, you can start thinking about the next step: cooking your mixture. This will help set the jelly and give it the perfect texture.

Cook Your Mixture

As you cook the mixture, the flavors will meld together and the scent will fill your kitchen, making your mouth water with anticipation for the finished product. Keep stirring the mixture constantly to prevent it from burning or sticking to the bottom of the pot.

Advertisement

The mixture will slowly start to thicken as the pectin and sugar mix together with the juice. You can adjust the consistency by cooking it for a longer or shorter time depending on how thick you want your jelly to be.

If you encounter any problems, such as the mixture not thickening or becoming too thick, there are a few troubleshooting techniques you can try. If the mixture is not thickening, try adding more pectin or sugar to the mixture. If the mixture is becoming too thick, try adding more juice to the mixture to thin it out.

Once the mixture has reached the desired consistency, remove it from the heat and move on to the next step of testing your jelly to ensure that it has set properly.

Test Your Jelly

Now that I’ve cooked my jelly mixture, it’s time to test it.

There are two ways I can do this: using the spoon test or using a candy thermometer.

Advertisement

To perform the spoon test, I’ll dip a spoon into the jelly and watch how it drips off. If it drips in sheets or with a jelly-like consistency, it’s ready.

Alternatively, I can use a candy thermometer to check the temperature of the jelly. It should reach 220°F (104°C) for it to set properly.

Use the Spoon Test

Quickly check the consistency of your jelly with the Spoon Test. Simply dip a spoon into the hot jelly mixture and hold it up to eye level. If the jelly drips off the spoon in a sheet or gels together on the spoon, it’s ready to be canned. However, if it drips off the spoon in drops, it needs to be cooked longer.

The Spoon Test is a quick and easy way to ensure that your jelly will set properly and have the perfect texture. Using the Spoon Test can evoke a sense of excitement and satisfaction as you see the jelly come together on the spoon. It can also spark creativity as you think of alternative methods for using the jelly, such as spreading it on toast or using it as a glaze for meats.

Additionally, experimenting with different flavor variations can add a personal touch to the jelly and make it even more enjoyable to eat. However, if you’re aiming for a specific texture, it’s important to use a candy thermometer to ensure that the jelly reaches the correct temperature.

Advertisement

Use a Candy Thermometer

To ensure that your homemade jelly has the perfect texture, you’ll want to use a candy thermometer. Using a candy thermometer allows for accuracy in temperature control, which is crucial in achieving the desired consistency of your jelly.

Jelly making requires bringing the juice and sugar mixture to a precise temperature, typically between 220 and 225 degrees Fahrenheit. Without a thermometer, it can be difficult to know when the mixture has reached the correct temperature, leading to over or undercooked jelly.

While a candy thermometer is the most accurate way to control the temperature, there are alternatives. Some people use a meat thermometer or a digital thermometer, but these may not be as precise as a candy thermometer. It’s important to note that not using a thermometer at all can lead to inconsistent results.

However, the drawback of using a candy thermometer is that it may not be suitable for all types of pots or pans. Additionally, it may take some practice to get the hang of using a thermometer to make jelly.

Now that you’ve achieved the perfect texture for your jelly, it’s time to fill your jars.

Advertisement

Fill Your Jars

Don’t forget to tightly pack your jars with the colorful and sweet juice, ensuring that each spoonful of jelly will transport you to a moment of pure joy.

Here are some tips to keep in mind when filling your jars:

  1. Use a funnel to avoid any spills or messes.
  2. Leave about 1/4 inch of headspace at the top of each jar.
  3. Wipe off any excess jelly from the rim of the jar before placing the lid on top.
  4. Label each jar with the date and flavor of the jelly, and consider adding some jar decoration for a personal touch.

Once you have all your jars filled, it’s time to seal them up and let the jelly set.

To seal your jars, carefully screw on the lids and place them in a large pot of boiling water. Make sure the water covers the jars by at least an inch, and let them boil for about 10 minutes.

This process will create a vacuum seal and ensure that your jelly stays fresh for months to come.

Seal Your Jars

Once you’ve filled your jars with the delicious jelly, it’s time to seal them up and ensure their safety. Before sealing, it’s important to check each jar for any cracks or chips that could compromise the seal. Also, make sure to wipe the rims of the jars clean to remove any jelly residue that could prevent a proper seal.

Advertisement

To seal your jars, simply place a lid on top of each jar and then screw on the band until it’s just tight enough to hold the lid in place. Don’t overtighten the bands, as this could cause the lid to buckle and prevent a proper seal.

Once all the jars are sealed, it’s time to store them properly. Keep your jars in a cool, dark place, such as a pantry or cupboard, to prevent exposure to sunlight and heat which can cause the jelly to spoil.

Now that your jars are sealed and stored, it’s time to move on to the next step and process them for long-term storage.

Process Your Jars

Now you’re ready to take the next step in preserving your delicious jelly: processing your jars to ensure long-term storage. This step is crucial in making sure your jelly stays fresh for a long time. Below is a table that outlines the sterilization techniques and safety precautions you need to follow before processing your jars.

Sterilization Techniques Safety Precautions
Boiling jars and lids for 10 minutes Use tongs to handle hot jars and lids
Heating jars in an oven at 225°F for 10 minutes Do not touch the jars or lids with bare hands
Using a dishwasher on the hottest cycle Empty dishwasher immediately after cycle and do not touch jars or lids with bare hands

After processing your jars, you may want to decorate them and choose labels to make them look more appealing. This is entirely optional, but it can add a personal touch to your homemade jelly. Once you’ve completed this step, you’re ready to move on to the next section on how to store your jelly.

Advertisement

Store Your Jelly

To keep your homemade jelly fresh and tasty for as long as possible, you’ll need to store it properly. One of the best ways to store jelly is in sterilized jars with tight-fitting lids. Make sure to label the jars with the date you made the jelly so you know when it’s time to use it.

You can store your jelly at room temperature for up to a year, but for longer shelf life, consider refrigerating or freezing it. If you choose to refrigerate your jelly, it can last up to 6 months. Just make sure to keep it in an airtight container or jar to prevent any odors from affecting the taste.

For longer storage, freezing your jelly is the best option. It can last up to 2 years in the freezer without losing its flavor or texture. When you’re ready to use your jelly, just thaw it overnight in the refrigerator and it will be ready to enjoy!

Enjoy Your Delicious Homemade Jelly!

Savor the fruity goodness of your homemade jelly by spreading it on toast or mixing it into yogurt for a delectable treat. But don’t stop there! Get creative and use your homemade jelly in various ways to impress your friends and family.

Here are some serving suggestions:

Advertisement
  • Use it as a glaze for roasted pork or chicken.
  • Spread it over a wheel of brie cheese before baking for a delicious appetizer.
  • Mix it into your favorite BBQ sauce for a sweet and tangy flavor.
  • Drizzle it over vanilla ice cream for a fruity dessert.
  • Use it to fill thumbprint cookies for a burst of flavor in every bite.

With these creative presentation ideas, you can turn your homemade jelly into a versatile ingredient that can be used in a variety of dishes. Impress your guests with your culinary skills and let the fruity goodness of your homemade jelly shine through.

Frequently Asked Questions

How long does it take for the jelly to set?

I find that jelly usually takes about 4-6 hours to set. If it’s not setting properly, try reducing the amount of liquid or adding more pectin. To switch up the flavors, experiment with different fruit juices or add in herbs like mint or lavender.

Can I use artificial sweeteners instead of sugar?

Artificial sweeteners can be used as an alternative to sugar in jelly making. They offer the benefits of being low in calories and not affecting blood sugar levels. However, they may not set as well as sugar.

Can I use frozen juice instead of fresh juice?

Yes, frozen juice can be used as an alternative to fresh juice when making jelly. However, the flavor may differ slightly due to the freezing process. It’s important to thaw the juice completely before using it in the recipe.

How do I prevent my jelly from crystallizing?

As they say, an ounce of prevention is worth a pound of cure. To prevent crystallization in jelly, try adding lemon juice or using pectin in the correct ratios. Troubleshoot common mistakes like overcooking or not enough sugar.

Can I add fruit chunks to my jelly?

Yes, adding fruit chunks to jelly is possible but may affect the consistency and shelf life. Fruitless jelly alternatives include using gelatin or pectin and adding texture with alternative ingredients like nuts or coconut flakes.

Advertisement

Conclusion

Well, that’s it! I’ve successfully made my own homemade jelly from juice. It was a fun and rewarding process that required some patience and attention to detail.

The result is a delicious spread that I can enjoy on toast, pancakes, or even as a glaze for meats.

But wait, there’s more! I can’t wait to experiment with different flavors and juices to create unique and tasty combinations. Maybe I’ll try adding some herbs or spices for an extra kick.

The possibilities are endless and I’m excited to continue my jelly-making journey. If you’re up for a fun and delicious challenge, give it a try yourself and see what creations you can come up with!

Advertisement

Continue Reading

Juice Tips and Tricks

How To Make Grapefruit Juice Taste Better

Published

on

By

After consuming grapefruit juice for many years, I understand that it may not be to everyone’s taste right away. However, due to its many benefits such as reducing inflammation and aiding in weight loss, it is definitely worth exploring ways to appreciate its flavor.

In this article, I’ll share my tips for making grapefruit juice taste better.

First, it’s important to understand the benefits of grapefruit juice. Not only is it packed with vitamins and antioxidants, but it can also help regulate blood sugar levels and improve digestion. By making grapefruit juice taste better, you’ll be more likely to incorporate it into your daily routine, reaping all of these benefits.

So let’s get started!

Key Takeaways

  • Experiment with different grapefruit varieties and mix with other fruits and herbs for a unique flavor combination
  • Add natural sweeteners like honey or maple syrup to balance flavor and dilute with water or sparkling water for a refreshing texture
  • Consider flavor pairing with alcohol, such as vodka, gin, and tequila, and serve chilled for enhanced flavor and aroma
  • Taste test to find the perfect balance of sweetness and tartness, and garnish with fresh fruit or herbs like mint, basil, cucumber, and pomegranate seeds to enhance flavor and appearance.

Understand the Benefits of Grapefruit Juice

You’re gonna love the benefits of grapefruit juice – it’s packed with health benefits and nutritional value that will keep you feeling great!

Grapefruit juice is a rich source of vitamins C and A, which are essential antioxidants that help your body fight off illness and disease. These vitamins also aid in collagen production, which helps keep your skin looking youthful and healthy.

Advertisement

Not only that, but grapefruit juice is also a great source of potassium, which helps regulate blood pressure and reduces the risk of stroke. It’s also low in calories and high in fiber, making it a great addition to any healthy diet.

Now that you understand the amazing benefits of grapefruit juice, let’s move on to choosing the right grapefruits to make your juice taste even better.

Choose the Right Grapefruits

Picking the cream of the crop when it comes to grapefruits is key to crafting a zesty and flavorful juice that’ll knock your socks off.

When selecting grapefruits, it’s important to pay attention to their ripeness levels and flavor profiles. Choosing grapefruits that are too ripe may result in a juice that’s overly sweet, while unripe grapefruits may have a bitter taste.

To ensure that your grapefruit juice has the perfect balance of sweetness and tartness, opt for grapefruits that’re slightly firm to the touch and have a bright, vibrant skin color. Additionally, you can experiment with different varieties of grapefruit, such as pink or red grapefruits, to add a unique flavor profile to your juice.

Advertisement

By choosing the right grapefruits, you can elevate the taste of your grapefruit juice and make it a refreshing and delicious beverage that you can enjoy any time of the day.

Experiment with Different Flavor Combinations

Try mixing different fruits and herbs with your grapefruit to create a unique and refreshing flavor combination that will tantalize your taste buds. Flavor pairing is an art, and it takes some experimenting to find the perfect flavor combination.

You can add some chopped mint leaves, or a slice of cucumber, to your grapefruit juice for a refreshing taste. Adding a pinch of salt can also balance out the bitterness of the grapefruit and enhance the sweetness.

Taste testing is an important part of the process. You can start by adding a small amount of the flavor pairing, and then gradually increase it until you find the perfect blend. You can also try different ratios of grapefruit juice to the added ingredients until you find the right balance.

By experimenting with different flavor combinations, you can create a delicious and unique grapefruit juice that you’ll love.

Advertisement

To further enhance the flavor, we can use natural sweeteners.

Use Natural Sweeteners

If you want to add some sweetness to your grapefruit drink, using natural sweeteners like honey or maple syrup is a great option. Alternative sweeteners are a healthier choice than refined sugar, which can lead to blood sugar spikes and crashes.

Honey is a good choice because it has a unique flavor profile that complements the tanginess of grapefruit. Maple syrup is also a great option, as it adds a rich sweetness that complements the bitterness of grapefruit. These natural sweeteners can be added in small amounts to balance the grapefruit’s flavor without overpowering it.

When using natural sweeteners, it’s important to experiment with different flavor profiles to find the right balance. Some people prefer a sweeter taste, while others prefer a more subtle sweetness. It’s also important to remember that a little goes a long way. Start with a small amount and gradually add more until you achieve the desired taste.

Once you’ve found the right balance, you can adjust the concentration to suit your taste preferences.

Advertisement

Adjust the Concentration

To adjust the concentration of your grapefruit drink, you’ll want to start by adding a small amount of water and gradually increasing it until it reaches your desired strength.

Here are some tips for dilution:

  1. If you want to add fizz to your grapefruit juice, try mixing it with sparkling water or soda. This will give your drink a refreshing and bubbly texture.

  2. Get creative with mix-ins! Try adding a splash of cranberry juice or a sprig of fresh mint to your grapefruit drink. This will add a new dimension of flavor and make your drink more interesting.

  3. Balancing acidity is key when it comes to grapefruit juice. If your drink is too tart, try adding a pinch of salt or a teaspoon of honey to balance out the acidity.

If you’re looking to serve your grapefruit drink as a mocktail or cocktail base, consider flavor pairing with alcohol. Vodka, gin, and tequila all pair well with grapefruit juice. And don’t forget to add ice to your drink for a refreshing finish.

Add Ice

Don’t forget to grab a handful of ice cubes and let them clink into your glass, creating a refreshing and cooling effect on your grapefruit drink. Adding ice to your grapefruit juice not only helps to cool it down, but it also offers a range of benefits.

The ice cubes dilute the juice slightly, making it less overpowering for those who don’t like the strong taste of grapefruit. Plus, the added water from the ice cubes can help you stay hydrated and refreshed throughout the day.

Advertisement

If you’re not a fan of adding ice to your grapefruit juice, there are other alternatives you can try. For example, you can freeze some grapefruit juice into ice cubes and add those instead. This will keep your drink cool without watering it down. Another option is to chill the grapefruit juice in the refrigerator before serving. This ensures that your drink is cool and refreshing without the need for ice.

Ultimately, the choice is yours, but adding ice to your grapefruit juice is an easy and effective way to make it taste better.

As you enjoy your grapefruit juice with ice, remember that serving it chilled is just as important. Keeping your drink cold enhances the flavor and makes it more enjoyable to drink. So, make sure to store your grapefruit juice in the refrigerator, or even better, in the freezer, for a quick and easy way to cool it down.

By doing so, you’ll be able to savor every sip of your delicious and refreshing grapefruit juice.

Serve Chilled

Adding ice is a great way to make grapefruit juice more palatable, but there’s an even better solution – serving it chilled. The benefits of chilling can’t be overstated. Not only does it improve the taste, but it also enhances the aroma and gives the juice a refreshing feel. And let’s not forget the importance of presentation.

Advertisement

Drinking a cold, refreshing glass of grapefruit juice is much more appealing than a lukewarm one. It’s easy to chill grapefruit juice. Simply put it in the fridge for a couple of hours before serving. If you’re in a hurry, you can add some ice cubes to speed up the process. But if you have the time, chilling the juice in the fridge is the better option. It allows the flavors to meld together and creates a more enjoyable drinking experience.

So, next time you’re making grapefruit juice, remember to chill it for a better taste and presentation.

Transitioning to the next section, it’s important to note that there are various ways to prepare grapefruit juice. Trying different preparation methods can enhance the flavor and help you find the perfect recipe for your taste buds.

Try Different Preparation Methods

You can switch up the way you prepare your grapefruit juice and experiment with different methods to enhance its flavor and find your perfect recipe, y’all.

Here are some ideas to get you started:

Advertisement
  • Juice pairing: Consider pairing your grapefruit juice with other juices like orange or pineapple to balance out its tartness.
  • Citrus alternatives: If you’re not a fan of grapefruit’s bitter taste, try using other citrus fruits like lemon or lime to add a tangy flavor to your juice.
  • Infusions: Infuse your grapefruit juice with herbs like mint or basil, or spices like ginger or cinnamon, to add a unique twist to your drink.

By trying out different preparation methods, you can discover the perfect recipe that suits your taste buds. Once you’ve found your ideal taste, you can then move on to the next step – garnishing your juice with fresh fruit or herbs.

Garnish with Fresh Fruit or Herbs

Enhance your grapefruit juice experience by adding a pop of color and flavor with a fresh fruit or herb garnish. Not only does this make your drink look more visually appealing, but it can also add depth to the flavor profile.

Some creative garnish ideas to try include adding a sprig of fresh mint or basil, a slice of cucumber, or even a few pomegranate seeds. These additions can help balance out the tartness of the grapefruit and give your juice a more complex taste.

Additionally, pairing grapefruit juice with cocktails can be a fun way to experiment with different flavors. Try adding a splash of gin or vodka to your juice and garnishing with a twist of lemon or lime for a refreshing and zesty cocktail. The possibilities are endless when it comes to garnishing and pairing grapefruit juice, so don’t be afraid to get creative and try new things.

To enjoy your grapefruit juice in the healthiest way possible, consider pairing it with a nutritious meal. This can help enhance the benefits of the juice and provide your body with the necessary nutrients it needs to thrive.

Enjoy with a Healthy Meal

Now that we’ve talked about garnishing grapefruit juice with fresh fruit or herbs, let’s move on to another way to make it taste better: enjoying it with a healthy meal.

Advertisement

Not only does pairing grapefruit juice with the right foods enhance its flavor, it also adds nutritional value to your meal.

When it comes to pairing suggestions, grapefruit juice goes well with a variety of foods.

For a light and refreshing breakfast option, try pairing it with yogurt and granola or oatmeal.

The tangy flavor of the grapefruit juice complements the creamy texture of the yogurt and the crunch of the granola.

If you’re looking for a heartier meal, grapefruit juice is a great addition to salads, especially those with a citrus-based dressing.

Advertisement

The acidity of the grapefruit juice helps to cut through heavier ingredients like avocado or bacon.

In addition to its flavor-enhancing properties, grapefruit juice is also a great source of vitamins and minerals.

It’s high in vitamin C, which can boost your immune system, and it also contains potassium, which can help regulate blood pressure.

By pairing grapefruit juice with healthy foods, you can create a well-rounded meal that is both delicious and nutritious.

So next time you’re looking for a way to make your grapefruit juice taste better, try pairing it with a healthy meal.

Advertisement

Your taste buds and your body will thank you.

Frequently Asked Questions

Are there any grapefruit varieties that should be avoided for making juice?

When choosing grapefruit for juicing, avoid red or pink varieties as they are sweeter and less acidic. Opt for white or yellow grapefruit instead. Look for fruits that are heavy for their size and have smooth, thin skin.

Can grapefruit juice be mixed with alcohol?

Yes, grapefruit juice can be mixed with alcohol to create delicious cocktails. Some popular grapefruit juice cocktail recipes include the Greyhound, Salty Dog, and Paloma. Be cautious when mixing with certain medications as it can have adverse effects.

How long does grapefruit juice last in the fridge?

Like a seed in the soil, grapefruit juice should be stored in a cool, dark place. Once opened, it lasts about 7-10 days in the fridge. To extend shelf life, try freezing it in an ice cube tray for later use.

Can grapefruit juice be frozen for later use?

Yes, grapefruit juice can be frozen for later use. However, the process may affect the flavor and texture. To preserve the grapefruit flavor, squeeze fresh juice and freeze in an airtight container for up to 3 months.

Advertisement

Are there any health risks associated with drinking grapefruit juice?

Did you know that grapefruit juice can interact with certain medications? Potential interactions aside, it’s also rich in nutrients such as vitamin C and potassium, providing numerous nutritional benefits to those who can safely consume it.

Conclusion

In conclusion, making grapefruit juice taste better is all about finding the right balance of flavors and personal preferences. By understanding the benefits of grapefruit juice and choosing the right grapefruits, we can create a delicious and nutritious drink.

Experimenting with different flavor combinations and using natural sweeteners can enhance the flavor profile and make it more enjoyable. Adjusting the concentration, serving chilled, trying different preparation methods, and garnishing with fresh fruit or herbs can also elevate the experience.

Whether enjoyed on its own or paired with a healthy meal, grapefruit juice can be a refreshing and satisfying addition to any diet. So, go ahead, get creative, and savor the flavors of this citrus delight!

Advertisement

Continue Reading

Trending