I really enjoy guava juice! It has a great combination of sweet and tangy tastes, and it’s full of essential nutrients. However, purchasing guava juice from the store can be costly, and some brands contain excessive sugar and additives. That’s why I’ve begun creating my own guava juice at home, and surprisingly, it’s quite simple to do!
In this article, I’ll walk you through the steps to make your own guava juice at home. I’ll share my tips for choosing the perfect guavas, preparing the juice, and experimenting with different variations. With just a few ingredients and a blender, you can enjoy a refreshing glass of homemade guava juice anytime!
Key Takeaways
- Making guava juice at home is easy and cost-effective, and allows for the inclusion of guava pulp and seeds which are packed with nutrients.
- Adding water, honey, or agave syrup can balance out the sweetness and provide a natural and healthier alternative to granulated sugar.
- Experimenting with variations like adding lime juice, fresh mint leaves, coconut milk, yogurt, spinach, or kale can create different flavor combinations.
- Chilling the juice in the refrigerator for a few hours ensures that the juice is chilled to perfection, making it a refreshing and healthy drink option that can be enjoyed any time of day.
Choose Ripe Guavas
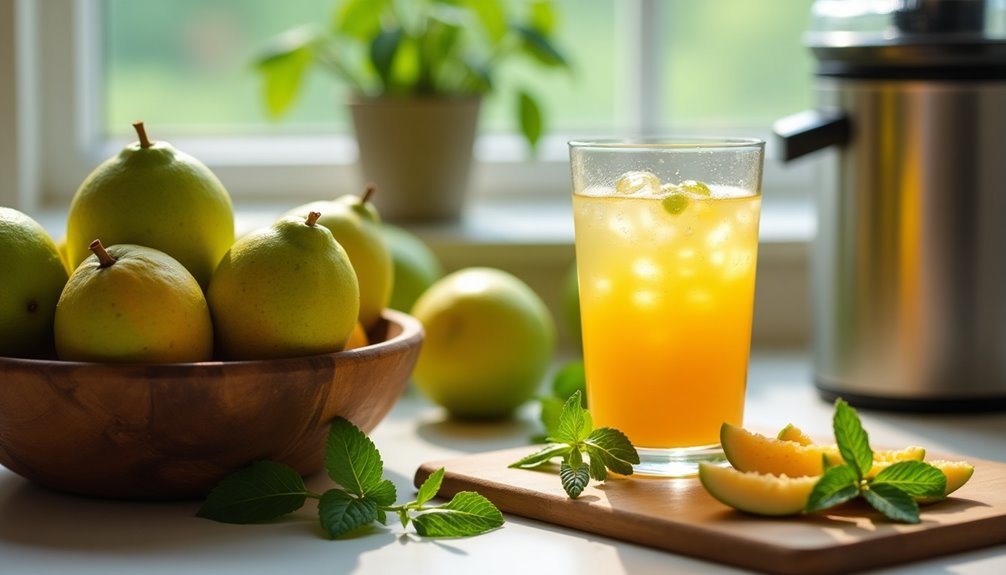
Before we get our hands sticky, let’s make sure we pick out some ripe guavas from the grocery store or our backyard! The best way to tell if a guava is ripe is by its color and smell. Ripe guavas should have a yellowish-green skin with a fragrant aroma.
If they’re too green, they’re not ripe yet, and if they’re too yellow, they may be overripe and will have a mushy texture. Once you’ve picked out your ripe guavas, it’s important to store them properly until you’re ready to use them. Guavas can be stored at room temperature for a few days or in the refrigerator for up to a week.
If you want to speed up the ripening process, you can place them in a paper bag with a ripe banana or apple. This will release ethylene gas that will help the guavas ripen faster. Now that we have our ripe guavas, let’s move onto washing and cutting them for the juice!
Wash and Cut the Guavas
Start by grabbing those fragrant guavas and giving them a good rinse under cool water. Then, slice them up into juicy wedges that will make your taste buds dance with delight. As you wash and cut the guavas, you’ll notice the sweet smell that fills the air.
Not only are guavas delicious, but they’re also packed with nutrients that are beneficial for your health. Here are some of the guava nutrition and health benefits you’ll get from making your own guava juice at home:
- Guavas are low in calories but high in fiber, making them a great choice for weight loss and digestion.
- They’re rich in vitamin C, which can boost your immune system and improve skin health.
- Guavas also contain potassium, which is important for maintaining healthy blood pressure levels.
- Studies have shown that guavas may have anti-inflammatory and anti-cancer properties.
Now that you’ve washed and cut the guavas, it’s time to prepare a blender.
Prepare a Blender
Okay, now that we’ve got our guavas washed and cut, it’s time to get our blender ready for action.
First things first, I need to make sure my blender’s clean and dry. I’ll give it a quick rinse and wipe down before I start adding in the guava pieces.
Once the blender’s good to go, I’ll start adding in the guava pieces, making sure to get as much of the fruit in there as possible.
Clean and Dry the Blender
First, grab a clean towel and thoroughly dry the blender. It’s important to make sure the blender is completely dry before using it to make guava juice. This not only prevents any water from diluting the juice, but also ensures that the blender blades are in good condition and won’t rust due to any moisture.
Making guava juice using a blender has many benefits. The blender is able to extract more juice from the guava fruit compared to other juicing methods. Additionally, it allows for the inclusion of the guava pulp and seeds, which are packed with nutrients.
If you don’t have a towel available, some alternative methods for drying the blender after cleaning include air drying it upside down on a dish rack or using a hair dryer on a low, cool setting. Once the blender is dry, we can move onto the next step of adding the guava pieces.
*Tip: I like to keep my blender on a towel while it’s drying to prevent any water spots from forming on the base of the blender.
*Fun Fact: Did you know that guavas are high in vitamin C and antioxidants?
*Personal Experience: I used to struggle with getting my blender completely dry until I started using a microfiber towel. It’s a game changer!
Now that the blender is clean and dry, it’s time to add in the guava pieces and start making the juice. After placing the guava pieces into the blender, be sure to add a splash of water to help everything blend smoothly. If you’re experimenting with flavors, you could even try combining other ingredients like ginger or mint for an extra kick. For those who enjoy a bit of heat, making jalapeno juice at home could be a fun twist to spice up your juice recipes!
Add the Guava Pieces
Now that the blender is dry, let’s go ahead and toss in those juicy guava pieces and see what kind of deliciousness we can create. Guava juice is not only tasty, but it also offers numerous health benefits. Guava is rich in vitamin C, fiber, and antioxidants, making it a great addition to your diet. Drinking guava juice regularly can improve digestion, boost immunity, and reduce the risk of chronic diseases. So, why not make some fresh guava juice at home and reap all these benefits?
To make the most out of your guava juice, it’s important to consume it at the right time. The best time to drink guava juice is in the morning, on an empty stomach. This will help your body absorb all the nutrients from the juice and improve digestion. Plus, guava juice is a great way to start your day on a refreshing note. So, let’s blend those guava pieces and get ready for a healthy and delicious treat. Next, we’ll need to add some water to the blender.
Add Water
As I pour in the water, I watch as the translucent guava puree transforms into a refreshing, pink-hued juice. Adding water is an essential step in making guava juice, as it dilutes the thick puree and balances out the sweetness. But that’s not all – drinking guava juice has numerous health benefits, such as aiding digestion, boosting immunity, and reducing the risk of chronic diseases.
Plus, there are different ways to flavor guava juice, such as adding lemon or ginger for a zesty kick or mint leaves for a refreshing twist. To make sure the water is evenly distributed, I gently stir the mixture with a spoon. It’s important not to add too much water, as it can dilute the flavor and color of the juice. I usually add one part water to two parts guava puree, but you can adjust the ratio according to your taste preferences.
Now that the water is added, it’s time to sweeten the juice with some sugar.
Add Sugar
You’ll want to slowly pour in the granulated sugar, watching as it dissolves and adds a sweet depth to the vibrant pink liquid. However, it’s important to note that excessive sugar intake can lead to health problems such as obesity and diabetes. Therefore, it’s beneficial to reduce the amount of sugar added to the guava juice.
Luckily, there are creative ways to sweeten guava juice without sugar. For example, adding honey or agave syrup can provide a natural and healthier alternative to granulated sugar. Another option is to blend in ripe bananas or strawberries for a fruity sweetness. By experimenting with different natural sweeteners, you can create a delicious guava juice that’s both flavorful and nutritious.
With the sugar added, it’s time to blend the mixture until it’s smooth and well-combined.
Blend the Mixture
After blending the mixture until it’s smooth, it’s important to note that consuming guava can provide numerous health benefits. These include improving digestion and aiding in weight loss, thanks to its high fiber content. To make the guava juice even more enjoyable, try blending in other complementary fruits like pineapple or strawberries.
Here are some other blending techniques and flavor combinations to consider:
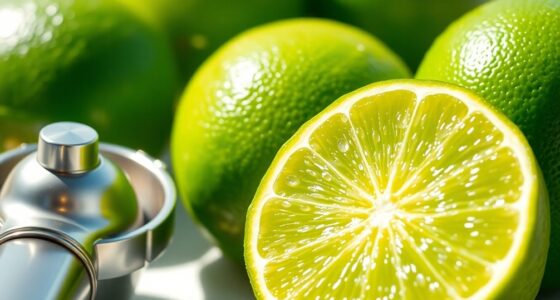
- Add a splash of lime juice for a zesty twist.
- Try blending in some fresh mint leaves for a refreshing flavor.
- For a creamier texture, blend in some coconut milk or yogurt.
- For an extra boost of nutrients, add some spinach or kale to the mix.
Once the blending is complete, it’s time to strain the juice to remove any pulp or seeds.
Strain the Juice
Now it’s time to strain the mixture, so grab a fine mesh sieve or cheesecloth and pour the juice through it into a pitcher or glass. Straining the juice will remove any pulp or seeds that were blended in. The more times you strain the juice, the clearer and smoother it will be.
You can also use different ways to strain juice, such as using a nut milk bag or a coffee filter for a finer strain.
Aside from the refreshing taste, guava juice also offers numerous health benefits. Guavas are packed with vitamins and minerals, including vitamin C, potassium, and fiber. Drinking guava juice can improve digestion, boost the immune system, and even help regulate blood sugar levels.
Once the juice is strained, it’s ready to be chilled. Whether you prefer it over ice or served cold, the next step is to let it cool in the fridge for a few hours before enjoying.
Chill the Juice
To savor the delicious taste of chilled guava juice, it’s best to let it cool in the refrigerator for a few hours. This step ensures that the juice is chilled to perfection, and it’s the perfect way to cool down on a hot summer day. But did you know that there are also many benefits to drinking guava juice? Guava is packed with nutrients like vitamin C, fiber, and potassium. It’s also low in calories and has been shown to improve digestive health and boost immunity. So not only is chilled guava juice refreshing, it’s also good for you!
There are many different ways to serve chilled guava juice. You can add a splash of sparkling water for a fizzy twist, or mix it with other fruit juices for a colorful and flavorful blend. It’s also a great base for cocktails, and can be paired with rum, vodka, or tequila for a tropical twist. Whatever your preference, chilled guava juice is a versatile and delicious drink that can be enjoyed any time of day. So why not experiment with variations and find your perfect recipe?
Experiment with Variations
Get creative with your chilled guava juice by experimenting with different flavors! Adding different fruits and herbs to your guava juice can create a unique and refreshing taste that will tantalize your taste buds.
You can try adding sliced strawberries, chopped mint leaves, or even a squeeze of lime juice to your guava juice. These additions will not only enhance the flavor but also provide additional health benefits.
Another way to experiment with your guava juice is to try different sweeteners. Instead of using regular sugar, try using honey, agave nectar, or even maple syrup. These natural sweeteners will add a different depth of flavor to your guava juice and make it even more enjoyable.
With a little experimentation, you can create a guava juice that is perfectly suited to your taste buds. Now that you’ve experimented with different variations, it’s time to enjoy your homemade guava juice!
Enjoy Your Homemade Guava Juice!
Savor the delicious and refreshing taste of your very own guava juice! Now that you’ve learned how to make guava juice at home, it’s time to enjoy the fruits of your labor.
Not only is it a tasty treat, but it also offers numerous health benefits. Guava juice is rich in vitamin C, fiber, and antioxidants, making it a nutritious addition to your diet.
When it comes to serving your homemade guava juice, the possibilities are endless. You can enjoy it on its own as a refreshing drink, or use it as a base for smoothies and cocktails. You can also mix it with other juices to create unique flavor combinations.
Additionally, guava juice pairs well with savory dishes, such as grilled chicken or fish. So go ahead and get creative with your homemade guava juice, and enjoy all the benefits it has to offer!
Frequently Asked Questions
Can I use unripe guavas to make juice?
Unripe guavas make great juice with a tangy flavor. It’s loaded with Vitamin C and other nutrients that boost immunity, aid digestion, and promote weight loss. Don’t underestimate the power of unripe guava juice for your health!
How long does it take to wash and cut the guavas?
I can wash and cut guavas in about 10 minutes. To increase washing efficiency, I soak them in water for a few minutes and use a soft-bristled brush to remove any dirt. For cutting techniques, I slice them into quarters and remove the seeds before blending.
What types of blenders are best for making guava juice?
When it comes to making fruit juices, investing in a high-quality blender is key. Blender brands like Vitamix and Blendtec are great options, each with their own pros and cons. Different fruit juices, like strawberry or mango, can be easily made in the recommended blenders.
How much sugar should I add to the juice?
When making guava juice, I prefer to use sugar alternatives like honey or stevia. Guava itself is a naturally sweet fruit, and adding too much sugar can negate the health benefits of the juice.
What are some variations I can try with my homemade guava juice?
I love to experiment with different flavor options when making guava juice. Some of my favorites include adding a splash of lime juice or a few sprigs of mint. For serving suggestions, try serving over ice or mixing with sparkling water for a refreshing spritzer.
Conclusion
I’m thrilled to have shared with you how easy it is to make homemade guava juice. With just a few simple steps, you can have a refreshing and nutritious drink that’s perfect for any time of the day.
Not only is guava juice delicious, but it also provides many health benefits. Did you know that guava is one of the richest sources of vitamin C? In fact, one guava contains more than twice the daily recommended intake of vitamin C. This means that by drinking guava juice, you can boost your immune system, improve your skin health, and even reduce your risk of chronic diseases such as cancer and heart disease.
So why not give this recipe a try and enjoy all the benefits that come with it? Your taste buds and body will thank you for it. Cheers to homemade guava juice!
Cindy thoroughly researches juicing trends, techniques, and recipes to provide readers with practical advice and inspiration. Her writing style is accessible, engaging, and designed to make complex concepts easy to understand. Cindy’s dedication to promoting the advantages of juicing shines through her work, empowering readers to make positive changes in their lives through the simple act of juicing.