Juice Tips and Tricks
How Much Juice Is In 1/2 Lemon
I like to add a touch of lemon juice to my meals to boost the flavor. But, have you ever thought about how much juice is in half a lemon? Being a fan of both cooking and baking, I recognize the importance of accurate measurements when following recipes.
In this article, I will explore the anatomy of a lemon, factors that affect juice yield, and techniques for juicing a lemon to help you determine just how much juice is in half a lemon. Understanding the amount of juice in half a lemon is crucial for achieving the desired flavor in your recipes. Whether you’re making a salad dressing, marinade, or lemon bars, the amount of lemon juice can make a big difference in the outcome of your dish.
By knowing how to measure the amount of juice in half a lemon, you can ensure that your recipes are consistent and delicious every time. So let’s dive into the world of lemons and learn how to get the most juice out of them!
Key Takeaways
- The amount of juice in 1/2 lemon varies depending on the variety, age, and juicing method.
- Rolling or microwaving the lemon before juicing can help extract more juice.
- On average, different lemon varieties yield different amounts of juice, with Eureka producing 30-40 ml, Lisbon producing 40-50 ml, and Meyer producing 20-30 ml.
- Storing lemon juice in an airtight glass container in the refrigerator or freezer can help preserve its freshness.
The Importance of Knowing How Much Juice is in Half a Lemon
You gotta know how much juice is in half a lemon if you want to make the perfect salad dressing or marinade. Lemon juice has a lot of benefits – it’s a good source of vitamin C, helps with digestion, and can even help reduce the risk of kidney stones.
Additionally, lemon juice in cocktails can add a refreshing and tangy flavor that can’t be beat.
Knowing how much juice is in half a lemon is crucial for getting the right balance of flavors in your recipe. Too much lemon juice can overpower the other ingredients, while too little can make the dish taste bland.

Before you can understand how much juice is in half a lemon, it’s important to understand the anatomy of a lemon.
Understanding the Anatomy of a Lemon
Think of a lemon as a vibrant and zesty world waiting to be explored. To understand how much juice is in half a lemon, it’s important to first understand the anatomy of this citrus fruit. A typical lemon consists of several parts, including the peel and pith, juice sacs and seeds, flesh and rind.
The peel and pith make up the outer layer of the lemon, which is often removed before juicing. The juice sacs and seeds are found inside the lemon and contain the tart and tangy juice that makes lemons so popular in cooking and baking. The flesh of the lemon is the soft, juicy part that surrounds the seeds and juice sacs, while the rind is the tough outer layer that is often used for zest or garnish. Lemon juice is known for its acidity and strong flavor, but it’s also rich in vitamins and minerals, making it a healthy addition to any diet.
Factors that affect juice yield can vary depending on the type of lemon and how it is prepared.
Factors that Affect Juice Yield
When I’m juicing lemons, I’ve noticed that the amount of juice I get can vary depending on a few different factors.
One of the most important factors is the ripeness of the lemon; a riper lemon tends to yield more juice than an unripe one.
The temperature of the lemon and the juicing method used can also impact the amount of juice you get.
The Ripeness of the Lemon
Feeling the texture of the lemon can give you an idea of its ripeness, which affects how much juice it will yield. Optimal ripeness is key to achieving maximum flavor extraction from the lemon. Here are a few things to consider when assessing the ripeness of a lemon:
- A ripe lemon will feel firm but slightly soft to the touch.
- The skin of a ripe lemon will have a slightly bumpy texture.
- A ripe lemon will have a bright yellow color, with no green spots.
- A ripe lemon will have a fragrant aroma.
It’s important to use a ripe lemon for juicing, as an unripe lemon won’t provide as much juice and may taste bitter. Once you’ve determined the ripeness of your lemon, you can move on to considering other factors that affect juice yield, such as the temperature of the lemon.
When it comes to juicing a lemon, the temperature of the lemon can also impact how much juice it yields.
The Temperature of the Lemon
Achieving the perfect temperature of a ripe lemon is crucial in extracting the most flavor possible, enhancing the overall taste of your dish or drink. When it comes to juicing a lemon, temperature plays a significant role in determining the amount of juice you can extract.
A lemon at room temperature yields more juice than a cold one, as the warmer temperature helps break down the cells and release the juice. Measuring accuracy is also important when it comes to the citric acid concentration in the juice. The more juice you can extract, the higher the concentration of citric acid, which gives the lemon its tart taste.
By ensuring that the lemon is at the optimal temperature, you can extract the most juice possible, leading to a more intense and flavorful taste.
Transitioning into the subsequent section about the juicing method, it’s essential to note that the temperature of the lemon is just one factor that affects the amount of juice you can extract. The juicing method you use also plays a significant role in determining the amount of juice you can get from a lemon.
The Juicing Method
To get the most flavor out of your ripe lemon, you’ll want to try out different juicing techniques. One popular method is to simply hand-squeeze the lemon over a bowl or glass. While this method is effective, it can sometimes be difficult to squeeze out all of the juice and can also result in pulp and seeds getting into the juice.
Another technique is to use a lemon squeezer. These tools are designed specifically for juicing lemons and can make the process much easier and more efficient. Lemon squeezers come in a variety of shapes and sizes, from handheld devices to electric juicers.
If you don’t have a lemon squeezer, there are also alternative tools you can use, such as a fork or a wooden reamer. These can be just as effective as a lemon squeezer, but may require a bit more effort and time.
When it comes to juicing a lemon, there are many tools and techniques that can help you get the most out of your fruit. In the next section, we’ll explore some of the best tools and techniques for juicing a lemon.
Tools and Techniques for Juicing a Lemon
Using a juicer can extract up to 75% of the juice from a lemon, making it an efficient tool for juicing. A citrus reamer can also be used to extract juice from a lemon, but it may not be as efficient as a juicer.
When using a citrus reamer, it’s important to cut the lemon in half and hold it with the cut side facing down. Then, insert the reamer into the lemon and twist it back and forth while applying pressure to extract the juice.
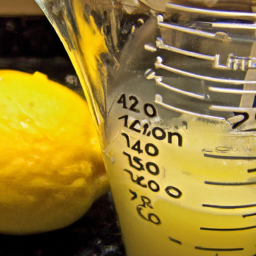
Now that we’ve discussed the tools and techniques for juicing a lemon, let’s move on to measuring the amount of juice in half a lemon. One way to do this is to use a measuring cup and a strainer. Simply squeeze the juice from the lemon half into the strainer over the measuring cup, and use a spoon to press down on the pulp to extract as much juice as possible.
This method may not be as accurate as using a juicer or a citrus reamer, but it’s a simple and effective way to measure the amount of juice in half a lemon.
How to Measure the Amount of Juice in Half a Lemon
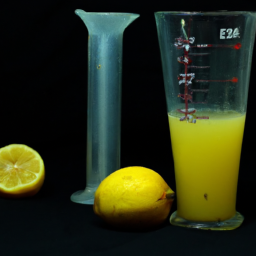
You can easily gauge the tartness of your dish by measuring the zing in the flavor of your half-lemon’s liquid gold, akin to the way a conductor measures the intensity of a symphony’s notes. To accurately measure the juice from half a lemon, the most common method is to use a citrus juicer or reamer to extract the juice. Alternatively, you can simply squeeze the lemon over a measuring cup, making sure to remove any seeds or pulp that may fall in.
Measuring the amount of juice in half a lemon is essential to achieving the desired level of acidity in your dish. To help you determine how much juice can be extracted from half a lemon, the table below presents the average juice yield for different lemon varieties. Keep in mind that the acidity level of the lemon can also affect the amount of juice extracted.
| Lemon Variety | Average Juice Yield (ml) |
|---|---|
| Eureka | 30-40 |
| Lisbon | 40-50 |
| Meyer | 20-30 |
Knowing the average juice yield for different lemon varieties can help you determine how much juice you need for your recipe. However, keep in mind that the amount of juice extracted from a lemon can vary depending on its ripeness and acidity level. In the next section, we will discuss how to choose the right lemon for your recipe.
Average Juice Yield for Half a Lemon
Measuring the amount of juice in half a lemon can be tricky, but once you’ve mastered the technique, you can get a more accurate measurement of how much juice you’re using in your recipes. But how much juice should you expect to get from half a lemon?
The answer depends on a few factors, including the lemon variety and the method of juice extraction. Different varieties of lemons have varying levels of acidity and sweetness, which can affect how much juice they produce. Meyer lemons, for example, have a sweeter taste and may produce less juice than a tart Eureka lemon. Additionally, the method of juice extraction can also impact the amount of juice you get. Squeezing the lemon by hand may produce less juice than using a citrus juicer or reamer.
Despite these variables, on average, you can expect to get about two tablespoons of juice from half a lemon. However, this is just a rough estimate, and the actual amount of juice you get can vary. To get the most juice possible, try rolling the lemon on a hard surface before cutting it in half, or microwaving it for a few seconds to loosen the juice. Additionally, using a citrus reamer or juicer can help extract more liquid compared to simply squeezing by hand. If you’re still wondering *how much juice in half lemon* you’ll get, keep in mind that factors like the size, ripeness, and temperature of the lemon all play a role in the final yield. It’s always a good idea to have an extra lemon on hand, just in case you need more juice than anticipated.
When it comes to storing lemon juice, there are a few different methods you can use. One option is to simply store the juice in an airtight container in the refrigerator. Another option is to freeze the juice in ice cube trays and then transfer the cubes to a freezer-safe container.
Regardless of the method you choose, storing lemon juice can help you save time and reduce waste in the kitchen.
How to Store Lemon Juice
To preserve the freshness of lemon juice, it’s essential to store it properly. The best containers for storing lemon juice are ones that are airtight and made of glass or plastic. Glass containers are preferable because they don’t absorb any flavors or odors, ensuring the juice stays fresh for longer periods.
On the other hand, plastic containers are lighter and more convenient to use, but they’re not as durable as glass and may not last as long. To maintain the quality of lemon juice, it’s important to refrigerate it immediately after squeezing. This helps to prevent the growth of bacteria and mold, which can cause spoilage.
Additionally, freezing lemon juice is an excellent way to preserve it for future use. To freeze lemon juice, place it in an airtight container and store it in the freezer. When you’re ready to use it, simply thaw it in the refrigerator or at room temperature. By following these simple techniques, you can extend the shelf life of your lemon juice and ensure it remains fresh and flavorful for all your cooking and baking needs.
When it comes to creative uses for lemon juice, there are countless possibilities. From adding a splash of lemon juice to your favorite drinks and recipes to using it as a natural cleaning solution, lemon juice is a versatile ingredient that can be used in a variety of ways.
Creative Uses for Lemon Juice
I love using lemon juice in creative ways beyond just adding it to my water or tea. In cooking and baking, it adds a bright, tangy flavor to dishes like roasted vegetables and marinades.
It’s also a natural cleaning agent that can be used to tackle tough stains and odors in the kitchen and bathroom. And in beauty and personal care, lemon juice can be used as a natural skin brightener and hair lightener.
Cooking and Baking
Hey, if you’re making a lemon cake, you’ll need a ton of juice from just half a lemon! The amount of juice you can extract from a lemon depends on its variety and age. The older the lemon, the harder and drier it becomes, making it more difficult to extract juice.
On the other hand, some varieties of lemons are juicier than others. For instance, Eureka lemons have a thick skin and are less juicy compared to Meyer lemons, which have a thinner skin and more juice.
To extract the maximum amount of juice from a lemon, roll it back and forth on a hard surface while applying slight pressure. Then, cut the lemon in half and use a reamer or juicer to squeeze the juice out. Alternatively, you can use a fork to press the pulp and extract the juice. A helpful tip is to microwave the lemon for 10-15 seconds before juicing it to increase its juiciness.
When you’re done juicing the lemon, it’s time to clean up the mess.
Cleaning
I love spending time in the kitchen, cooking and baking my favorite meals and treats. However, the aftermath can be quite overwhelming, especially when it comes to cleaning up. That’s why I’ve developed some effective cleaning techniques that not only make the process easier but also more environmentally friendly.
When it comes to cleaning, I prefer to use natural alternatives instead of harsh chemicals. Not only are they better for the environment, but they’re also safer for my family and pets.
Here are three natural cleaning alternatives that have worked wonders for me:
- Using vinegar and baking soda to clean surfaces and remove stains.
- Mixing lemon juice and salt to clean and deodorize cutting boards.
- Using essential oils like tea tree and eucalyptus to disinfect and freshen up the air.
Now that I’ve shared some of my cleaning tips, it’s time to move on to the next topic: beauty and personal care.
Beauty and Personal Care
Take care of your body and skin with natural and eco-friendly beauty products that are not only good for you but also the environment. One way to achieve this is by incorporating DIY lemon-based skincare into your routine. Lemons are packed with vitamin C and antioxidants that help brighten and even out skin tone, reduce inflammation, and fight free radicals that lead to premature aging. Lemon juice is also a natural exfoliant that helps remove dead skin cells and unclog pores, leaving your skin smooth and glowing.
In addition to skincare, lemon juice can also be used in haircare. It helps clarify and remove buildup from the scalp, promoting healthy hair growth. Lemon juice can also add shine to dull hair and lighten hair naturally, making it a great alternative to chemical hair dyes. However, it’s important to note that lemon juice can be drying to the hair, so it’s best to dilute it with water or mix it with a conditioner before applying. By incorporating lemon juice into your beauty routine, you can take advantage of its natural benefits and avoid harsh chemicals found in many commercial products.
Now, let’s move on to tips for getting the most juice out of your lemons.
Tips for Getting the Most Juice Out of Your Lemons
Using a juicer or rolling the lemon on a hard surface before squeezing can help you get the most juice out of your lemons. However, there are other lemon squeezer alternatives and lemon juice extraction hacks that you can try to ensure that you get the most out of your lemons.
One of the most popular lemon squeezer alternatives is to use a fork. Simply cut the lemon in half and insert a fork into the flesh and twist it to extract the juice.
Another method is to use a pair of tongs. Cut the lemon in half and place it between the tongs. Squeeze the tongs together to extract the juice.
If you don’t have a juicer or any of these alternatives, you can also try microwaving the lemon for 10-15 seconds before squeezing. This will soften the flesh and make it easier to extract the juice.
Frequently Asked Questions
What are some other fruits that can be used to substitute lemon juice in recipes?
I love experimenting with substitute fruits in recipes! Some great options for replacing lemon juice include lime, grapefruit, orange, and even vinegar. Consider the flavor profiles and acidity levels of each fruit to find the perfect fit for your dish.
Can lemon juice be frozen for later use?
Yes, lemon juice can be frozen for later use using various freezing techniques. The best ways to preserve freshness include freezing the juice in ice cube trays or airtight containers. This allows for easy access and longer storage.
How long can lemon juice be stored in the refrigerator?
Did you know that lemon juice can be stored in the fridge for up to 2-3 months? To properly store lemon juice, use an airtight container and keep it in the coldest part of the fridge. Adding a little bit of sugar or salt can also extend its shelf life.
What are some health benefits of consuming lemon juice?
I’ve read that lemon juice detoxing is a myth. However, lemon juice may aid in weight loss due to its high vitamin C content and ability to improve digestion. It’s always important to consult a healthcare professional before trying any new diet or detox regimen.
How do different types of lemons affect juice yield?
Different lemon varieties and juicing techniques can affect juice yield. Meyer lemons are known to have more juice and pulp, while Eureka lemons have less. Rolling and microwaving lemons before juicing can also increase juice yield.
Conclusion
So there you have it, folks: knowing how much juice is in half a lemon is crucial for any recipe that calls for it. By understanding the anatomy of a lemon, the factors that affect juice yield, and the tools and techniques for juicing a lemon, you can ensure that you get the most out of your lemons every time.
Now, some of you may be thinking, "But I don’t have a juicer or any fancy tools. How can I possibly get all the juice out of my lemons?"Don’t worry, you don’t need anything fancy. Simply rolling the lemon on a hard surface before cutting it open can help release more juice. And if you don’t have a juicer, you can always use a fork or a citrus reamer to extract the juice.
With a little bit of effort, you can easily get all the juice you need from half a lemon.
So the next time you’re cooking or mixing a drink that calls for lemon juice, remember to measure your juice carefully and store any leftover juice properly. And don’t forget to get creative with your lemon juice! From salad dressings to cocktails, there are endless ways to use this versatile ingredient.
Happy juicing!

Cindy thoroughly researches juicing trends, techniques, and recipes to provide readers with practical advice and inspiration. Her writing style is accessible, engaging, and designed to make complex concepts easy to understand. Cindy’s dedication to promoting the advantages of juicing shines through her work, empowering readers to make positive changes in their lives through the simple act of juicing.


Have you ever squeezed a lime and wondered how much juice it would yield?
I remember the first time I tried to make a recipe that required lime juice, and I was shocked at how little juice one lime seemed to produce. It was like trying to get blood from a stone. But as I learned more about the science of juicing and the properties of limes, I discovered that there are many factors that can affect the amount of juice you can get from a lime.
Lime juice is an essential ingredient in many recipes, from marinades and dressings to cocktails and desserts. It adds a tangy, acidic flavor that can brighten up even the most basic dish. But getting the right amount of juice can be tricky, especially if you don’t know how to choose, prepare, and juice your limes properly.
In this article, I’ll share some tips and tricks for getting the most juice out of your limes, as well as some creative ways to use lime juice in your cooking and mixology.
So let’s get started!
Key Takeaways
- The yield of juice from one lime can vary depending on its size, ripeness, and other factors.
- Tips for maximizing juice yield from limes include warming the lime before juicing, using a strainer, and re-juicing the pulp.
- Lime juice is high in vitamin C, antioxidants, and other beneficial nutrients that can boost immunity, aid digestion, and promote overall health.
- Storing lime juice in an airtight container in the refrigerator helps preserve its freshness and it can also be frozen for later use.
The Importance of Lime Juice in Cooking and Mixology
Lime juice’s crucial role in cooking and mixology can’t be overstated. It adds a zesty and refreshing touch to any recipe. But its versatility goes beyond just culinary uses.
Lime juice is packed with vitamin C and antioxidants, making it a great addition to any health regimen. It can also be used around the house as a natural cleaner due to its antibacterial properties. And let’s not forget its eco-friendliness, as limes are easily grown and harvested, making them a sustainable choice compared to other fruits.
One of the most exciting aspects of lime juice is its ability to transform any dish or drink. From marinades to cocktails, a squeeze of lime can take a recipe from ordinary to extraordinary. Plus, with its numerous health benefits and household uses, it’s a staple that should always be stocked in your kitchen.
But how much juice can you really expect to get from one lime? Let’s dive into the factors that affect the amount of juice in a lime.
Factors Affecting the Amount of Juice in a Lime
When it comes to juicing limes, there are a few factors that can affect the amount of juice you get.
First, the size of the lime can make a big difference. A larger lime will obviously yield more juice than a smaller one.
Second, the ripeness of the fruit can impact the amount of juice available. A fully ripe lime will be juicier than one that is still under-ripe.
Finally, the juicing method you choose can also make a difference in the amount of juice you get. By considering these three factors, you can maximize the amount of juice you get from your limes and ensure that you have enough for all your cooking and mixology needs.
Size of the lime
Nowadays, a single lime can yield about 2 tablespoons of juice. However, this amount can vary depending on the size of the lime. Common lime varieties, such as the Persian lime and the Key lime, can have different sizes and shapes that affect their juice content. Generally, the larger the lime, the more juice it will contain.
It’s also important to note that the skin of the lime does not affect the amount of juice it produces, so it’s best to choose limes that are firm and free of bruises or soft spots. To get the most juice out of a lime, it’s important to store it properly. Limes should be stored in a cool, dry place away from direct sunlight. They can also be kept in the refrigerator for up to a month. However, it’s best to let them come to room temperature before juicing to maximize the amount of juice extracted.
By keeping these factors in mind, you can ensure that you’re getting the most out of your limes and adding the perfect amount of citrus to your dishes and drinks.
Moving on to the next subtopic, the ripeness of the fruit also plays a crucial role in determining the amount of juice it contains.
Ripeness of the fruit
As the fruit ripens, it becomes softer and more fragrant, making it easier to extract its tangy and zesty flavor. The lime is a versatile fruit that can be used in a variety of dishes and drinks, and its ripeness can impact the intensity of its flavor. A lime that is too unripe may have a bitter taste, while an overly ripe lime can have a dull flavor. Therefore, it is important to choose limes that are ripe but not overripe for optimal flavor.
There are several benefits to allowing limes to ripen before use. As the lime ripens, it develops a higher concentration of vitamin C, which can help boost the immune system and protect against disease. Additionally, the ripening process breaks down the complex sugars in the lime, making it easier to digest. To ensure that limes stay fresh, it is best to store them at room temperature or in the refrigerator. However, it is important to note that refrigeration can slow down the ripening process, so it is best to only refrigerate limes that are already fully ripe. With the proper storage methods, limes can be enjoyed at their best flavor and nutritional value. In the next section, I will discuss the best juicing method for extracting the juice from a ripe lime.
Juicing method
To get the most out of a ripe lime, it’s best to use a juicer that can efficiently extract the tangy and zesty flavor. Here are some things to keep in mind when juicing a lime:
-
Pulp extraction can be tricky, but it’s important for achieving a smooth and consistent juice. Use a fine mesh strainer or cheesecloth to filter out any unwanted bits of pulp.
-
Limes can be preserved for longer periods by storing them in the refrigerator or freezer. When preparing to juice a lime, it’s best to let it come to room temperature before squeezing to get the most juice out of it.
-
On average, one lime will yield about 1-2 tablespoons of juice. However, the yield can vary depending on the ripeness and size of the lime.
-
To get the most juice out of a lime, roll it on a hard surface before slicing it in half. This will help break down the pulp and release more juice.
When it comes to juicing a lime, the right tools and techniques can make all the difference. In the next section, we’ll explore some of the best tools and techniques for juicing a lime to ensure maximum juice yield and minimal waste.
Tools and Techniques for Juicing a Lime
You’ll need a juicer or a reamer to extract the juice from a lime. There are different juicing techniques and tools you can use to get the most juice from your lime. A lime squeezer is a popular alternative to a juicer or reamer, but keep in mind that it may not extract as much juice as the other tools. To use a lime squeezer, simply cut the lime in half and press it against the squeezer. Rotate the lime while applying pressure to extract as much juice as possible.
When using a juicer or reamer, cut the lime in half and place it cut side down on the juicer or reamer. Apply pressure and twist the lime to extract the juice. A citrus press can also be used, which works by squeezing the lime between two ridged surfaces to extract the juice. No matter which tool you choose, it’s important to use firm and ripe limes for the best results. Speaking of which, let’s discuss how to choose the best limes for juicing.
How to Choose the Best Limes for Juicing
When picking limes for juicing, look for ones that are firm, brightly colored, and have a slight give when gently squeezed, ensuring that they are juicy, flavorful, and ready to be juiced. Here are some important things to consider when choosing the best limes for juicing:
-
Ripeness: Choose ripe limes that are heavy for their size and have a thin, smooth skin. Overly ripe limes will have a rough, puffy skin and may be dry and flavorless, while underripe limes will be hard and acidic.
-
Juice content: Look for limes that have a high juice content, which can be determined by gently rolling them on a hard surface before cutting them open. Limes that are heavy and have a lot of juice inside will yield more juice when juiced.
-
Lime juice benefits: In addition to adding flavor to drinks and recipes, lime juice is high in vitamin C, antioxidants, and other beneficial nutrients that can boost immunity, aid digestion, and promote overall health.
Now that you know how to choose the best limes for juicing, let’s move on to how to prepare them for juicing.
How to Prepare Limes for Juicing
Get ready to experience the zesty aroma and tangy flavor of freshly squeezed lime juice with these simple preparation tips.
To remove the seeds, start by cutting the lime in half horizontally. Then, use a small pointed knife to carefully cut around the circumference of the lime halves to loosen the flesh from the skin.
Next, use a small spoon or your fingers to scoop out the flesh, making sure to remove any seeds that may have been left behind. When it comes to cutting techniques, there are a few options to choose from depending on your preference.
Some people like to cut the lime into wedges, while others prefer to slice it into rounds. If you’re using a citrus juicer, it’s best to cut the lime in half horizontally.
Finally, to preserve the freshness of your limes, store them in the refrigerator in a sealed plastic bag or container. This will help prevent them from drying out and losing their flavor.
Now that you know how to prepare your limes, it’s time to move on to the next step: juicing them!
How to Juice a Lime
When I want to juice a lime, I have three options: using a juicer, hand-squeezing with a fork or citrus reamer, or using a citrus press.
Each method has its benefits and drawbacks. Using a juicer is the most efficient way to extract the maximum amount of juice, but it can be expensive and difficult to clean.
Hand-squeezing is a cheap and easy method, but it may not yield as much juice as the other methods.
Using a citrus press is a good compromise between the two, providing a higher yield than hand-squeezing while still being relatively affordable and easy to use.
Using a juicer
Using a juicer can make extracting the juice of 1 lime a breeze, giving you more time to enjoy your favorite cocktail.
When it comes to juicing techniques, there are a few citrus juicing tips to keep in mind. Firstly, it’s important to choose a juicer that’s specifically designed for citrus fruits. This’ll ensure that you get the most juice out of your lime without wasting any of it.
Additionally, make sure to cut your lime in half before feeding it into the juicer, as this’ll make it easier for the machine to extract the juice. Another tip is to press down firmly on the juicer while it’s in use. This’ll help to extract even more juice from the lime.
Once you’ve finished juicing, be sure to clean your juicer thoroughly to prevent any build-up of bacteria or mold. With these tips in mind, you’ll be able to extract the juice of 1 lime quickly and efficiently.
However, if you don’t have a juicer on hand, don’t worry! You can still extract the juice by hand-squeezing with a fork or citrus reamer.
Hand-squeezing with a fork or citrus reamer
To extract the flavorful essence of a citrus fruit without a juicer, simply grip a fork or citrus reamer with your dominant hand and press it firmly into the fruit’s flesh. This is one of the alternative methods for hand squeezing limes, and it has both pros and cons.
On the one hand, hand-squeezing with a fork or citrus reamer is a low-cost and easy way to get fresh lime juice at home. On the other hand, it requires some effort and may not yield as much juice as a juicer or citrus press.
When hand-squeezing with a fork or citrus reamer, it’s important to use a firm grip and apply steady pressure to fully extract the juice. The yield will vary depending on the size and ripeness of the lime, but generally, one lime will yield about 1-2 tablespoons of juice.
While this method may not be as efficient as a juicer or citrus press, it’s a good option for small quantities or when a juicer is not available.
Moving on to using a citrus press, this method offers a more efficient way to extract lime juice without the need for manual effort.
Using a citrus press
If you’re looking for a quicker and more efficient method of extracting citrus juice, a citrus press may be the tool for you. Here are some benefits of using a citrus press over hand-squeezing with a fork or citrus reamer:
-
Less effort: With a citrus press, you simply place the halved fruit cut-side down and press the handles together. The press does the work for you, so you don’t need to exert as much force as you would when hand-squeezing.
-
More juice: Because a citrus press applies more pressure to the fruit, it can extract more juice than hand-squeezing. On average, you can expect to get about 20% more juice from a lime using a press.
-
Cleaner juice: When hand-squeezing, it’s easy to accidentally include bits of pulp or seeds in the juice. With a citrus press, the juice is often clearer and pulp-free.
-
Consistency: A citrus press can also help you achieve consistent results. When hand-squeezing, the amount of juice you extract can vary depending on your technique and the ripeness of the fruit.
Using a citrus press can be a great alternative to hand squeezing, but there are still benefits to the latter method. In the next section, we’ll explore just how much juice you can expect to get from one lime when hand squeezing.
How Much Juice Can You Get from One Lime?
Squeezing a lime can yield about 1-2 tablespoons of flavorful juice. This citrus fruit is a common ingredient in many recipes, such as salads, marinades, and cocktails.
Lime juice is also known for its potential health benefits, including improving digestion and boosting the immune system. Consuming lime juice can provide a good source of vitamin C, antioxidants, and other essential nutrients.
However, to make the most out of your lime, it’s important to know how to maximize its juice yield. By using a citrus press or rolling the lime on a hard surface before squeezing, you can extract more juice from the fruit. This will not only enhance the flavor of your dishes but also provide you with more nutritional benefits.
Tips for Maximizing Juice Yield
When it comes to maximizing juice yield from limes, I’ve found a few simple tips can make a big difference.
First, I like to warm up my limes by rolling them on the counter or microwaving them for a few seconds. This helps to break down the cell walls and release more juice.
Second, I always strain my juice to remove any pulp or seeds that can reduce yield.
Finally, if I have any leftover pulp, I’ll re-juice it by squeezing it again to extract every last drop.
These small tricks can add up to a significant increase in juice yield and make all the difference in your cooking and baking.
Warming the lime
Heating up the lime is like putting a cozy sweater on before going outside on a chilly day. It helps to soften the fruit and make it easier to extract the juice.
The benefits of warming limes are numerous, including an increase in the amount of juice that can be extracted. When a lime is heated, the cells in the fruit expand, making it easier for the juice to flow out.
In addition to yielding more juice, warming limes can also improve the flavor of the juice. This is because the heat helps to break down the natural sugars in the fruit, making them more soluble. As a result, the juice becomes sweeter and less tart.
So, if you want to get the most out of your limes, try warming them up before juicing. As you move on to using a strainer, keep in mind that the amount of juice you get from a lime can vary depending on its size, ripeness, and other factors.
Using a strainer
After warming the lime, it’s time to squeeze out the juice. To ensure that the juice is free from pulp and seeds, I often use a strainer. This handy kitchen tool is a great way to keep the juice smooth and consistent, making it perfect for cocktails or any other recipe that requires lime juice.
However, if you don’t have a strainer at home, there are some alternatives that you can use. One option is to use a fine mesh sieve, which will also remove any unwanted bits from the juice. Another alternative is to use a cheesecloth, which works well for larger quantities of lime juice. With these options, you can still enjoy the benefits of fresh lime juice without any pulp or seeds. And speaking of recipes, some of the best ones for lime juice cocktails include margaritas, mojitos, and caipirinhas.
Moving on to the next step, re-juicing the pulp can be a great way to extract even more juice from the lime.
Re-juicing the pulp
Now that you’ve strained the lime juice, don’t throw away the pulp just yet! You can actually re-juice the pulp to extract even more of that delicious citrus flavor. Here are some techniques you can use to get the most out of your lime:
- Squeeze the pulp with your hands: Take the pulp and squeeze it with your hands over a sieve to catch any seeds. This method is quick and easy, but may not extract all the juice.
- Blend the pulp: Put the pulp in a blender with a little bit of water and blend until smooth. Strain the mixture to remove any solids and you’ll have more juice.
- Boil the pulp: Place the pulp in a small saucepan with just enough water to cover it. Bring the mixture to a boil, then reduce the heat and simmer for 5 minutes. Strain the mixture and you’ll have concentrated lime juice.
- Freeze the pulp: Place the pulp in an ice cube tray and freeze. When you need lime juice, simply thaw out a cube and squeeze the juice from it.
Re-juicing the pulp can have a significant impact on the flavor of your lime juice. By using these techniques, you can extract as much juice as possible and ensure that your lime juice is bursting with flavor.
When it comes to storing lime juice, it’s best to store it in an airtight container in the refrigerator. It will keep for up to a week, but the flavor will deteriorate over time. For longer storage, you can freeze the juice in an ice cube tray and use as needed.
Storing Lime Juice
To keep your lime juice fresh, it’s important to store it properly. Storing lime juice in an airtight container in the refrigerator is the best way to preserve its freshness. When exposed to air and heat, lime juice can quickly lose its flavor and nutritional value.
By keeping it in a sealed container in the refrigerator, you can extend the shelf life of your lime juice for up to a week. It’s important to note that lime juice, like all citrus juices, can undergo changes in flavor and appearance over time. If your lime juice begins to smell off or change color, it’s best to discard it.
When using lime juice in cooking or cocktails, it’s always best to start with fresh juice to ensure the best flavor and nutritional value. With this in mind, let’s explore some creative ways to use lime juice in your culinary creations.
Creative Ways to Use Lime Juice in Cooking and Cocktails
Get ready to experience a burst of zesty and tangy flavors that’ll take your taste buds on a wild ride with these incredibly creative ways to incorporate lime juice in your cooking and cocktails.
Lime juice adds a refreshing and citrusy flavor that pairs well with a variety of dishes and drinks. Here are some pairing suggestions to elevate your dishes and cocktails:
-
Grilled Fish: Squeeze some lime juice over grilled fish to add a zesty flavor that cuts through the richness of the fish.
-
Spicy Foods: Use lime juice to tone down the heat in spicy foods like curries and chili. The acidity of lime juice balances the heat and adds a tangy flavor.
-
Margaritas: No margarita is complete without lime juice. Use freshly squeezed lime juice to create a bright and refreshing cocktail.
-
Fruit Salads: Add a pop of freshness to fruit salads by drizzling lime juice over them. Lime juice brings out the sweetness of the fruits and adds a tangy flavor that complements the sweetness.
Aside from its delicious taste, lime juice also offers a range of health benefits. Lime juice’s an excellent source of vitamin C, which’s essential for the immune system. It also contains antioxidants that protect the body from free radicals. Incorporating lime juice into your diet can boost your overall health and wellness.
So, go ahead and add a squeeze of lime juice to your dishes and cocktails for a burst of flavor and health benefits.
Frequently Asked Questions
What is the nutritional value of lime juice?
Lime juice has numerous benefits, including being a great source of vitamin C and antioxidants. It can be used in a variety of recipes, such as marinades and dressings. It’s important to note that the nutritional value may vary depending on the amount used.
Can lime juice be substituted with lemon juice in recipes?
Lemon juice can be a suitable substitute for lime juice in recipes, but be aware of flavor differences and make recipe adjustments accordingly. As a nutrition expert, I know the chemical properties of both fruits and can provide precise measurements and recommendations based on scientific evidence.
Does the ripeness of the lime affect the amount of juice it yields?
Lime ripeness and juice extraction techniques can affect the amount of juice a lime yields. Ripe limes may yield more juice than unripe ones, and using the right extraction method can also increase juice yield.
How long does lime juice stay fresh in the fridge?
To properly store lime juice, transfer it to an airtight container and refrigerate for up to a week. Use it in cocktails or as a marinade. One lime typically yields about 2 tablespoons of juice.
Does the temperature of the lime affect the amount of juice it yields?
The temperature of a lime can affect the yield of its juice. Citrus juicing techniques can also impact the amount of juice extracted. Precise measurements and calculations are essential for accurate nutrition information. Objectivity is crucial for making evidence-based recommendations.
Conclusion
In conclusion, lime juice is a versatile ingredient that can elevate the flavor profile of both savory and sweet dishes, as well as cocktails. As someone who loves to cook and mix drinks, I’ve found that understanding how to juice a lime and maximize its yield has been critical in achieving the perfect balance of acidity and brightness.
While the amount of juice in a lime can vary depending on factors such as ripeness and juicing technique, on average, you can expect to get about 1-2 tablespoons of juice from one lime. The lime juice quantity can also differ based on the size of the lime, as larger limes will naturally yield more juice. Additionally, microwaving the lime for a few seconds or rolling it firmly on a countertop before juicing can help maximize the amount of liquid extracted. Whether you’re making cocktails, dressings, or marinades, knowing the lime juice quantity can assist in achieving the perfect balance of flavor in your dish.
It’s amazing how such a small fruit can pack such a punch of flavor! I’d even go so far as to say that lime juice is the unsung hero of the culinary world, adding zest and zing to everything it touches. So whether you’re making a classic margarita or a tangy ceviche, don’t underestimate the power of a freshly squeezed lime. It might just be the missing ingredient that takes your dish from good to great.
Cindy thoroughly researches juicing trends, techniques, and recipes to provide readers with practical advice and inspiration. Her writing style is accessible, engaging, and designed to make complex concepts easy to understand. Cindy’s dedication to promoting the advantages of juicing shines through her work, empowering readers to make positive changes in their lives through the simple act of juicing.
Did you realize that a typical lemon weighs around 3-4 ounces and can provide 1-3 tablespoons of juice?
As someone who enjoys cooking and baking, I’ve often found myself wondering how much lemon juice I can expect to get from half a lemon. The answer, as it turns out, depends on a variety of factors, from the ripeness of the fruit to the tools and techniques used for juicing.
In this article, I’ll explore the different factors that can affect lemon juice yield, including the anatomy of a lemon and the tools and techniques used for juicing.
I’ll also provide tips for maximizing lemon juice yield and offer some guidance on how much juice you can expect to get from half a lemon. Whether you’re a seasoned cook or just getting started in the kitchen, understanding how much juice comes from half a lemon can be a helpful tool in your culinary arsenal.
Key Takeaways
- The amount of juice that comes from half a lemon can be affected by factors such as ripeness, temperature, and juicing technique.
- Lemon anatomy includes pulp, seeds, membranes, and zest, all of which can affect the juice yield.
- There are various tools and techniques for extracting lemon juice, including lemon squeezers, forks, tongs, and hand-squeezing.
- To maximize juice yield, it’s helpful to roll the lemon on a hard surface, warm it in the microwave, use room temperature lemons, and strain the juice. Additionally, lemon juice can be stored in an airtight container in the refrigerator with a pinch of salt or sugar to preserve flavor.
Factors that Affect Lemon Juice Yield
You’ll be surprised at how much juice you can get from a lemon half, but it all depends on factors affecting citrus fruit yield.
The ripeness of the fruit is one of the most important factors to consider. A ripe lemon is softer and juicier than an unripe one, so it will yield more juice.
The temperature of the lemon can also affect juice yield. A lemon at room temperature will yield more juice than a cold lemon because the heat loosens the juice cells in the fruit.
Lastly, the way you squeeze the lemon can make a difference. Pressing the lemon down and twisting it back and forth will yield more juice than just squeezing it.
It is important to note that lemon juicing techniques can also affect the amount of juice you get from half a lemon. Some people prefer to cut the lemon in half and then squeeze it with their hands. Others use a citrus squeezer or a reamer to extract the juice.
Regardless of the method, understanding lemon anatomy is key to getting the most juice out of the fruit. With that in mind, let’s take a closer look at the structure of a lemon.
Understanding Lemon Anatomy
The anatomy of a lemon can be quite complex, with its outer layer of zest protecting the juicy pulp inside. Understanding the different parts of a lemon can help in maximizing its juice yield. Here are the key components of a lemon’s anatomy:
-
Pulp: The fleshy interior of a lemon, where the juice is stored. Lemons can have varying levels of pulp, depending on the variety.
-
Seeds: Small, oval-shaped structures found within the pulp. They can be removed to avoid bitterness in the juice.
-
Membranes: Thin, translucent layers that separate the pulp and seeds. They can be easily removed by cutting the lemon into wedges.
-
Zest: The yellow outer layer of a lemon that contains the essential oils. It can be used to add flavor to dishes and drinks.
Different varieties of lemons can also have varying juice yields due to differences in their anatomy. For example, Meyer lemons have thinner membranes and more pulp, making them ideal for juicing. Knowing the anatomy of lemons can help in selecting the right variety and maximizing the juice yield.
Understanding the anatomy of a lemon is just the first step in getting the most juice out of it. In the next section, we’ll explore the tools and techniques for juicing lemons.
Tools for Juicing Lemons
To get the most out of your lemons, it’s essential to have the right tools for juicing, and luckily, there are a few simple items you probably already have in your kitchen.
Lemon squeezers are an excellent tool to extract juice from lemons, but if you don’t have one, you can use alternatives like a fork, a pair of tongs, or your hands. Simply cut the lemon in half, hold it over a bowl, and squeeze it with the tool of your choice.
Keep in mind that using your hands can be messy and may not be the most efficient method, but it works in a pinch. Another lemon juicing hack is to warm the lemon in the microwave or roll it on a flat surface before juicing. This softens the fruit and makes it easier to extract the juice.
You can also use a citrus reamer or a wooden spoon to get the most juice out of your lemons. Once you have extracted the juice, be sure to strain it to remove any pulp or seeds that may have fallen in.
With these simple tools and techniques, you can easily extract the maximum amount of juice from your lemons. Now that you know about the different tools and hacks for juicing lemons, let’s move on to techniques for juicing them.
Techniques for Juicing Lemons
When it comes to juicing lemons, there are several techniques that I find most effective. The first is hand-squeezing, which involves using my hands to press and twist the lemon halves until all the juice is extracted.
Another technique is using a fork to pierce the lemon flesh and then twist it to release the juice.
Finally, I sometimes use a spoon to scoop out the flesh and then squeeze it over a bowl to collect the juice.
Each of these techniques can be useful depending on the amount of juice you need and the tools you have available.
Hand-Squeezing
Ready to get your hands messy? Squeezing half a lemon by hand can yield about 1-2 tablespoons of juice depending on its size and ripeness.
While it may seem like a simple and straightforward task, there are actually some benefits to hand squeezing that you may not have considered. For one, hand squeezing allows you to control the amount of pressure you apply, which can help you extract more juice without also getting too much of the bitter oils from the lemon peel. Additionally, it’s a great way to get a little bit of exercise and build some hand strength!
Of course, there are also alternative hand squeezing techniques you can try if you want to get the most out of your lemons. For example, you can roll the lemon on a hard surface before cutting it in half to help release more juice. Or, you can try using a citrus reamer, which is a tool designed specifically for juicing lemons (and other citrus fruits).
Regardless of which method you choose, hand squeezing is a quick and easy way to get some fresh lemon juice for your recipes. Now, let’s move on to another technique: using a fork to extract even more juice from your lemons!
Using a Fork
Now, you can easily extract every last drop of lemon juice by using a fork to press and twist the flesh of the lemon. This method is perfect for those who don’t have a citrus juicer or a handheld squeezer.
Simply cut the lemon in half, hold one half with the cut side up, and insert the fork into the center. Press and twist the fork back and forth, applying gentle pressure to the lemon flesh. You’ll see the juice start to flow out, and you can continue to press and twist until you’ve extracted as much juice as possible.
If you don’t have a fork on hand, there are a few alternatives you can try. One method is to roll the lemon back and forth on a hard surface, like a cutting board, before cutting it in half. This will help to loosen up the juice inside.
Another option is to use your hands to squeeze the lemon, but this may not be as effective as using a tool.
In the next section, we’ll explore another tool-free method for extracting lemon juice: using a spoon.
Using a Spoon
Earlier, we talked about using a fork to extract juice from half a lemon, but if the lemon is too soft, using a fork may not be the best option. In such cases, using a spoon may be a better alternative.
To use a spoon, simply cut the lemon in half and hold one half in your hand. Then, use the spoon to scoop out the flesh and squeeze it gently to release the juice. You can also use a straw to pierce the flesh and extract the juice, but be careful not to push too hard and break the straw.
Alternative methods for extracting lemon juice include using a citrus juicer, a hand-held juicer, or simply squeezing the lemon by hand. Each of these methods has its own advantages and disadvantages, so it’s important to choose the method that works best for you.
When it comes to maximizing lemon juice yield, there are a few tips you can follow. One of the most important is to roll the lemon on a hard surface before cutting it. This helps to break down the membranes inside the lemon and makes it easier to extract the juice. Another tip is to microwave the lemon for a few seconds before cutting it, which can help to soften the fruit and make it easier to juice.
Tips for Maximizing Lemon Juice Yield
To maximize the juice yield from lemons, I’ve found that rolling the lemon on a hard surface before juicing helps to break down the fruit’s fibers and release more juice.
Another technique that works well is microwaving the lemon for a few seconds to soften the fruit and make it easier to extract the juice.
Finally, using room temperature lemons rather than cold ones can also lead to more juice output.
Roll the Lemon
Simply squeeze and swirl the lemon to extract the succulent juice. But if you want to maximize the amount of juice you get from the fruit, rolling the lemon beforehand can help. Rolling the lemon helps to break down the membranes inside the fruit, releasing the juice more easily.
Here are three benefits of rolling citrus fruits:
-
Even distribution: Rolling the lemon ensures that the juice is evenly distributed throughout the fruit, making it easier to extract.
-
Increased yield: By breaking down the membranes, rolling the lemon can increase the amount of juice you get from the fruit.
-
Faster extraction: Rolling the lemon beforehand can make it easier to extract the juice more quickly, which can be helpful if you’re in a hurry.
Now that you’ve rolled your lemon, it’s time to move on to the next step: microwaving the lemon.
Microwave the Lemon
After trying the rolling technique, it’s time to explore other ways to extract juice from a lemon. Alternative methods, such as microwaving the lemon, can be a game-changer for those who want to save time and effort. However, it’s essential to take safety precautions to avoid any accidents in the kitchen.
To microwave a lemon, cut it in half and place it in a microwave-safe dish with a tablespoon of water. Cover the dish with a microwave-safe lid or plastic wrap, leaving a small vent to release steam. Microwave the dish for 10 to 20 seconds, or until the lemon is warm to the touch. This method softens the lemon and makes it easier to extract juice, resulting in more juice than just squeezing a cold lemon.
When using this method, it’s important to be careful when handling the hot lemon and dish. Use oven mitts or a towel to carefully remove the dish from the microwave. Also, be mindful of the steam that may escape when removing the lid or plastic wrap. By taking these precautions, you can safely and easily extract more juice from a lemon.
Using alternative methods to extract juice from a lemon can be a great way to get the most out of your fruits. However, it’s important to remember that the temperature of the lemon can affect how much juice you get. This is why it’s recommended to use room temperature lemons. Let’s explore more about the benefits of using room temperature lemons in the next section.
Use Room Temperature Lemons
Did you know that using room temperature lemons can bring out more flavor and acidity in your recipes? When lemons are stored in cold temperatures, their natural oils and juices can become dormant, resulting in a less juicy and flavorful lemon.
By allowing your lemons to come to room temperature before juicing them, you can ensure that you are getting the most out of your citrus. To store your lemons at room temperature, simply place them in a bowl or basket on your kitchen counter away from direct sunlight. Avoid storing your lemons near any heat sources, as this can cause them to dry out and lose their juice.
By keeping your lemons at room temperature, you can have them ready to use whenever you need a burst of citrus in your recipes. Now that you know how to properly store your lemons, let’s move on to the next step: how much juice to expect from half a lemon.
How Much Juice to Expect from Half a Lemon
You’ll be surprised at how much juice you can get from just half a lemon! There are several ways to extract lemon juice, but one of the most common and effective methods is to roll the lemon on a hard surface before cutting it in half. This helps to break down the membranes inside the lemon and release the juice.
Using fresh lemon juice in your cooking and drinks has many benefits. Not only does it add a bright, tangy flavor, but it also provides a good source of vitamin C and other antioxidants.
If you’re planning to use half a lemon in a recipe, you can expect to get around 1-2 tablespoons of juice, depending on the size and ripeness of the lemon. With this knowledge, you can confidently measure out the right amount of juice for your dish or drink. This makes it easy to adjust quantities based on how much lemon flavor you want to add. Always keep in mind that the juice yield from half a lemon can vary slightly, so it’s a good idea to taste-test as you go. If you need more acidity, you can always add another squeeze to enhance the flavor.
Speaking of which, let’s explore some delicious recipes that call for half a lemon!
Recipes that Call for Half a Lemon
When using half a lemon in your cooking, try incorporating it in dishes like grilled chicken, roasted vegetables, or a refreshing summer salad for a burst of citrus flavor and added health benefits. Lemon juice not only adds a tangy taste to your dishes, but it also contains vitamin C and antioxidants that are beneficial for your health. Here are some recipes that call for half a lemon:
| Recipe | Ingredients |
|---|---|
| Grilled Chicken | 1/2 lemon, chicken breasts, olive oil, garlic, salt, pepper |
| Roasted Vegetables | 1/2 lemon, mixed vegetables (carrots, zucchini, bell peppers, etc.), olive oil, salt, pepper |
| Summer Salad | 1/2 lemon, mixed greens, cherry tomatoes, cucumber, feta cheese, olive oil, salt, pepper |
Incorporating half a lemon in these recipes can add a bright and refreshing taste to your dishes. Additionally, the health benefits of lemon juice can boost your immune system, aid in digestion, and improve your skin health.
Moving on to the next section, if you don’t have any lemons on hand, there are other substitutes for lemon juice that you can use in your cooking.
Substitutes for Lemon Juice
I just finished discussing recipes that call for half a lemon, but what if you don’t have any lemons on hand? Don’t worry, there are plenty of lemon juice alternatives that you can use in your cooking and baking.
While nothing quite matches the unique flavor of lemon juice, there are several ingredients that can add a similar tanginess to your dishes. Plus, some of these alternatives offer additional health benefits that you won’t find in lemon juice.
Here are some lemon juice alternatives to consider:
- Lime juice: This citrus fruit has a similar flavor to lemon and is a great substitute in recipes that call for lemon juice.
- Vinegar: Both white vinegar and apple cider vinegar can add a tangy flavor to your dishes. Just be sure to use them in moderation as they can be quite strong.
- Yogurt: If you’re looking for a creamy alternative to lemon juice, try using plain yogurt instead. It adds a tangy flavor and can help thicken sauces and dressings.
In addition to providing substitutes for lemon juice, it’s also worth noting the health benefits of lemon juice. Lemon juice is high in vitamin C, which can help boost your immune system and protect against illness. It’s also a good source of antioxidants and can aid digestion. So, while you may need to use a substitute in a pinch, it’s always a good idea to keep some fresh lemons on hand for their health benefits.
When it comes to storing lemon juice, there are a few steps you can take to ensure it stays fresh and flavorful.
Storing Lemon Juice
To keep your lemon juice fresh and flavorful, it’s important to store it in an airtight container in the refrigerator. This is because lemon juice is highly susceptible to oxidation, which can cause it to lose its tangy taste and nutritional value. Moreover, storing lemon juice at room temperature can speed up spoilage and bacterial growth, which can lead to foodborne illnesses.
When storing lemon juice, it’s best to use a glass or plastic container with a tight-fitting lid. Make sure to fill the container to the top to minimize the amount of air inside, which can cause the juice to oxidize faster. You can also add a pinch of salt or sugar to the juice to help preserve its flavor and prevent bacterial growth.
Remember to label the container with the date when you made the juice, so you can keep track of its freshness. With these simple tips, you can enjoy fresh and tangy lemon juice for up to a week or longer.
Frequently Asked Questions
Can you use bottled lemon juice instead of fresh lemon juice in recipes that call for half a lemon?
I highly recommend using fresh lemon juice instead of bottled for the best taste in recipes. Bottled juice lacks the bright, tangy flavor of fresh lemons. The benefits of using fresh juice are undeniable and worth the extra effort.
Is it necessary to remove the seeds from the lemon before juicing it?
Removing lemon seeds when juicing is unnecessary, as they can be strained out later. However, using fresh lemon juice is recommended for optimal flavor, as bottled juice may contain additives and lack the same level of acidity.
How long can you store fresh lemon juice in the refrigerator?
When it comes to storing fresh lemon juice, the best method is to keep it in an airtight container in the refrigerator. Freezing can prolong shelf life, but may affect taste. As for how long it lasts, it’s best to use within a week. "When life gives you lemons, make lemonade"- but remember to store it properly.
Can you juice a lemon without a juicer or any special tools?
Yes, I can juice a lemon without a juicer or any special tools. Lemon squeezing techniques include rolling the lemon on a hard surface, cutting it in half, and using a fork to extract the juice. Using fresh lemon juice has benefits such as adding flavor and vitamin C to dishes.
How much lemon zest can you expect to get from half a lemon?
To properly zest a lemon, use a microplane or zester to remove the outer layer of the skin. Half a lemon typically yields about a teaspoon of zest, which can be used in a variety of dishes for added flavor and aroma.
Conclusion
In conclusion, the amount of juice that comes from half a lemon can vary based on a number of factors, including its size, ripeness, and the tools and techniques used for juicing. Understanding the anatomy of a lemon and choosing the right tools and techniques can help maximize juice yield.
On average, half a lemon can yield approximately 1-2 tablespoons of juice, making it a common ingredient in many recipes. As they say, when life gives you lemons, make lemonade. With the knowledge and techniques outlined in this article, you can confidently juice your lemons and make the most of their tart, citrusy goodness.
So go ahead, squeeze away and add a burst of flavor to your favorite recipes.
Cindy thoroughly researches juicing trends, techniques, and recipes to provide readers with practical advice and inspiration. Her writing style is accessible, engaging, and designed to make complex concepts easy to understand. Cindy’s dedication to promoting the advantages of juicing shines through her work, empowering readers to make positive changes in their lives through the simple act of juicing.

I frequently find myself in the kitchen, pondering the exact quantity of lime juice required for a recipe. Lime juice plays a crucial role in various dishes, like guacamole and cocktails, and achieving the correct measurement can significantly impact the flavor. This led me to conduct some research to determine the juice yield of a single lime.
As it turns out, the amount of juice you can get from a lime depends on several factors, such as the ripeness of the fruit and your juicing technique. Understanding these factors can help you get the most out of your limes and ensure that your dishes are bursting with flavor.
In this article, I’ll be sharing my findings on how much juice you can expect from one lime, as well as tips for selecting and juicing the best limes for your recipes. So, let’s get started!
Key Takeaways
- One lime can produce about 1-2 tablespoons of juice, depending on its size and ripeness.
- The ripeness and temperature of the lime can affect its juice yield.
- Rolling the lime before juicing and microwaving it for 15 seconds can help extract more juice.
- A citrus reamer or juicer can be used to get the most juice out of the lime.
Understanding the Importance of Lime Juice in Recipes
You’re probably wondering why lime juice is such a crucial ingredient in so many recipes. Well, let me tell you, it brings a tangy and bright flavor that can take a dish from mediocre to exceptional in just a squeeze.
The benefits of lime juice go beyond its taste, as it also has health benefits. Lime juice is rich in vitamin C, which boosts the immune system, helps with digestion, and even promotes healthy skin.
However, if you don’t have lime juice on hand, there are alternatives you can use. Lemon juice is a common substitute that can provide a similar tangy flavor, while vinegar can add some acidity. However, keep in mind that these alternatives may not have the same distinct flavor profile as lime juice, and using them may require adjusting other ingredients in the recipe.
With that being said, now let’s move on to the factors that affect lime juice yield.
Factors that Affect Lime Juice Yield
There are certain factors that can impact how much liquid you get when squeezing a lime. One of the most important factors is the lime juice acidity. The higher the acidity of the lime, the more juice it will produce. This is because the acidic environment helps to break down the cell walls of the lime, making it easier to extract the juice.
Another factor that affects lime juice yield is the ripeness of the lime. A ripe lime will generally have a higher juice yield than an unripe one. This is because a ripe lime has more juice-filled vesicles in its pulp, which are easier to extract.
Additionally, the temperature of the lime can also affect how much juice it produces. A warm lime will generally yield more juice than a cold one.
With these factors in mind, it’s important to understand how to optimize lime juice extraction to get the most out of your limes.
Now, let’s move on to discussing the average amount of juice you can expect to get from one lime.
Average Amount of Juice from One Lime
Getting the perfect amount of lime juice for your recipe can be tricky, but understanding the average yield from a single lime can help you plan accordingly. On average, one lime can produce about 1-2 tablespoons of juice, depending on its size and ripeness. This may not seem like a lot, but keep in mind that lime juice has a strong flavor and can easily overpower a dish if too much is used.
If you find yourself in a pinch and don’t have fresh limes on hand, there are several lime juice alternatives that can be used in a recipe, such as bottled lime juice or even lemon juice. However, it’s important to note that fresh lime juice provides the most health benefits.
Lime juice contains high amounts of vitamin C and antioxidants, which can boost your immune system and may even prevent certain types of cancer. To determine the ripeness of a lime, there are a few key indicators to look for. But before we dive into that, let’s first understand why the ripeness of a lime matters.
How to Determine the Ripeness of a Lime
If you’re looking to add a zesty kick to your dish, picking a ripe lime is as important as a bee finding a flower with nectar. The ripeness of a lime can significantly affect the amount of juice you can get from it, as well as its flavor and aroma. So, how can you determine if a lime is ripe? Here are some tips.
Firstly, check the color of the lime. A ripe lime should be bright green or slightly yellowish. Avoid limes that are too green or too yellow as they may not be ripe yet or overripe.
Secondly, give the lime a gentle squeeze. A ripe lime should be slightly soft and give a little when pressed. If it’s too hard, it may not be ripe yet, and if it’s too soft, it may be overripe.
Finally, smell the lime. A ripe lime should have a fresh and fragrant scent. Uses for ripe limes include making lime juice, adding zest to dishes, and even making lime-infused water. To extend the life of a lime, store it in the refrigerator or in a cool, dry place.
When it comes to selecting the best limes for juicing, there are a few additional steps to take. Look for limes that are heavy for their size and have smooth, firm skin. Avoid limes that are wrinkled, have blemishes, or feel too soft. By selecting the right limes, you can ensure that you get the most juice out of them and add the perfect touch of citrus flavor to your dishes.
How to Select the Best Limes for Juicing
To ensure maximum flavor and yield from your lime juice, it’s important to carefully select limes that are heavy, smooth, and firm. The best suppliers for limes are local farmers’ markets or specialty grocery stores that sell organic produce. These suppliers tend to have fresher and higher quality limes compared to regular supermarkets.
Additionally, it’s important to check for any blemishes or soft spots on the lime as this could indicate that the fruit is overripe and will not yield as much juice.
If limes are not readily available or if they’re not in season, there are alternative citrus fruits that can be used for juicing. Lemons and oranges are great substitutes for limes and can still provide a similar flavor to your dishes. However, it’s important to note that the acidity and sweetness levels may differ from lime juice, so it’s best to adjust the measurements accordingly.
With the right selection of limes or alternative citrus fruits, you can ensure that your lime juice is bursting with flavor and ready to be used for your favorite recipes.
When it comes to getting the most juice out of a lime, there are a few tips that can be helpful.
Tips for Getting the Most Juice out of a Lime
After selecting the best limes for juicing, it’s important to know how to get the most juice out of them. Here are some tips I’ve learned over the years:
- Roll the lime on a hard surface before juicing to break down the membranes inside and release more juice.
- Microwave the lime for 15 seconds to warm it up and make it easier to juice.
- Cut the lime lengthwise instead of crosswise to expose more juice-filled membranes.
- Use a citrus reamer or juicer to get the most juice out of the lime.
But even with these tips, sometimes it can be difficult to get as much juice as you need from just one lime.
In these cases, there are alternative squeezing methods you can try, such as using a fork or tongs to press and twist the lime against a juicing cone. You can also use lime zest to add extra flavor to your dish or drink, which can be grated off even after the lime has been squeezed.
When you’re finished juicing your limes, you may have some leftover juice. But how do you store it to keep it fresh?
How to Store Leftover Lime Juice
Properly storing leftover lime juice is key to avoiding waste and ensuring freshness lasts. There are various storing techniques and preservation methods that can help extend the shelf life of leftover lime juice. One of the most common ways to store leftover lime juice is by using an airtight container. This can be a glass jar with a tight-fitting lid or a plastic container with a snap-on lid. It is important to make sure that the container is completely sealed to prevent the juice from getting exposed to air, which can cause it to spoil faster.
Another way to store leftover lime juice is by freezing it. This can be done by pouring the juice into ice cube trays and freezing them. Once the cubes are frozen, they can be transferred into a resealable plastic bag and kept in the freezer for up to six months. This method ensures that the lime juice stays fresh and can be used whenever needed. Properly storing leftover lime juice allows for easy access to it when needed and can help save money and avoid waste. Speaking of which, let’s move on to some common recipes that call for lime juice.
Common Recipes that Call for Lime Juice
You’ll love adding a zesty kick to your dishes with these common recipes that just wouldn’t be complete without a splash of lime. Lime juice is a versatile ingredient that can be used in many dishes, from savory to sweet.
Some creative uses of lime juice include adding it to marinades for meats, using it as a dressing for salads, or mixing it into cocktails for a refreshing twist. Not only does lime juice add flavor to your dishes, but it also has health benefits.
Lime juice is high in vitamin C, which can boost your immune system and improve your skin health. It also contains antioxidants that can help fight inflammation and prevent chronic diseases. So, the next time you’re looking to add some zest to your meal, reach for a lime and enjoy the added health benefits.
Now, let’s move on to learning about conversions for lime juice in recipes.
Conversions for Lime Juice in Recipes
Don’t be afraid to go crazy with the tangy flavor of lime in your recipes by using it in generous amounts – your taste buds will thank you!
But before you squeeze that lime, it’s important to know how much juice you’re actually getting from it. One average lime typically yields around 1-2 tablespoons of juice, depending on its size and juiciness. To get the most out of your lime, try gently rolling it between your hand and a hard surface before juicing it.
If you don’t have any limes on hand, don’t worry! There are alternative citrus options that can give your recipes a similar tangy flavor. For example, lemons, oranges, and grapefruits can all be used as substitutes for lime juice. Just keep in mind that each citrus fruit has its own unique flavor profile, so adjust the amount of juice accordingly.
And when measuring lime juice accurately, it’s always a good idea to use a measuring spoon or a juicer to get consistent results in your recipes.
Frequently Asked Questions
Can I substitute bottled lime juice for fresh lime juice in a recipe?
I’ve successfully substituted bottled lime juice for fresh lime juice in recipes before, but it can alter the taste slightly. Be sure to use the same amount called for and adjust to your liking.
What are the health benefits of lime juice?
I’m excited to share the many uses of lime juice, including its impressive nutritional value. From aiding digestion to boosting immunity, this zesty citrus fruit packs a punch. Let’s dive into the health benefits of lime juice!
How long can I keep fresh lime juice in the refrigerator?
I usually store fresh lime juice in an airtight container in the refrigerator for up to 2 weeks. To maximize its shelf life, I avoid exposing it to air and light. I use lime juice in various recipes such as marinades, dressings, and cocktails.
Is it necessary to use a specific type of juicer for limes?
I’ve found that using a handheld citrus press works best for lime juice extraction. It’s quick and efficient, and helps to avoid any bitter taste from the skin. Experiment with different juicing techniques to find what works for you.
Can I freeze leftover lime juice for later use?
I’ve discovered that you can freeze leftover lime juice for later use. Simply pour the juice into an ice cube tray and freeze. This is a great way for lime juice preservation and to always have fresh juice on hand.
Conclusion
Well, folks, we’ve come to the end of our journey to uncover the mysteries of lime juice. Who knew that such a small citrus fruit could cause so much confusion?
But fear not, for now we have the knowledge to confidently squeeze our limes and add that tart goodness to our favorite recipes. But let’s not get too ahead of ourselves. We must always remember the importance of selecting the perfect lime, and using the correct techniques to get the most juice out of it.
Because, let’s face it, no one wants to waste precious lime juice, especially when it costs a whole 25 cents per lime (I mean, that’s practically a fortune, am I right?). Each drop is like gold, and we all know that balancing the perfect margarita or cocktail requires precision. The real kicker comes when you’re mixing in top-shelf spirits, and suddenly, you’re faced with a ‘boosie juice liquor price‘ situation — that moment when you realize your drink costs more than dinner. So, do you really want to throw off that delicate ratio with skimped or poorly-squeezed citrus? I didn’t think so.
So, let’s raise our lime juicers high and toast to the power of lime juice in our culinary adventures. Cheers!
Cindy thoroughly researches juicing trends, techniques, and recipes to provide readers with practical advice and inspiration. Her writing style is accessible, engaging, and designed to make complex concepts easy to understand. Cindy’s dedication to promoting the advantages of juicing shines through her work, empowering readers to make positive changes in their lives through the simple act of juicing.


15 Best Cold Press Juicers With Large Feed Chutes for Effortless Juice Extraction
Discover the 15 best cold press juicers with large feed chutes for effortless juice extraction, but which one will be...


15 Best Coffees for French Press That Will Elevate Your Brewing Game
Imagine brewing the perfect cup of coffee with our top 15 picks for French press; you won't want to miss...


15 Best Cold Press Juicers on Amazon: A Comprehensive Review for Health Enthusiasts
Discover the top 15 cold press juicers on Amazon that maximize nutrients and flavors; find out which models made the...


15 Best Cachoo Cold Press Juicers of 2025 – Our Top Picks for Fresh Juice Lovers
Find the perfect Cachoo cold press juicer for your kitchen in 2025 and discover the unique benefits that await your...


15 Best Organic Coffees of 2025 – Savor the Purest Brews
Get ready to indulge in the 15 best organic coffees of 2025, where exceptional flavors await—discover which brews made the...


The 15 Best JE-60 Easy Clean Slow Cold Press Juicers of 2025 – Your Guide to Healthier Juicing
Discover the top 15 JE-60 Easy Clean Slow Cold Press Juicers of 2025 that transform your juicing experience—find out which...


15 Best Dual Coffee Makers of 2025 – Brew Your Perfect Cup Every Time
Master the art of coffee brewing with the 15 best dual coffee makers of 2025, and discover which one will...


15 Best Cold Press Juicers for Pure Juice Lovers in 2025 – Expert Reviews & Recommendations
The 15 best cold press juicers for pure juice lovers in 2025 offer unmatched efficiency and nutrient retention, but which...


15 Best Coffee Grinders for Espresso Lovers: Expert Reviews & Recommendations
Learn about the 15 best coffee grinders for espresso lovers, featuring expert recommendations that could elevate your brewing experience to...


15 Best Atsent Cold Press Juicers of 2025 – Fresh Juice at Your Fingertips
Discover the top 15 Atsent cold press juicers of 2025 that guarantee fresh juice at home; find out which model...


15 Best Coffee Beans for Espresso That Will Elevate Your Brewing Game
Sip your way to espresso perfection with these 15 exceptional coffee beans that promise to transform your brewing game—discover the...


15 Best Prefix Cold Press Juicers of 2025: 10 Individual Suggestions You Can’t Miss
Navigate through the 15 best cold press juicers of 2025 and uncover top picks that will revolutionize your juicing experience—discover...
-

 Popular Juice Brands3 weeks ago
10 Top-Rated Organic Juice Brands to Try
-

 Popular Juice Brands3 weeks ago
9 Best No-Sugar-Added Popular Juice Brands
-
 Health Benefits of Juice1 week ago
How Much Bottled Lemon Juice Equals 1 Lemon
-

 Vegetable Juices3 weeks ago
12 Top Organic Vegetable Juice Brands Reviewed
-
 Juice Tips and Tricks4 days ago
How Long Does Lemon Juice Last After Expiration Date
-
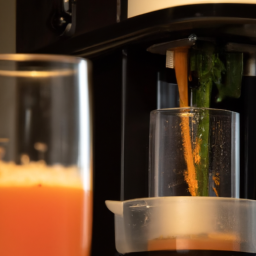 Juice Tips and Tricks6 days ago
How Long Does Juice Last After Juicing
-
 Juice Tips and Tricks6 days ago
2 Lemons Equal How Much Juice
-

 Vetted3 months ago
15 Best Juices for Diabetics: Refreshing Options That Won’t Spike Your Blood Sugar